• When you click on links to various merchants on this site and make a purchase, this can result in this site earning a commission. Affiliate programs and affiliations include, but are not limited to, the eBay Partner Network.

Hyrdgoon's - project angrybird

Car looks awesome on all 4!!
And congrats on the future owner of your RR ;-)
Pat
 
There's been a huge life change for us so the project will slow down but we are beyond happy to welcome our baby boy Lukas

I did however still get to the shop to mount my rims again and make sure my new centre calls clear the spindles lol

View attachment 597181 View attachment 597183
Congrats on the boy :bananadance:
Lukas, cute little guy :thumbsup:
hope mom is doing well too

life will certainly change & so will the priorities too
 
Oh yeah like the stance too, car's looking great
 
Stance looks great.. more so if you visualize the nose dropping a bit once you sit that RB in there. Going to be one wicked ride!
 
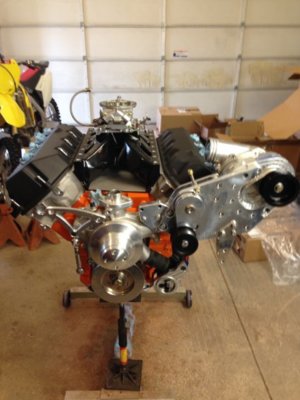
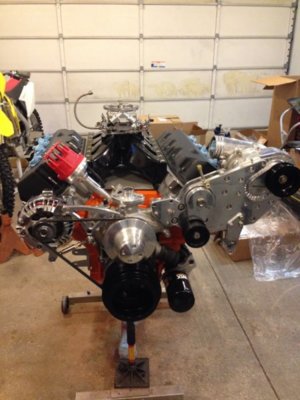
Quick trip to Ohio yesterday to see Devin (747Mopar) and bring my engine fir his generous offer to help with the bulletproofing and getting it back together with the Procharger set up.

We tore the engine apart yesterday and were pleasantly surprised to learn CME Crate Motors were true to their word of using good quality internals. Nice h beam rods, Icon pistons, clevite bearings. Crank looked great. I have little to no miles on this engine and it showed.

Some nice new parts going on too maybe Dev can update here with some progress pics once everything is getting fit back up
 
Congrats on the addition to the @HYRDGOON family....looks like there will be competition for the driver's seat in a few years. :lol:
 
Haven't checked in in a while...

Had to do a refresh on the past few pages

nice work, it's gonna' be bad ***, one of a kind :thumbsup:

:luvplace:

How's life with the baby/Lukas,
I'll bet you're a beaming proud papa :bananadance:
get him out in the garage early....

-------------------------------------------------

Out of curiosity;
sorry if this has been asked before...
why the boxed Rad Support ?
I know it'll be stronger than a flat piece with a few bends...
I like it, I'm just wondering why, especially with all the
rest of the stuff, bars & other suspension pieces/bars & panels your fab guy
is doing, to make it stiff &/or handle already...
is it just for the looks ? so it's not like anyone else's car...
is there another purpose ?
was it just to stiffen up ?
add rigidity the forward parts of the car ?
or did I miss something ?
will it hold fluids ? or a way to route air for the boost?
or something else ?

Just me overthinking ****


I like the torque-arm too...
 
Last edited:
Haven't checked in in a while...

Had to do a refresh on the past few pages

nice work, it's gonna' be bad ***, one of a kind :thumbsup:

:luvplace:

How's life with the baby/Lukas,
I'll bet you're a beaming proud papa :bananadance:
get him out in the garage early....

-------------------------------------------------

Out of curiosity;
sorry if this has been asked before...
why the boxed Rad Support ?
I know it'll be stronger than a flat piece with a few bends...
I like it, I'm just wondering why, especially with all the
rest of the stuff, bars & other suspension pieces/bars & panels your fab guy
is doing, to make it stiff &/or handle already...
is it just for the looks ? so it's not like anyone else's car...
is there another purpose ?
was it just to stiffen up ?
add rigidity the forward parts of the car ?
or did I miss something ?
will it hold fluids ? or a way to route air for the boost?
or something else ?

Just me overthinking ****


I like the torque-arm too...
Hey Budnicks!

Little Lukas is doing great and definitely has us both loving being parents. Some happy fur siblings too

The boxed in rad support was to add rigidity and my fab guy really just wanted his own cleaner design. Made one mistake in carrying the height forward it now hits the hood so we are actually going to modify it and notch it out to leave a ledge for a closeout panel to sit on
 
Hey Mike, couldn't remember if I have sent you these pics or not. These pics show how the brackets mounts to the water pump housing.
There is suppose to be a brace that runs from the first bolt on the header flange to the back of the supercharger bracket. I don't have a pick of that. For the Hemi they had a cable but I made my own bracket that attached to one of the header bolts. Look forward to seeing the engine come together when you and Devon start building it.

IMG_0141.JPG IMG_0142.JPG IMG_0143.JPG IMG_0144.JPG
 
This pic shows the spacer that changes the pulley from Mopar six bolt to Chevrolet 3bolt. Not a great pic but hopefully helps.

DSC01767.JPG
 
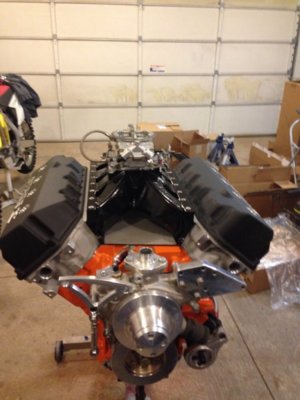
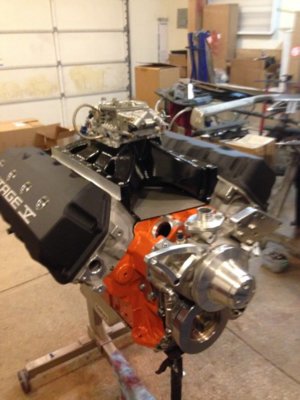
I got your pattern in the mail last week, appreciate you taking the time to do it. Goons motor is about 2 weeks from getting done at the shop where they're line boring it with the new SD Concepts girdle kit but in the meantime I'm playing with the intake setup. Trying to come up with ways to minimize all of the wiring clutter and keep his valve covers clean of coil packs. So far this is what I'm thinking, injectors installed pointing inward allowing the wiring to be ran down the inside of the rails like pictured (individualwires still need cleaned up). Goon likes his pretty valve covers (don't blame him) so I'm thinking about brackets to mount the coils like pictured? This will be nice for 2 reasons, with his tall intake the coil wiring can be plumbed under the intake and provided I can get the brackets right you should be able to pull the covers without touching a single wire. Just throwing ideas around.

20180805_111012.jpg


IMG-20180804-WA0004.jpeg


IMG-20180804-WA0002.jpeg
IMG-20180804-WA0000.jpeg
 
Last edited:
Working with the pulley I had made that lined up with the stick accessories hopefully everything falls in line with relative ease.

I'm liking Devin's idea for the coil packs I'd like to keep them off the top of the valve covers if possible and keeping a clean look so Dev's approach seems to nail that.

I'm lucky to have friends like you guys! Car guys are truly the best people!
 
I got your pattern in the mail last week, appreciate you taking the time to do it. Goons motor is about 2 weeks from getting done at the shop where they're line boring it with the new SD Concepts girdle kit but in the meantime I'm playing with the intake setup. Trying to come up with ways to minimize all of the wiring clutter and keep his valve covers clean of coil packs. So far this is what I'm thinking, injectors installed pointing inward allowing the wiring to be ran down the inside of the rails like pictured (individualwires still need cleaned up). Goon likes his pretty valve covers (don't blame him) so I'm thinking about brackets to mount the coils like pictured? This will be nice for 2 reasons, with his tall intake the coil wiring can be plumbed under the intake and provided I can get the brackets right you should be able to pull the covers without touching a single wire. Just throwing ideas around.

View attachment 635074

View attachment 635075

View attachment 635080 View attachment 635081

Nice!! That is going to be really clean! With the engine build i'm doing on my Charger i'll be redoing the engine bay and wiring. I liked how you did your Chargers wiring and engine bay. Really Clean!!
 
Appreciate that and the pics!

What regulator are you using and what would you recommend for the fuel and return line sizes?

I use the Aeromotive X1. I use -10 But you can run -08 for return.If you use PTFE stainless for your fuel line -10 is about the same size as
-08 regular stainless. You would need to run the -08 to -10 adapter fitting.
Thanks,Joe
 
Auto Transport Service
Back
Top