• When you click on links to various merchants on this site and make a purchase, this can result in this site earning a commission. Affiliate programs and affiliations include, but are not limited to, the eBay Partner Network.

Increasing rear tire clearance in a '70 Charger.

I have the same needle scaler but its still new in the box. Never got around to getting under my 66 before I had to sell it. My compressor is out in my shed. I ran an airline under ground in a conduit to my garage. I don't ever have to hear it running. Looks like you got some work to do there. Are you going to cut them out or beat the snot out of them?

I know when my buddy had his old yellow 69 GTX over here that car had the passenger side quarter replaced at some point. Hell they even half assed the inner structure behind the pillar into the car. I know because I took the rear seats out and the passenger side was bronze color and the driver side was the original F8 green.

Here is a funny note. The Roadrunner was F8 green and so was the guys 70 GTX.
apparently its not a popular color. I like it and would paint one F8 in a heart beat if that was what it was originally.
 
Right side:

GWT 36.JPG


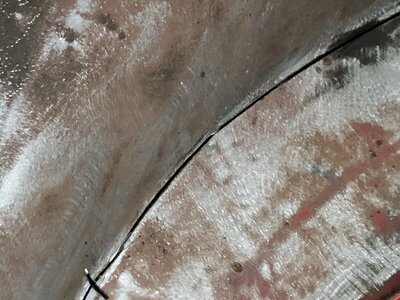
With the undercoating gone, you can see the offending bulge much clearer.

GWT 37.JPG


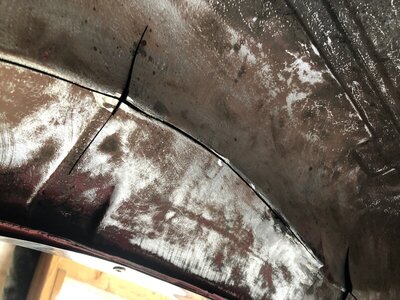
The cutting has begun!

GWT 38.JPG


This stuff makes me nervous with this car. I knew that it had to be done but I still wince a little cutting into the car.

GWT 40.JPG

GWT 41.JPG


I am making decisions on the fly here. I don't know yet if I will cut a huge hole and patch in sections of these...

GWT 4.JPG


....Or try a slightly different version of what I did with Jigsaw where I just modified the existing wheel tub. I am leaning toward the former. A taller and more squared off arch will allow more room.

GWT 39.JPG GWT 42.JPG
 
In the same manner that I did with Jigsaw, I made the cuts and started bending the flaps.


GWT 44.JPG


GWT 45.JPG


GWT 46.JPG


With the amount of clearance that I needed, the bends in the tubs would have a big gap so.....The decision was made to make a hole.

GWT 50.JPG


GWT 52.JPG


Next up was test fitting the patch to cover the hole.

GWT 54.JPG


All those little cuts along the outside edge allow me to bend the metal to match the shape of the tub. The self tapping screws hold the patch in place.

GWT 55.JPG


In the photo below, you can see the new section allows far more clearance than stock. Now the tub extends over to just inside the edge of the wheelwell trim molding.

GWT 56.JPG
 
Lots of scraps....

GWT 61.JPG

The white Ford wheel tub that started out looking like this:
GWT 4.JPG


After some trimming and multiple trial fittings looked like this:


GWT 62.JPG


I decided to make the modifications to both sides, then do all the welding. I bought some panel bonding adhesive but I'm not sure that I'll use it. The slits that I made to allow the metal to bend would need to be welded to retain the original strength. I don't think that this adhesive is compatible with the heat of welding.
 
So far, the left side looks like it will take half the time. I didn't bother to make all the cuts and bends trying to save the original tub, I just made the hole.

GWT 70.JPG


GWT 69.JPG


The edges of the original tub were sliced and bent at a 90 degree angle.

GWT 71.JPG


This will allow me to place the patch panel against the remaining section of the tub at the wheel opening....which sits far enough away from the quarter panel to avoid damage during welding.

GWT 72_LI.jpg


This is what I did on the right side and now the left.
Next up, final fitment and welding it all up.
 
Damn dude you are making decent progress on the car. Must be mild temps there.. Here it sucks to work on **** in the cold.
 
It was 65 today. I was wearing shorts and two t shirts while in the shop.
 
Here in Georgia it was 55 outside but my garage is unheated and felt like it was 35 in that bastard.
 
I have a LONG way to go to make any money at this!

I was thinking of how much easier it would be to do this on a car with the quarters off. THEN I thought about how it might be to do the mods then try to fit the quarter...what if the tub sticks out too far or IN too far?
I'm okay with doing it this way....as long as the welding doesn't burn the paint.
 
Just look at the extra room!

GWT 37.JPG


GWT 54.JPG
 
The welding will be all done inside the wheelwell. I plan to stitch weld in short bursts. This will keep the heat down. I do plan to remove the wheel opening moldings to protect those. I'm not a great welder so I don't know all the short cuts. My stuff holds together but isn't always fast and pretty.
 
I have a LONG way to go to make any money at this!

it's an impossible task without a tv show


I'm okay with doing it this way....as long as the welding doesn't burn the paint.

one tack at a time cooled immediately with an air blower........ I'm a fan of panel bond, nothing wrong with a combination of weld and panel bond keeping any welding to a minimum.....

if you burn the paint, you can get some cool bullet hole decals to cover it with

1Pcs-23-29cm-Funny-Car-Sticker-3D-Bullet-Hole-Car-Styling-Accessories-Motorcycle-Scratch-Decal-Stickers.jpg
 
The welding will be all done inside the wheelwell. I plan to stitch weld in short bursts. This will keep the heat down. I do plan to remove the wheel opening moldings to protect those. I'm not a great welder so I don't know all the short cuts. My stuff holds together but isn't always fast and pretty.
Same as my welding skills.. Shitty but hold. Not a great welder but one hell of a grinder tech lol.
 
While welding hold a damp rag against the painted metal... Maybe a strong magnet on top of the rag... I've got some gun magnets that are ridiculously strong...
 
While welding hold a damp rag against the painted metal... Maybe a strong magnet on top of the rag... I've got some gun magnets that are ridiculously strong...
Good idea.
The areas that concerned me were above the wheel opening. With the way that I bent the remaining metal there and with the flange, I have about an inch to the quarter panel. I'm going to do lap welds in short bursts. That should be safe.....

1 Nervous.png
 
Any way to see the outer wheel well from the trunk? Or by taking out the back seat? Maybe lay some wet towels across the inside.
 
Auto Transport Service
Back
Top