av8or1
Member
Y'all,
I decided to join the group by posting a thread regarding my Roadrunner restoration project! Hope it's ok. I created a thread a short while back in the Welcome Wagon forum and now that I have actually begun working on her, I decided to share with the class. After reading several similar threads over the past couple of months, I thought it would be cool to follow suit and name mine accordingly, so like Roger and Rusty (to name but a couple), this is "Jerry's Roadrunner" - hah! ;-)
First, a couple of quick caveats if I may. This is my first American muscle car and thus my first mopar. I'm new so cut me some slack if I ask stupid stuff. Also, I have another restoration project already underway, so with a full-time non-automotive work schedule and regular life stuff I expect this restoration effort will require at least 2 years, likely more. There might be dry spells in my posting, but I'll keep things current with my progress. Silence from me only means I'm busier-n-hell, as this project is priority for me.
Ok now to my new prized possession. She's a 1970 true RM23 Roadrunner. I did the online VIN check prior to purchasing and also got a few things from the seller in a rather significant attempt to authenticate her history prior to actually laying down any coin. This was a sight-unseen Internet purchase, so I was apprehensive to say the least. But in the end, she was exactly as advertised, so I can't complain much. On the positive side of things, she has a numbers matching 383 and 4 speed, bucket seats (supposedly from the factory) and a pistol grip shifter. On the not-so-positive side however, the list is large. Overall condition isn't good. No fender tag. No broadcast sheet. Still trying to track down the history. Not much luck thus far. It's sat through at least three owners that I know of. Every panel will need to be touched with many in need of replacement. Too many missing parts to list. Cracked front windshield. Sagging rear suspension. Non-original wheels. And finally, both the engine and tranny will need a complete overhaul, if they are even salvagable.
Hmmmm...what was I thinking again? Hah! Well, it's admittedly not the path I wanted to take with my first muscle car. I had wanted a numbers-matching opportunity, but without the tag or a broadcast sheet, that's gonna be impossible here. So instead, I decided to simply pretend that I was/am living in 69 or 70 and have walked into a Plymouth dealership. I'm sitting down with the salesman who is filling out an order form for me. And I'll build this car like I would have ordered it back in the day. Again, not quite what I wanted, but it is what it is. If anyone can help with the history, I'd be immensely grateful, but I've already contacted a couple of potential Internet resources in that regard and the news wasn't good. My RM23 was manufactured in St. Louis, FWIW. Anyway, maybe the next project can be a numbers-matching affair. Just gonna do the best with what I have.
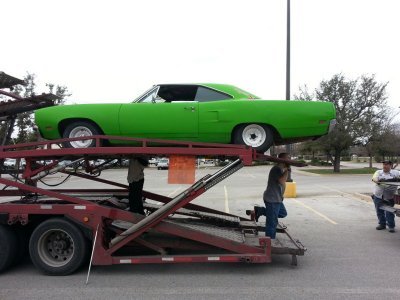
A few introduction pictures follow. Arrival:
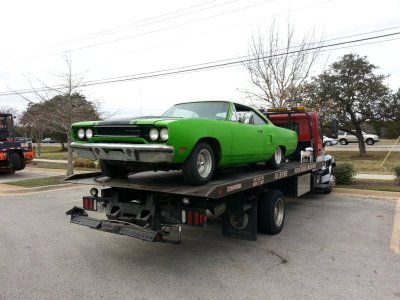
Ready for home:
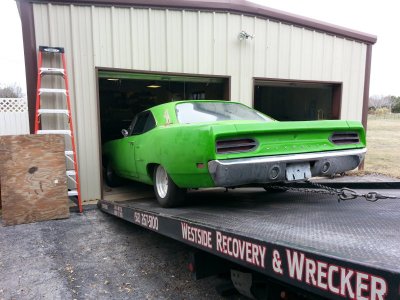
And right into the workshop:
It's difficult to post again on the forum, so I will stop here for now.
Thank you for reading,
Jerry
- - - Updated - - -
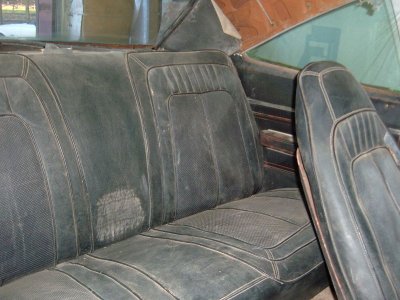
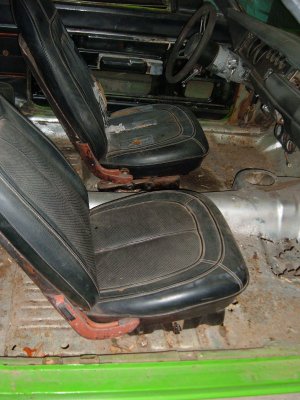
More pictures. The interior:
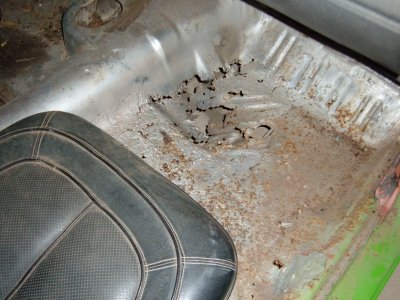
As I mentioned, most panels will need replacement:
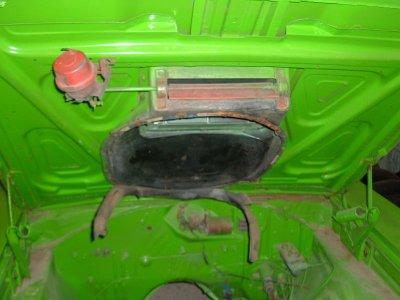
And the air grabber has seen better days:
Gonna stop here and pray that this post makes it past the FBBO posting gods.
- - - Updated - - -
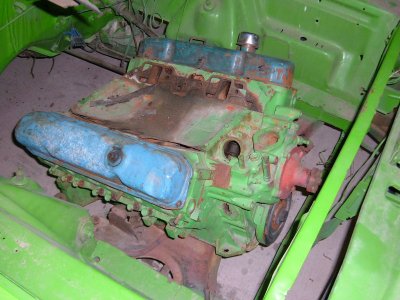
So this past weekend I finally got around to doing some work on her. Engine stuff is my favorite part of any build/restoration, with bodywork being the least. Boy but is this project gonna be trying at times! Being that as it may, the engine needed to be removed anyway, so I decided to begin there. Whoever put the engine in like this was ... well. They just were [fill in the blank with your choice explicitive]:
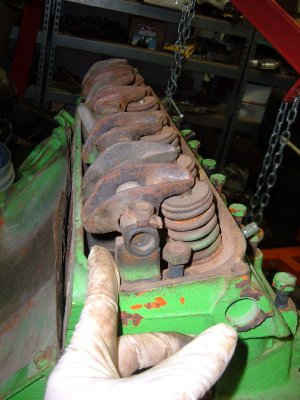
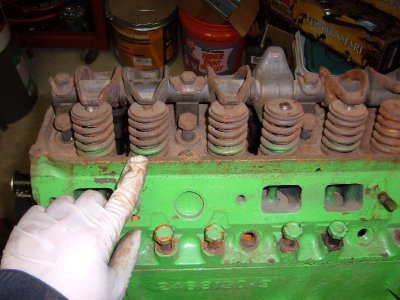
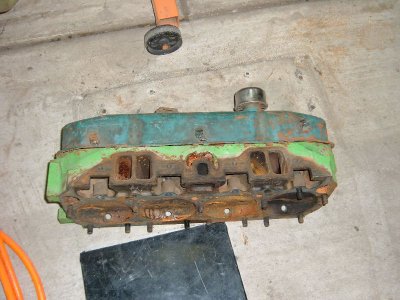
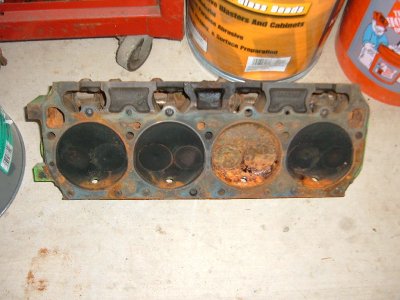
I had to remove the driver's side head just to get the thing out. Like the remainder of the engine, it's seen better days:
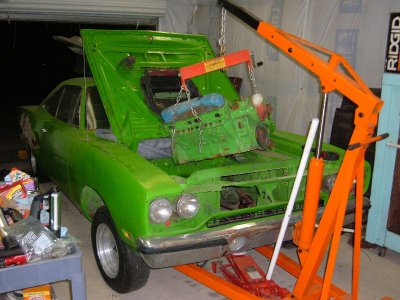
On its way out:
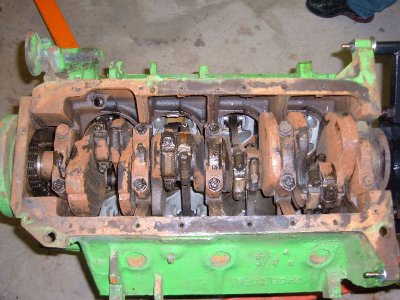
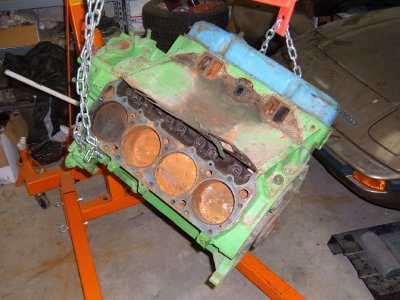
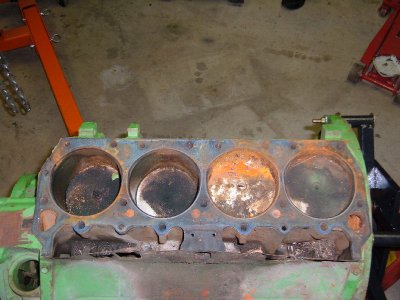
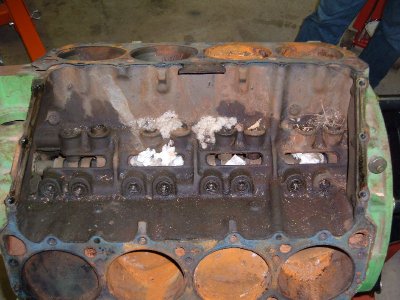
Yeah I'd say this thing has been sitting for a while:
I decided to join the group by posting a thread regarding my Roadrunner restoration project! Hope it's ok. I created a thread a short while back in the Welcome Wagon forum and now that I have actually begun working on her, I decided to share with the class. After reading several similar threads over the past couple of months, I thought it would be cool to follow suit and name mine accordingly, so like Roger and Rusty (to name but a couple), this is "Jerry's Roadrunner" - hah! ;-)
First, a couple of quick caveats if I may. This is my first American muscle car and thus my first mopar. I'm new so cut me some slack if I ask stupid stuff. Also, I have another restoration project already underway, so with a full-time non-automotive work schedule and regular life stuff I expect this restoration effort will require at least 2 years, likely more. There might be dry spells in my posting, but I'll keep things current with my progress. Silence from me only means I'm busier-n-hell, as this project is priority for me.
Ok now to my new prized possession. She's a 1970 true RM23 Roadrunner. I did the online VIN check prior to purchasing and also got a few things from the seller in a rather significant attempt to authenticate her history prior to actually laying down any coin. This was a sight-unseen Internet purchase, so I was apprehensive to say the least. But in the end, she was exactly as advertised, so I can't complain much. On the positive side of things, she has a numbers matching 383 and 4 speed, bucket seats (supposedly from the factory) and a pistol grip shifter. On the not-so-positive side however, the list is large. Overall condition isn't good. No fender tag. No broadcast sheet. Still trying to track down the history. Not much luck thus far. It's sat through at least three owners that I know of. Every panel will need to be touched with many in need of replacement. Too many missing parts to list. Cracked front windshield. Sagging rear suspension. Non-original wheels. And finally, both the engine and tranny will need a complete overhaul, if they are even salvagable.
Hmmmm...what was I thinking again? Hah! Well, it's admittedly not the path I wanted to take with my first muscle car. I had wanted a numbers-matching opportunity, but without the tag or a broadcast sheet, that's gonna be impossible here. So instead, I decided to simply pretend that I was/am living in 69 or 70 and have walked into a Plymouth dealership. I'm sitting down with the salesman who is filling out an order form for me. And I'll build this car like I would have ordered it back in the day. Again, not quite what I wanted, but it is what it is. If anyone can help with the history, I'd be immensely grateful, but I've already contacted a couple of potential Internet resources in that regard and the news wasn't good. My RM23 was manufactured in St. Louis, FWIW. Anyway, maybe the next project can be a numbers-matching affair. Just gonna do the best with what I have.
A few introduction pictures follow. Arrival:

Ready for home:

And right into the workshop:

It's difficult to post again on the forum, so I will stop here for now.
Thank you for reading,
Jerry
- - - Updated - - -
More pictures. The interior:


As I mentioned, most panels will need replacement:

And the air grabber has seen better days:

Gonna stop here and pray that this post makes it past the FBBO posting gods.
- - - Updated - - -
So this past weekend I finally got around to doing some work on her. Engine stuff is my favorite part of any build/restoration, with bodywork being the least. Boy but is this project gonna be trying at times!

I had to remove the driver's side head just to get the thing out. Like the remainder of the engine, it's seen better days:

On its way out:

Yeah I'd say this thing has been sitting for a while:


