• When you click on links to various merchants on this site and make a purchase, this can result in this site earning a commission. Affiliate programs and affiliations include, but are not limited to, the eBay Partner Network.

My charger restoration dream car

Tack it in place on center, back and front and then middle of sides and out towards the corners. Resist following the "spray glue everywhere" crowd. If you don't have headliner retainer clips for the roof rail sides use the interior finish trim clips to hold it, then when you are happy with fit go back and lift them off one at a time and contact cement just the overlap. Covered it pretty well in my build thread...
 
keep stretching it, for what its worth, I had a problem with the sewn in loops linning up with the factory positioning of the roof bows, the spacing was off especially the small ones in the sail panel area, added a secondary loop sewed it into the loop on the legendary head liner. the loop was a cloth ribbon material 3" wide folded in half off centered to give me a one inch extention. worked pretty good but when i was done wished i had extended the one in front of the small bows, have a few small wrinkles, and you can see where the bow goes into the clip that it could have been extended about a half inch. maybe this could have resolved by doing something else but this seemed to be the answer for my situation.
Thanks for the heads up. My headliner is also from legendary. I have been reading, watching, and trying to find all the information I can to help me install it.
 
Tack it in place on center, back and front and then middle of sides and out towards the corners. Resist following the "spray glue everywhere" crowd. If you don't have headliner retainer clips for the roof rail sides use the interior finish trim clips to hold it, then when you are happy with fit go back and lift them off one at a time and contact cement just the overlap. Covered it pretty well in my build thread...
Thank you for the help, I am open to any and all the pointers I can get. I have been studying your thread and any others I can find.
 
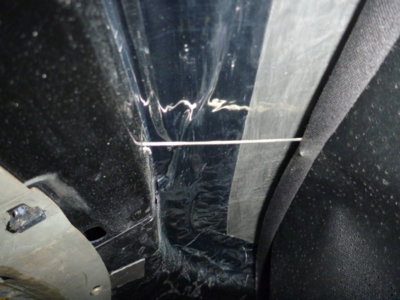
x2 on resisting spraying glue everywhere. I didn't spray any, I brushed it on with a small brush. And don't forget the wires in the back sides that keep the bows from going/leaning forward., I didn't know about them but found out in time to get them in while I did mine.
 
Last edited:
x2 on resisting spraying glue everywhere. I didn't spray any, I brushed it on with a small brush. And don't forget the wires in the back sides that keep the bows from going/leaning forward., I didn't know about them but found out in time to get them in while I did mine.
Thank you for reminding me, I do remember those wire clips now. One thing that has helped me a ton was when I dismantled my car I tried to document as much as I could. My car was missing many parts but the parts that it did have I bagged and labeled them. Most of the parts I even took a picture of the part and where it goes and put that in the bag also. It has been several years now sense I labeled everything and my memory and the labels are fading. Still very useful though.
IMG_0282.JPG
 
I spent some more time working with my headliner and feel like things are going well so far.
First I set up the wire clips and trimmed the material around the bow so I could hook them up where needed.
IMG_0283.JPG

IMG_0284.JPG

I fit all of the bows and cut the hole fore the dome light.
IMG_0285.JPG

IMG_0287.JPG

Then I started working, stretching, and clipping the headliner in place. once I got everything where I liked it I then started to glue and tack down all of the edges around the clips and shark teeth.
IMG_0291.JPG

I still have the sail panels to fit and stretch.
 
Doing GREAT! Like all stressful projects, take a break once in a while to clear your head.
 
SEE.. it's not that hard! Another "more time spent wondering and worrying than doing" item! Getting mine done is still the most personally satisfying item on my entire build!

Looking GREAT!
 
SEE.. it's not that hard! Another "more time spent wondering and worrying than doing" item! Getting mine done is still the most personally satisfying item on my entire build!

Looking GREAT!
YES,
I spent so much time going back and forth trying to decide to do it or have an upholstery shop do it. I talked with many people, visited several upholstery shops and got 3 bids. I have been kind of a control freak and want to try and do everything myself.
Thanks for your help.
 
Looks great. I knew you’d do a good job just by seeing your other work on this car. Well done.
 
I worked on finishing my headliner yesterday. I spent time trimming and attaching all of the edges and worked on the sail panels.
The side clips go over the seams.
upload_2019-5-5_16-52-20.jpeg


upload_2019-5-5_16-53-13.jpeg


I brushed contact glue on all of the edges and tucked them in and up the front. I didn’t use much glue until I had it all stretched out. Then I made sure it was secured on all of the shark teeth.
upload_2019-5-5_17-2-9.jpeg
 
The sail panels were a little more challenging. I had a hard time trying to keep the last seam straight. I will use a hot air hair dryer to stretch out the small wrinkles.
upload_2019-5-5_17-8-30.jpeg


upload_2019-5-5_17-9-24.jpeg


upload_2019-5-5_17-10-11.jpeg
 
Your headliner install looks just as good as the ones I have paid the pros to do. Debating trying it myself on my Bee when the time comes. Sail panels are what is making me nervous.
 
Auto Transport Service
Back
Top