You are using an out of date browser. It may not display this or other websites correctly.
You should upgrade or use an alternative browser.
You should upgrade or use an alternative browser.
So It Begins, 1966 Charger Restification.
- Thread starter 66ChargerHI-PO
- Start date
Moparnocar
Well-Known Member
Damn, sorry to hear that, I woul pick it up if I didn't have 2 already
....sorry to here about this. Good luck Eric. Maybe you'll find a good driver after this.......
Damn, sorry to hear that, I woul pick it up if I didn't have 2 already
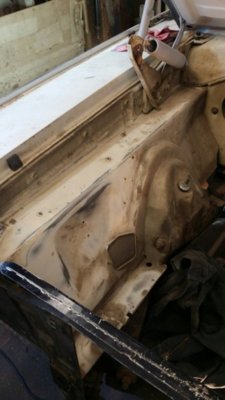
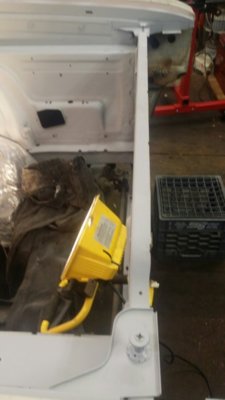
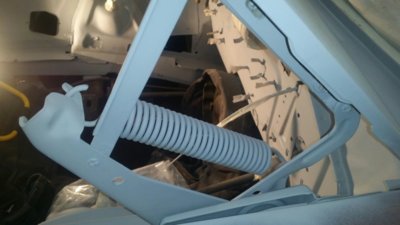
Nah I'm only kidding. It's April 1st, Happy April Fools Day guys! It was a joke. Don't feel bad and don't be mad at me, some guy pulled that today with his restoration project on FCBO and I fell for it too. I do have an update for you guys though, the engine bay is being primered tonight. Pictures to soon come
hanks73340
Well-Known Member
To The Moon Alice!.......Nah I'm only kidding. It's April 1st, Happy April Fools Day guys! It was a joke. Don't feel bad and don't be mad at me, some guy pulled that today with his restoration project on FCBO and I fell for it too. I do have an update for you guys though, the engine bay is being primered tonight. Pictures to soon come

More.....

Here is a factory paint run mark....more pictures of these in a little bit
 Notice the little letter and number above. Letter B, number 36
 Outside of the core support

More factory paint run marks....more to come


The number here above was from the above photo (if that makes sense)
 outside of the core support


More run marks by where the battery goes
Here is a factory paint run mark....more pictures of these in a little bit
More factory paint run marks....more to come
The number here above was from the above photo (if that makes sense)
More run marks by where the battery goes
More.....
 runs
runs

Inside core support
 More runs

Above is the number on the cowl


Bye bye core support decals
Inside core support
Above is the number on the cowl
Bye bye core support decals
So after one coat of primer.....here is what we have below


After a 2nd and final coat of primer, here is what we have.....


A few more. Last ones.....


Update- Tonight Thursday April 2nd, 2020. Oil was drained out of the engine. Also took the oil pan off and took out the freeze plugs and inside of freeze plugs was cleaned out. Finishing cleaning the rest of the engine as well.


More pictures of the engine. The plan is to keep what is in the engine right now, the oil pan may be salvageable.Stay tuned for an update on that......


Cleaned out freeze plug holes


Above is taken from left front side of engine

Above is taken from left back side of engine

Above is taken from right back side of engine

Above is taken from right front side of engine
Cleaned out freeze plug holes
Above is taken from left front side of engine
Above is taken from left back side of engine
Above is taken from right back side of engine
Above is taken from right front side of engine
"Update"- Hedman headers came today April 3rd 2020, along with a windage tray and a few other parts from Jegs. Unfortunately we decided not to go with TTI's as originally planned, as it is not in the budget right now. More photos to come later on, stay tuned......

Update- Here are a couple more pictures of the parts that came from Jegs. New engine freeze plugs and a windage tray

New freeze plugs

The new windage tray. It is set on the engine for now, not bolted to it yet.
New freeze plugs
The new windage tray. It is set on the engine for now, not bolted to it yet.
Update- Today April 4th, 2020. Engine parts were painted today and the old oil pan was also fixed and sanded.

This is actually 318 small block engine red paint. This is not the actual paint that will be used on the rest of the 383, just the "base coat" to prevent it from rusting.

This above is already blasted and painted

Original metal splash guards and hood rods are painted.


Motor Mounts Before Paint......


This is actually 318 small block engine red paint. This is not the actual paint that will be used on the rest of the 383, just the "base coat" to prevent it from rusting.
This above is already blasted and painted
Original metal splash guards and hood rods are painted.
Motor Mounts Before Paint......
Motor Mounts After Paint. I am pretty damn happy with how these look, as I personally painted them. My stepfather painted all the other stuff.....


Oil pan with dents now taken out of it. See old pictures of how it used to look......


After being sandblasted, here is what we have......


 318 small block engine paint again applied, just to keep it from rusting. Orange paint will be applied when we get it.

After being sandblasted, here is what we have......
Last edited:
Update- Today April 5th, 2020. All 6 of the new freeze plugs were put in the engine, and the horns were sandblasted and painted. I also took another picture of the new windage tray too, (see third picture below). Come to find out when we pulled the oil pan off the engine it did not have one.

 Looking good

The new windage tray. More pictures to come of the horns later, stay tuned......
The new windage tray. More pictures to come of the horns later, stay tuned......
Similar threads
- Replies
- 9
- Views
- 870
- Replies
- 5
- Views
- 404


