You are using an out of date browser. It may not display this or other websites correctly.
You should upgrade or use an alternative browser.
You should upgrade or use an alternative browser.
Starting the resto process 69 GTX
- Thread starter moparfanUSA
- Start date
moparstuart
Well-Known Member
- Local time
- 9:32 PM
- Joined
- Jul 19, 2008
- Messages
- 6,586
- Reaction score
- 1,052
shame to tear that one apart
Postman
Well-Known Member
Do you really want to Do big Bodyworks and wanna repaint it?? :confused2:
To me, nothing is more wonderfull than a real nice survivor, with some scarves and signs of the years...
Think twice about a repaint and tell us more about the history of the car!!
To me, nothing is more wonderfull than a real nice survivor, with some scarves and signs of the years...
Think twice about a repaint and tell us more about the history of the car!!

RGAZ
Well-Known Member
Speechless.
its...its...like new? I just can't fathom how little work it will take and yet you are taking it apart.
ahhh, ahhh, My head hurts thinking about it.
I concur, super find, careful taking it apart. Its almost new now, how much better do you want it?
Randy
its...its...like new? I just can't fathom how little work it will take and yet you are taking it apart.
ahhh, ahhh, My head hurts thinking about it.
I concur, super find, careful taking it apart. Its almost new now, how much better do you want it?
Randy
moparstuart
Well-Known Member
- Local time
- 9:32 PM
- Joined
- Jul 19, 2008
- Messages
- 6,586
- Reaction score
- 1,052
Speechless.
its...its...like new? I just can't fathom how little work it will take and yet you are taking it apart.
ahhh, ahhh, My head hurts thinking about it.
I concur, super find, careful taking it apart. Its almost new now, how much better do you want it?
Randy
I totally agree
only original once
ODSVET
Well-Known Member
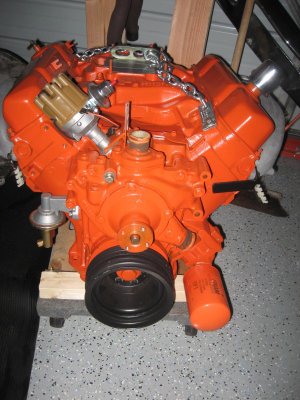
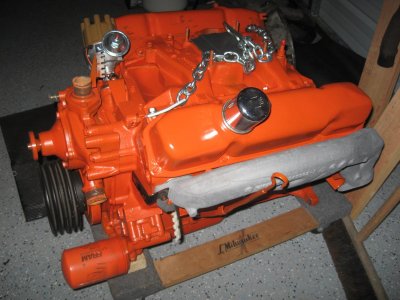
Well the madness begins. I started to tear my 69 GTX apart. I am learning about it everyday. I was fortune it to speak to one of the old owners of this car and he shed alot of info on it. I knew the car was all numbers matching, but I thought that maybe the engine had some work done to it, but I found out only the heads were redone. The motor still has almost the factory parts in it. Anyway I am posting some pictures of the process and will update it as I work on it. Here it is before I started.
I'd like to hear more of the history on this car. How far was it taken down ? Is that the original paint ? I mean you're telling us 3 of the 4 headlights were original ? That's pretty amazing in this day and age. From my experience (granted, limited ) it seems it'd be worth more as a "survivor" than a "resto". I mean just freshen it up and call it good. Like moparstuart, it's only original once.. Of course "restoration" is subject to interpretation .. what some people call a resto , I call washing the car . Just out of curiosity , how many miles are on it ?
iraqivet01
Well-Known Member
Scuff and paint.
If the body is straight, your one lucky guy. Knock the rust off the windshield motor and master cylinder. Leave it alone, don't blast it if not needed.
My car is in good shape, nothing like that one.
If the body is straight, your one lucky guy. Knock the rust off the windshield motor and master cylinder. Leave it alone, don't blast it if not needed.
My car is in good shape, nothing like that one.
mopar6976
Well-Known Member
Do you really want to Do big Bodyworks and wanna repaint it?? :confused2:
To me, nothing is more wonderfull than a real nice survivor, with some scarves and signs of the years...
Think twice about a repaint and tell us more about the history of the car!!
I absolutely agree.
Bens69PlymouthSatellite
Well-Known Member
Holy hell!! Like the boys said freshen her up a bit but a full resto!? Holy... Save your cash,wash,wax,whatever u gotta do to be satisfied w/ her but drive it and appreciate it the way she is.. thats a true survivor,if u want a project I will trade u my 69 sport satellite and u can resto,resto mod,whatever u want on that,I would drive yours til the doors fell off then restore it,beautiful car! Lets hear some history!
moparfanUSA
Well-Known Member
redoing the car
The car has 75,000 on it now. I brought it with 72,700 in April of this year.
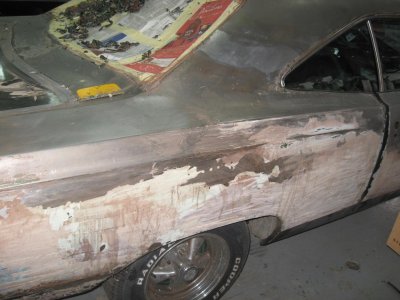
I know the pictures do not show it, but the car has been painted once before. There is bondo on the pass. side on the whole front fender and door and a little on the rear Qtr. A deer hit it long ago. The paint looks like crap. There is a small dent on the roof. The carpet was faded and the front seat had a small rip in it. I replace it. Here are some pictures from when I first got iy. I'm putting it back to "stock" as much as possible
Donny
Well-Known Member
- Local time
- 9:32 PM
- Joined
- Aug 28, 2009
- Messages
- 3,206
- Reaction score
- 544
- Location
- North East San Antonio TX
FYI, the 69 GTX had a dark semi-flat black paint down low, and either a white or red stripe. That moulding also didn't come on the 69 GTX, nice car, love the color!
moparfanUSA
Well-Known Member
update
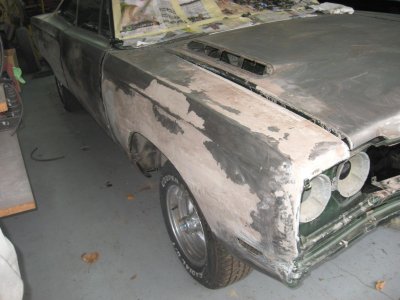
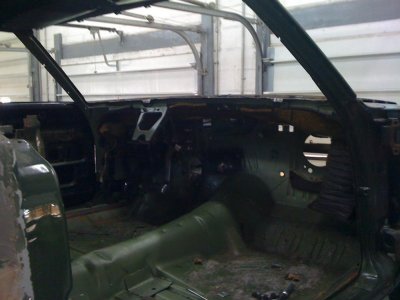
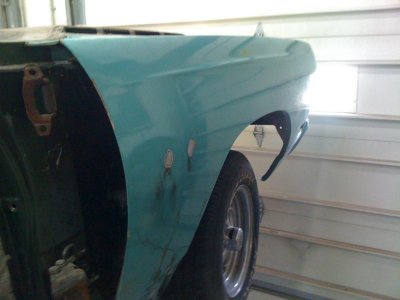
Well, the car is at the body shop and the paint removed, we found alot of Bondo, so I had another fender and door that we are going to use, but it still will need more sheet metal. The roof is all good, no bondo there, but the rest of the car has at least some on it.
Well, the car is at the body shop and the paint removed, we found alot of Bondo, so I had another fender and door that we are going to use, but it still will need more sheet metal. The roof is all good, no bondo there, but the rest of the car has at least some on it.
Attachments
Donny
Well-Known Member
- Local time
- 9:32 PM
- Joined
- Aug 28, 2009
- Messages
- 3,206
- Reaction score
- 544
- Location
- North East San Antonio TX
Man, no media blasters around there to do this?
moparfanUSA
Well-Known Member
there are
but there is way to much Bondo on there to play with it. I havec a nice clean front fender and door to replace it.
but there is way to much Bondo on there to play with it. I havec a nice clean front fender and door to replace it.
moparfanUSA
Well-Known Member
moparfanUSA
Well-Known Member
moparfanUSA
Well-Known Member
Heater Box
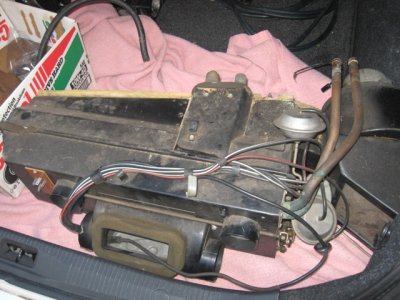
Here is the heater and AC box
Here is the heater and AC box
moparfanUSA
Well-Known Member
426HemiCharger
Well-Known Member
I actually had fun doing my AC box. It's not really hard. I got mine gutted, and I ripped the old insulation out. I set aside the heater core and the evaporator. Then the box got acid dipped. I then cleaned it off and painted it semi-gloss black. Then I scuffed the inside with some 300 grit and wiped it off. The insulation kit is from DMT. Follow the instructions in the kit. Then clean off the evaporator if it's good and I flushed mine. I also checked it for leaks and it was good so the leaves stuck in the tubes came out and it went back in. With the heater core the tubes and o-rings need the be replaced. If the tubes are brittle (usually are) I used a box cutter then a pair of pliers to yank of each piece. After that i cleaned up the tubes with a wire brush and steel wool. then a coat of black paint. the black paint is not original but it reduces corrosion and when the central vent is open you shouldn't see a heater core. The inlet and outlet tubes are copper with black overspray. Once you finish the heater core it can be installed to the front half of the box. Once you do that align the front half of the box with the rear half and hold it together with the nuts (yellow zinc dichromate) and srews (clear zinc). A final touch is a date code stamp, but I haven't found anyone who makes them, so I'll have to make my own.
moparfanUSA
Well-Known Member
fixing
Yes I was thinking of doing all the work myself, but when I got the car the AC was not hooked up, so that means that the AC core was open to the elements for over 4 years. It also looks like the heater core might have a leak in it. Classic Auto air will make it look like new with a new core for $499. so I might go that route. Thanks very much for the advise.
Yes I was thinking of doing all the work myself, but when I got the car the AC was not hooked up, so that means that the AC core was open to the elements for over 4 years. It also looks like the heater core might have a leak in it. Classic Auto air will make it look like new with a new core for $499. so I might go that route. Thanks very much for the advise.
Similar threads
- Replies
- 5
- Views
- 325
- Replies
- 41
- Views
- 3K
- Replies
- 2
- Views
- 262
- Replies
- 16
- Views
- 798

