• When you click on links to various merchants on this site and make a purchase, this can result in this site earning a commission. Affiliate programs and affiliations include, but are not limited to, the eBay Partner Network.

Taking Up New Residence

Finished prepping where the cat wiskers go and painted just to the edge.
20180220_213733.jpg
20180221_151158.jpg
20180226_194527.jpg


20180221_144216.jpg


Ready to install the headliner boards. Thought that I would take some measurements off the original board and compare them to the new board. Glad that I did.

I had glued the pieces that were supplied with the board and they only would fit one way. Boy I fell for that one. Here's where I glued the one supplied.
20180223_160038.jpg

Here's where the piece needed to be attached. I had to remove the first one I glued and cut a new piece to glue where it should have been.
20180223_175405.jpg

Next I installed the three stainless steel bows that devides the boards and which the plastic trim fastens to.
20180225_161418.jpg


Then I install the rear board first. I had my hands full with this one but got it without any problems.
20180225_184933.jpg


Then I cut the extra "shipping" material off the next piece and installed it. I bowed the board down in the middle, get it lined up, then push it up into place.
20180225_185423.jpg
20180225_191409.jpg
 
Then the next board is where the interrior light goes. Transferred the plate to the new board.
20180225_194025.jpg

20180225_194032.jpg


I fed the wire and bulb socket through the hole before installing the board. Same procedure, bowing it down in the middle, then push it up.
20180225_215156.jpg


I tried one of the plastic trims on this piece to make sure it was going to work with this board thickness. It's heavier than the factory material. It went on just fine.

In this picture you see that I'm useing a paint stirrer to hold the stainless steel bow it place. The weight of the board in the center would push out on the bow and the board would want to drop out.
20180225_215118.jpg


Installing the last board, I left the paint stirrer in place until I had the board where I wanted it, then just reached in and pulled it out.
20180226_132326.jpg

20180226_134850.jpg


Turned out ok. You really have to take your time and not force anything.
20180226_151841.jpg


Next is cleaning up all of the chrome trim! My legs and knees are killing me.
20180226_175709.jpg
 
Last edited:
Then the next board is where the interrior light goes. Transferred the plate to the new board.
View attachment 576369
View attachment 576370

I fed the wire and bulb socket through the hole before installing the board. Same procedure, bowing it down in the middle, then push it up.
View attachment 576372

I tried one of the plastic trims on this piece to make sure it was going to work with this board thickness. It's heavier than the factory material. It went on just fine.

I this picture you see that I'm useing a paint stirrer to hold the stainless steel bow it place. The weight of the board in the center would push out on the bow and the board would drop out.
View attachment 576373

Installing the last board, I left the paint stirrer in place until I had the board where I wanted it, then just reached in and pulled it out.
View attachment 576377
View attachment 576378

Turned out ok. You really have to take your time and not force anything.
View attachment 576379

Next is cleaning up all of the chrome trim! My legs and knees are killing me.
View attachment 576380
-----
Very excellent work!
 
Can you imagine if car Mfgs had to build cars with all this nice trim now days. A car would twice the average price of $36k.
You've got that right.

The whole time that I'm working on this car I'm imagining the car on the assembly line and a worker putting these parts on the car.

Well if I would have been the one on the assembly line installing the hardboard headliner, I would have put the whole plant behind schedule a day or two and gotten myself fired!

It's amazing how the whole design process had to have taken place along with the actual manufacturing of each part and to have only used a lot of the pieces for just one year. All of this takes place in a very short period of time just to start designing next year's model. That's a lot of people with the knowhow and talent to pull it all off! Good stuff.

Probably why it was 1 year only? Looks great!
 
Here's some additional pictures of the headliner parts.
20180228_201348.jpg
20180228_202607_001.jpg


Measurements for the coat hanger. 7 1/2" from the front.
20180228_121702.jpg


1 1/2" from the bottom edge. I used a wire to probe for the original hole.
Screenshot_2018-02-28-21-32-01.jpg

20180228_214220.jpg
 
Cleaned up the quarter windows and installed the weather strips.

The factory used a piece of tape to hold the attachment bolt in place during installation.
20180301_110857.jpg
20180301_110833.jpg

20180301_121806.jpg
20180301_111434.jpg

20180301_121945.jpg


Cleaned the slot real good and installed the new weather strips from the side. They fit too tight to just slide them up from the bottom. I even sprayed them with silicone and they were still too tight to slide.
20180301_113843.jpg
20180301_114111.jpg

20180301_115304.jpg
20180301_110757.jpg
 
Last edited:
I liked this decal so I thought I would try preserving it with some urethane clear.
20180301_184438.jpg

20180301_183326.jpg


Windows cleaned and assembled so I oiled and greased the regulators and slides. All the parts here looked good.
20180301_141858.jpg


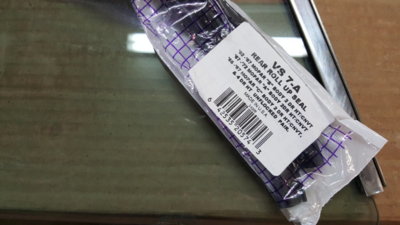
Installed the new seals before installing the glass.
20180301_140013.jpg


Insert the glass from the front of the opening then lower it down. Have the frame rolled about halfway up. Get both bolts inserted into the frame, then lower it down to install the nuts. Hand tighten with a nut driver.
20180301_142148.jpg

20180301_142303.jpg
20180301_142357.jpg
20180301_142431.jpg
 
Doing adjustments.
Screenshot_2018-03-05-16-25-31.jpg
Screenshot_2018-03-01-19-17-35.jpg
Screenshot_2018-03-05-17-18-29.jpg
Screenshot_2018-03-01-19-20-47.jpg


With the new seal or wiskers, they are thicker than original so the window needs to be moved inward. You accomplish this by useing these adjusters.
Screenshot_2018-03-01-19-24-24.jpg
 
Last edited:
Doesn’t your butt just clench though when tightening anything on glass parts ?!
 
With the quarter windows adjusted (sort of centered in and out and lined up with door window) I'm ready to install the roof rail seal.

First thing I noticed is the seal is made with two different profile pieces and my original ones are too deteriorated to tell what's what. So I turned to the Forum, that's what they're there for!
https://www.forbbodiesonly.com/mopa...-62-63-roof-rail-seals.147467/#post-910901606

Having the quarter windows all the way up they weren't lined up with the door windows where they meet. Looking at the doors, they needed to be adjusted up. The hinges are in excellent shape with no play. Useing a scissor jack to support the door, I loosened the three hinge bolts. Two from inside the kick panel and one outside between the door and fender.
20180304_132309.jpg


You have to have everything adjusted and lined up correctly. I did a lot of adjusting. The door latches took many tries after raising the doors where they belonged. Then the quarter windows took multiple adjustments to get them to match up to the door window, vertical and parallel and the distance between the two. All of these adjustments can be made.

Ok on to the roof rail seal.
20180302_165613.jpg


The trim piece that holds the seal has to be perfectly clean from any pieces left from the old one. A plastic scraper and lacquer thinner worked good. This piece is stainless so there was no rust!
20180302_165630.jpg


You can see that I marked, with tape, where the two glasses are located. The seal that I bought has two different profile pieces joined together right where the two glass comes together. That's where you need to start with the installation. The quarter glass fits inside the seal and the front goes on the outside of the seal.
20180302_172619.jpg
20180302_180533.jpg

20180304_192348.jpg
20180304_192400.jpg


The front end of the seal has a piece of flat metal inside. You just have to shape it to fit the curve where it is going to be glued. Clean any old glue off the paint with lacquer thinner and clean the new rubber with the same to remove any "mold release" that is on it. I used the 3M Super black adhesive. Coat both sides, wait till tacky and place together.
20180303_171653.jpg
20180303_173338.jpg


On the other end just leave about three or four inches of seal below the bottom of the window. Once installed, roll the quarter windows up, watching for any folding of the rubber. I used a thin plastic trim tool to help the glass into the groove where it belongs. Check it inside and out. Once in place I loosened the two lower track adjustments to let the window find center.
20180301_143117.jpg
 
Last edited:
Doesn’t your butt just clench though when tightening anything on glass parts ?!
And the hardware is just padded by cardboard, not rubber! That's why I said to use a nut driver. They were actually finger tight when I removed them. Also the frame is spring mounted to a certain point, there are springs at each set of rollers. Biggest thing is not to put anything on a bind. Don't force any adjustments.
 
Cut out new quarter moisture barriers and glued them on with lightly applied contact adhesive.
20180305_150508.jpg


Went over the entire floor. It's in exceptional good shape, no rust what so ever. I did find a couple of spots that the paint was flaking off. It was in spots where the factory dipping ran into a low place. Just used a putty knife on those spots and followed up with a little primer. Touched up a couple of places with body caulk in the seams where it had shrunk. Might get it up on jacks tomorrow to start installing insulation.
20180305_150522.jpg


Here's a picture that only a automotive proctologist would admire!
20180305_172837.jpg
 
Boy that thing has more “shiny stuff” inside than a Cadillac!
 
Boy that thing has more “shiny stuff” inside than a Cadillac!

Yea, that's the bad part when you're trying to build a nostalgic looking, semi race car. But the Polara 500s were on the track back then along with the Darts, just not as many.
 
Auto Transport Service
Back
Top