• When you click on links to various merchants on this site and make a purchase, this can result in this site earning a commission. Affiliate programs and affiliations include, but are not limited to, the eBay Partner Network.

Tips for replacing rear side windows for '72 Road Runner/Satellite?

Dibbons

Well-Known Member
Local time
1:50 PM
Joined
Nov 29, 2014
Messages
4,865
Reaction score
5,776
Location
La Paz, B.C.S., Mexico
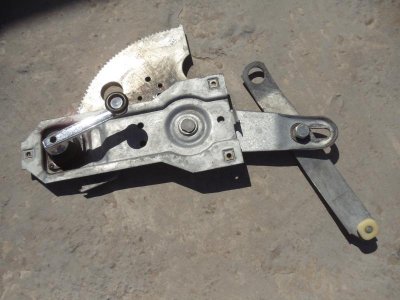
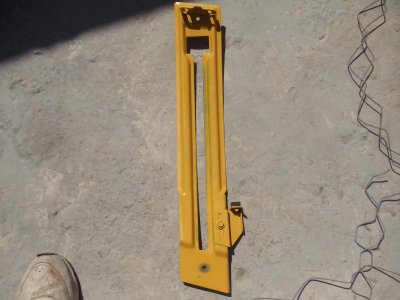
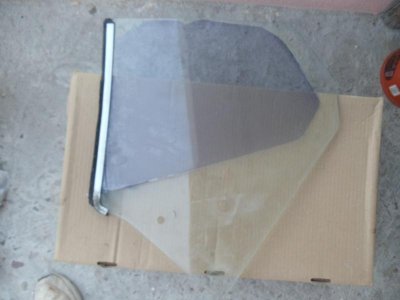
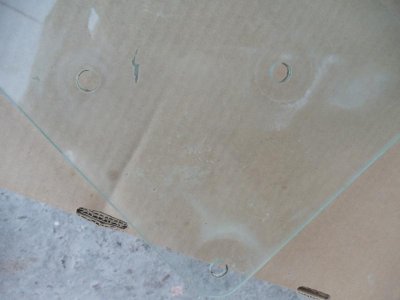
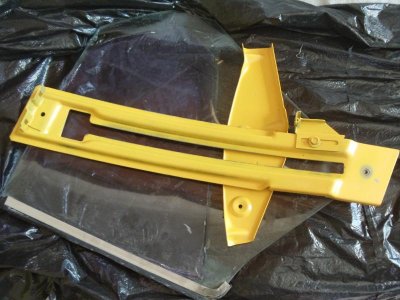
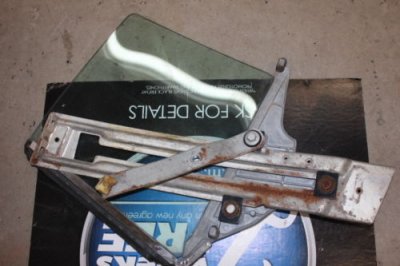
About to re-install the rear side windows (AKA quarter windows?) today and not sure of the procedure. The '71 factory body service manual diagrams don't quite look the same as my '72 rear side window pieces. Any tips? Are '71 and '72 window regulator hardware for the rear side windows different?

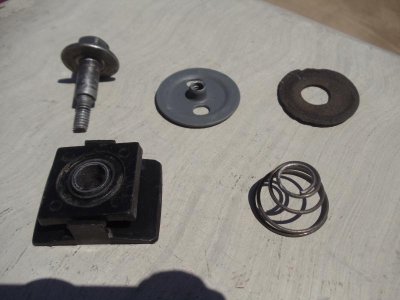
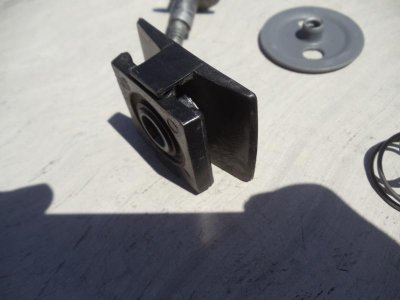
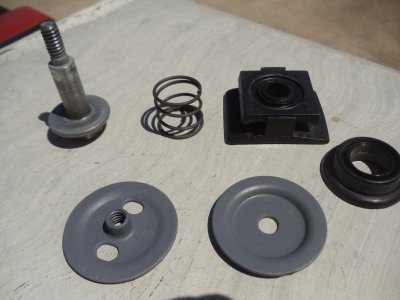
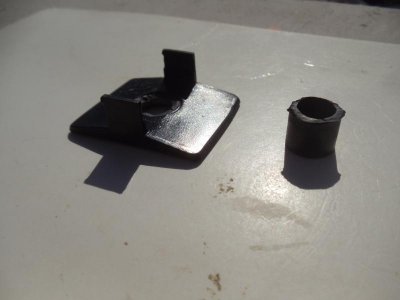
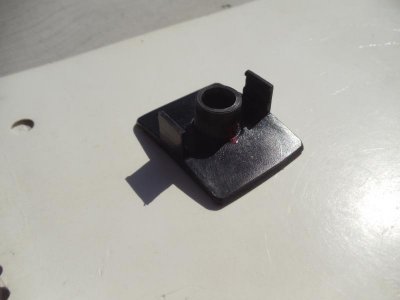
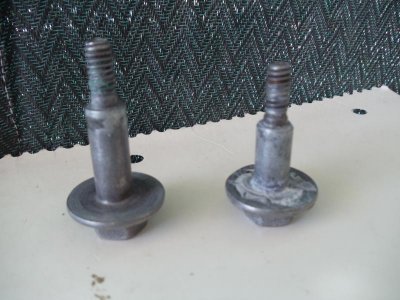
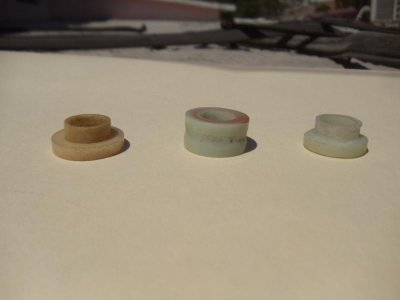
I spent most of the morning now trying to figure out the correct order of the bolt, spring, plastic slide, bushing, gasket, and nut/washer and what fits on the inside/outside of the window glass. No luck. I am giving up for now and will continue to work on the door windows, which I was able to figure out yesterday. Hopefully, someone on the forum has this all figured out for us already. Hope to hear from that member soon. Thank you.
 
Last edited:
Here are some fotos for reference:

#1 Bolt set with conical spring. There are two sets like this
#2 Same as foto #1, different angle.
#3 Bolt set with straight spring (non-conical). There is one set like this.
#4 Roll up mechanism
#5 Bracket with attached factory gasket and three bushings.
#6 Guide
#7 and #8 quarter window glass (has aftermarket tint film applied)

Don't know if missing pieces or if previous owner substituted some parts for others.
 

Attachments

  • DSC00665.jpg
    DSC00665.jpg
    45.5 KB · Views: 406
  • DSC00666.jpg
    DSC00666.jpg
    35.2 KB · Views: 446
  • DSC00667.jpg
    DSC00667.jpg
    46 KB · Views: 438
  • DSC00668.jpg
    DSC00668.jpg
    46.6 KB · Views: 438
  • DSC00669.jpg
    DSC00669.jpg
    59.4 KB · Views: 430
  • DSC00670.jpg
    DSC00670.jpg
    53.2 KB · Views: 406
  • DSC00677.jpg
    DSC00677.jpg
    33.9 KB · Views: 368
  • DSC00679.jpg
    DSC00679.jpg
    33.6 KB · Views: 393
Last edited:
I wish I could help, but I'll be following the thread.

I have roll up windows to swap into my RL21 fixed window 73 Satellite.
 
i'm going to put my car together twice with Dibbons!..j/k
the 71-4 rear window roll up nightmare..
I've had them in the past..lol
yeah
you might be missing some stuff
there are alot of parts that go with it.

on my list of one of my many things to do
was to pull out some rear power windows (for total rebuild) out of one of my 71 rr
its a original power window car.
and install some roll up windows i have to take its place.
its just been a little cold out or i would be doing it already

the roll ups i have came from a 71 parts car and i saved every last piece
that goes with it. a bunch of bolts and braces that all go in there.
over the weekend
let me dig out what i got
i have the hardware/braces put away in boxes somewhere
and i have some other rear window assemblys from a 72 dodge also
and get some pics up for ya.
 
I think I'd have to go back P/W on a factory P/W RR that early.
 
Let's keep in mnd I found some fotos on Ebay of a '71 quarter window with the bracing still attached and the bracing looks very different from my 72. Passenger side fotos below: #1 My '72 brace which is painted yellow #2 the 71 brace on Ebay.

- - - Updated - - -

Finding several of these plastic pieces broken off in places. Using Krazy glue for now to glue back the little cylinder shaped pieces. Foto #1: broken off piece on the right. Foto #2: broken piece glued back on (but for how long?)>
 

Attachments

  • DSC00690.jpg
    DSC00690.jpg
    68.3 KB · Views: 361
  • Passenger one.jpg
    Passenger one.jpg
    31.1 KB · Views: 371
  • DSC00682.jpg
    DSC00682.jpg
    29.7 KB · Views: 352
  • DSC00683.jpg
    DSC00683.jpg
    25.7 KB · Views: 356
Two more fotos

#1 There are two different length bolts, two short ones and one long one per window. I assume the longer bolt is used to connect the crank mechanism to that slot on the window.

#2 Another broken plastic piece, which I will call a "wing". I used krazy glue to affix it, but of course, during my pre-assembly testing/fitting/experienting it snapped off again. Krazy glue does not resist torsional forces. It will have to be assembled without this "wing" for now.
 

Attachments

  • DSC00691.jpg
    DSC00691.jpg
    68.8 KB · Views: 333
  • DSC00692.jpg
    DSC00692.jpg
    25.3 KB · Views: 289
I think I'd have to go back P/W on a factory P/W RR that early.

yes it is all going back... lol
all will be in brand new condition
nos switches,new harness,motors all redone..ect and so on.
don't dare ask what i have invested so far
and i'm not even done yet.

power windows came on less then 5% of the 71 runners
the car it came in had to of been ordered (its missing its fender tag) with that option
and with all the other options it had (340 autumn bronze/burnt o gut 4 spd bucket/ console /hood signal car )

when i got the car it had roll ups in the doors
and i thought it had fixed in the rear.
i never peeked in there for years
it did have a pile of junk power window regs/motors in the trunk
most that i cannot identify c body maybe?
when i pulled the rear interior out
there were the rear pw regulator/motors that were hidden away
i found the main harness stuffed behind the kick panels on either side
and under the carpet when i pulled the buckets out.
so i had the main harness totally redone,new wiring,i even had to switch out all of the plug ends for the switches.
i have alot invested in just the harness alone it took many hours to build it.
anyway the reason for the window switch out is
i need to fill the hole when i pull the pw parts out
and i don't want to leave it open
because i have no clue of how long it will be before it is all rebuilt
and going back in.

sorry for the derail Dibbons
i will make it up in a bit
i got a bunch of pics to post
just have to upload them
stay tuned....

- - - Updated - - -

ok
i found my boxes of stuff
here is what i have for one side
DSCF7928_zpsc6m52lx7.jpg

DSCF7930_zpsqmdtyq0u.jpg

DSCF7941_zps8pn8tcc9.jpg

that is the contents for one side and what you need

some of the parts you show are broken and you
are going to need replacements

- - - Updated - - -

next is pics of a complete 72 rear roll up assembly
all together ready to bolt in
the only difference between it and the 71
is the shape of the glass
DSCF7952_zpsvs2bcrji.jpg

DSCF7943_zpsc4yogdwv.jpg

DSCF7950_zpsdifkfyat.jpg

DSCF7924_zpszgrrplqe.jpg
 
Last edited:
Now I wonder if the stepped bushings I showed in one of my pictures is a '72 only item. I wonder which side of the window they belong?

And in the same foto it seems there were two round gaskets/seals pinched between the window and that large rectangular gasket glued to the glass, one can clearly see the depressions in the old gasket material. That's weird.

- - - Updated - - -

Referring to flypaper's posting above, that looks like a lot of gear to squeeze through the crack for the window, especially considering how fragile those darn plastic slides are. And all of that fits through the opening for the window while already put together, or is it assembled piece-meal, one piece at a time inside the quarter panel?
 
this is 71 glass
the tracks and parts are the same for 72
it looks like you might have some fixed window parts mixed in
the parts you have to attach to the glass.
i think that is what is in your pic
anyway 71 glass and track
DSCF7916_zpspxkjmajd.jpg

DSCF7921_zpsp22nvnoe.jpg

and last
just for reference since i'm posting rear glass
this is 71 fixed glass
DSCF7961_zpsmai9shf0.jpg

DSCF7963_zpsjz2xg61d.jpg


- - - Updated - - -

Now I wonder if the stepped bushings I showed in one of my pictures is a '72 only item. I wonder which side of the window they belong?

And in the same foto it seems there were two round gaskets/seals pinched between the window and that large rectangular gasket glued to the glass, one can clearly see the depressions in the old gasket material. That's weird.

- - - Updated - - -

Referring to flypaper's posting above, that looks like a lot of gear to squeeze through the crack for the window, especially considering how fragile those darn plastic slides are. And all of that fits through the opening for the window while already put together, or is it assembled piece-meal, one piece at a time inside the quarter panel?

i think that piece you have is for fixed windows
it has no place to accept a slide in the middle
if you look at how the ones that i have are arranged
for reference
the first tinted widow i showed came from a 72 charger
the clear glass/track was from a 71 sat
the tracks and hardware is the same for both
i can't see it being any different for other cars
and the last fixed glass was from a 71 sat
i have the brackets for that somewhere in my stuff

as for installing tips
when i took them out,i do remember that
i had to disconnect the regulator away from the glass
at where it connects to the base at the end of its 2nd arm
by removing that bolt with the spring and plastic slide off the track
that is why those parts are in my hardware box
it came out the side hole in 2 pieces,the regulator came out first,then the track with the glass and slides
and i would put it in reverse order of that.
 
Last edited:
hmmm
that yellow piece that he has in his pics, looks just like the bracket in that blow up..
thats weird because i don't have it on my window stuff?
maybe some of that stuff did change around..
i do have other 71 rear track window parts
and they are like what i have..
 
Attach points to the glass are different for ’71 vs ’72 and later. Some of the track hardware is interchangeable, but that's it.
 
not sure if this helps but this is how i pulled them out so i could remeber how to put them back in again

IMG_20120208_201446.jpg
 
Attach points to the glass are different for ’71 vs ’72 and later. Some of the track hardware is interchangeable, but that's it.

i learn something new every day with these cars
Dibbons will have to look around for later 72 and up style parts it appears
i don't see that blow up when i look in my 71 manual,is that from a 72 manual?
 
Yes, the blowup above is from the '72 Plymouth Body Service Manual, pg. 6-24. Not seeing the same blowup in the '71 body manual, but installation of rear side glass is on pg. 6-25 in the '71 Plymouth Body Service Manual.
 
Update on the shoiuldered bolts w/springs. I measured them, the single long bolt is 2 inches long overall, and other two shorter ones measure at 1 3/4 inches long overall (top of head to bottom of threaded portion).

My '72 application calls for a bushing/spacer in each of the three mounting holes in the window glass (3 on each window). I was missing one, only found 5 of the 6. Took an old roller (that was replaced with a new one from the window rebuild kit I purchased) and fabricated another bushing/spacer using a Dremel tool, several Dremel tool attachments, a small triangular file, and razor blade. See foto below: original factory bushing/spacer on the left, original factory roller center, "new" bushing/spacer made from the roller on the right.
 

Attachments

  • DSC00700.jpg
    DSC00700.jpg
    22 KB · Views: 243
Guys, what about the inner and outer window seals and fuzzies?
What do they look like and who is reproducing them?
 
Auto Transport Service
Back
Top