• When you click on links to various merchants on this site and make a purchase, this can result in this site earning a commission. Affiliate programs and affiliations include, but are not limited to, the eBay Partner Network.

TxDon's 67 GTX Project

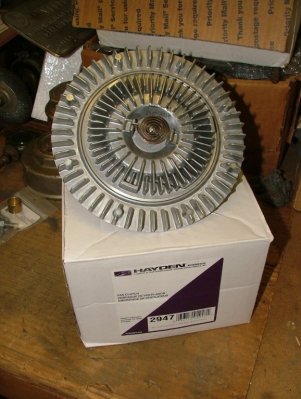
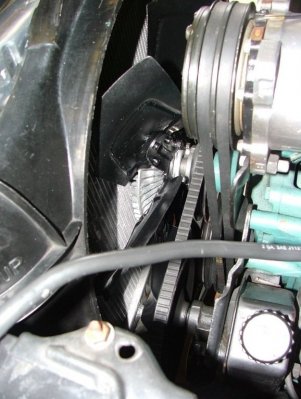
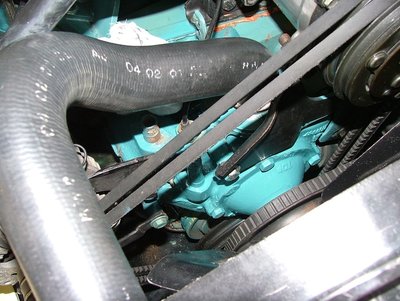
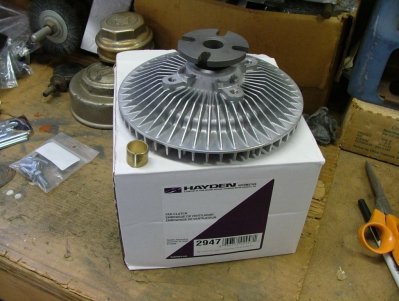
I finished another project this weekend. Like a lot of others I've had some cooling issues here in the Texas summer hell, mostly with the temps creeping up when running the A/C. I've been involved with at least three other threads on this topic (A lot of good advice, thanks!) and I decided to upgrade the fan and add a thermostatic fan clutch. The car had an 18" fixed 7-blade fan inside a factory looking shroud with a 22" opening. I found a 20" high-pitch fan and clutch on Ebay but when I tried to mount it the blades hit the lower tank on my ECP aftermarket radiator. I was stuck at that point until one of threads on here mentioned that Hayden was releasing a new shorter version fan clutch with heavy duty construction. I bought one of these from RockAuto and installed it this weekend.

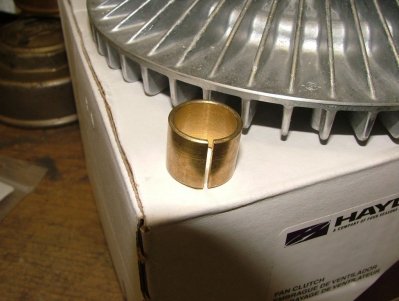
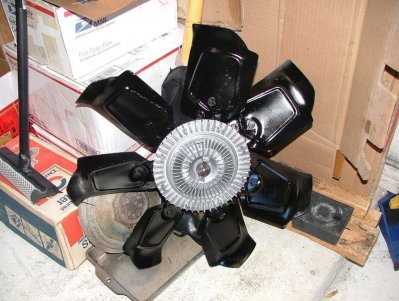
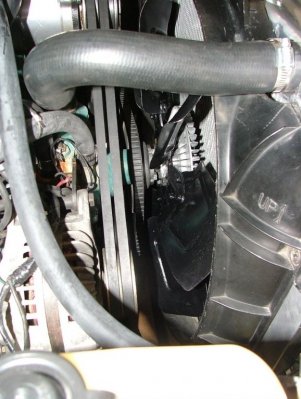
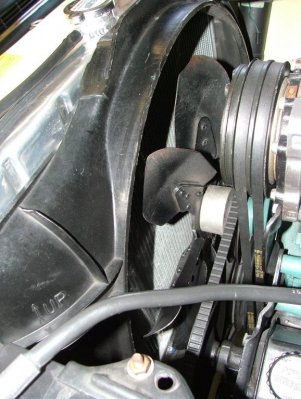
After cleaning and repainting the larger fan I bolted it to the clutch and removed my fixed fan. The shorter depth dimension is accomplished by using a shorter shaft so it really tightens up the space where the mounting bolts go. Between the tight space and my 68 year old eyes it took awhile to get them started but I finally got it. There is only room for an open end wrench to tighten the bolts, wearing gloves is a good idea. Hayden supplies a brass bushing to downsize the center hole and I needed to use that. Once I got the fan on I checked clearances everywhere, it now clears the bottom tank and is centered in the shroud. The high pitch blades are about halfway into the shroud and are pretty close to the pulleys on the engine side but no interference.

I started the engine and noticed an immediate difference in air movement along with a roar when revving it up. I took it for a 20 minute ride today in sunny 90 degree weather with the air on, it stayed at 185-190 when cruising and never got above 200 when sitting which is an improvement. So far so good, I also have ordered a hood to radiator rubber seal which I did not have. Here are some photos of the fan install, the first picture shows the old fixed fan.
DSCF6622.JPG DSCF7257.JPG DSCF7259.JPG DSCF7261.JPG DSCF7263.JPG DSCF7265.JPG DSCF7266.JPG
 
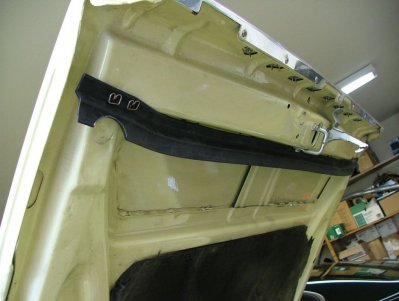
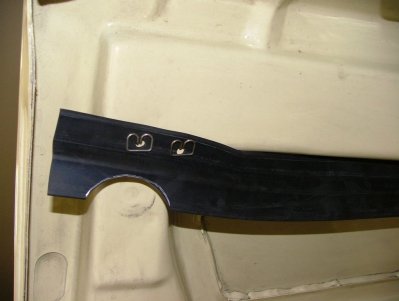
I finally got the hood to radiator seal, bought on Ebay from Detroit Muscle Technologies. They say they manufacture the item and they had the best price. I put it on today, very simple install with push-in clips. It's a well made part and fit perfectly. I'll probably have to wait until next summer to know if it makes any difference in cooling.

DSCF7557.JPG DSCF7559.JPG DSCF7560.JPG
 
hood to radiator seal
Thinking about doing the same thing. Just wondering if your car has a lower radiator shroud/deflector? It would fasten to the lower rear edge of the bumper and the forward edge of lower rad support; the holes are already there. Maybe it's a stone shield, not sure. The purpose would be similar to the upper seal - to direct all air through the rad. It might be simple enough to fabricate something. Clean car, very nice!
 
Last edited:
I asked about the lower shroud on some other threads, apparently the 68's upward used it but the 67 back did not, although I'm no expert.
 
I remember seeing that Packard one time over at the whole foods, Beautiful ride!

The stone shield/gravel pan is the deflector......it is metal instead of rubber
 
I remember seeing that Packard one time over at the whole foods, Beautiful ride!

The stone shield/gravel pan is the deflector......it is metal instead of rubber

Thanks, the Packard was a great car but most likely my last prewar car.
Do you or anyone have a photo of that metal deflector on a 67? Is it a bolt-on part?
 
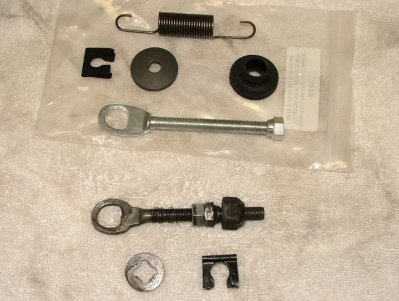
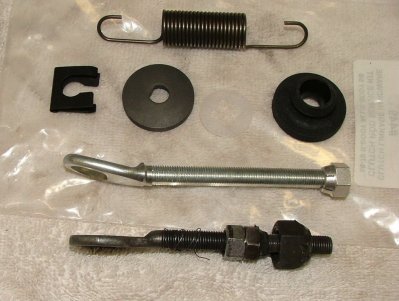
When the shop rebuilt my transmission they filled it with ATF per recommendation of the rebuilder. It shifted ok but seemed noisy so I checked on here and finally called Brewer's - they said absolutely not on ATF and recommended 85W-90 GL-4 from Sta-Lube. I got a gallon and changed it out on Tuesday, not one of my favorite jobs pushing that hand pump! I also had some minor issues with the clutch pedal feel and adjustment since I got the car, no change after the new clutch plus I could hear a rattling noise when the car was idling that went away when I pressed the clutch. From past views I knew the adjustment rod setup was not stock so I ordered a replacement from Brewer's. I blocked the pedal in the up position and took everything off. Good thing I did because the spring clip holding the rod to the Z-bar was ready to fall out! Comparing what I had to the new kit showed the problems, the stock insulator and large washer were gone and someone had thrown an old lug nut on the end. The adjustment nut was all chewed up and loose so you had to use a jam nut to tighten it. Brewer's adjustment rod also has a bend which allows it to properly align with the fork, the old one didn't have that. I put on all the new parts and adjusted the free play, then took it out for a ride. No more rattles, clutch pedal action is smooth, the trans is quieter and shifts much better!

DSCF7562.JPG DSCF7563.JPG
 
Good catch! That lug nut looks like an attempt to make a clutch linkage swivel. But that kit from Brewer's has all the right stuff.
 
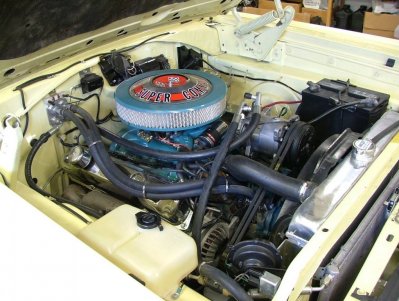
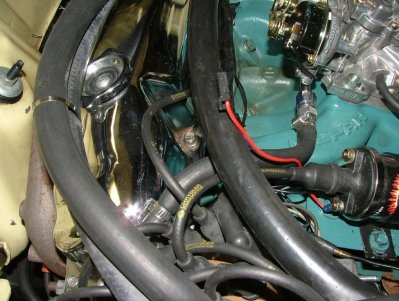
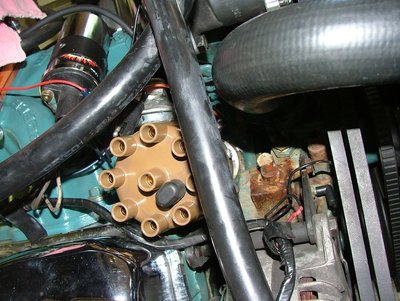
Haven't done much with this car except drive it - we have had a very mild winter in Texas so not too much hibernation. The car is running good but I still think it could be running better so I'm laying groundwork for my next project. The first thing to do is get into the distributor and advance curve but I can't get it out! Whoever did the underhood and A/C addition work didn't think it out too well. The heater hoses and A/C lines were run over the top right side of the motor without much slack so they block access to the distributor, I can't get the cap off and definitely can't pull the whole thing. In addition the ignition wires and wire harness are all tangled up and the fuel line / filter is kind of a mess. So here is my initial scope of work:
  • Temporarily remove heater hoses and plug fittings with rubber nipples.
  • Flush cooling system, replace thermostat, and replace coolant.
  • Clean up fuel line layout and replace filter.
  • Pull distributor, check / modify advance curve - or possibly replace with an upgrade.
  • Clean up wire layout, possibly replace plug wires.
I currently have what appears to be a Mopar electronic distributor. I understand that to check or modify the advance curve it has to go on a distributor machine, true? Are there any aftermarket units available that can be easily adjusted without the machine? I'd like to do this work myself if possible. I'll do the research if you can point me in the right direction.

DSCF2628.JPG DSCF5850.JPG
 
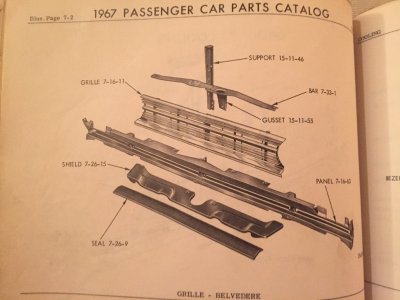
This is an illustration of the airshield and rubber seal.It is a bolt on unit and should be used as part of your cooling system. Try eBay or post want to buy ad here to procure one. Seal can be purchased from multiple sources...

image.jpeg
 
Last edited:
This is an illustration of the airshield and rubber seal.It is a bolt on unit and should be used as part of your cooling system. Try eBay or post want to buy ad here to procure one. Seal can be purchased from multiple sources.

Thanks, I'll check it out.
 
I currently have what appears to be a Mopar electronic distributor. I understand that to check or modify the advance curve it has to go on a distributor machine, true? Are there any aftermarket units available that can be easily adjusted without the machine? I'd like to do this work myself if possible. I'll do the research if you can point me in the right direction.

Any help on this part?
 
Recently took this picture of the kids, toddler on the right and big brother on the left.

DSCF9042.JPG
 
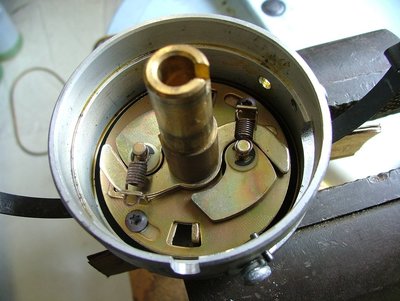
Well it took me two months but I'm finally working on my ignition tuning. I pulled off the heater hoses, fuel line / filter and plug wires and finally was able to get the distributor out. I have a set of new Pertronix 7mm wires, a new fuel filter and fresh plugs on order. The distributor is a newer style MP electronic, very clean inside and out and looks like it has not had much use. I still have to open it up but it has the adjustable centrifugal advance with the slotted plate and screws. I used the search here and found a little about this but I still have some questions.

My engine has a mild cam, high rise intake and 750cfm Edelbrock and its a 4-speed car used exclusively on the street. Based on my research it appears that the 440 with a few mods likes less distributor advance and more initial with a total of 36 to 38 degrees. The MP distributor supposedly came with a "performance" curve which I assume mine still has since the adjustable slot is at its widest setting. Does anyone know what that "factory" setting is in degrees? Also does anyone know what the opposite extreme fully closed setting is in degrees? Since there are no marks or numbers on the plate this would help me know where to start.

The other question has to do with the advance weight springs. Again assuming I have the "factory" performance curve is changing the springs something I need to do? If so what do I go by and where is a good place to get the right springs? Thanks for your help.
 
first off, love the olds! Distributor. Yes you can change the curve but are you sure you need to. Are you saying you don't have a timing tab on the cover? Generally a good range is 38-40 total advance and shorten the curve to come all in sooner, say below 2500rpm. I set initial based on max vacuum reading at constant idle and go from there. You can mark the balancer with a sharpie if you have to, that's how mine is and it will read just fine with a timing light.
 
The other question has to do with the advance weight springs. Again assuming I have the "factory" performance curve is changing the springs something I need to do?
Just thinking off the top of my head, and remembering. The springs themselves adjust when, at what RPM, advance is full in...in other words, allows you to pick the RPM.
I'd say, at least for now, you don't need to change the springs, until you check what RPM advance is in.
If your's is good, no need to change 'em.
say below 2500rpm
Like SlinktRR says. I keep thinking 1800 to 2200, though that's for stock motors, if I remember right. Something I've got to do, is find a spring chart, since their color-coded, and I have a small handful of springs...but, don't know their rates.
 
yes there are some good discussions on the topic. For initial the engine will like what it likes and there are no rules. I use 20 degrees initial with an open chamber low compression big block; from what I have read and experienced the low comp engines like more initial. The only limits are pre-ignition and starter kickback with too much advance.
 
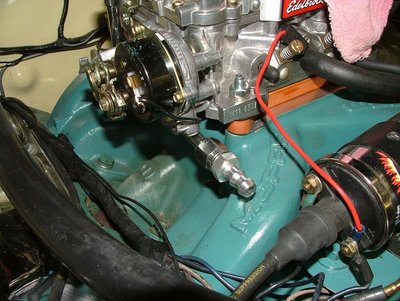
Here is an update on my ignition cleanup, the car's been laid up for over a month and I'm still not done. The heater hoses are gone and everything is sealed with bypass plugs. The fuel line has been cleaned up with new fuel injection hose and a new filter. It is the factory 5/16" line, whoever had added the Edelbrock carb used a banjo line with a 3/8" 6AN barb, they had a piece of 3/8" hose on that with the other end over the 5/16" line and a really tight clamp - that was a fire waiting to happen. I replaced the fitting with the correct one. I pulled the ignition wires and distributor which I opened up and reset the centrifugal limit to 16 degrees. I cleaned and repainted part of the block and water pump area and untangled the wiring harness before reinstalling the distributor. The old ignition wires were a date coded restoration set but they were all tangled up like rats nest and only about half were in the separator brackets. The Pertronix "Stock Look" replacement wires are black 7mm and pretty close in length to the others, I ran them more carefully so they are all in the separators, still working on buttoning them up. I'm also going to run a new electric choke supply wire from the ballast line, it had been connected to the positive side of the coil which is apparently bad. Hope to get it running this week so I can play with my new dial back timing light, I'll keep you posted.

DSCF9291.JPG DSCF9295.JPG DSCF9420.JPG DSCF9454.JPG DSCF9458.JPG
 
Auto Transport Service
Back
Top