• When you click on links to various merchants on this site and make a purchase, this can result in this site earning a commission. Affiliate programs and affiliations include, but are not limited to, the eBay Partner Network.

Yankee Express RestoMod Project

That's me; " Doing everything with nothing by myself since 1957."
& progress

gotta' love when a plan comes together

sand, prime, sand, prime, sand, prime, sand some more
seal then prime again, sand some more, sand again :poke:

looking really good Ghost :thumbsup:

-----------------------------------------------------------------------

I wish I'd have sanded more on mine
I went 80, 120, 220, to 320 grit dry & wet
then sealed it again, then primed again, sanded smooth with 320
looked/felt smooth as a babies butt (I thought)
& the damn scratches came back thru some 6 months latter :BangHead:
something shrunk/checking or a reaction to the paint/lacquer
it was supposed to be all compatible stuff, base clear coat

I guess now all I have a good undercoat
for the next paint job :poke:
 
I have paper all the way to 600. Smoother the better, smaller scratches the better. As I'm sure you know, the bodywork needs to be as close to the smoothness of the surrounding metal as possible. No other way. I hate it too, sand, prime hell...
 
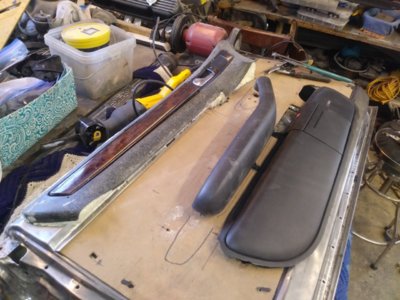
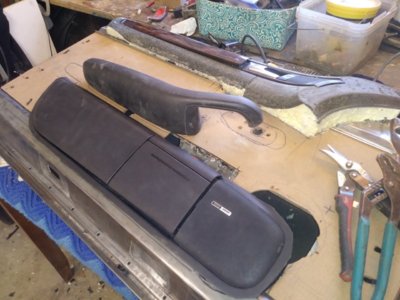
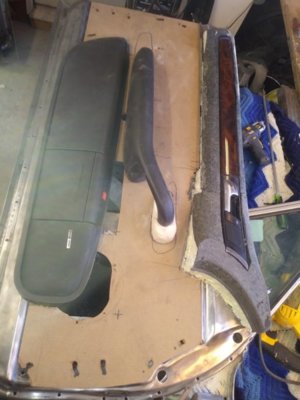
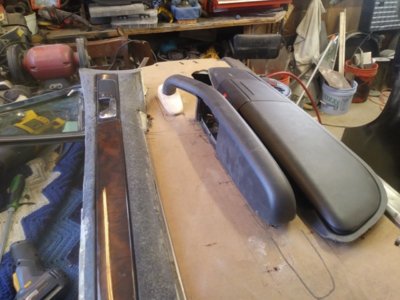
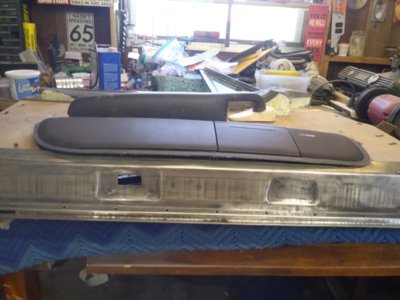
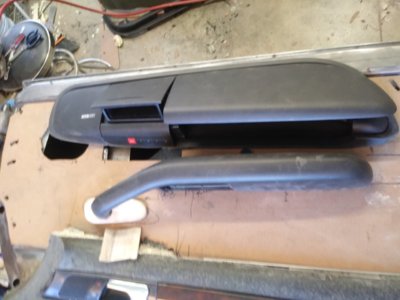
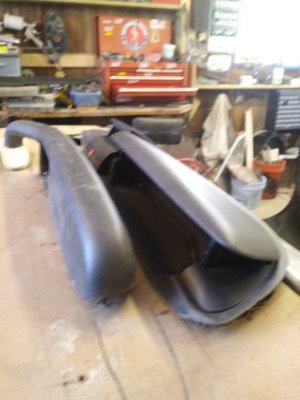
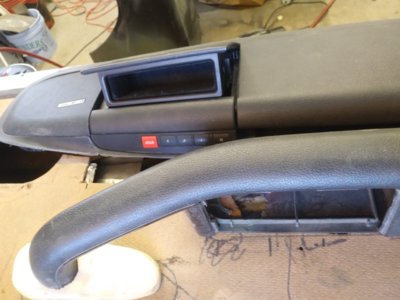
I received the 4 door panels today. triple black with the built in's. The only thing missing is the wood grain insert and I have those. So, I tried it real quickly by placing it up against the door and the dash in the rotated position. Lined right up perfect. no sweat. I just need to trim the forward top corner back a little to fit between the dash and pillar trim then get on with the modifications. One problem down, a dozen to go!.

0115201656.jpg
0115201656a.jpg
0115201657.jpg
0115201657a.jpg
 
Oh, and I don't need the rear panels at all. lol. It was just a great deal money wise to get all four versus buying two fronts separately.
 
Err..back that last post up. I DO need the rear panels. I forgot that the rear panels have a longer wood grain insert which fits better on the long Coronet doors. So, what I ended up doing was this:
I measured all along the two insert channels to determine where, if at all, they were the same width. Turns out they are, and in a good spot to cut and fit the two pieces together. So I sliced and diced and glued the two halves together. This gives me the forward weird shape that I have had so much trouble with to mate up to the dash end, AND, gives me the longer insert and a flatter body going towards the rear. The Audi rear door panel top sections are flat. So, Bob's Yer Uncle.
I screwed the whole thing down onto the upper door panel and then sprayed expanding foam under it all to fill in behind it. Also gives me a smooth transition from panel to door glass edge. From panel to door body all around. Once both sides are dry and sanded I will apply some shear material over the outside edges all the way around, soak that material with resin, let that dry, trim and sand, put body filler where needed. Once it all is exactly how I want it, I will set the doors aside till time to paint. Then do that and cover the sections in leather. I trimmed and mocked up the left door card and will do the same on the right.
untitled.png
0118201253a - Copy.jpg
0118201249_Burst01 - Copy.jpg
0118201250a - Copy.jpg
0118201251 - Copy.jpg
0118201253 - Copy.jpg
0119200748b.jpg
0119201653a.jpg
0119201653b.jpg
 
I'm also going to revisit adding the lower storage bin/CD player/speaker.
 
I really like this creative application of a modern interior. It’s well outside of the box.

David
 
I really like this creative application of a modern interior. It’s well outside of the box.

David
My primary address.....Outside of the Box. lol. Thanks, it means a lot coming from you. I know what I want, I only have then to figure out how to get there...
 
Drivers door after a little sanding to shape the contour. I'm undecided about losing the chrome strip though..

0120200808.jpg
0120200808a.jpg
0120200808b.jpg
 
Okay...lol. I gave installing the lower storage bin/speaker unit the 'ole college try. THIS time I was better informed and prepared. It went in fine. I fabricated a brace to set underneath the speaker end because there needs to be something there to bolt the lower end of the wing window/ glass channel to. In addition I shaped it so that there would be real estate left over in two spots to run a screw down through the storage bin back to anchor the thing against the door panel. It also connects the upper and lower portions of the door panel back together for strength. I had to raise the bin up away from the door panel 1/2" to clear the window crank arm in the down position too. Next up is figuring out how to attach the bin to the shell from the backside while out of the door and still have a way to place the anchor screws in the front side under the bin body and through the shell the bin sets in. It's two pieces, one inside of the other. One being a portion of the old Audi door panel. I may have to drill holes through the bin body, over the screw heads that bolt the shell to the door. That way I can install the bin to the shell from the backside and the shell to the door from the outside afterwards. Cant think of another way. It's not like anyone other than me is going to tip out the bin and look in there to see the screw heads. lol.
Also I will now glue down speaker fabric around all of the edges of everything attached to the door, to stretch down to the door card surface where it will be glued in place leaving a contour that I will apply resin to once it's dry. Once that dries I can lay fiberglass over the formed contours so the edges will set down onto the leather upholstery later on when I assemble the door. lots of fooling around to get the look that I want. lol The speaker grill needs a wash too....

0120201058.jpg 0120201059.jpg 0120201241a.jpg 0120201242c.jpg 0120201243.jpg 0120201244.jpg 0120201245.jpg 0120201245b.jpg 0120201246.jpg
 
Maybe I will get the Dremel out and carefully grind off the Audi rings from the Bose Speaker logos and put black paint in there instead. If I get bored someday...
 
Just for comparison, here's the Audi door panel before removing each element..
61703537.jpg
0120201059a.jpg
 
Just ordered a few yards of this Eversoft fabric for door panels and lower dash. Going with this color offset by black.
EverSoft-Indoor-Outdoor-Burnt-Orange-54-Vinyl-Fabric_1.jpg
 
Just sitting here daydreaming about how the interior will look and had an epiphany. I can use the whole stretching of the speaker fabric and applying resin to harden the shell to create the center tower going up between the seats to the bottom center of the seat back topper, like an old 'vette. Also, if I make the center channel of the roadster panel black, and both sides in the fabric color I just ordered it will look badass. The seat topper is black as well.
 
Picked up the black vinyl for both door top sections & two 3'x4' sheets of 1/8" dense foam for the shaping of the two separate sections on the door card and to give a "well" for the armrest to sink into. This will be covered by the burnt orange leather. Also bought a 4'x8' sheet of hardboard to craft new door cards with now that I have a final template for holes & cutouts. Also a can of Weldwood high strength/high temp contact cement to glue everything down. Yesterday I placed the door glass guides back in plus the lift arm to make sure everything cleared the cubby and that I didn't cut out a mounting tab that would be needed later. Coming together!
 
After reading the label on that contact cement i'm about half scared to use it. Might blow my house up...
 
I know. It's more of an overkill warning as usual. I don't recall any news reports about houses blowing up due to the use of contact cement..no pilot lights nearby and no gas lines. Only using a small dab around some edges anyway, not doing the whole door panel or dash until spring when I can do it outside or at least have the garage door open.
 
Last edited:
I'm satisfied with the results. Net I'll put some glass cloth on it to strengthen it up and it should sit down against the soft 1/8" cushion under the fabric just fine. Also need to do this at the rear tip of the armrest where it curves up. And around the edges of the upper section. Now that I know what to expect...the pic with the blue arrow is pointing at a piece of the soft padding that goes under the fabric. Black, 1/8" thick and dense but pliable.
0124200754.jpg
0124200754a.jpg
Inked0123201049_LI.jpg


0124200754.jpg
0124200754a.jpg
 
Auto Transport Service
Back
Top