• When you click on links to various merchants on this site and make a purchase, this can result in this site earning a commission. Affiliate programs and affiliations include, but are not limited to, the eBay Partner Network.

1964 Rusty Bucket transformation

Well gents, this evening after work, I spent some time trying the get the 440's rotating assembly apart. Due to the frozen state of the crank, all of the rod bolts can not be accessed to loosen. If you manage to get a socket on a rod bolt and get the nut off, the bolt ends up hitting the block before getting it removed. On the ones the rod bolts came off, when knocking a rod out the crank shaft end hits the block..Kind of like banging one's head on a wall...lol.
So, if I am going to try to save this block a gas ax will need be used to cut the connecting rods in half, so the pistons can be knock out and the crank pulled out. This will be tomorrow evenings project.
I am concerned I may be wasting my time with this 440. I am glad that I didn't spend any of my hard earned money to buy this block....it was free.
 
Last edited:
Well gents, this evening after work, I spent some time trying the get the 440's rotating assembly apart. Due to the frozen state of the crank, all of the rod bolts can not be accessed to loosen. If you manage to get a socket on a rod bolt and get the nut off, the bolt ends up hitting the block before getting it removed. On the ones the rod bolts came off, when knocking a rod out the crank shaft end hits the block..Kind of like banging one's head on a wall...lol.
So, if I am going to try to save this block a gas ax will need be used to cut the connecting rods in half, so the pistons can be knock out and the crank pulled out. This will be tomorrow evenings project.
I am concerned I be wasting my time with this 440. I am glad that I didn't spend any of my hard earned money to buy this block....it was free.

Were you able to get any pistons out at all? Knocking the rod bolts out might help too. Without looking back to see, how bout taking the main caps off, perhaps there's a problem there and it's holding the crank solid. I had one 440 one time, had to pound so much that a piston broke but I got it. Hope you get it loose.
 
Malex, I have managed to get 2) piston and rod assemblies out. Cylinders one and two.
All of the crank main caps are broke loose.
Due to the position of the crank throws, there isn’t access to all of the rod bolts. The rod bolts that have been loosened on both sides, won’t come out before it hits the block.... I am seriously thinking about taking an oxy/acetylene torch and cutting the rods in half. Then knock the piston out one way and pull the crank out the other.
I may have misstated with frozen crank. There is a lot of rust below the piston skirt in cylinders 5, 6, 7 & 8 which Is keeping the assembly from rotating.
I will try to get pictures of the rust in the cylinders below the piston and post them.
So far there has been very little rust under the crank main caps and bearing races.
 
Last edited:
Malex, I have managed to get 2) piston and rod assemblies out. Cylinders one and two.
All of the crank main caps are broke loose.
Due to the position of the crank throws, there isn’t access to all of the rod bolts. The rod bolts that have been loosened on both sides, won’t come out before it hits the block.... I am seriously thinking about taking an oxy/acetylene torch and cutting the rods in half. Then knock the piston out one way and pull the crank out the other.
I may have misstated with frozen crank. There is a lot of rust below the piston skirt in cylinders 5, 6, 7 & 8 which Is keeping the assembly from rotating.
I will try to get pictures of the rust in the cylinders below the piston and post them.
So far there has been very little rust under the crank main caps and bearing races.
--
Crumley can you not lift the crank out with all the rod and main caps off? Maybe even enough to get a rod to swing over so you can knock it downward
 
Last edited:
Malex,Thank you. It took some time and effort, but the crank is now out of the block. It was accomplished without cutting the connecting rods. I took your advise and took all of the main caps off. I then knocked and pried the crank up a little at a time...because that was all it would do. Removing nuts on the connecting rods and knocking the rods and pistons out as I could. One of the pistons ended up breaking a skirt...oh well. Finally getting all of the connecting rod bolts off and pistons knocked out. Pictures:
DSC_1065.JPG

Take a look at my experiment in rust....lol.
DSC_1066.JPG

DSC_1067.JPG

DSC_1068.JPG

DSC_1069.JPG

Well guys what do you think? To me it is down right ugly. I hope it is salvageable? Next it will be trying to get the cam out. I guess I will be finding me a machine shop that likes doing Mopar engines to see what they have to say.
 
Malex,Thank you. It took some time and effort, but the crank is now out of the block. It was accomplished without cutting the connecting rods. I took your advise and took all of the main caps off. I then knocked and pried the crank up a little at a time...because that was all it would do. Removing nuts on the connecting rods and knocking the rods and pistons out as I could. One of the pistons ended up breaking a skirt...oh well. Finally getting all of the connecting rod bolts off and pistons knocked out. Pictures:
View attachment 561400
Take a look at my experiment in rust....lol.
View attachment 561402
View attachment 561403
View attachment 561404
View attachment 561405
Well guys what do you think? To me it is down right ugly. I hope it is salvageable? Next it will be trying to get the cam out. I guess I will be finding me a machine shop that likes doing Mopar engines to see what they have to say.
--
Way to go Crumley, you got it apart! It looks like the lifters are out so that cam will come right out. Might as well knock those frost plugs out and if the water jacket plugs will budge, get those out too. That block and crank will clean up once it's in the tank. So your good to go to the next step! If your going 4-speed, don't forget the pilot bearing.
 
Malex, and all of ya'll following this thread here at B bodies only, thank you for the support.

Will it snowed here in the south last night. This means nothing but chaos on the roads around Atlanta. The metro Atlanta area is so ill prepared for any type of winter time precipitation...lol. I think they may have 6 snow plows/salt slingers and two of them are in their shop needing repairs. There were wrecks and traffic jams, due to the snow and ice, all over the metro area. The at work project I am currently running wasn't critical, so, I had a day at home to goof around in the shop.
Lifters, cam, freeze plugs and water jacket plugs removed. All of the allen head plugs around the oil galleries removed. Everything is bagged and tagged. It is now a bare block. Pictures:
DSC_1072.JPG

DSC_1074.JPG


After finishing the tear down of the block, I began the re-assembly of the 9" rear end. This rear end will do for now. It was a craigslist special....all I can say is, I will chalk this one up to experience, "NEVER" take a person word for anything...lol. When it was tore down, it wasn't what was represented in the ad. Oh well, live and learn...it will get used for now. It is the width need for the mini tubs, all I had to do was relocate the leaf spring perches.
Looking on the positive side, it will help me figure out what rear gear ratio works the best for what I want to do. Currently, it has a 4:50ish to 1 ratio. This is a really low gear, but it will do for now. Pictures:
DSC_1070.JPG


DSC_1071.JPG


Sometimes we think we are saving a dollar only to find out it will cost more in the end....lol. I have worked with many a project manager that will walk on $100.00 dollar bill to pick up a nickel...lol.
 
Last edited:
Looking good Crumley. Big headway. I heard that you guys in the south east got it bad today. Another Mopar friend that way was home bound and he too was taking advantage of it at home. Let us know what the machine shop says.
 
Great job, getting the block down! Fingers crossed. Any idea what the bore size is?

Man, I hate rust. Heh, you've had your share to deal with.
 
Thanks guys, will do on what the machine shop says.
Miller, not a clue on the bore size, all I have is a stick rule to measure the bore....lol....not very accurate. I did manage to get into the shop this weekend. Got the other fender down to bare metal. I used liquid paint stripper to remove the paint on the hood. Pictures:
DSC_1078.JPG

DSC_1075.JPG

Still have sanding to do on the hood.
Painted the rear calipers. Probably wont last be it looks good for now.
DSC_1076.JPG

When I got the calipers bolted to the rear end, I noticed that something didn't look right. Then I realized that rear brake brackets are on in the wrong direction.
DSC_1077.JPG

Needless to say, I took everything off and installed the brackets in the correct direction...now the calipers are installed. That's about it for now.
 
Thanks guys, will do on what the machine shop says.
Miller, not a clue on the bore size, all I have is a stick rule to measure the bore....lol....not very accurate. I did manage to get into the shop this weekend. Got the other fender down to bare metal. I used liquid paint stripper to remove the paint on the hood. Pictures:
View attachment 563286
View attachment 563287
Still have sanding to do on the hood.
Painted the rear calipers. Probably wont last be it looks good for now.
View attachment 563288
When I got the calipers bolted to the rear end, I noticed that something didn't look right. Then I realized that rear brake brackets are on in the wrong direction.
View attachment 563294
Needless to say, I took everything off and installed the brackets in the correct direction...now the calipers are installed. That's about it for now.
--------
Making headway Crumley!
Those fenders look pretty clean, usually the bottoms are rotted off. Is that rear brake kit from Right Stuff? The brackets look like it. As usual, nice work, moving forward.
 
Thanks, Crumley! Yep, machine shop will be able to let you know pretty quick. Fingers crossed for you.

Doggone rust can be real deceiving. When I got into my 69 440, got ticked finding my crank was -.010, from the factory. Did a little looking for a standard steel. Was told about a 'Mopar' guy, who had a standard 6-pack crank, if I wanted to look. I did, after he brought it in...from his backyard, letting it 'season'.
The entire length looked factory new, on one side, the other heavily rusted! Took a piece of 80 grit, and made a rub, showing two huge pits on that main. Walking out, said it would make a great pair of boat anchors!
 
Thanks, gents:

I have been working nights this weekend, so haven't had much time to get into the shop. But, I did manage to squeeze in enough time this afternoon, enough to get the hood down to bare metal.
Picture:
DSC_1079.JPG

after removing the paint and primer, it is amazing the amount of little factory imperfection's in the metal. So I guess the next set of pictures will be to get the body filler out to get things flat....lol.
 
A little update from today. The underside of the hood has been stripped of paint. I cut additional holes in the hood support braces to access the underside. Now it can be cleaned and rust proofed. Picture:
DSC_1080.JPG


That's about it for now.....
 
Ok, it's been awhile.....lol. I have been a busy beaver (lake house) doing everything but working on the ol rusty bucket. Not so much rusty now.
Well, anyway, the current plan is not installing the exterinal antenna. So the antenna hole was plugged.
Due to the humidity level this year, I have delt with alot flash rusting on bare metal. There has been alot of sanding to remove the flash rusting. I am trying to get the front fenders and hood epoxy primied when I get the chance. Pictures:
DSC_1084.JPG


DSC_1085.JPG


DSC_1086.JPG


The rearend has been slid up under the car for trial fitting. Everything looks good. There is alot of room in the fender wells...lol. In the picture, the car is as low as my jack stands will allow. There is still too much space between the tire tops and fender lip. The tires will be further up in the fender wells when finished. But you can get the look I am going for. Man this thing is going to be awesome...
DSC_1082.JPG
 
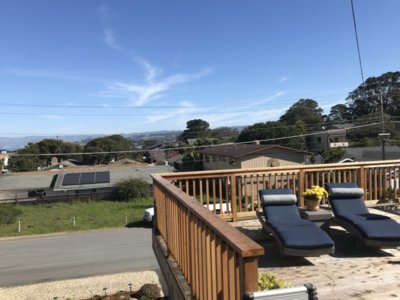
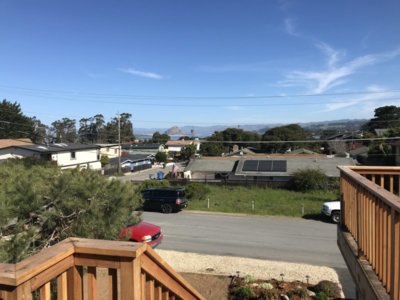
Good to see you getting to spend some time on your ride. Mine will be awhile before I get back on it. We will be moved out of here by the beginning of may and living in Los Osos Ca which is where we used to live 22 years ago. After we get in place, I'll be building a garage for the car and equipment next to the house. Looking forward to getting back up there to an area we love. Here is the view off the main deck looking at the back side of Morro Bay.

IMG_0562.JPG IMG_0563.JPG
 
Los Osos is my old stomping ground, love that place!!!
 
Auto Transport Service
Back
Top