• When you click on links to various merchants on this site and make a purchase, this can result in this site earning a commission. Affiliate programs and affiliations include, but are not limited to, the eBay Partner Network.

1968 Coronet 500 Project

I knew you had my door handle, you clearly have the rare 1 bolt option.

Clearly it is NOT your handle as I clearly recall seeing the common 2 bolt handle in your doors. Us 500 owners are in a class by ourselves... ;)
 
Hot of the machine shop Facebook page!

Piston and Rods ready for install
14705822_676545659187030_738254118528167328_n.jpg


Cam Bearing replacement!
14670605_676546182520311_500249048643991552_n.jpg
14517458_676546095853653_1437941037467230715_n.jpg
 
I knew you had my door handle, you clearly have the rare 1 bolt option.

Actually I may give you that handle, it is in really rough shape and looks like crap against the new shiny paint.... Looks like another $150 down the drain for new ones....
 
Actually I may give you that handle, it is in really rough shape and looks like crap against the new shiny paint.... Looks like another $150 down the drain for new ones....
I already went down that road.
 
Just farting around this evening and started to polish up some of the old chrome... then one thing leads to another and you have to mock it up.....

Still hate the hubcaps :)

DSC_0023.jpg
DSC_0024.jpg
DSC_0026.jpg
 
Looks really nice Jim, and reminds me of doing all of that to mine back in 88-90 before having to go back overseas...
 
Decided to let Dave at Precision Machine Service assemble the long block on the 318. Save me some time and the need to find a few special tools.... All the machine work is done, just a matter of bolting it together!

Guess I need to think about the transmission now.....

14690918_677263189115277_5006265306424993252_n.jpg
14705822_676545659187030_738254118528167328_n.jpg
 
I got in the groove in cutting and buffing today. All that is left to do is the right front fender and hood! Also polished up some more chrome and items to mock them up... I am liking it!

DSC_0027.jpg
DSC_0028.jpg
DSC_0029.jpg
DSC_0030.jpg
DSC_0031.jpg
 
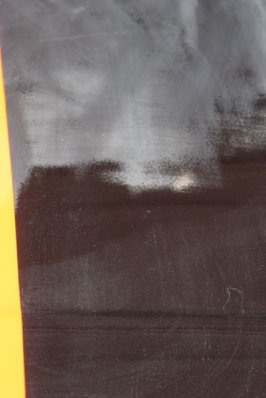
Little example of cutting and buffing...

Used 1000 wet on a hard small block to remove any urethane wave and dirt nibs. Change your paper OFTEN so it is cutting and not just polishing the imperfections...

Starts like this:

DSC_0034.jpg


Below is where I have sanded with 1000 grit at the top of the photo and the bottom is the original last coat of clear. It looks worse than it is. In real life it just looks like flat black not grey. You have so sand enough to get all those dark spots (orange peel low spots) out.

DSC_0032.jpg
DSC_0033.jpg


Ready for the 1500 grit on the soft block..

DSC_0037.jpg


Finish with 1000 grit on the hard block, 1500 grit on a soft block and 1500 grit on a foam backer on the DA running very slowly..

Polish with the Presta 2 stage kit...

DSC_0038.jpg
DSC_0033.jpg
 
The Coronet is cut and buffed! Crap the chrome now looks like crap.... The to call the plating company tomorrow to get quotes.... It never ends does it...

DSC_0039.jpg DSC_0040.jpg DSC_0041.jpg DSC_0042.jpg DSC_0043.jpg DSC_0044.jpg DSC_0046.jpg DSC_0047.jpg DSC_0048.jpg DSC_0049.jpg
 
It never ends does it..

No Jim, it does not.

The car is looking great though. Years back in my motorcycle/hooligan days, the worst thing you could do was buy a brandy new, shiney *** chrome horn cover. It was cheap and easy to replace, or so the thinking went. But then.......now the air cleaner looks like ****..$$...and the forward controls..$$.....and the primary cover..$$....lather, rinse, repeat. That friggin' fifteen dollar horn cover cost about a grand all in.
 
What really sucks is the outside and under the hood looks so cherry now that the door jambs look like $hit. I have learned valuable lessons about order of painting a car. My way was completely a$$ backwards. You paint all the primer first, then you spray all the base coat second, then the clear on the outer panels then under the hood, jams and trunk. The overspray from shooting the outer panels ruins the look of the inside areas. It is impossible to stop the overspray as well. It is better to get the overspray on the outer panels since you will be cutting and buffing them anyway. Oh well live and learn.
 
What really sucks is the outside and under the hood looks so cherry now that the door jambs look like $hit. I have learned valuable lessons about order of painting a car. My way was completely a$$ backwards. You paint all the primer first, then you spray all the base coat second, then the clear on the outer panels then under the hood, jams and trunk. The overspray from shooting the outer panels ruins the look of the inside areas. It is impossible to stop the overspray as well. It is better to get the overspray on the outer panels since you will be cutting and buffing them anyway. Oh well live and learn.


One thing I learned from watching a pro shop paint is they use round foam tape in the doors after the car is jamb'd. I was not sure if I believed in it but have used it on the last two resto's we did and it keeps everything out and due to it being round if you pull it right after spraying there are no tape lines. We have two in our shop right now I can show pics of. Your car looks incredible by the way.
 
One thing I learned from watching a pro shop paint is they use round foam tape in the doors after the car is jamb'd. I was not sure if I believed in it but have used it on the last two resto's we did and it keeps everything out and due to it being round if you pull it right after spraying there are no tape lines. We have two in our shop right now I can show pics of. Your car looks incredible by the way.

Yes I have seen that in videos and at the auto body supply store. Now I see the point of them.
 
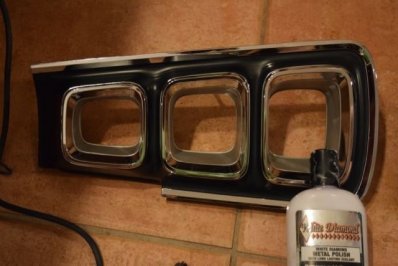
After the initial thoughts of rechroming everything hit the reality that I would have to actually pay for it I decided to see how things looked if I put a little elbow grease into the parts. They cleaned up nicely but the initial years in western Pennsylvania have taking their toll on the chrome. It shined up nicely but it a lot of pits in it. It is 10ft chrome. It looks good from 10ft away, just don't get any closer.

Here is the left tail light housing all cleaned up. Not bad.
DSC_0054.jpg


The tools of the trade. White Diamond metal polish, Dremel with a buffing wheel, 0000 steel wool and a cloth.

DSC_0050.jpg


Before

DSC_0052.jpg


After (with a coat of Meguiar's Carnauba Wax to restore the black)

DSC_0053.jpg


Ready for install. Just need to do the center panel then I can install them with the new Detroit Muscle Technologies gaskets.
DSC_0055.jpg
DSC_0051.jpg
 
Well I could not live with the tail components as they were with the paint job.... Used some SEM black self etching primer then SEM satin black. The chrome still has pits but this will give me an idea how the paint holds up and if/when it does start to fail I will get the parts rechromed. The bank account will have recovered by then!

I got tired and still have the left tail light frame to do but the right and center parts are done.

DSC_0060.jpg
DSC_0061.jpg
DSC_0062.jpg
DSC_0063.jpg
 
Last edited:
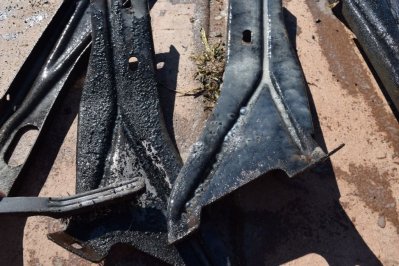
Tough day of cleaning, stripping, blasting and painting.... Pulled the bumpers apart to get them prepped. I am about ready to install the rear bumper so I ended up doing both ends. I have decided that time is money. I now use my undercoating gun and Airplane Stripper to get the parts 95% done. After that blasting is simple as the paint that is remaining is softened and it is mainly is just preparing the surface. Takes no more than a minute or two per part at the blaster after doing this.

Spray down the parts with stripper.
DSC_0116.jpg


Wait about 5 minutes then scruff with a wire brush.
DSC_0118.jpg


Spray on another coat and wait 10 minutes. Then hit it with a high pressure washer and the job is almost done in just a few minutes.

DSC_0120.jpg


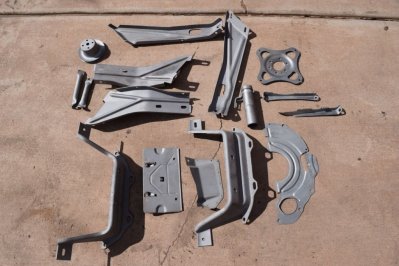
Now off to the sand blaster with Starblast for the parts that will get paint and glass bead for the parts that will be natural metal with clear coat.

DSC_0121.jpg


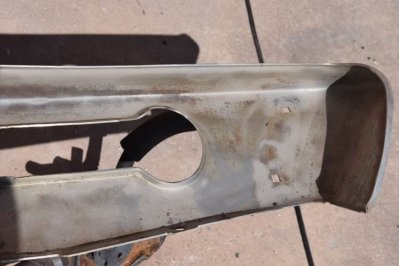
the back of the bumpers were rusty too so I blasted the and got off all the rust and flaking chrome.
DSC_0125.jpg


DSC_0123.jpg
DSC_0117.jpg DSC_0119.jpg DSC_0122.jpg DSC_0124.jpg
 
Auto Transport Service
Back
Top