• When you click on links to various merchants on this site and make a purchase, this can result in this site earning a commission. Affiliate programs and affiliations include, but are not limited to, the eBay Partner Network.

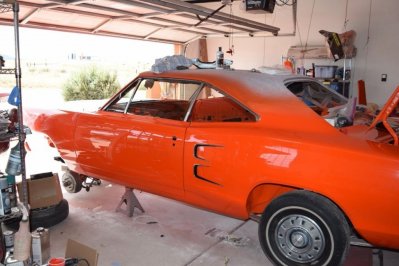
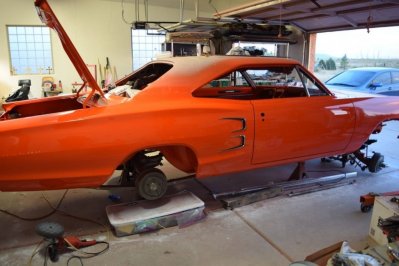
1968 Coronet 500 Project

great looking car ! nice work also I just picked this one up last week at carslile 1969 coronet 500 with 80/90 percent of it's orig.paint 383 h code car w/a/c ,am/fm buckets all #'s matching

View attachment 350381
Hello Desotoman :) Thats my old 69 Coronet 500, you picked it up from Ken didn't you ? I want to know how it goes, I had to sell it cause I came across a '70 Coronet 500 N code (same engine as yours...) Have a look at my garage pics, you may also see your 69 in there...
 
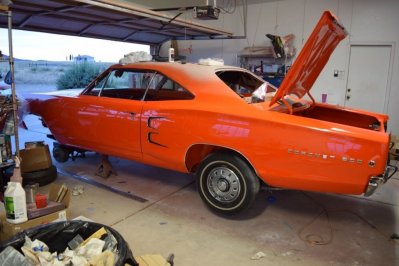
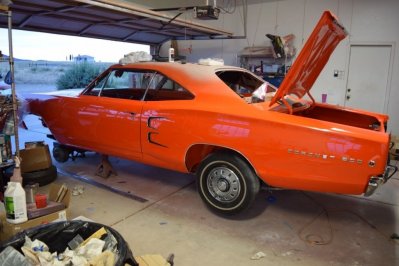
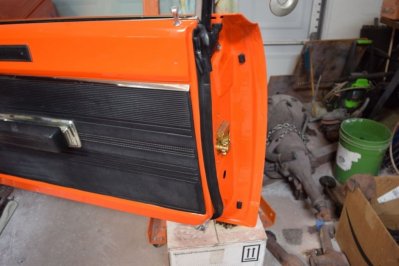
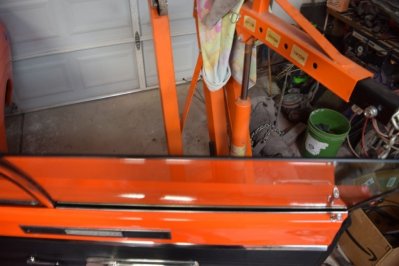
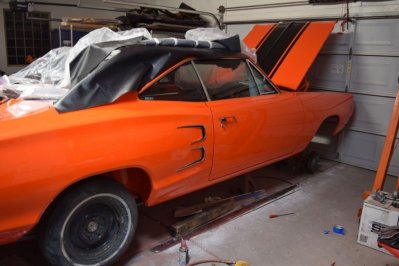
Put the doors back on the car after repainting the jambs.
DSC_0042.jpg


One more pass with the buffer since the spray bomb painting on the piece parts got overspray on me new paint job.... Must be careful! Also installed the trim and tail trim with new gaskets and refurnished bolts/nuts.
DSC_0043.jpg
DSC_0044.jpg
DSC_0045.jpg
DSC_0046.jpg
View attachment 368842 View attachment 368843 View attachment 368844 View attachment 368845 View attachment 368846
 
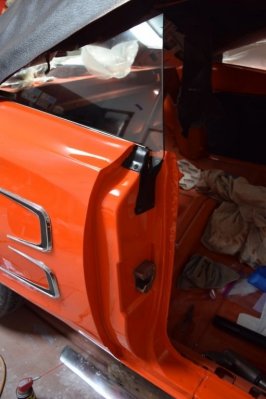
Installed the rear window regulators and glass. The 1970's accident body shop replaced the left quarter with clear glass not the factory blue tint... guess I will need to buy one of those eventually.
DSC_0047.jpg
DSC_0048.jpg
DSC_0049.jpg
DSC_0050.jpg


Replaced the weatherstrip on the door glass. A little lube and a GM window regulator handle clip remover tool works great..

DSC_0051.jpg


Decided to try this the way the manual states. Installed the glass in the vent slider. Ran out of time today so tomorrow.

DSC_0053.jpg


I flared the end of the track a little to allow the new seal to engage and start easier. A shot of Pledge to lube it and the window slid right up the track.
DSC_0054.jpg
View attachment 368852
 
Last edited:
Well tried to install the vent frame and glass as one unit per the manual. It sucks. Too awkward to handle and get the vent frame to engage in the front bolts. Also be very careful with the vent frame. There one screw that will get the paint.... won't tell you how I know.... grrrrr...
DSC_0055.jpg
DSC_0056.jpg


Watch out for this damn screw....
DSC_0057.jpg


I gave up. I did what Jason did on his. Install the vent frame. Remove the upper rubber triangle (one screw) remove the screw holding the window track to the top of the vent frame and pull the track out and to the side slightly. I ended up needing to use a Dremel tool and remove the sharp edges at the top of the window track. My first attempt did a little damage to the new weatherstrips but it is barely noticeable. I will likely be pulling this back out someday to rechrome the frame so I will replace the strips again then.
 
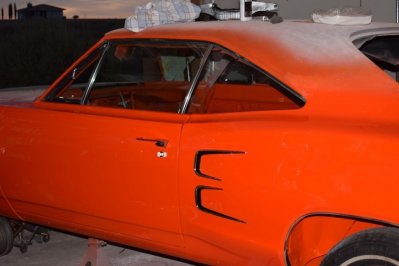
Tried to get new quarter letters from my contact in Vegas but failed. Today a post on the Super Bee and Coronet Facebook page a compete set went up for sale. They lasted about 30 minutes. I should be getting them this week and I will have a set of cherry letters by mixing them with the ones I have. They also come with the acorn nuts that I was missing. I refinished the acorn nuts and restarted them in the original thread on the letter such that it was only necessary for fingers to tighten them. Can't break any more. I will get the 5 letters I need next week and the other side will be done.

DSC_0058.jpg DSC_0067.jpg DSC_0070.jpg
 
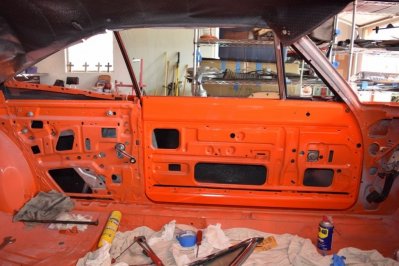
The left side windows, regulators, and some of the interior trim is in! Working on the right side, should be done this week.

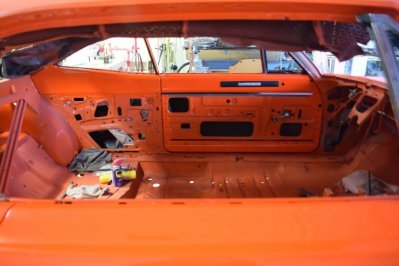
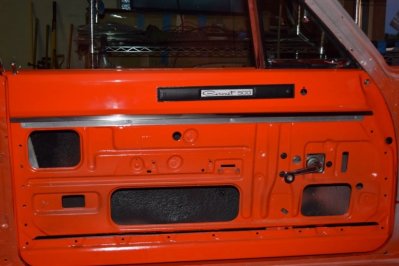
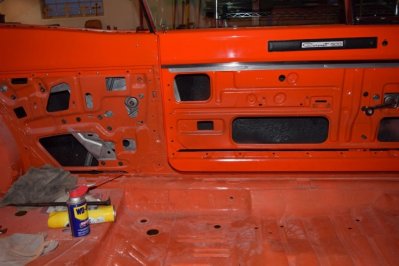
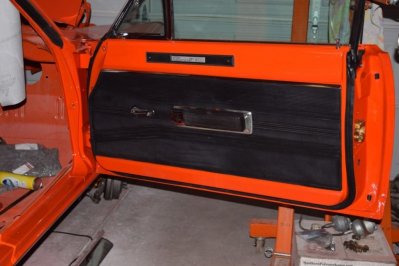
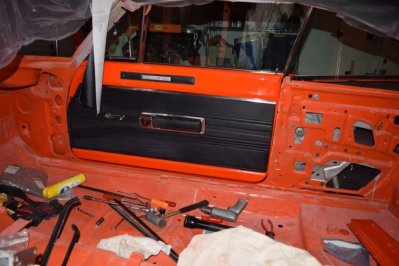
I went a bit custom on the interior. The car is a black interior but I wanted to bring the orange inside a bit so I painted the inner panels orange too. I think the black door panels and chrome will really transition the exterior color to the interior of the car.

DSC_0059.jpg DSC_0060.jpg DSC_0061.jpg DSC_0062.jpg DSC_0065.jpg DSC_0066.jpg DSC_0068.jpg DSC_0070.jpg
 
[POLL] Does it need the Coronet 500 letters on the quarters highlighted in black instead of the factory white? Note that chrome rocker moulding need to go on as well.
DSC_0070.jpg
 
Received the restored brake booster from the Ram Man today. It was sent on Friday! It was clear mine was replaced sometime down the line. The one from the Ram Man looks exactly like the Dodge parts book. The one on the car has an accordion boot on the plunger, the parts book and Ram Man have a straight sided boot. Need to get the brake peddle back in... then I can think about restoring the AC box and getting that back it...

Also ordered a ton of stuff from Classic Industries. They had a 30% off sale that ended last night that I needed to take advantage of. Vinyl Top, Headliner, Trunk Mat, a few missing weatherstrips for the doors and headlight bolt kit should keep me busy for a few hours....
 
Christmas in November... Classic Industries order came in. Rest of the weatherstrips so the door glass should all be in soon, trunk mat, headliner, vinyl top, case of 3M adhesive, headlight adjuster kit. Also the quarter letters from South Dakota showed up today and the brake booster and peddle are all staged to reinstall. Should be a weekend of progress...
 
Not a lot of work on the Coronet today. Went to the Cop and Rodders car show in Tucson. I blinked and missed the Mopars on the very end of the show in the low traffic area.... Went back and looked. A few B bodies. Roadrunner, a few Chargers, a faux Modtop Roadrunner and a few Challengers. Then a row of new Challengers.

After looking around I have new enthusiasm for mine. It is coming out as nice as most of what I saw there.

I did get one side finished. All weatherstrip, locks, latches and whiskers are in. Looks really nice if I do say so myself :)

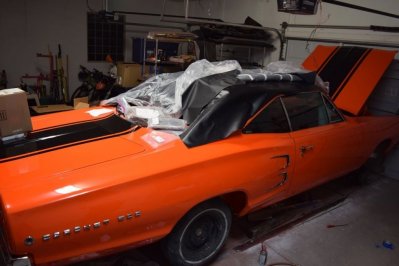
Also laid out the vinyl top and headliner to get the wrinkles out and to get a feeling for what it is going to look like. Plan on trying to install the headliner tomorrow which will allow the rest of the interior to be installed.

DSC_0002.jpg DSC_0003.jpg DSC_0004.jpg DSC_0005.jpg DSC_0006.jpg DSC_0007.jpg DSC_0009.jpg
 
IMG_2890.JPG
IMG_3788.JPG
IMG_3414.JPG
IMG_3511.JPG
Looks great!!!! I am getting more motivated to get my 69 Super Bee finished! I still have a ton of work to do. It's been helpful seeing you install some of the parts (window regulators) that I felt would be a pain. Thank you for all the tips. I am also more motivated to do the paint myself. I have never painted a car before or have I done any type of sanding/polishing. With most stuff if I've seen it once I can pick it up pretty easily. I have my tranny back from being resealed and checked, I tore the engine apart and everything is being cleaned, checked, and set for me to rebuild. Body is almost stripped of all parts. Waiting to start the bodywork. I'm moving in about a month to 2.4 acres where I'll have way more room to do the work.

Thank you again for all the pics.
IMG_3833.JPG
 
Looks great!!!! I am getting more motivated to get my 69 Super Bee finished! I still have a ton of work to do. It's been helpful seeing you install some of the parts (window regulators) that I felt would be a pain. Thank you for all the tips. I am also more motivated to do the paint myself. I have never painted a car before or have I done any type of sanding/polishing. With most stuff if I've seen it once I can pick it up pretty easily. I have my tranny back from being resealed and checked, I tore the engine apart and everything is being cleaned, checked, and set for me to rebuild. Body is almost stripped of all parts. Waiting to start the bodywork. I'm moving in about a month to 2.4 acres where I'll have way more room to do the work.

Thank you again for all the pics.View attachment 370469
Thanks. The bodywork was fun. I enjoyed watching it get straighter and straighter. Block sanding is an art that you eventually can feel what is happening. The paint was nerve wracking. Now that I have done it and fixed it numerous times it is not so bad. Just don't rush it. It is done when it is done and you will know it when you see it. It just takes persistence and $$$$! The reassembly has been WAY easier than I expected. After it is cleaned and painted it seems like it is easier to see how it all fits back together. The rear regulators scared me too but they were a piece of cake to install and adjust.

Good luck. Are you keeping it the WW1 like mine was?
 
Last edited:
Looks great!!!! I am getting more motivated to get my 69 Super Bee finished! I still have a ton of work to do. It's been helpful seeing you install some of the parts (window regulators) that I felt would be a pain. Thank you for all the tips. I am also more motivated to do the paint myself. I have never painted a car before or have I done any type of sanding/polishing. With most stuff if I've seen it once I can pick it up pretty easily. I have my tranny back from being resealed and checked, I tore the engine apart and everything is being cleaned, checked, and set for me to rebuild. Body is almost stripped of all parts. Waiting to start the bodywork. I'm moving in about a month to 2.4 acres where I'll have way more room to do the work.

Thank you again for all the pics.View attachment 370469
Ah the stripper question came from you too. I think yours needs media blasting. Mine did not have near that much surface rust. It can't be a native Temecula car!
Jim
 
Hey Jim, you are correct. It is originally from North Carolina where it sat in a wet barn since about 1980. The trunk floor is completely gone. the passenger quarter has been replaced sometime in it's life. It needs quite a bit of floor work also.
What's WW1? Sorry maybe a newbie question.
 
Hey Jim, you are correct. It is originally from North Carolina where it sat in a wet barn since about 1980. The trunk floor is completely gone. the passenger quarter has been replaced sometime in it's life. It needs quite a bit of floor work also.
What's WW1? Sorry maybe a newbie question.

The color code for the eggshell white color
 
IMG_2198.JPG
I thought that's what it was referring to. My car is actually the Y2 yellow however it probably looks white because it's so rusted and faded. Lol. I found one area under the original windshield seal that was still shiny and new paint.
 
It was a weekend of task switching.... Finished up the weatherstrip and whiskers on the drivers door. Man that is a solid CLUNK when those door close on new weatherstrip! Next I installed my rebuilt brake booster from The Ram Man and the restored brake peddle/frame...
DSC_0025.jpg
DSC_0026.jpg
DSC_0028.jpg


I also installed new insulation under the dash along with the restored wiper linkage and new seals from Detroit Muscle Technologies.

DSC_0029.jpg
DSC_0030.jpg
 
Next I moved to the headliner since that had to get completed before I can wrap up the rear door panels and trim. I pulled the old headliner out and scraped off the old insulation with a putty knife.

DSC_0010.jpg
DSC_0011.jpg
DSC_0014.jpg


Make sure you don't loose the two wires in the back. They stab through the fabric and grab the rear bow. This allows you to pull forward on the headliner and not have the rear bow flip forward on you.

DSC_0015.jpg


The bows sit in the special clips.... this would be my downfall. I found that the frontmost right one was broken when I started to install the new liner.....

DSC_0016.jpg
DSC_0016.jpg


Next I took the old insulation and laid it out on some new material to use as a pattern..

DSC_0019.jpg
DSC_0020.jpg


Sprayed the roof and the panels with Yellow 3M Super Trim Adhesive.

DSC_0021.jpg


And stuck them on. Notice how the originals were way to small. I started to think I messed up but as I was installing them it became clear that in a production environment where you slapped these up FAST there was no time for precision cuts and fits. It needed to be able to be slapped up fast and with HUGE error since it was a manual job I am sure.

DSC_0022.jpg
DSC_0023.jpg
 
Once I started to install the headliner I found the broken clip..... Done for the day on that one...

DSC_0024.jpg


Lastly the most important thing I did is I cleaned up the pigpen.... I staged the parts that I need to bead blast and got things organized. I see the light at the end of the tunnel, my shelves I can see through the grates on them... they are emptying!

DSC_0034.jpg
DSC_0035.jpg
DSC_0036.jpg
DSC_0037.jpg
DSC_0038.jpg
 
Last edited:
Auto Transport Service
Back
Top