You are using an out of date browser. It may not display this or other websites correctly.
You should upgrade or use an alternative browser.
You should upgrade or use an alternative browser.
1969 Charger R/T resurrection
- Thread starter hunt2elk
- Start date
hunt2elk
Well-Known Member
hunt2elk, might be the computer I'm using, but in your post about the steering wheel the "where and who" did the wheel is covered up by the picture. Please repost, thanks for posting the pics.
I don't think I mentioned who did the wheel, but I should have. He is a member here (1970 Roadrunner). Rod Glaser from Ozark, MO. He also restores Charger grills.
Last edited:
hunt2elk
Well-Known Member
What color paint did you use for the tail light housings? Did you use a rattle can?
Hey Don,
I did use rattle can paint. Aluminum on the inside and Eastwood detail grey on the outside.
Ron 73
Deceased, But not forgotton
Everything looks and sounds like like its going smooth Elk, Ive been watching but thought id say something this time! lol, Good luck man!!! 
hunt2elk
Well-Known Member
Everything looks and sounds like like its going smooth Elk, Ive been watching but thought id say something this time! lol, Good luck man!!!
Thanks Ron. Everything is going ok except I can't seem to get any free time to get out in the garage.
Superfreak
Well-Known Member
Thanks Ron. Everything is going ok except I can't seem to get any free time to get out in the garage.
Welcome to the club of "not enough time"
hunt2elk
Well-Known Member
Yeah - 'the not enough time club' would be a good one for me to be a part of.
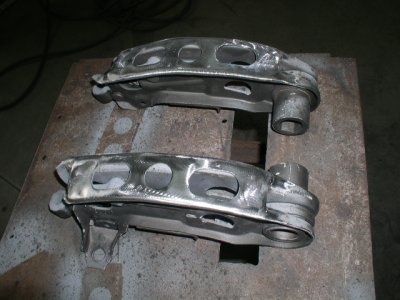
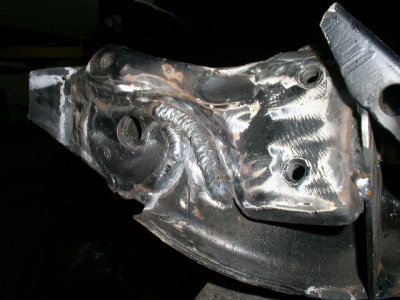
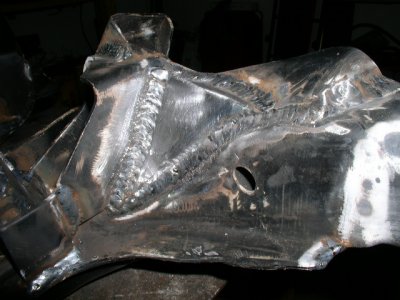
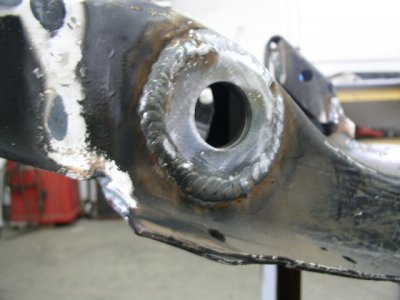
I did get the lower control arm stiffening plates from PST and managed to get them welded on. They are a nice fitting stamping.
- - - Updated - - -
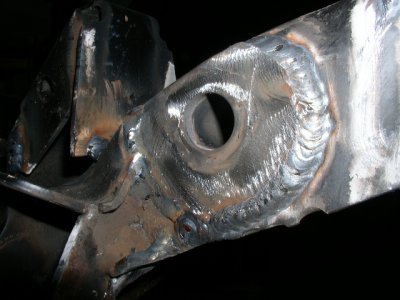
My right hand metal fab man got caught up on his other projects and will be working on mine again. He saw the job I did on the k-frame kit and thought he could make it look a little better. So he spent some time redoing all my welds and then going over all the factory joints. I don't understand why, but I just can't even get close to duplicating his work. He even stands over my shoulder explaining how to do it to no avail. I told him I think I will continue doing my HVAC work and let him be in charge of the welding. It is frustrating but like he says it takes alot of practice.
- - - Updated - - -
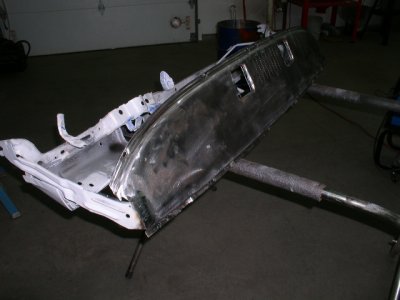
The rust free dash frame is welded together and ready to be cleaned up and painted black. Anybody know where I can find the correct color and % of gloss that this should be?
- - - Updated - - -
We then spent some time addressing the poor fitment between the front valance and fenders. After some cutting, welding, grinding, hammer & dolly, and tweaking, he got these 2 joints fitting really nice. There were portions with 1/2" gaps and the contours were not even close.
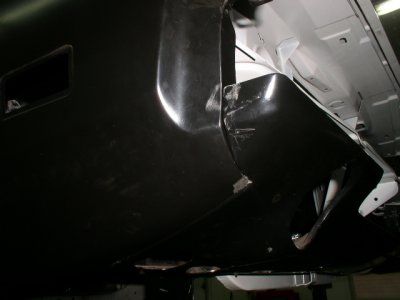
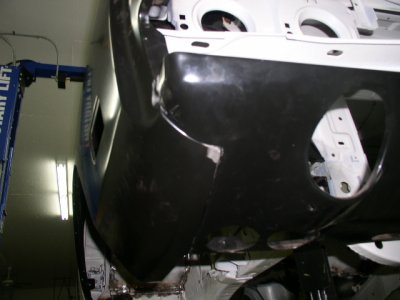
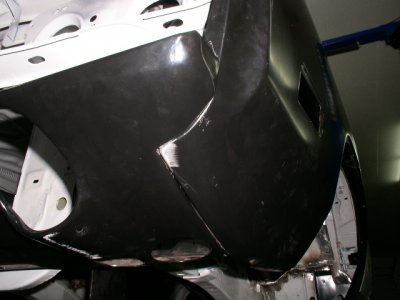
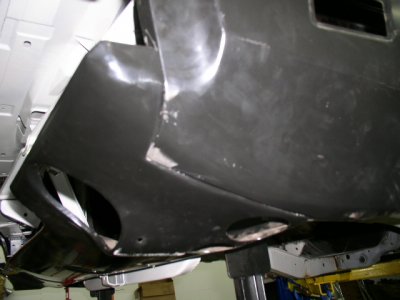
- - - Updated - - -
Another terrible fitting spot was on the drivers side lower fender to rocker/door. We had to drill out the spot welds on the bottom of the fender to internal brace and reweld it in the correct position. This was only bad on this side with the passenger fitment being perfect. This was the last bad area to adjust as far as panel fitment concerns. I am now pleased with all the gaps on the entire car.
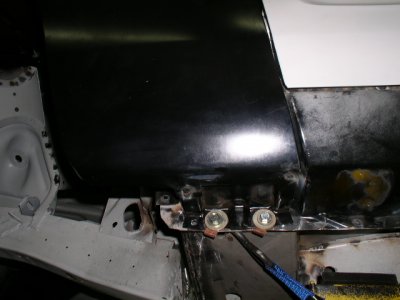
I did get the lower control arm stiffening plates from PST and managed to get them welded on. They are a nice fitting stamping.

- - - Updated - - -
My right hand metal fab man got caught up on his other projects and will be working on mine again. He saw the job I did on the k-frame kit and thought he could make it look a little better. So he spent some time redoing all my welds and then going over all the factory joints. I don't understand why, but I just can't even get close to duplicating his work. He even stands over my shoulder explaining how to do it to no avail. I told him I think I will continue doing my HVAC work and let him be in charge of the welding. It is frustrating but like he says it takes alot of practice.


- - - Updated - - -
The rust free dash frame is welded together and ready to be cleaned up and painted black. Anybody know where I can find the correct color and % of gloss that this should be?

- - - Updated - - -
We then spent some time addressing the poor fitment between the front valance and fenders. After some cutting, welding, grinding, hammer & dolly, and tweaking, he got these 2 joints fitting really nice. There were portions with 1/2" gaps and the contours were not even close.


- - - Updated - - -
Another terrible fitting spot was on the drivers side lower fender to rocker/door. We had to drill out the spot welds on the bottom of the fender to internal brace and reweld it in the correct position. This was only bad on this side with the passenger fitment being perfect. This was the last bad area to adjust as far as panel fitment concerns. I am now pleased with all the gaps on the entire car.

hunt2elk
Well-Known Member
You are an inspiration!
PLEASE keep the pictures and documentation coming.
Does your "right hand metal fab man" make garage calls?
Thanks for the encouragement Don. Hate to say it, but there is no way I am letting this kid get away from me until the body is in color - whatever hue that may be. I would be way over my head without him.
Ron 73
Deceased, But not forgotton
Very seldom you find someone with the capabilities this lad has, I don't blame you for not letting him out of your sight! Watching, and i mean rather intently, id love to have just a small portion of his abilities. Better pick that hue quickly Elk... 
hunt2elk
Well-Known Member
Howdy elk, I've been following the thread regularly and love the work done.
Twenty years ago I restored a '69 and was in the same quandry about color. I had a car that was originally light gold that I did not want to replicate. I had seen Chargers around then that were R6 red and it was too dull and toward maroon for my taste. I wanted something with more depth and checked the books at the local paint shops which steered me toward metallic and candy paints. I ended up going to a car show and saw a red '70 Cuda there. I asked the owner and he told me it was R4 Charger Red! It was perfect for what I wanted. I mention all this since I see a similarity in the colors on the cars you posted to what I thought I originally wanted.
R6 red http://www.hamtramck-historical.com/paintChipCharts/_1969PaintChipCharts-01.shtml?load_img=1
R4 red http://www.hamtramck-historical.com/paintChipCharts/_1969PaintChipCharts-01.shtml?load_img=3
A thread on my car here, the pics are recent scans of 20 year old pics and don't do the color justice.
http://www.dodgecharger.com/forum/index.php/topic,91842.0.html
I'm a sucker for factory colors so it all worked out for me. I hope you find the correct color for your car, I'm looking forward to seeing it!
hunt2elk
Well-Known Member
Howdy elk, I've been following the thread regularly and love the work done.
Twenty years ago I restored a '69 and was in the same quandry about color. I had a car that was originally light gold that I did not want to replicate. I had seen Chargers around then that were R6 red and it was too dull and toward maroon for my taste. I wanted something with more depth and checked the books at the local paint shops which steered me toward metallic and candy paints. I ended up going to a car show and saw a red '70 Cuda there. I asked the owner and he told me it was R4 Charger Red! It was perfect for what I wanted. I mention all this since I see a similarity in the colors on the cars you posted to what I thought I originally wanted.
R6 red http://www.hamtramck-historical.com/paintChipCharts/_1969PaintChipCharts-01.shtml?load_img=1
R4 red http://www.hamtramck-historical.com/paintChipCharts/_1969PaintChipCharts-01.shtml?load_img=3
A thread on my car here, the pics are recent scans of 20 year old pics and don't do the color justice.
http://www.dodgecharger.com/forum/index.php/topic,91842.0.html
I'm a sucker for factory colors so it all worked out for me. I hope you find the correct color for your car, I'm looking forward to seeing it!
I remember reading the story about your car. It turned out great but I would have had a hard time parting with it after all the time you spent restoring it. We have a decent sized car show called Mopars in the Park about 2 hours west of me the first weekend of June. I am hoping to make the final decision on color after that weekend.
Ron 73
Deceased, But not forgotton
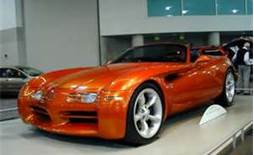
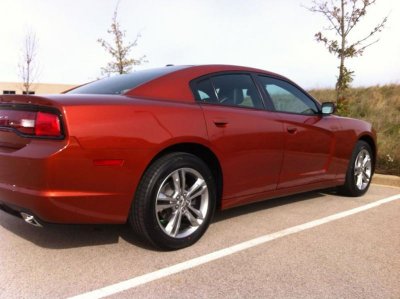
I'm just amazed what he can do with a piece of metal. I'm also still losing sleep over the color choice. Here is a Viper & Charger painted 2013 Copperhead pearl. The lighting changes the color so much it is hard to tell what it would really look like.
View attachment 106565View attachment 106566
That 2013 Copperhead pearl is a beautiful color! Hard to tell with pictures, with the pearl in it i imagine its better by far in person then a picture can do..
Propwash
Well-Known Member
- Local time
- 11:53 PM
- Joined
- Oct 29, 2009
- Messages
- 9,710
- Reaction score
- 4,327
- Location
- Island of Misfit Toys
That 2013 Copperhead pearl is a beautiful color!
X2...That would look great on your Charger!
daytona kid
Well-Known Member
I feel your pain Hunt, I have trouble making my welds look good also. I used to weld better when I was younger, 57 now. My eyes have gotten bad and I have to use hi powered reading glasses for up close stuff such as welding. Also everything has to be perfect for me, clean lenses on the hood & glasses, and I have to be in a comfortable body position which is hard to do sometimes. I'm going to try to make some of the front end mods you did with the help of your pics, so thanks for those.
What brand quarter skins did you use? I am about to order mine and looking at my options for them. Classic Industries really brags on theirs but they are $370 ea.
What brand quarter skins did you use? I am about to order mine and looking at my options for them. Classic Industries really brags on theirs but they are $370 ea.
hunt2elk
Well-Known Member
I feel your pain Hunt, I have trouble making my welds look good also. I used to weld better when I was younger, 57 now. My eyes have gotten bad and I have to use hi powered reading glasses for up close stuff such as welding. Also everything has to be perfect for me, clean lenses on the hood & glasses, and I have to be in a comfortable body position which is hard to do sometimes. I'm going to try to make some of the front end mods you did with the help of your pics, so thanks for those.
What brand quarter skins did you use? I am about to order mine and looking at my options for them. Classic Industries really brags on theirs but they are $370 ea.
All my repoped metal is AMD stuff. The kid helping me says that these quarter skins are the absolute worst he has ever seen. They are going to take alot of time to make them presentable. He told me to send them back - but I didn't. They are full of waves,buckles, and the body lines are horrendus. Someone on this site used the AMD full quarters and said they fit perfect and was able to get all the imperfections out with just high build primer. I have never seen the full ones, but I'm sure they can't be as bad as mine. I didn't go with them because the kid told me he prefers the skins because you are locked in on all sides and don't have any wiggle room with full quarters. After putting these on he said maybe we should have tried them. They are alot more money though.
Last edited:
hunt2elk
Well-Known Member
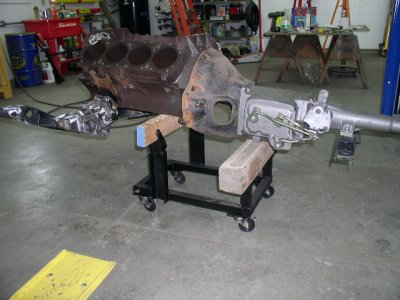
Decided to bolt together the block, bell housing, tranny, and k-frame to make sre everything is going to fit together.
- - - Updated - - -
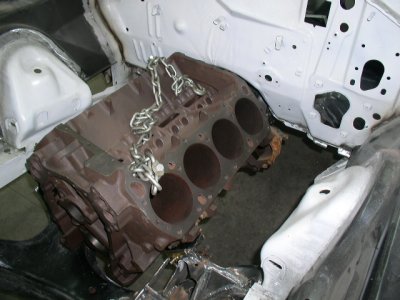
And there she is boys & girls. Ma Mopars 440 Magnum sitting in a Charger. Just needs a few more things to make her go. This went really slick dropping the car over the entire assembly. I am going to go this route when I do it for good. Lots less chance of doing any damage.
- - - Updated - - -
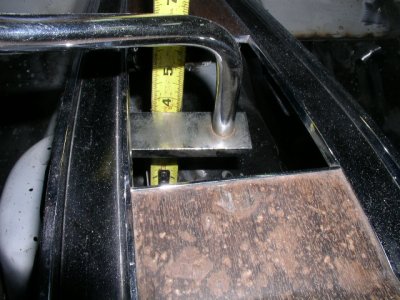
I got the shifter centered and the console level with the brackets tacked in. Does anyone have their interior out to see if this looks right? When in reverse, the sharp bend of the handle comes very close to the top of the console and actually bumps into the side cover. It seems like the console should go up or the tranny down, but the tranny shaft to floorpan hump measures the same as on my Road Runner. And the only way to raise the console would be to shim it. I don't have any console 4-speed cars to look at for reference so am hoping someone here can help.
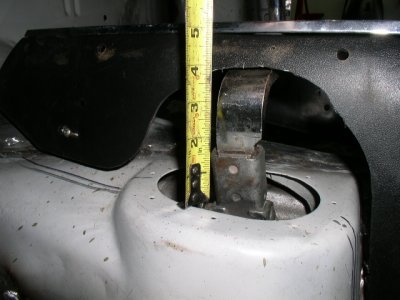
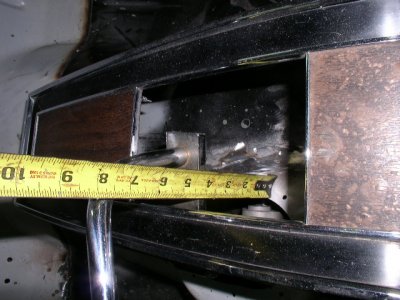

- - - Updated - - -
And there she is boys & girls. Ma Mopars 440 Magnum sitting in a Charger. Just needs a few more things to make her go. This went really slick dropping the car over the entire assembly. I am going to go this route when I do it for good. Lots less chance of doing any damage.

- - - Updated - - -
I got the shifter centered and the console level with the brackets tacked in. Does anyone have their interior out to see if this looks right? When in reverse, the sharp bend of the handle comes very close to the top of the console and actually bumps into the side cover. It seems like the console should go up or the tranny down, but the tranny shaft to floorpan hump measures the same as on my Road Runner. And the only way to raise the console would be to shim it. I don't have any console 4-speed cars to look at for reference so am hoping someone here can help.


- Local time
- 11:53 PM
- Joined
- Jan 1, 2013
- Messages
- 8,050
- Reaction score
- 3,464
- Location
- Mascoutah, Illinois
Yeah - 'the not enough time club' would be a good one for me to be a part of.
I did get the lower control arm stiffening plates from PST and managed to get them welded on. They are a nice fitting stamping.
the LCA stiffening job and K frame and rest of the work looks great H2E!
Similar threads
- Replies
- 44
- Views
- 5K
- Replies
- 6
- Views
- 3K
- Locked
- Replies
- 2
- Views
- 4K

