• When you click on links to various merchants on this site and make a purchase, this can result in this site earning a commission. Affiliate programs and affiliations include, but are not limited to, the eBay Partner Network.

$500- 68 charger

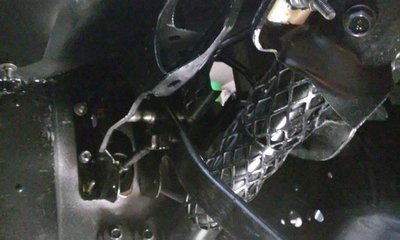
I started installing the brake pedal bracket, pedal, master cylinder, push rod. I have not installed the brake switch yet because it seems to me that I'm missing something to stop the pedal from coming up so high. The push rod may be too long but it does bottom out in the master cylinder(with no fluid) when the pedal is about 1" off the floor so that seems about right. If I install the switch it would act as an up stop but I would think the pedal would break it if I let the pedal recoil fast. I can't find any exploded view pics anywhere. And is the spring in the master cylinder the only spring that returns the pedal up? That seems odd. Can someone school me a little more here? Here's some pics of where I'm at.
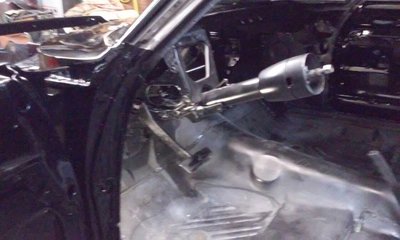
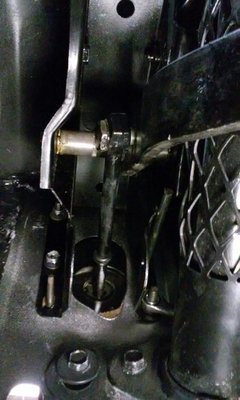
20170824_194253_resized.jpg 20170824_194455_resized.jpg 20170824_194615_resized.jpg 20170824_200115_resized.jpg
 
Last edited:
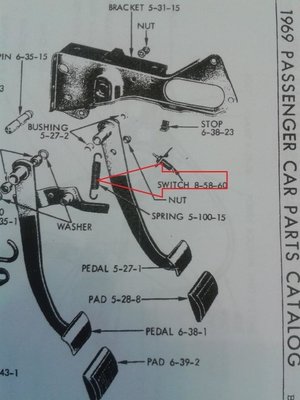
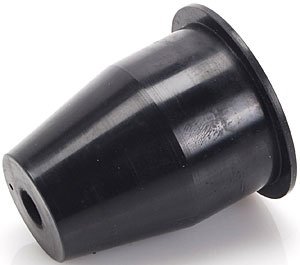
I found this 69 drawing (which I would think would be the same as a 68) and did some more research, apparently the spring is for power brakes and is for anti-rattle and to keep tension off the booster. , so I don't need a spring but I think I do need the stop in the pic above the arrow. I don't think mine had that or I've misplaced it. I also ordered a boot for the push rod from jegs.

24474782sy.jpg 555-631410.jpg
 
Last edited:
I still need to figure all of my brake linkage also.
It sure is fun to see you put parts back on your car now. :thumbsup:
 
I still need to figure all of my brake linkage also.
It sure is fun to see you put parts back on your car now. :thumbsup:
Thanks, I think I've got the pedal problems figured out if I can find the up-stop for it.
Funny, there are a bunch of us here at the same point in our rebuilds,. And I think everyone with similar cars really enjoys watching them all coming back to life with new paint and new parts, and some polished up old ones also,lol..
 
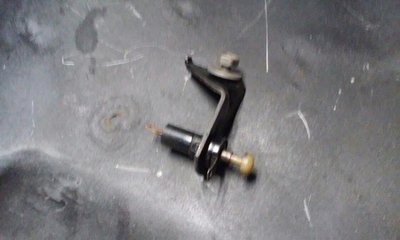
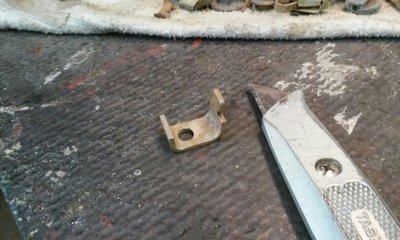
I found this part which I added a piece of rubber hose to for some padding and mount it to the pedal bracket. It seemed to be the perfect thing for the stop, don't remember removing it tho. Anyone recognize it for something else? Only problem now is there isn't room for it and the stop light switch. Does anyone else have this or something similar as a pedal stop?

20170828_184600_resized.jpg
 
I found this 69 drawing (which I would think would be the same as a 68) and did some more research, apparently the spring is for power brakes and is for anti-rattle and to keep tension off the booster. , so I don't need a spring but I think I do need the stop in the pic above the arrow. I don't think mine had that or I've misplaced it. I also ordered a boot for the push rod from jegs.

View attachment 506023 View attachment 506024
The stop is for the four speed clutch pedal arm....

The brake switch is activated by the head of the pushrod, not the pedal...

I found this part which I added a piece of rubber hose to for some padding and mount it to the pedal bracket. It seemed to be the perfect thing for the stop, don't remember removing it tho. Anyone recognize it for something else? Only problem now is there isn't room for it and the stop light switch. Does anyone else have this or something similar as a pedal stop?

View attachment 507301
That bracket is for the E brake cable. It holds the cable to the e brake unit. It also has a bolt and a nut....


If you need pics let me know....of the brake switch and e brake....
 
The stop is for the four speed clutch pedal arm....

The brake switch is activated by the head of the pushrod, not the pedal...


That bracket is for the E brake cable. It holds the cable to the e brake unit. It also has a bolt and a nut....


If you need pics let me know....of the brake switch and e brake....
So the brake light switch is all that stops the pedal arm from coming up too high? Seems kinda flimsy for that but I guess there's not a lot of recoil force to it.
 
Last edited:
Hard to tell from your pics but it appears to be non power manual, right? Do you have the correct pushrod?
http://www.ebay.com/itm/68-69-70-Ch...dy-/362078213160?_trksid=p2141725.m3641.l6368

I cannot remember the exact measurement but it is a little over 7"

So the pedal doesn't utilize the switch as a stop....You may have to use another slot for the switch to get it in the right position or you have the wrong pushrod...

Here are some pics I just snapped from the X

IMG_0571.JPG
IMG_0572.JPG
IMG_0573.JPG
IMG_0574.JPG
 
Lol, that's the ad that I bought the push rod I have from, he must have a pile of them. I got it all together and working as it should now, with the switch in it's best slots. Without the switch in place the pedal just seemed to go up further than I thought it should as you almost can see in the 1st pic in my post#1761. Then I saw the stop in that drawing and thought it was for the brake and I needed that., duh... This was a mess for me because the car was power brakes with some stuff missing, and I converted it to manual brakes not knowing what all parts I had would work. Thanks to you guys pics and schooling I finally got it right. I just over thunk it I guess, lol..
 
So the brake light switch is all that stops the pedal arm from coming up too high? Seems kinda flimsy for that but I guess there's not a lot of recoil force to it.

No, there should be a stop plate mounted to the base of the master cylinder that stops the piston. The brake switch is adjusted to be depressed at full height after you get the brakes bled.
 
No, there should be a stop plate mounted to the base of the master cylinder that stops the piston. The brake switch is adjusted to be depressed at full height after you get the brakes bled.
Could you find some type of pic or drawing of this stop plate? I figured I may have to tweek it a bit after I get the lines on, fluid in it, and bleed it. The piston in this m/c is stopped by a c-clip I think. I'll work on it more later but I just wanted to get it in and close to ready so I can proceed with installing the dash, etc..
 
Last edited:
Could you find some type of pic or drawing of this stop plate? I figured I may have to tweek it a bit after I get the lines on, fluid in it, and bleed it. The piston in this m/c is stopped by a c-clip I think. I'll work on it more later but I just wanted to get it in and close to ready so I can proceed with installing the dash, etc..
Mine is 4 wheel manual drum which has a plate with 2 screws and a rubber seal. If yours has a c clip keeping the piston inside the housing it should be sufficient.
 
Mine is 4 wheel manual drum which has a plate with 2 screws and a rubber seal. If yours has a c clip keeping the piston inside the housing it should be sufficient.
Ok, yea I can just barely see it in some of the pics above that justin posted. Mine doesn't have that plate, different brand of m/c.
 
I borrowed a rear wheel and tire to help make sure I get the right size. This is a 275/60/15 tire on a 15x8 rim with a 3.5- 4" backspace. Lots of room left for bigger. I'm thinking, like some here have suggested, a 15x10 rim with 5 or 5.5, and 295/50 tire. The car should sit down another inch or two when finished I'd imagine.

View attachment 502648 View attachment 502649
Found out this 15x8 wheel has a 3.5" backspace and after checking both sides the closest spot to tire rub was 1.75" on the inner wheel well. So if I go with a 10"wide wheel with a 4.5" backspace it would leave .75" at the closest., I think.. Had thought I could use a 5.5" backspace but my math says no.
 
I had 15x10's on my GTX before I tubbed it with 5" back space. With the 325/50/15s I had about .625 on both sides (1/4 & spring). Maybe a little to tight for cornering but ok for straight line.
 
I did the .75 spring offsets which got the springs in further than my inner wells. I may be closer than .5 on the outer well lip with 4.5 backspace but I may can trim it a little more.
 
Ok, yea I can just barely see it in some of the pics above that justin posted. Mine doesn't have that plate, different brand of m/c.
Most reman MC's have a single tear drop bracket installed with a single screw on the back.....If you need a boot and bracket I may have one but in order to out on you have to pull the rod....If you system is not bled yet than dont worry about the pedal until you bleed the system...The hydraulics and spring in the MC will return the pedal....
 
Most reman MC's have a single tear drop bracket installed with a single screw on the back.....If you need a boot and bracket I may have one but in order to out on you have to pull the rod....If you system is not bled yet than dont worry about the pedal until you bleed the system...The hydraulics and spring in the MC will return the pedal....

That tear drop and single screw will bend back and cause air to get into the master cylinder. Ask me how I know. The boot isn't as important as holding the piston in the mc. I fabricated the full circle bracket and used both bolt holes.
 
That tear drop and single screw will bend back and cause air to get into the master cylinder. Ask me how I know. The boot isn't as important as holding the piston in the mc. I fabricated the full circle bracket and used both bolt holes.
That is probably why I was told years ago to throw that away and use the original bracket...

Sounds like it was made either to thin or cheap steel content....

Heck from what you say if you pull the pedal to far towards you that torque alone will bend it...
 
Last edited:
Auto Transport Service
Back
Top