• When you click on links to various merchants on this site and make a purchase, this can result in this site earning a commission. Affiliate programs and affiliations include, but are not limited to, the eBay Partner Network.

$500- 68 charger

That's is probably why I was told years ago to throw that away and use the original bracket...

Sounds like it was made either to thin or cheap steel content....

Heck from what you say if you pull the pedal to far towards you that torque alone will bend it...

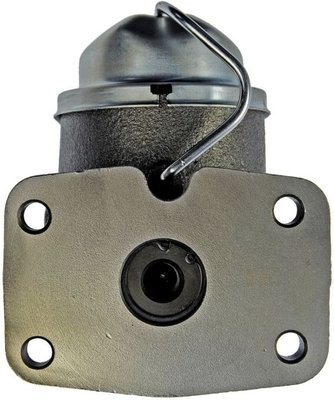
Exactly, it bends too easy. I was having to re bleed my brakes every few days. Took a look under the dash and the tab was bent out enough to let the piston go too far. Replaced it and solid brakes ever since. I believe it is meant for shipping only, but most of the time the original bracket is missing so it gets used as the stop.
 
Most reman MC's have a single tear drop bracket installed with a single screw on the back.....If you need a boot and bracket I may have one but in order to out on you have to pull the rod....If you system is not bled yet than dont worry about the pedal until you bleed the system...The hydraulics and spring in the MC will return the pedal....
Thanks confirming that for me, That's what I'm thinking also, that fluid in it will help the feel out and slow the recoil. Mine looked like the pic below, no hole for a fastener for a plate. The c-clip holds the piston in on this one. I got a universal boot from jegs that worked great. And I put an o-ring in the groove on the front end of the push rod which pops into a groove in the front of the piston and holds it in place. I gotta get some lines now. Thinking about stainless ones. Anyone know a good deal on some?

$_58.JPG
 
Thanks confirming that for me, That's what I'm thinking also, that fluid in it will help the feel out and slow the recoil. Mine looked like the pic below, no hole for a fastener for a plate. The c-clip holds the piston in on this one. I got a universal boot from jegs that worked great. And I put an o-ring in the groove on the front end of the push rod which pops into a groove in the front of the piston and holds it in place. I gotta get some lines now. Thinking about stainless ones. Anyone know a good deal on some?

View attachment 514276
You will not have any problems with the C clip type....

Lines...well I got mine from In-line tube and I had to do A LOT of re-bending and cutting/flaring. Overall, I got them to fit perfectly but thankfully, I had all original lines to model by...

When it comes to fuel and brake lines....I would never even consider plain steel lines...Spend the extra and never think about them again...
 
Last edited:
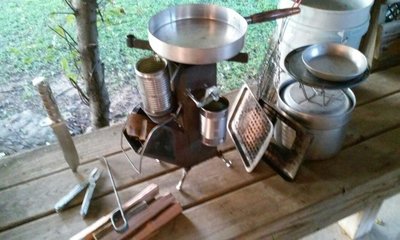
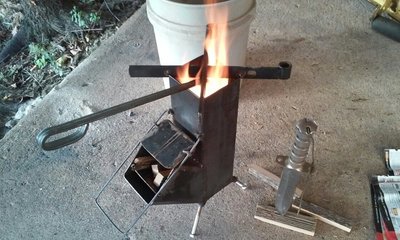
This has nothing to do with cars other than after enjoying all the welding I did on the car I found a neat little welding and metal-work project a few weeks ago. It's called a rocket stove, and man is it fun.. I have cooked all kinds of stuff with it with great results. It breaks down and stows in a 5gal bucket. I made it out of 4x4 tubing. I wondered why they are called rocket stoves but found out when I decided to fill it with wood and see how hot I could get it, it was glowing red and roaring a flame like an upside down rocket, lol. I made several attachments that allow you to cook different ways such as boiling, frying, grilling, baking. And have cooked burgers, steaks, chicken, fish, baked potatoes, cans of beans, etc... Loaded with a handful of wood and/or charcoal it will burn 8 hours. One of the many benefits it has is it will heat the ground in cold weather while camping as you have dinner then you place your tent or sleeping bag on the warm spot which lasts a few hours.

20170914_184257_resized.jpg 20170806_191711_resized.jpg
 
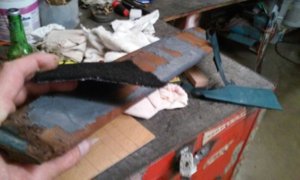
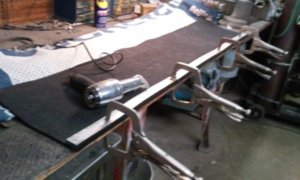
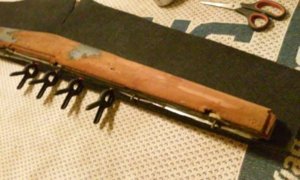
The $300 for a new dash pad has been holding me up so I decided to resto-mod the old one for $10. The old cracked vinyl/plastic covering came off pretty easy. Patched the cracked foam with seam sealer and will cover with the same thin black fuzzy carpet that will going on the backseat delete areas also. I think the carpet can be shaped with a heat gun so hopefully I can tuck it under on the edges. Will test that theory tommorow.

20171009_205434_resized.jpg
 
Thanks Bro! I've been working on the dash pad redo, and I think it will be acceptable. It will be a tad thicker due to the carpet being thicker than the vinyl/plastic was, but for $10 compared to $300 I'm gonna go with it, if it turns out ok.

20171016_191656.jpg 20171017_194229.jpg
 
Last edited:
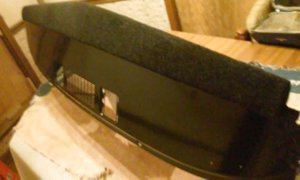
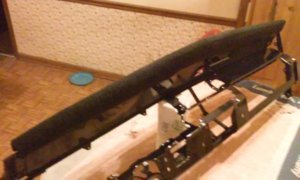
All done with the dash pad. It was not hard to do it with the thin fuzzy carpet. I shaped it with the heat gun to make a perfect fit and used a little seam sealer to stick it on, then super glued the front edges where it connects to the dash. I'm happy with it and the $290 I saved by not buying a new one makes me even happier. I can proceed with assembling the dash and installing it and get some progress going, hopefully.

20171019_211250.jpg 20171019_212152.jpg 20171019_212303.jpg
 
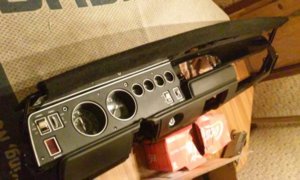
I'm going to have to find a lot of pics and info on mine. I've never had one this far apart. And it was missing the gauge cluster and a few other things. I have most of all the parts new to finish out but unsure of how to put it back together so it should be a very fun puzzle, ha..
 
I’ll be tuning in for sure. I’ve been considering rewiring my car and replacing my cluster and switch panel with the fancy restored ones I picked up along the way... but that underdash puzzle has me skeered.
 
I'm going to have to find a lot of pics and info on mine. I've never had one this far apart. And it was missing the gauge cluster and a few other things. I have most of all the parts new to finish out but unsure of how to put it back together so it should be a very fun puzzle, ha..

You and me too Daytona Kid . . . I'm down to bare metal fixing the rust and doing body work . . . one day hope to be "putting it back together" as you are ! ! Enjoy !
 
The dash is going together nice so far. Going to try to start plugging the wire harness to it now. Installing the glove box door is going to be fun, the spring hinge is like a bear trap. Anyone know the trick for those? I'm going to have to try to make my ash tray door pad. It's the extremely hard to find slide down door type, early 68.

20171023_214049_resized.jpg
 
20171026_204013.jpg
Got the glove box door on. It was a little tricky figuring out how the hinge went back on, no box yet tho. The new glove boxes seem to be very inexpensive but not sure if I want one in there, yet. May leave it open and later put one of those little heater units there. I put a piece of the leftover carpet on the ash tray door for now, since the pads for them are not to be found., I still may try to make one later with some Flex-Seal or similar liquid rubber.
 
Last edited:
Yeah sorry about being late on the draw, but I was going to say the glove box door isn’t so bad.
 
The original glove box is cardboard (for 69 Plymouth’s anyway). I think I picked mine up from Dante’s back at Carlisle 5 years ago or so. Probably easier to put in now, but I’d be afraid the cardboard would be damaged while handling the dash during install. So if you do decide to go with one, probably best to do it later anyway.
 
Auto Transport Service
Back
Top