• When you click on links to various merchants on this site and make a purchase, this can result in this site earning a commission. Affiliate programs and affiliations include, but are not limited to, the eBay Partner Network.

69 gtx

Will do. I'll try to get some parts listed tonight.
 
So the engine build has started! So to start I'll list my goals or intentions. I'm trying for something that has a good idle & vac. Must have good street manners. I'm going to be running a Gear Vendor overdrive to help with cruising RPM & gas mileage. So the cam must have good power around 2400 rpm. To that end I'll be running a 6bbl set up using all new parts with the 71 carbs. I want something I can drive coast to coast with if I want. thirdly I want to be able to run 7.50 1/8th 11.50 1/4 times in street trim. So I know this is a tall order and to get there isn't going to be cheap by any means. But I know what I want so there it is. So I decided to run the 6bbl for mileage and to have enough CFM to support 550-575 hp. I ifgured I need about that much to reach my E.T. goal. Under that I will be using trick flows new heads. Jim @ LaRoys Engines like what he sees in them so I think that was a good choice with the closed chamber it will help keep detonation at bay. Icon 836 12cc dished pistons (10.2:1 with closed chamber heads) with SCAT h beam rods. A custom solid roller with some big lift. This was my only comprimise as I'm willing to set the lifters once in a while, I wasn't sure the hyd lifters would take the extreme lobes. Harland Sharp 1.6 roller rockers. So there is a basic parts list. I'll go into more detail as the build goes along.
 
I want to see some 1/4 mile action time slips once all completed! I like the head choice. I may have missed it, but are you running headers or original type manifolds? I took my 69 X out last year and ran a 13.69 at BIR with the "stock" set up including a Carter AVS set up and 45 year old Polyglas Goodyear tires. TTI 2.5 "X" system fits nicely. Lookin' good!
 
MG I will be running 1 7/8 TTI's with 3" exhaust. And you can bet I'll have time slips & video of dragstrip action!!!! I really wish more guys would do that HP # really don't mean squat, ET now that talks! I have raced motorcycles in the past @ BIR like 1989

- - - Updated - - -

I'm sure you all have seen the Mild Mannered Mauler project. I'm kinda trying to do that. They never seem to ever complete their projects or put them in a car to see what they can do. So I'm hoping this build will help awnser some of those question. They were shooting for 600 hp 600 tq. Me 550/550 was what I'm shooting for but we'll see. My number I want to see is 7.50/11.50 at the finishline.
 
I agree totally. I have seen low HP cars do much better than they should at the strip, and supposedely high HP cars fall flat. ET is the great equalizer. Those are good numbers to shoot for. They still run a lot of bikes up there at BIR. Excellent job on your project details!
 
MG BTW 13.69 is a good # there at BIR with your set up.
 
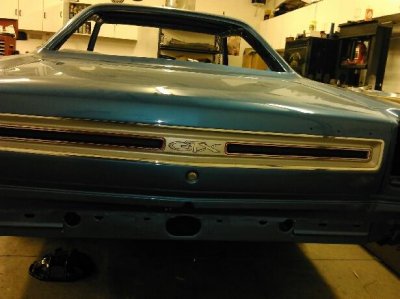
So it was a rainy gloomy day here today, I walk out to my truck from work and some *** had hit my truck and drove off, perfect!! So it was a little pick me up when my GTX emblem showed up so I could put my finish panel on my trunk lid. IMG_20151117_175521.jpg

- - - Updated - - -

BTW if anyone is ordering the big GTX for the quarter panel from year one make sure they pull it out of the box and check the lower leg of the X. I got 3 and all of them were bent. I new if I tried to straighten it, it would break with my luck.

- - - Updated - - -

Engine update, block and crank are getting machined this week. Looking at Jan. as a completion date.:hello2:
 
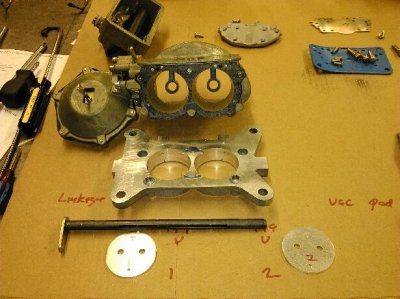
So I'm getting the six pack ready to send to IQ52 (Jim) so it can be installed for the dyno sessions. So I got the Pro max rear throttle plate with the angled idle screws. This is a must for easy idle adjustments.IMG_20151121_115705 (2).jpg

- - - Updated - - -

You need to transfer your throttle blades & shaft to the new assembly. Also the short roll pins. Make sure to red loc tite the screws in the blades.IMG_20151121_115904 (2).jpg

- - - Updated - - -

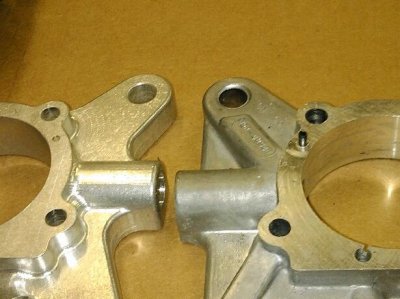
Per instructions help yourself and clearance the fuel bowl for the screw also.IMG_20151121_131456 (2).jpg
I used a 1/2 ball end mill but a dremel will do just as well. You really only need to go to the blank hole.

- - - Updated - - -
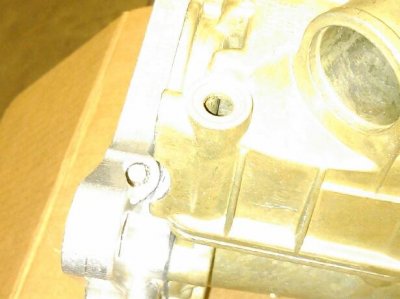
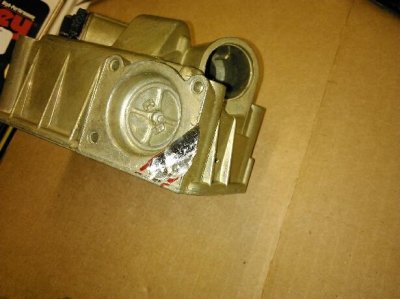
IMG_20151121_131517 (2).jpg

- - - Updated - - -

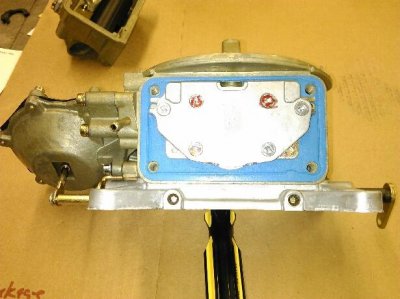
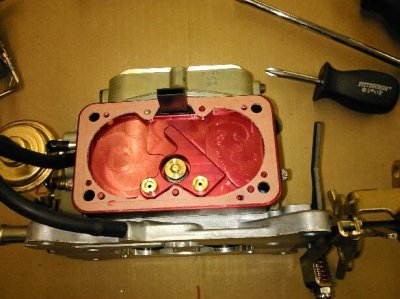
So next I replaced the drilled plates with Quick fuel plates with jets.IMG_20151121_114244 (2).jpg

- - - Updated - - -

When I pulled the bowl off the screws that are red were not tight. I found 3 that were loose on the front carb. These were brand new units so I would suggest everyone pull their bowls off and check them. I forgot to get a picture of the new plate but I put 85 jets in for a starting point.

- - - Updated - - -

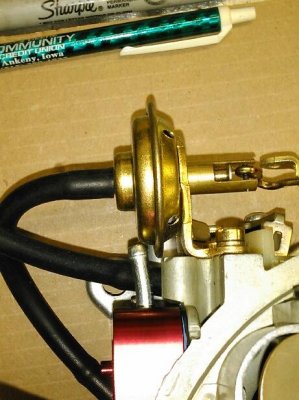
So next I put a QF 34-8 metering block on the center carb. BTW the end carb plates were 34-3. The new metering block has a vacuum port for your vacuum advance. I had to bend it a little in order to get it to clear like the original but no big deal.IMG_20151121_141341 (2).jpg

- - - Updated - - -

I put a 6.5 power valve in & 66 main jets. This metering block has removable IFR (idle fuel restriction) jets. And power valve jets. QF also sends along a alternate set of jets for both. This help for the people that can't seem to get their idle leaned out. There is a very good article about this in Hemmings Muscle Car magazine. Also if you choose to use a holley gaske on the metering block you will need to trim it just a little, however QF does send all needed gaskets.IMG_20151121_142549 (2).jpg

- - - Updated - - -

I also bought a phenolic spacer kit to help with vapor locks & boiling gas in the carbs.

- - - Updated - - -
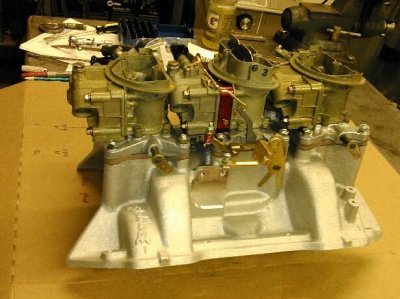
IMG_20151121_150124 (3).jpg
So next is vacuum lines and linkage. Air cleaner assm, & ship!
 
I went with a phenolic spacer on my 6 pack setup. I have the Weiand super stock intake. I am thinking about replacing with a Hoggans intake or a mod man.
 
Also on the slosh tube make sure it's installed with the bigger lip up. To check for float interference on jet plates, remove bowl fuel level screw and note float level before and after install.
 
Wow, great progress so far, going to be a great car. Sorry to hear about the truck. That really sucks. I love the 68/9 GTX's.
 
Got my lid from jegs for 79$ free shipping. On a side note it doesn't have a full lip all the way around the bottom. I don't see it being a issue so decided to use it. I put the decal on looks pretty good. Not sure if it's in the right location but went with it. Getting the fiberglass base painted so I can glue on the seal. Just a few details left before the intake system is done.
 
A note on the fiberglass base. I'm going to spray some guide coat on the bottom side to smooth out the fiberglass. Not much gel coat there and I want to make sure the seal sticks good when I glue it on.
 
Good luck to ya GTX!!! Your doing a great job man... ;)
 
Auto Transport Service
Back
Top