Killer Bee, pun intended.....
You are using an out of date browser. It may not display this or other websites correctly.
You should upgrade or use an alternative browser.
You should upgrade or use an alternative browser.
69 Super Bee Long Time Coming
- Thread starter Coledavis01
- Start date
GetX'd
Making Life Great Again!
- Local time
- 12:36 AM
- Joined
- Jul 20, 2014
- Messages
- 11,868
- Reaction score
- 13,123
- Location
- Laguna Beach, CA
First time I've seen this thread. Love those bad *** bees! You've done a lot of work to your baby and I suspect she'll be pollinating the freeways close to your home sometime soon. Keep up the nice thread, we all love pics and progress.
git her done......
git her done......
Coledavis01
Well-Known Member
Fenders have been refinished and painted but the headlight buckets were toast. Really wish I would have addressed them beforehand. Bit of a pain in the *** to drill out all of the welds, this is one of the donors. Going to try and drill out the bad one's and install the replacement without having to respray at least the visible part of the fenders. We have this 2 part liquid packing foam gun at work I'm going to use to try and encase them. Will report back back how that operation goes 0_o
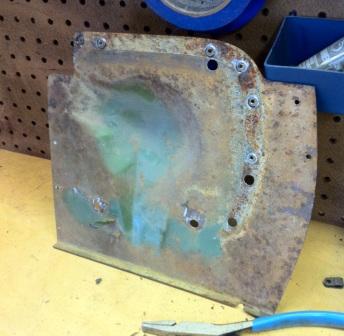
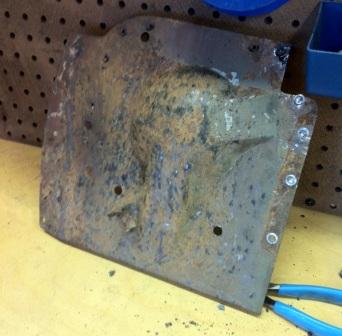
Highly recommend a spot weld cutter! I didn't get a Blair as I wasn't anticipating to have to use it a lot, but a cheap one from Ebay, Boulderfly I believe but for under $10 am very impressed with it's performance.
- - - Updated - - -
it's a picture of a picture but the only one I have of me driving it before it was taken down. May have posted this one elsewhere on the site but I keep it in the office to remind myself that I did in fact do a burnout at one point. The plan is to recreate the picture once it's all back together and skedaddle on out of there before a grumpy neighbor calls me in.
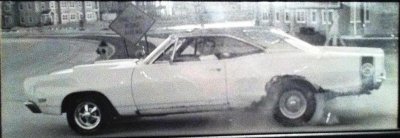

cool picture!
LeoD
Well-Known Member
Maybe just undercoat the headlight buckets?
Coledavis01
Well-Known Member
Hey Leo, how are your projects coming along?
I was able to salvage the bucket mounting pieces from that old parts car at my dad's. Whatever this piece is called behind the headlight bucket mount was rotted as well, unfortunately was on the parts car too and did get lucky and find the driver's side piece on an old junk fender. The guy that did the paint did a half *** fiberglass job on them to prevent water/mud from coming through the wheel well area, but knowing it's there would drive me nuts even though nobody will ever see it.
I was able to salvage the bucket mounting pieces from that old parts car at my dad's. Whatever this piece is called behind the headlight bucket mount was rotted as well, unfortunately was on the parts car too and did get lucky and find the driver's side piece on an old junk fender. The guy that did the paint did a half *** fiberglass job on them to prevent water/mud from coming through the wheel well area, but knowing it's there would drive me nuts even though nobody will ever see it.
LeoD
Well-Known Member
Yes i know that piece. My fenders for my Bee are not in the greatest of shape, they are rust free, but have had some damage along the way in its life. Its really the only parts i don't have any extra of for a 69 Bee. If you ever need anything don't be afraid to ask, we got extra pieces around, plus we owe you. If it was car i'd fix it too, it would bug me as well. My projects are coming, almost done with this challenger for the wife, then back on to the Bee. Hope to see you around.
Coledavis01
Well-Known Member
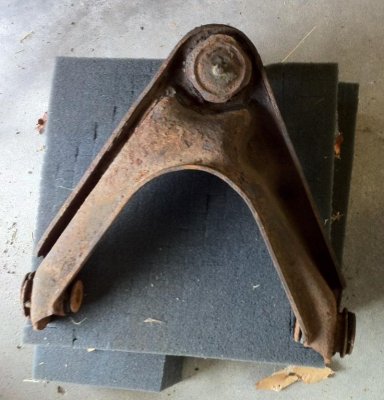
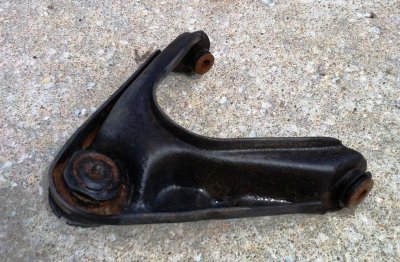
I bought some tubular a-arms but unfortunately they don't fit, about 1" too wide and none of the manufacturers could ID. Believe the gusset could be cut, press them and re-weld, but it's beyond my comfort level. Let me know if anyone wants them!
Had already done one set of the original a arms for the 4 door I had using a wire brush for the rust clean off and it was a dusty mess.
This time around thought I'd try another method and so far very pleased with the results.
Sure some of you guys have used electrolysis for rust removal, I was nervous but after reading up quite a bit on it there's not a whole lot to screw up.
Using a plastic tub/bucket large enough for the piece needed work you need to set up electrodes around the container's interior. Some sources recommend using graphite bars as they don't make as much of the foamy rust mess but I had rebar laying around so went with it. Using stainless steel is a big no-non as it will produce a chromium VI which is nasty, nasty stuff.
Drill some small holes to secure the rods to the interior of the container and wire them in. Next take about a 12 gauge wire and connect all the electrodes, I used 5 as line of site is important in the process, or so I've read.
Next you fill the container with water and add 1Tbsp of washing soda (sodium carbonate)- not baking soda, per gallon of water and stir it until dissolved. This is your electrolyte.
No you want to secure your piece. I used a 2x4 because it was handy, really anything would work but with the electrodes being close by wouldn't recommend metal and risk shorting it out. Using a metal clothes hanger I secured the piece and left enough of a lead to connect my charger to.
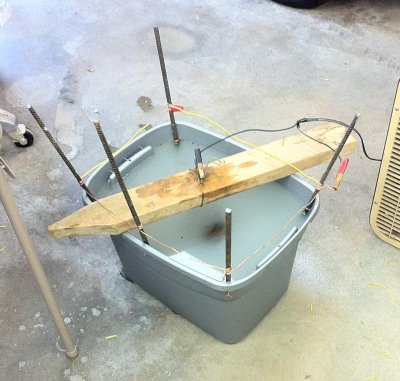
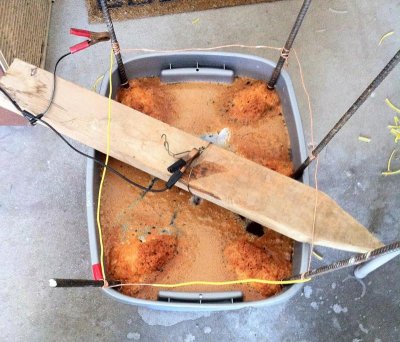
Any DC power source can be used but doesn't take a lot of voltage or amperage to work. Some newer battery chargers have a built sensor that may kick them off, mine is from the 60's so not an issue. It's 12vdc pushing about 4-6amps. Before you connect the power make sure the charger is going to a GFRI and that the piece is not touching any of the electrodes or you'll throw the breaker. Once that's been confirmed connect the positive lead to the electrodes & the negative to the wire leading to the work piece. If you do it the other way, it will turn the piece into nothing but rust so make sure they're connected properly!
It can take a few hours to really start noticing the results. Can take the piece out at any time and does help to use a wire brush to clean off both the scale rust and the electrodes as rust will build up on them. I put this a-arm in for ~12 hours and while still need to give it a brushing in the corners it worked! Somebody will surely catch it but I didn't get a before pic of the one I ran through the process, other was just as ugly.
Would paint the piece as soon as possible as it can rust back up quickly since all the iron oxide has been removed.
This link for the garage journal was my main inspiration- http://www.garagejournal.com/forum/showthread.php?t=154196
Had already done one set of the original a arms for the 4 door I had using a wire brush for the rust clean off and it was a dusty mess.
This time around thought I'd try another method and so far very pleased with the results.
Sure some of you guys have used electrolysis for rust removal, I was nervous but after reading up quite a bit on it there's not a whole lot to screw up.

Using a plastic tub/bucket large enough for the piece needed work you need to set up electrodes around the container's interior. Some sources recommend using graphite bars as they don't make as much of the foamy rust mess but I had rebar laying around so went with it. Using stainless steel is a big no-non as it will produce a chromium VI which is nasty, nasty stuff.
Drill some small holes to secure the rods to the interior of the container and wire them in. Next take about a 12 gauge wire and connect all the electrodes, I used 5 as line of site is important in the process, or so I've read.
Next you fill the container with water and add 1Tbsp of washing soda (sodium carbonate)- not baking soda, per gallon of water and stir it until dissolved. This is your electrolyte.
No you want to secure your piece. I used a 2x4 because it was handy, really anything would work but with the electrodes being close by wouldn't recommend metal and risk shorting it out. Using a metal clothes hanger I secured the piece and left enough of a lead to connect my charger to.

Any DC power source can be used but doesn't take a lot of voltage or amperage to work. Some newer battery chargers have a built sensor that may kick them off, mine is from the 60's so not an issue. It's 12vdc pushing about 4-6amps. Before you connect the power make sure the charger is going to a GFRI and that the piece is not touching any of the electrodes or you'll throw the breaker. Once that's been confirmed connect the positive lead to the electrodes & the negative to the wire leading to the work piece. If you do it the other way, it will turn the piece into nothing but rust so make sure they're connected properly!
It can take a few hours to really start noticing the results. Can take the piece out at any time and does help to use a wire brush to clean off both the scale rust and the electrodes as rust will build up on them. I put this a-arm in for ~12 hours and while still need to give it a brushing in the corners it worked! Somebody will surely catch it but I didn't get a before pic of the one I ran through the process, other was just as ugly.
Would paint the piece as soon as possible as it can rust back up quickly since all the iron oxide has been removed.


This link for the garage journal was my main inspiration- http://www.garagejournal.com/forum/showthread.php?t=154196
This is different to me, the first time i remember hearing of this one, thanks for posting!!!
Coledavis01
Well-Known Member
Ran across it on a website called Reddit, someone had used it to clean off some tools that had belonged to a family member. Started in on Google and realized people have been doing it for a long time but nobody I've talked to since has heard of the method.
Feel like a mad scientist; hope the neighbors don't see in the garage and think I'm up to no good!
Feel like a mad scientist; hope the neighbors don't see in the garage and think I'm up to no good!
If i looked over, yep, i would probably be thinking sinister lol, Don't dim there lights or make the lights in the shop at night looking like lighting, ya may get company from the local keepers of the peace rofl.. 

Coledavis01
Well-Known Member
Door Panels
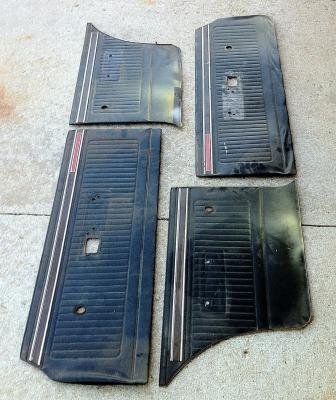
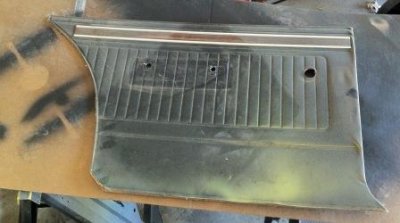
My door panels with the exception of the driver's front were in great shape. They did end up with overspray as a result of the first body guy painting the floor yellow :angryfire: but nothing that couldn't be fixed.
- - - Updated - - -
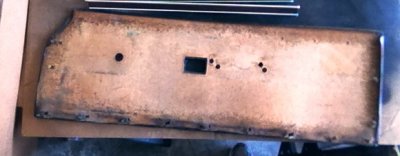
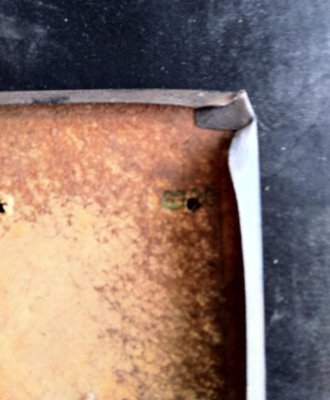
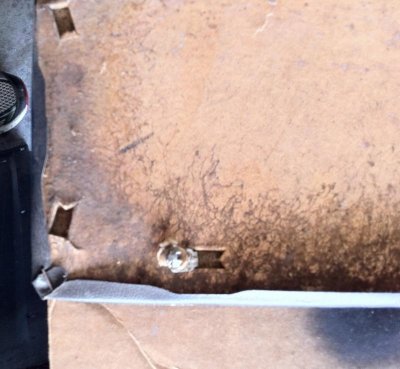
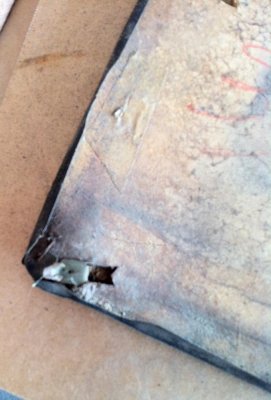
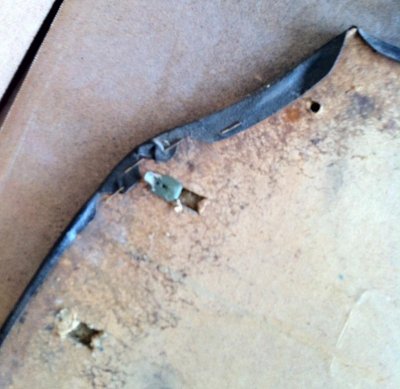
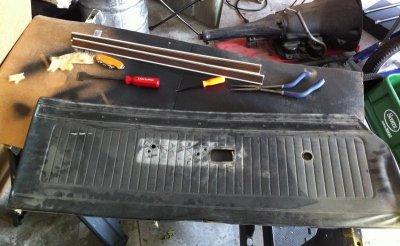
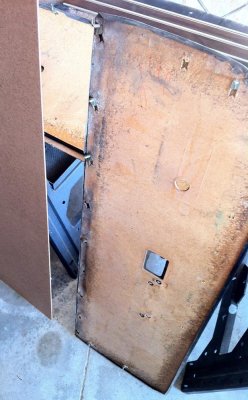
The driver's side vinyl was okay but the board had suffered water damage and was warped and torn up to the point the clips wouldn't stay in and looked like crap.
- - - Updated - - -
Will have to check the receipt but picked up a sheet of particle board, believe it was 3/16" thick but can double check if anyone wants to know.
Used a heat gun, plastic scraper and patience to separate the vinyl from the old board. Notice the old batting was in pretty sorry shape too so would be replacing it as well.
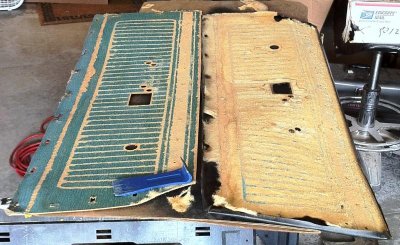
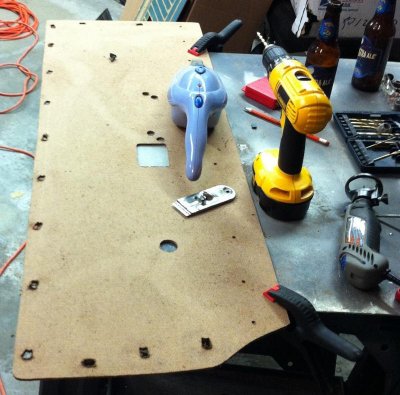
Better shot of how bad of shape it was in and the board that was going to become the replacement.
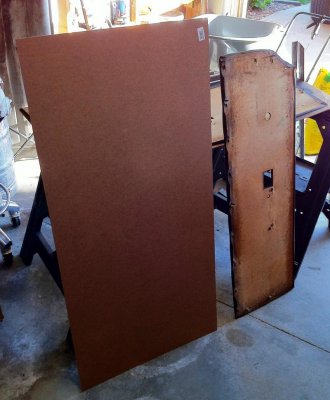
Rough outline, used the old board to get an idea of where everything needed to be, since it was warped took a straight edge for the bottom cut and used the center point of the trim clip cutouts and traced a tab on the old panel that wasn't punched out to get the sizing right.
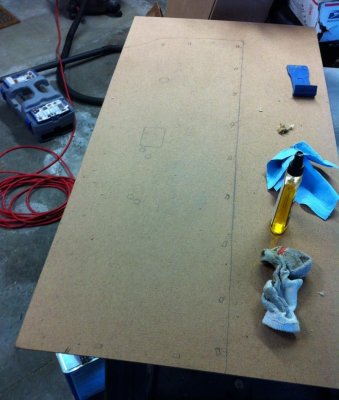
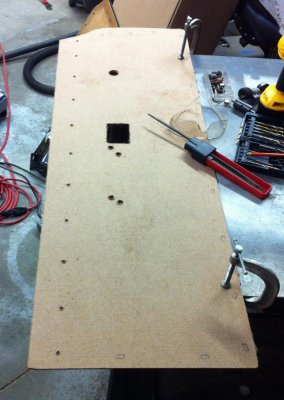
Made the rough cut with a circular saw then used a dremel with a router attachment to clean it up. The trim piece holes were 7/32", 1" on the door handle and 3/8" for the armrest.
Used a file, razor, sandpaper and beer to smooth everything out. Note that all the corners are rounded, if you leave it sharp it'll 1) look goofy, and 2) risk not allowing the vinyl to fit back over or worse yet, tear it.
My door panels with the exception of the driver's front were in great shape. They did end up with overspray as a result of the first body guy painting the floor yellow :angryfire: but nothing that couldn't be fixed.


- - - Updated - - -
The driver's side vinyl was okay but the board had suffered water damage and was warped and torn up to the point the clips wouldn't stay in and looked like crap.


- - - Updated - - -
Will have to check the receipt but picked up a sheet of particle board, believe it was 3/16" thick but can double check if anyone wants to know.
Used a heat gun, plastic scraper and patience to separate the vinyl from the old board. Notice the old batting was in pretty sorry shape too so would be replacing it as well.

Better shot of how bad of shape it was in and the board that was going to become the replacement.


Rough outline, used the old board to get an idea of where everything needed to be, since it was warped took a straight edge for the bottom cut and used the center point of the trim clip cutouts and traced a tab on the old panel that wasn't punched out to get the sizing right.

Made the rough cut with a circular saw then used a dremel with a router attachment to clean it up. The trim piece holes were 7/32", 1" on the door handle and 3/8" for the armrest.
Used a file, razor, sandpaper and beer to smooth everything out. Note that all the corners are rounded, if you leave it sharp it'll 1) look goofy, and 2) risk not allowing the vinyl to fit back over or worse yet, tear it.


LeoD
Well-Known Member
Looking good! I see yours have that woodgrain piece, don't loose those, those things are pricey!!
Coledavis01
Well-Known Member
Door Panels
The woodgrain and red reflective inserts were intact but the clear overlay was peeling and someone along the way had been picking at the reflector. If I was going to the trouble of restoring the rest didn't want them sticking out like a sore thumb.
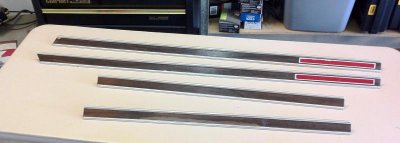
From everything I read the Klean-Strip Aircraft Decal/Adhesive remover was the way to go. I couldn't find it locally so gave the Turtle Wax version a shot and it worked great. Used it liberally along with a small gasket scraper to get the decals off then went back over it with a terry cloth rag to remove all the residue.
After these were cleaned up I ran them all through the buffing wheel to make them look like new.

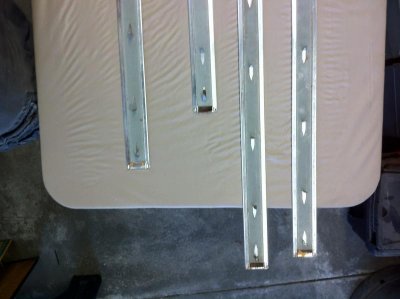
When the pieces were orginally laid, it appears they helped the decals stay in place by pinching in the piece with the mounting tabs after the woodgrain had been applied. I tried to get these off to duplicate the factory way, but was worried I'd bend them beyond repair so when I laid the new pieces I clamped them on the back until they were dry.
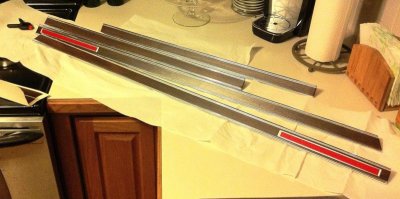
Would like to give a thank you and recommendation to David Patik at Performance Car Graphics. the kit came with everything needed, including a squeegee and thorough instructions to get the job done.
The woodgrain and red reflective inserts were intact but the clear overlay was peeling and someone along the way had been picking at the reflector. If I was going to the trouble of restoring the rest didn't want them sticking out like a sore thumb.

From everything I read the Klean-Strip Aircraft Decal/Adhesive remover was the way to go. I couldn't find it locally so gave the Turtle Wax version a shot and it worked great. Used it liberally along with a small gasket scraper to get the decals off then went back over it with a terry cloth rag to remove all the residue.
After these were cleaned up I ran them all through the buffing wheel to make them look like new.

When the pieces were orginally laid, it appears they helped the decals stay in place by pinching in the piece with the mounting tabs after the woodgrain had been applied. I tried to get these off to duplicate the factory way, but was worried I'd bend them beyond repair so when I laid the new pieces I clamped them on the back until they were dry.

Would like to give a thank you and recommendation to David Patik at Performance Car Graphics. the kit came with everything needed, including a squeegee and thorough instructions to get the job done.

Coledavis01
Well-Known Member
Door Panels
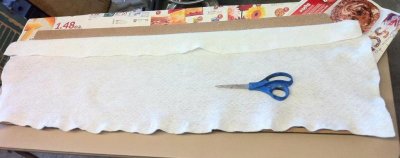
While the original material was a coarse loose orange fiber I opted for a sheet of thin polyester batting typically used for little old ladies making quilts. Sorry for the potato quality pictures, I really need to stop using my camera phone. Looks great on that little screen until I load them up to the laptop!
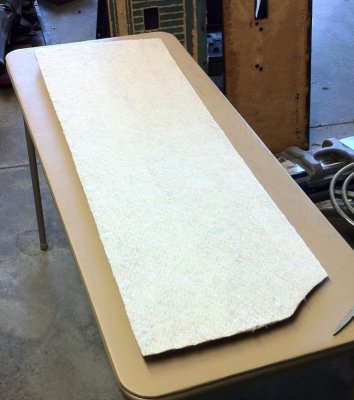
First thing I did was install the door panel clips (thanks fk5bird!), positioning them to match the passenger side. Then using the batting laid it down for an idea of where it needed to go, cut it then used a spray adhesive (believe it was 3M super 77) to stick it together. Do want to keep it stretched so it's even across the entire surface.
After it had dried a bit went back and trimmed up all the excess.
Wish I had taken more pictures of this part but was a bit of a hands on ordeal so will walk through how I did it.
Using DAP Weldwood Contact Cement (not the automotive variety but checking the temp requirements it ought to hold- may regret that later but didn't want/need a gallon of the auto version) I started at the thick horizontal line where the trim pieces sit and applied a line only as thin as the embossed piece all the way across. Double checked that I had everything lined up and pressed the vinyl over the board, using the flat edge of the plastic squeegee that had come with the graphics kit to apply pressure and get it into place.
You may need a heat gun or hair dryer to soften up the vinyl a bit if there are wrinkles it needs stretched. Used a heat gun on mine and as long as you're patient and measure twice, glue once, the process is simple.
Picked the thick line as I wanted to use it as an anchor for applying the rest.
Once that had dried for 30 minutes or so I moved down the panel to the next thin line, let it dry then moved on. The most tedious point was the vertical pieces in the center of the panel. I used a thin foam brush to apply the cement, if you get it over the line it will show up after it's together if you don't wipe it off. Acetone works though don't let it sit on the vinyl.
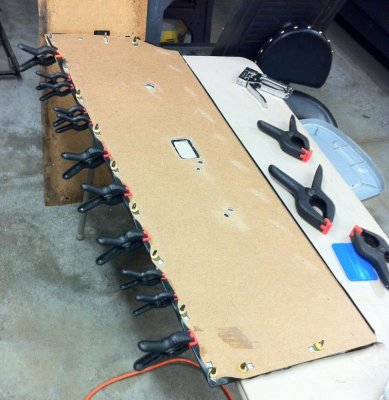
After the front was all in place went around the edges with the cement, double checking everything lined up and the vinyl made it over all the corners.
The corners and front top curved area had been stapled from the factory. I was unable to find anything short enough that wouldn't pop clear through the panel & vinyl so took some 5/16" staples i had, taped them together then cut them as short as possible with tin snips before loading back in the staple gun. Took a few minutes but wanted to make sure the vinyl stayed on and I didn't ruin the whole thing by shooting holes in it.
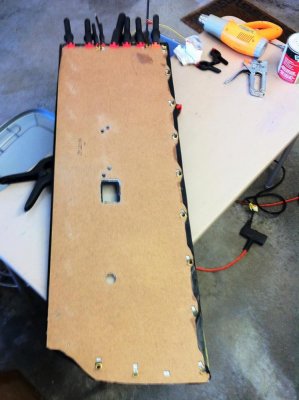
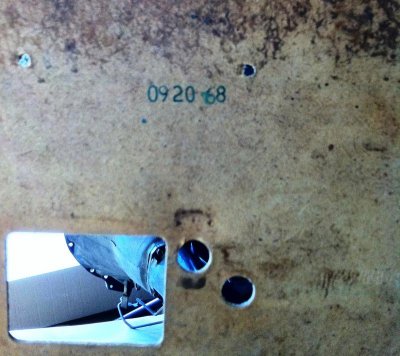
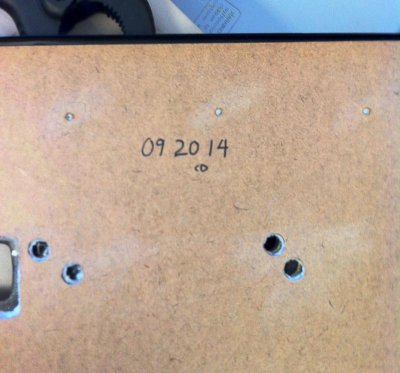
By sheer coincidence I finished up the cementing process 46 years to the day after they had originally been done!
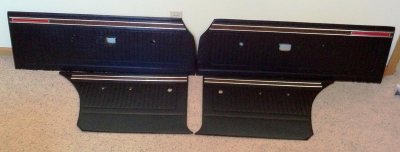
Here's the finished product, used SEM Vinyl Prep (about 3 servings of it to make sure it was as clean as could be), then adhesion promoter and finished off the panels with SEM Landau Black. Took just about 1 full can to do all four panels, I bought 3 extra so if any of you local guys need any let me know!
I think they turned out pretty nice and saved a bundle versus buying the repros!
While the original material was a coarse loose orange fiber I opted for a sheet of thin polyester batting typically used for little old ladies making quilts. Sorry for the potato quality pictures, I really need to stop using my camera phone. Looks great on that little screen until I load them up to the laptop!
First thing I did was install the door panel clips (thanks fk5bird!), positioning them to match the passenger side. Then using the batting laid it down for an idea of where it needed to go, cut it then used a spray adhesive (believe it was 3M super 77) to stick it together. Do want to keep it stretched so it's even across the entire surface.

After it had dried a bit went back and trimmed up all the excess.

Wish I had taken more pictures of this part but was a bit of a hands on ordeal so will walk through how I did it.
Using DAP Weldwood Contact Cement (not the automotive variety but checking the temp requirements it ought to hold- may regret that later but didn't want/need a gallon of the auto version) I started at the thick horizontal line where the trim pieces sit and applied a line only as thin as the embossed piece all the way across. Double checked that I had everything lined up and pressed the vinyl over the board, using the flat edge of the plastic squeegee that had come with the graphics kit to apply pressure and get it into place.
You may need a heat gun or hair dryer to soften up the vinyl a bit if there are wrinkles it needs stretched. Used a heat gun on mine and as long as you're patient and measure twice, glue once, the process is simple.
Picked the thick line as I wanted to use it as an anchor for applying the rest.
Once that had dried for 30 minutes or so I moved down the panel to the next thin line, let it dry then moved on. The most tedious point was the vertical pieces in the center of the panel. I used a thin foam brush to apply the cement, if you get it over the line it will show up after it's together if you don't wipe it off. Acetone works though don't let it sit on the vinyl.

After the front was all in place went around the edges with the cement, double checking everything lined up and the vinyl made it over all the corners.
The corners and front top curved area had been stapled from the factory. I was unable to find anything short enough that wouldn't pop clear through the panel & vinyl so took some 5/16" staples i had, taped them together then cut them as short as possible with tin snips before loading back in the staple gun. Took a few minutes but wanted to make sure the vinyl stayed on and I didn't ruin the whole thing by shooting holes in it.

By sheer coincidence I finished up the cementing process 46 years to the day after they had originally been done!


Here's the finished product, used SEM Vinyl Prep (about 3 servings of it to make sure it was as clean as could be), then adhesion promoter and finished off the panels with SEM Landau Black. Took just about 1 full can to do all four panels, I bought 3 extra so if any of you local guys need any let me know!
I think they turned out pretty nice and saved a bundle versus buying the repros!

CoronetDarter
Well-Known Member
I used the SEM Landau Black to change my interior panels and trim from Saddle Tan. I like the product and could use more but I'm a little ways away.
LeoD
Well-Known Member
So how much you gonna charge me to make me some door panels for my bee? 
1971 plymouth roadrunner
Well-Known Member
Very nice work, I really like how you did the door panels yourself
Similar threads
- Replies
- 47
- Views
- 3K
- Replies
- 100
- Views
- 3K


