• When you click on links to various merchants on this site and make a purchase, this can result in this site earning a commission. Affiliate programs and affiliations include, but are not limited to, the eBay Partner Network.

73 Roadrunner 340 Auto

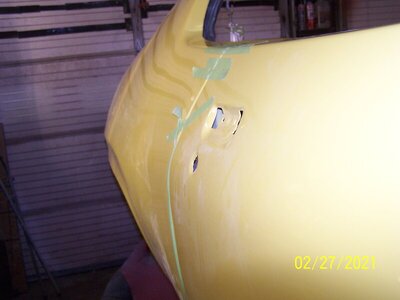
Trunk lid is on, grill support is on (still needs blackout), and the doors are installed and adjusted. The driver door was spot on using just the drilled guide holes. The work on the hinge pins did not affect the alignment. Not bad for being on the car almost 50 years. The passenger door pins I didn't have to do anything with but when hung, this door was off a little. It was a touch low and the bottom stuck out just a bit. I can't say it wasn't like that from the start as I guess I did't pay too much attention to it, other than checking that the pins were tight. A little adjustment and the door fits pretty well. I made one small mistake. I should have painted the black on the inside of the doors before hanging them. I thought about it but I didn't want to put the finished side of the door down on the stands. So now I created a little more work for myself as far as masking.
100_9273.JPG

100_9274.JPG

100_9275.JPG

100_9276.JPG
100_9277.JPG
100_9279.JPG
100_9278.JPG
 
Nice gaps!

Unless you're gonna fill/grind/file/build for countless hours, it's tough to get these cars perfect. Remember, they were assembled with all the thought as a modern base Corolla but with worse stamping tech.

:thumbsup:
 
Spent some family time with the youngest son and his girlfriend so I didn't spend much time with the car. Still got the hood hinges on, two of the fuel/vapor lines run, and the crossover break line installed. Can't complain as the kids helped install the doors earlier. It is very fulfilling watching these kids grow up and make decisions based on some of our parenting.
100_9282.JPG

100_9283.JPG
 
Crossover brake line (right side line) and the shorter brake line (left side line) are both new. The fuel lines (except for any rubber sections) are the original existing lines that were blown out, cleaned, and leak checked. The car was undercoated from the factory and the fuel and brake lines under the car were like new so I kept them. The rear brake lines (attached to the axle) will also be replaced.
 
Crossover brake line (right side line) and the shorter brake line (left side line) are both new. The fuel lines (except for any rubber sections) are the original existing lines that were blown out, cleaned, and leak checked. The car was undercoated from the factory and the fuel and brake lines under the car were like new so I kept them. The rear brake lines (attached to the axle) will also be replaced.
nice. Looks like it's a good repo. I was worried about having to hand-form a new crossover line on my 74.
 
SureGrip,
That crossover is # 965-RKT7303 ordered thru JEGS and drop shipped out of The Right Stuff Detailing in Westerville, OH
Still had to do a little adjustment, mostly the 90 degree drop on the left side just after the last firewall clip. Other than that
it was not too bad. I had taken some pictures of the original line so I could match it. The tag says it is for 73 with power disc so your 74 might be a little different, IDK.
Thanks!

Yeah, I have a 74 with power front disk. I don't remember Right Stuff having those lines the last time I looked. Thanks for the info!
 
What did you coat the bottom of the car with. Dose not look like the mud they put on from the factory.
 
Thanks!

Yeah, I have a 74 with power front disk. I don't remember Right Stuff having those lines the last time I looked. Thanks for the info!
Inline Tube may have them for you.
 
Very Very Nice Mr. Builderguy, We are close to each other in our build progress. I have the firewall and engine compartment done but my doors are not on. Rear of the car is done. I am certain I will struggle with the doors, I did not know about any tricks to get the hinges in the same spot they came off of, I scribed them but of course the marks are gone, rookie mistake on my part. I'll post current pics on my thread shortly.
 
Mopar JimT
Just remember to put the rubber stop blocks on the inside edge of the doors or you can over close them and cause a chip even with the edges taped. :(
When holding the door in place, don't put too much pressure on the outside door edge. Instead, use the inside threshold (where the window tracks are bolted) to support the weight of the door. Much more room to put a lifting device on and you wont risk cracking paint on the door edge. Best of luck on your install!
 
Thanks for the tips Builderguy. I have the new door bumpers but would not have thought to put them on first to keep from chipping the edges. Awesome tip!!!
 
Last edited:
Got the interior color on the doors:

100_9397.JPG
100_9399.JPG


Trying to save the back glass (kinda $$$$$$$) but it had a lot of deep scratches on it. We'll see how it turns out.

100_9403.JPG
100_9406.JPG


Was able to salvage the brake distribution block/proportioning valve

100_9382.JPG
100_9394.JPG
 
Way too busy at work, can't seem to get anything done on the car. Did manage to blast some rims, make a little spray booth, and get some epoxy on them before they rusted. Still sanding on the back glass :(
thumbnail_IMG_3593.jpg
100_9546.JPG
100_9547.JPG
 
Knocking out a little more as time allows.

Soaking the wheel bearings to get rid of all the old grease. The bearings were still good with no slop to them.

100_9549.JPG


Cleaning up the center section:
100_9564.JPG


Started on the axles and found some studs fowled with junk lugnut debris.
100_9567.JPG


Still working on that center section, but it is getting better.
100_9578.JPG


Axles cleaned up and just about ready to go in.

100_9579.JPG


Old axle seal vs new seal

100_9580.JPG


I measured for insertion depth but it didn't matter as the new one bottomed out just like the original and at the right depth.
Photo sucks!!!
100_9583.JPG


Getting closer.

100_9588.JPG


This is as far as I got before other duties took over. I will get a better pic later as I ................

100_9589.JPG


Had to wake up the trailer from it's winter nap. I am a little too heavy to get on that roof so I let the better half do it.

100_9592.JPG
 
Auto Transport Service
Back
Top