• When you click on links to various merchants on this site and make a purchase, this can result in this site earning a commission. Affiliate programs and affiliations include, but are not limited to, the eBay Partner Network.

74 Satellite Station Wagon...

74Satellite

Well-Known Member
Local time
5:09 PM
Joined
Nov 18, 2008
Messages
628
Reaction score
5
Location
Syracuse, NY
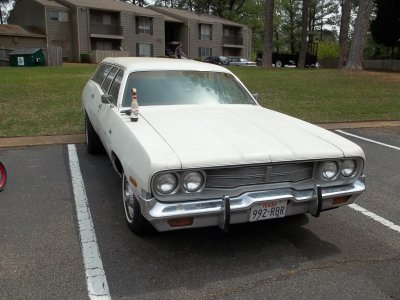
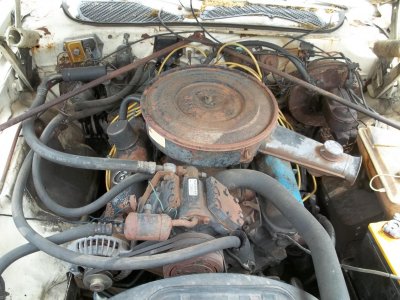
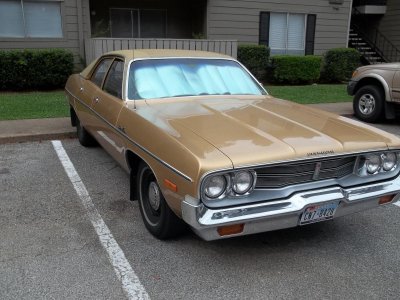
Well, I guess I get to start one of these threads since I officially started the resto on the wagon today. Started the slow dissassembly, I am taking my time making sure to mark everything and bag and tag everything as it comes apart. Im even marking the inside of the trim panels with their location as they come off. Also spending alot of time on ebay purchasing parts that need purchasing as they come off. I am probably going to go a little unconventional than most people as I am going to focus solely on the body first. Interior second, and drivetrain last. It runs and drives well right now. So I can drive it around to the shops where I farm stuff out while I build my 451. After all the body and interior is completed then I will yank the drivetrain and get started on that.
 
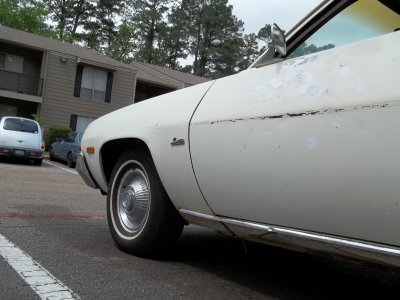
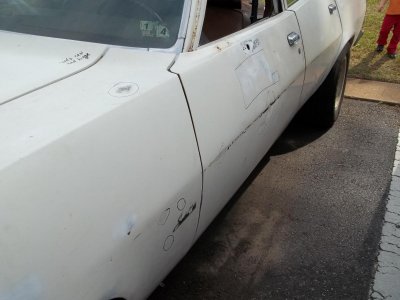
Here are some pictures of her after I unloaded her from the transport truck.
 

Attachments

  • 100_0107.jpg
    100_0107.jpg
    168.8 KB · Views: 810
  • 100_0110.jpg
    100_0110.jpg
    130 KB · Views: 715
  • 100_0112.jpg
    100_0112.jpg
    111.9 KB · Views: 679
  • 100_0121.jpg
    100_0121.jpg
    169 KB · Views: 687
  • 100_0116.jpg
    100_0116.jpg
    92.4 KB · Views: 682
  • 100_0113.jpg
    100_0113.jpg
    119.8 KB · Views: 660
If you notice in the first picture the bumper is shoved in a good 2 inches on the driver side. So I am going to have to find out what caused that. It doesnt appear to have normal "Y" bumper brackets but some kind of cylinder.

I will post pictures of todays progress tomorrow.
 
Bumper shock is collapsed.
NOT sure if Mopar used hydraulic shocks like some other OEM's but I wouldn't mess with trying to fix it either way.
Don't even think about heating it up or anything.
Just source a replacement and swap it out.
Looks like a good solid project! :D
 
Bumper shock is collapsed.
NOT sure if Mopar used hydraulic shocks like some other OEM's but I wouldn't mess with trying to fix it either way.
Don't even think about heating it up or anything.
Just source a replacement and swap it out.
Looks like a good solid project! :D

Thanks for the heads up on the bumper shock. I will start looking for one now.
 
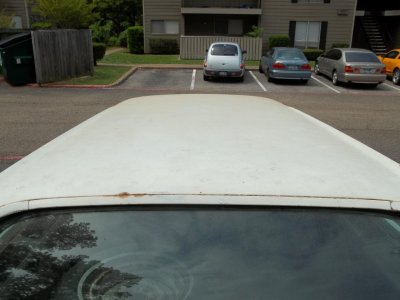
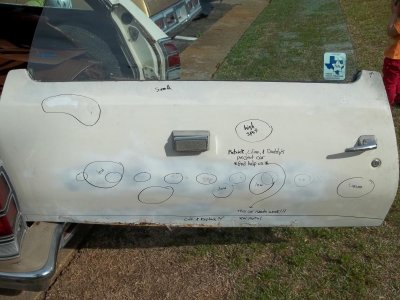
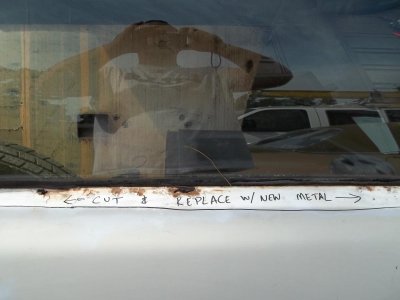
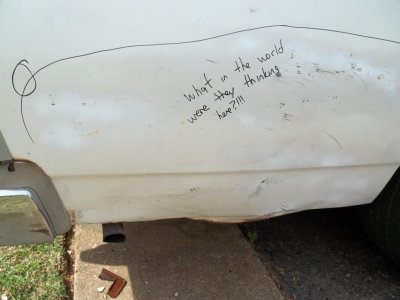
went around the hole car today marking all the dents, lows, highs, cracks, and poking and proding with a screwdriver looking for rust.

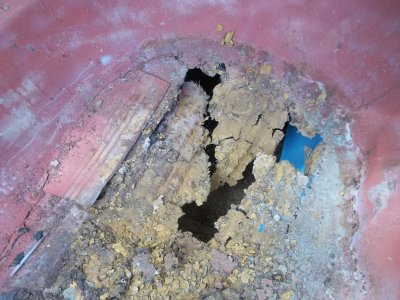
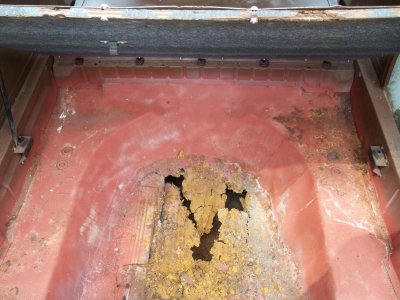
Boy did I find some rust.
 

Attachments

  • 42011 005.jpg
    42011 005.jpg
    141.6 KB · Views: 833
  • 42011 008.jpg
    42011 008.jpg
    79.4 KB · Views: 737
  • 42011 007.jpg
    42011 007.jpg
    104.3 KB · Views: 763
Lifted up the spare tire cover and WOAH!

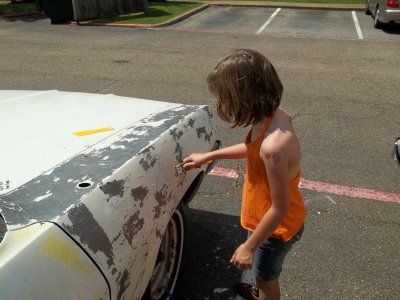
Also a pic of my daughter helping scrape the paint off the fender. We are going to do one panel at a time.

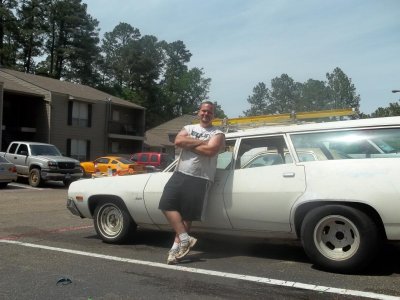
Picture of my ugly mug and one of the wife filling water balloons with the babies.
 

Attachments

  • 42011 010.jpg
    42011 010.jpg
    190.4 KB · Views: 643
  • 42011 009.jpg
    42011 009.jpg
    145.2 KB · Views: 617
  • 42011 004.jpg
    42011 004.jpg
    80 KB · Views: 595
  • 42011 011.jpg
    42011 011.jpg
    161.9 KB · Views: 590
  • 42011 021.jpg
    42011 021.jpg
    137.5 KB · Views: 614
  • 42011 012.jpg
    42011 012.jpg
    200.1 KB · Views: 590
be careful on getting the sheetmetal done on your pass. side rear quarter.. the spare tire stamping is down there and you want to make sure you maintain that when doing sheetmetal replacement.. not sure if you knew or not, but just wanted to highlight in case you did not.

the rusty area is not a spare tire compartment, but a storage compartment.. as stated above, your spare tire is mounted on the passenger side inner quarter panel to the right of your rear door.
 
She's a little rough but easily repairable.
You'll get her all fixed up. ;)

One thing...if your using stripper it would be a good idea to tape off the body seams to prevent stripper from getting down between panels and into hidden areas where it might remain.
After the car is painted it can then leach out and do nasty things to your fresh paint!

I tape off the seams until I'm finished stripping and have everything cleaned up, then I sand the edges the stripper didn't get.
 
be careful on getting the sheetmetal done on your pass. side rear quarter.. the spare tire stamping is down there and you want to make sure you maintain that when doing sheetmetal replacement.. not sure if you knew or not, but just wanted to highlight in case you did not.

the rusty area is not a spare tire compartment, but a storage compartment.. as stated above, your spare tire is mounted on the passenger side inner quarter panel to the right of your rear door.

Car had two spare tires, one in that wheelwell area on passenger side which is all banged up and is going to take some ingenuity to replace. There was a second spare tire in that storage area. So far the rot is the spare tire well, the storage area and both rear floor pans, bottom of tailgate, and both rails along the rear glass. Frame rails are all solid (Thankfully)

Gives me an excuse to buy a new mig welder!
 
She's a little rough but easily repairable.
You'll get her all fixed up. ;)

One thing...if your using stripper it would be a good idea to tape off the body seams to prevent stripper from getting down between panels and into hidden areas where it might remain.
After the car is painted it can then leach out and do nasty things to your fresh paint!

I tape off the seams until I'm finished stripping and have everything cleaned up, then I sand the edges the stripper didn't get.

Thanks for the tip I will be sure to do that for the rest of the car. I am not a body man by any means, but I am going to take it slow and do one panel at a time after I get it all smoothed out and straightened and in primer then I will move to the next panel. Once it is all done then I will bring to a body shop to have them do final prep and spray the paint.

I ordered a bunch of SEM paint products today for the interior vinyl..cant wait to see how that turns out!
 
it's a good idea that you're marking things that you need to do,maybe you can also write everything that you need/want to do on a legal pad. those spare tire wells were like a traveling bird bath when the cars got older.
 
Interior Color change

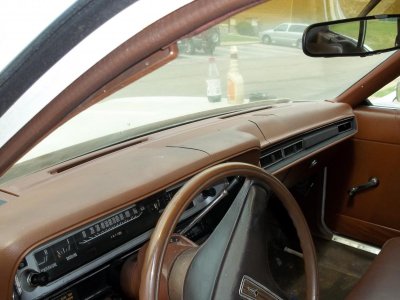
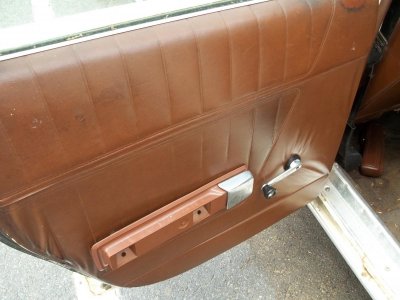
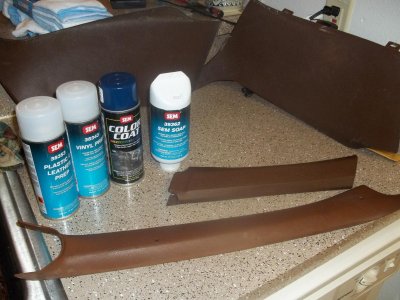
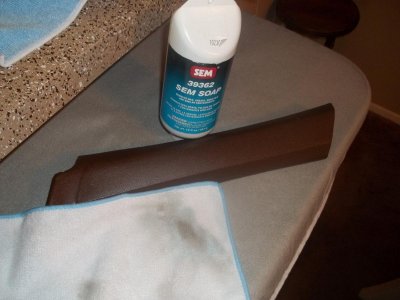
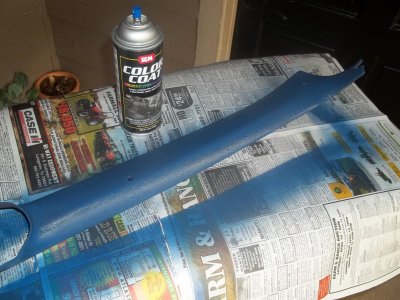
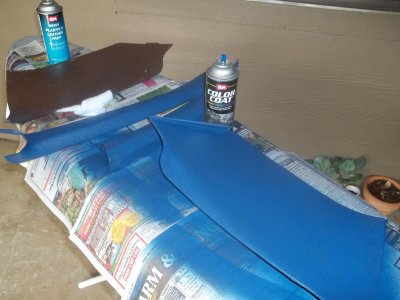
Well, since the interior of this car was brown...and I detest brown I decided I wanted to change the color a bit. I did a bunch of research on the proper method for changing the color of the hard plastic and vinyl pieces of the car and came up with the SEM paint system. I ordered the SEM soap, Vinyl Prep spray, Plastic Prep Spray and 1 can of SEM Color Coat of Pacific Blue. I figure a White car with a blue interior would look pretty sweet. I performed the following steps

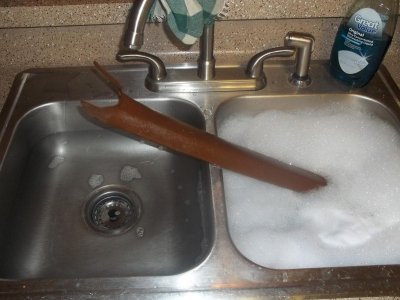
1) Cleaned all the parts with a mild dish soap and rinsed with clean water
2) Dried parts with clean rag and applied the SEM soap which pulled up more dirt and rinsed with clean water and another clean rag.
3) Sprayed on the plastic SEM prep which again yielded a little more dirt and again wiped clean with another clean rag.
4) I then sprayed on the Pacific Blue Color coat in a couple thin layers.
5) Drank a beer very satisfied with the results.

After this posting I am going to repeat steps 1-5 with the kick panels and rear side panels.
 

Attachments

  • color change 007.jpg
    color change 007.jpg
    128.7 KB · Views: 521
  • color change 006.jpg
    color change 006.jpg
    152.6 KB · Views: 534
  • color change 008.jpg
    color change 008.jpg
    113.8 KB · Views: 511
  • color change 009.jpg
    color change 009.jpg
    168.4 KB · Views: 536
  • color change 010.jpg
    color change 010.jpg
    122.9 KB · Views: 529
heck of ajob on the interior panels.looks like a factory job.
 
heck of ajob on the interior panels.looks like a factory job.

Thanks! I was really impressed with how the whole system worked. Its about $55 for those 4 cans of materials but well worth the cost. Panels look like new again. I was also impressed with how far 1 can of color coat went. I was able to paint both rear sail panels, the two short intermediate panels, 1 a-pillar panel, both sunvisors, both kick panels, 2 armrests, and both passenger side door windlace. I just ordered 2 more cans to finish up all the interior panels. The seats I am going to have recovered and the front bench I am going to ditch in favor of a couple buckets I have laying around.

Wife wasnt too thrilled I used her ironing board but it was the perfect height. :bootyshake:
 
Wife wasnt too thrilled I used her ironing board but it was the perfect height. :bootyshake:

MAN....your fearless!!!

Never used the SEM interior color products but we have used some of their other products at work. (Collision repair shop)
I'd be surprised if it didn't work well for you because the products we used seemed to be of a high quality and never gave any problems.
 
MAN....your fearless!!!

Never used the SEM interior color products but we have used some of their other products at work. (Collision repair shop)
I'd be surprised if it didn't work well for you because the products we used seemed to be of a high quality and never gave any problems.

Hahaha, one thing I have learned about my wife in the last 6 years of marriage is ALOT of things I do piss her off...but she only stays mad for a week or two and then she gets over it. (of course it will come up in every argument from now until eternity...but I just tone those parts out).

Im loving the SEM products...these panels look outstanding. After I am getting them painting, I am wrapping them in bubblewrap and putting in rubbermaid bins for reinstallation after paintwork is complete.

I am trying to restore/replace each item as I take it off the car, labeling, and storing for later. Its making the dissasembly phase take forever, but I find solace in knowing that doing it this way will make reassembly faster as all the parts will be ready to go.
 
Auto Transport Service
Back
Top