You are using an out of date browser. It may not display this or other websites correctly.
You should upgrade or use an alternative browser.
You should upgrade or use an alternative browser.
Cowl Rust Repair
- Thread starter Evan Frucht
- Start date
brian.linn
Well-Known Member
Robby’s Hobbies in Wichita will blast and primer the car on the rotisserie for $400. Waiting our turn before I put it together.
Evan Frucht
Well-Known Member
I was having a little trouble getting the corner of my new lower cowl piece to fit perfectly. I wasn't satisfied with the fit and might have trimmed it too much to begin with. Decided to make another little chunk to replace it, I used 16 gauge for this since I wanted it to be strong.


the jig ended up working


the jig ended up working
Evan Frucht
Well-Known Member
ground it down sufficiently in the areas that will be hidden....


and then hit it with some catalyzed acrylic urethane. random color I had left over. just brushed on

and then hit it with some catalyzed acrylic urethane. random color I had left over. just brushed on
Last edited:
Evan Frucht
Well-Known Member
finished grinding the outer surface of the upper cowl. painted the inside so it would be protected.


test fitting it in place before I continue. installed the wiper pivot to make sure I was all good


test fitting it in place before I continue. installed the wiper pivot to make sure I was all good
Evan Frucht
Well-Known Member
Finally got some time to finish uploading the photos I took during the process and update this thread.... so here it went...
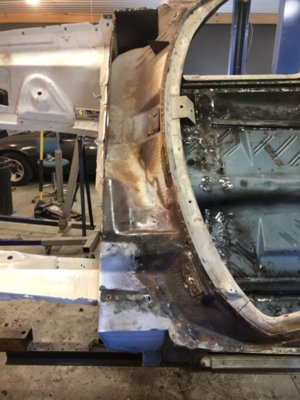
Finishing up the welding on the drivers side. I didn't fully weld the bottom of it at it's lowest point where it is also hidden, leaving a slot so any water that collected from the wiper hole would be able to drain. I also cut a 7/8 hole that would fit a flush mount hole plug I had, which would serve as an inspection hole. Probably way overkill but at least this way if any crud gets stuck in there I will be able to blow it out, clean it out, dry it etc.
The fit of my new top panel was not exact because my plans changed slightly after shaping it. At first I wanted to make it look perfectly original in that corner under the hood, behind the hinge, that no one looks at. In other words, I had planned to mimic the shape of the upper cowl edge where it was spot welded to the lower cowl on drivers side. But then I decided that was more trouble than it was worth and would actually leave a narrow gap where moisture could get trapped like before.
Therefor I had to tediously shape and fit some slivers of 16g steel here and there so I wouldn't be wasting material and blowing holes through it the hole time!
Turned out ok and will look very close to original.
Evan Frucht
Well-Known Member
More work to finish welding that side up...
Made new panel by flattening out what was left of the old one to make an outline or guide. Once new the metal was cut out, I bent it by securing it in between two scraps of angle iron in the vice. Then hammer down the top of it flat. That's how I ended up with that sharp 90 degree bend in it.


Made new panel by flattening out what was left of the old one to make an outline or guide. Once new the metal was cut out, I bent it by securing it in between two scraps of angle iron in the vice. Then hammer down the top of it flat. That's how I ended up with that sharp 90 degree bend in it.
Evan Frucht
Well-Known Member
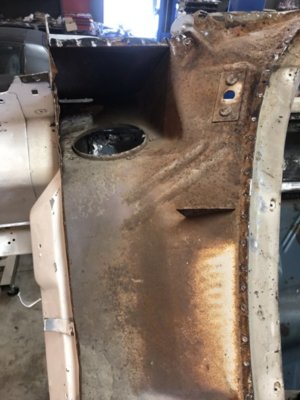
Back to the passenger side. Let the piece soak in evaporust before I cut out damage, then painted the inside with high temp BBQ paint. Kind of an experiment there, I wanted to protect it but figured the welding heat on such a small panel would burn up any other paint. BTW, if anyone has any questions about my process please ask


Evan Frucht
Well-Known Member
Evan Frucht
Well-Known Member
after welding was finished I started grinding down


Evan Frucht
Well-Known Member
most welding and grinding done = time to remove old junk windshield


and thankfully no rust on the inner lip. hard to tell from pics but just dirty old factory sealer and paint


and thankfully no rust on the inner lip. hard to tell from pics but just dirty old factory sealer and paint
Evan Frucht
Well-Known Member
more uploading pics tmrw. going to bed for now!
Good job it looks very good. Is there supposed to be a nut plate on the drivers side for the fender to bolt to?
Nice work on that, makes me thankful mine doesn't have that issue. After you have done your grinding on the outside, blast those inner areas with some rust encapsulator with the straw so you can protect those inner areas.
Evan Frucht
Well-Known Member
Thanks, and Yes, but I waited until I did a test fit of the fender to cut that hole out for the nut.Good job it looks very good. Is there supposed to be a nut plate on the drivers side for the fender to bolt to?
Evan Frucht
Well-Known Member
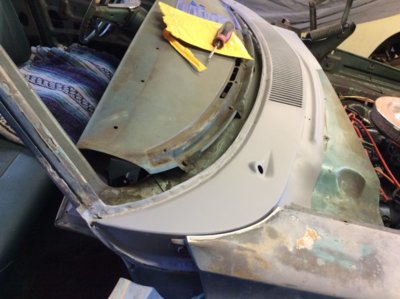
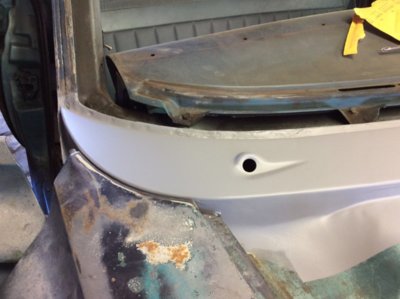
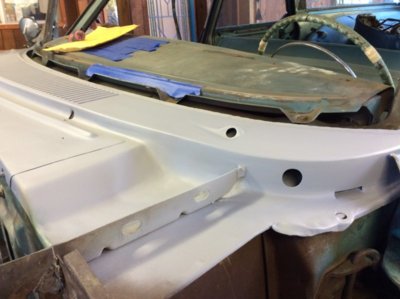
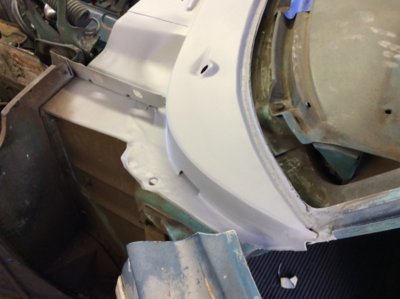
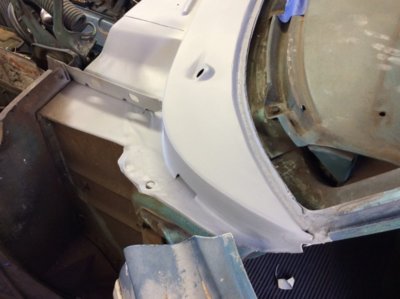
more pictures of it, getting ready for a little filler, primer, then paint.


gonna have to change out those clips!
gonna have to change out those clips!
Evan Frucht
Well-Known Member
Evan Frucht
Well-Known Member
some single stage urethane that was similar in color to the engine bay, rest of body will be painted later.


Similar threads
- Replies
- 4
- Views
- 580
- Replies
- 0
- Views
- 412
- Replies
- 1
- Views
- 517
- Locked
- Replies
- 6
- Views
- 3K

