Way to tackle a big job, looking good. Just stay focused on one task at a time (not how much is to be done) and before you no it you'll be looking at a solid car again. Good luck
You are using an out of date browser. It may not display this or other websites correctly.
You should upgrade or use an alternative browser.
You should upgrade or use an alternative browser.
Don's 1969 Charger Restoration
- Thread starter mopar4don
- Start date
mopar4don
Well-Known Member
I was all set to replace my rear frame rails when I remembered that they are spot welded to the inner rockers.
I also have to replace the torsion bar crossmember which also is spot welded to the inner rocker.
I'm now thinking I should check the inner rocker and if it's bad I should replace it FIRST.
This is really driving me crazy!
Because of lack of experience, I'm not sure what the best way to proceed would be.
That's why I need some input from those who have done this a time or two...
What do you guys think?
I also have to replace the torsion bar crossmember which also is spot welded to the inner rocker.
I'm now thinking I should check the inner rocker and if it's bad I should replace it FIRST.
This is really driving me crazy!

Because of lack of experience, I'm not sure what the best way to proceed would be.
That's why I need some input from those who have done this a time or two...
What do you guys think?
hunt2elk
Well-Known Member
I got lucky with my inner rockers being ok. It is going to turn into a much bigger job if you have to replace yours. I would cut some decent sized holes in your outer rockers to check the condition of the inners. This is what I did anyway. I think the inners were one of the first pieces in the jig when these cars were built and this is where you have to start before going any farther.
Donny
Well-Known Member
- Local time
- 12:24 AM
- Joined
- Aug 28, 2009
- Messages
- 3,206
- Reaction score
- 543
- Location
- North East San Antonio TX
Rockers I consider graduate level stuff, even above quarter panels! Reason being is this is the Rosetta Stone of the car, all lines and squareness hangs off these being installed correctly.
mopar4don
Well-Known Member
That's what I kinda figured.
So lets just say I will need to replace the inner rockers.
To do that, I will need to remove the floor, but before I do that, I should brace the front and rear jams. Is this right?
So lets just say I will need to replace the inner rockers.
To do that, I will need to remove the floor, but before I do that, I should brace the front and rear jams. Is this right?
CharGer
Well-Known Member
I would brace as much as possible, your going to have to be creative in where to brace to since you will be removing so much, but you can brace to the jig you made to keep everything stable. I didn't have to replace my inners so I can't give much more advice than this. Ger
detmatt1
Well-Known Member
- Local time
- 12:24 AM
- Joined
- Dec 8, 2008
- Messages
- 4,705
- Reaction score
- 815
- Location
- Detroit Metro Area
Really nice work to this point, I'm pretty sure there's nothing you won't be able handle here. I didn't have to replace the rockers on the "DOG", one of only a few things that were in good shape. I would say you locate and brace everything that's attached to them, one at a time, take measurements and/or make gauge blocks from your jig and from part to part. Triangulate when bracing its very important that things aren't allowed to spring out of place when drilling and cutting apart. Remove and replace slowly and methodically and don't hesitate to add bracing as you find you might need it. Think in 3D and think ahead at all times.
SGTPaul
Well-Known Member
Looks good so far Don. Ah yes. The fun of discovery. If your rockers are bad take a look at my post when I replaced both inner rockers. You will need to stabilize the A & B post and the rear frame before you remove them. I agree with Matt. Do one side at a time. Recheck measurements a lot (vertical, width, and length) – especially before welding. Since you are replacing cross member and frame rails you can do it in stages. My choice would be to temporary brace where the cross member is, cut it out, screw the new one and temporary brace it and then do the same with one frame rail at a time. This will locate these pieces in the correct location before you remove the rockers. If you need to replace the outer rocker as well it’s a lot less weld cutting if you remove them together. Use the diagram that Donny has in his GTX post for all the frame measurements to help out. I tackled this as a beginner and so can you, just take your time. Give me a call if you have questions.
Mr.SpeedFreak
Well-Known Member
- Local time
- 10:24 PM
- Joined
- Jan 29, 2013
- Messages
- 1,645
- Reaction score
- 1,056
- Location
- Southern Oregon
Wow great job so far Don! Quite the project but you're off to an awesome start and definitely doing things four with all the bracing and hopefully taking a ton of measurements. I barely had to do any metalwork on mine compared to you but it's awesome seeing how you guys do all this stuff. Keep at it and you'll get there, looking forward to seeing another Charger put back on the road
 ccasion14:
mopar4don
Well-Known Member
I have some rust damage to my 69 Charger in the a-pillars and have some questions
first the damage
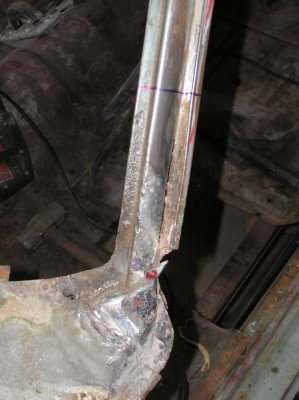
This lower cowl rust area will get fixed using the front clip from a 69 4 door Coronet.
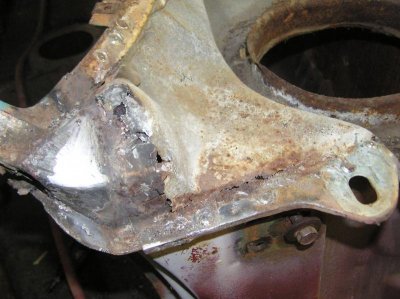
top corner
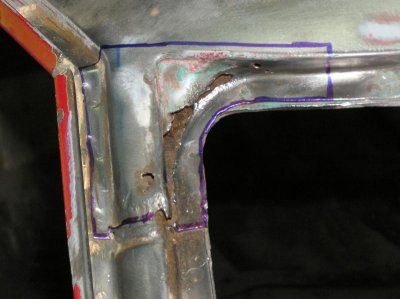
I have a roof with the a-pillars from the 69 4 door Coronet that I would like to use to fix this if possible.
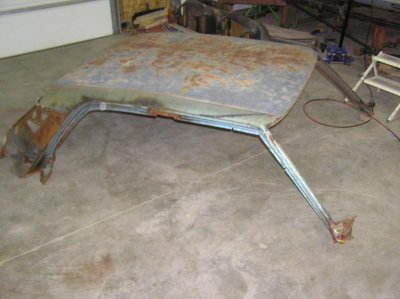
I know that the a-pillars from the 4 door car are longer. but what I want to do is section out the top corners (pic #3 outlined in blue marker) and replace them with the corners from the coronet.
What I found was the profile is different between the cars.
4 door profile
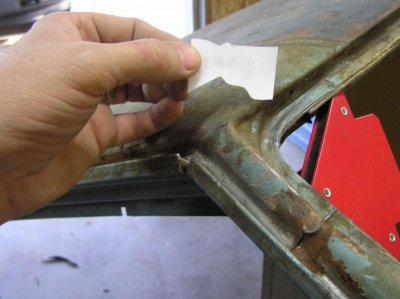
4 door profile laying in the corner. (It fits)
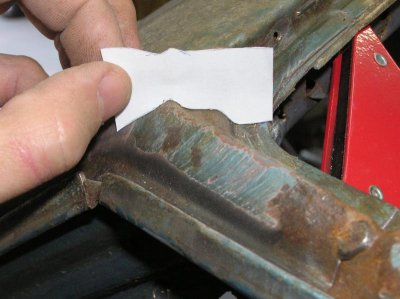
4 door profile in the Charger
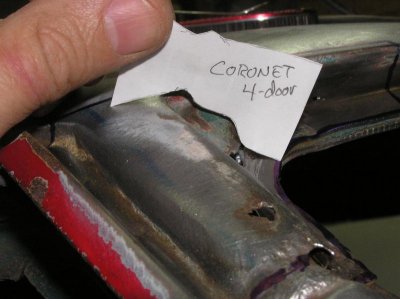
It's not even close!
Will the windshield seal make up for this difference?
I thought this would be the easy way to fix the corners but now I'm thinking I should section out the bad, and hand fab this area? Any thoughts?
If I cut this corner out about a 1/4 of an inch back from the edge of the roof. (about were the line is)
Will this be far enough? I am thinking if I cut it any farther back I may get warp-age. The closer the welded seam is to the front edge, it seems the better I'll be. Am I thinking right?


first the damage

This lower cowl rust area will get fixed using the front clip from a 69 4 door Coronet.

top corner

I have a roof with the a-pillars from the 69 4 door Coronet that I would like to use to fix this if possible.

I know that the a-pillars from the 4 door car are longer. but what I want to do is section out the top corners (pic #3 outlined in blue marker) and replace them with the corners from the coronet.
What I found was the profile is different between the cars.
4 door profile

4 door profile laying in the corner. (It fits)

4 door profile in the Charger

It's not even close!
Will the windshield seal make up for this difference?
I thought this would be the easy way to fix the corners but now I'm thinking I should section out the bad, and hand fab this area? Any thoughts?
If I cut this corner out about a 1/4 of an inch back from the edge of the roof. (about were the line is)
Will this be far enough? I am thinking if I cut it any farther back I may get warp-age. The closer the welded seam is to the front edge, it seems the better I'll be. Am I thinking right?


Propwash
Well-Known Member
- Local time
- 12:24 AM
- Joined
- Oct 29, 2009
- Messages
- 9,710
- Reaction score
- 4,324
- Location
- Island of Misfit Toys
Yes you're thinking right.....Geometry (angles, edges and corners) do a great job of curbing heat across a surface. (Compared to a flat surface at least) I would keep your cut lines close to the edges, but far enough away where you'll be able to work the weld/repair back down to a smooth transition without interfering with the angles/edges.
As far as the 4-door donor, again you are right, they are taller. But..........they have a different pitch as well (steeper), as you have found out with the difference in the window opening area.
That rot you have in the top corner of the A-Pillar is pretty common (my bird had it as well). Finding a 2 door (non-vert) donor section is definitely a possibility, but removal of the donor area would be a bit surgical without chewing/bending it up too bad. Do it yourself if you can, if you can find a donor section. Looking at what you got there, I would and I did hand fabricate repair metal into that area, but that's just me. Doesn't have to be pretty being the seal and window will be over it, just makes sure you get the channel right. Looks like you have making templates down, so you shouldn't have no issues there.
As far as further down your pillar (bottom of A-pillar-end of drip rail)....Donor would be great, being that is a clearly visible area and is clearly pretty rotten. Also, that area holds structual support for the core of the car. Can an area of the 4-door donor be successfully grafted in that area? Either way, that needs to go....just like the trashed inner cowl.
mopar4don
Well-Known Member
View attachment 117817
Thanks Prop,
Sure would like to find some donor a-pillars. that would probably be the easiest way to fix it. Just replace the entire a-pillar.
So if anyone has some a-pillars with the upper corner of the windshield channel let me know.
I'm not sure I would want to cut the a-pillar at the blue line then weld in a donor.
Not only do you have to smooth out the welded seam (bondo) but it seems like it might be a bit structurally dependent on getting really good welds!
- Local time
- 10:24 PM
- Joined
- Jan 16, 2011
- Messages
- 74,377
- Reaction score
- 114,454
- Location
- NorCal Sierras
I guess I'm really lucky to have so many nearly rust free California cars in my lifetime... Man you guys back east & in the north have way too much Rust to deal with, daunting rustoration & tasks for sure, I commend you for going thru so much work, to bring back a fine MoPar....
Propwash
Well-Known Member
- Local time
- 12:24 AM
- Joined
- Oct 29, 2009
- Messages
- 9,710
- Reaction score
- 4,324
- Location
- Island of Misfit Toys
Yeah around here, rust free means 2010 or newer........
LOL...No Doubt.
mopar4don
Well-Known Member
front clip
Well it's about time I update this thread....
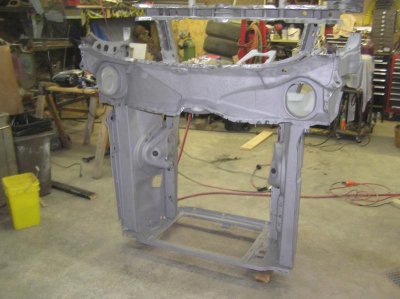
I've decided to replace the entire front clip with the donor clip from a 69 4 door Coronet.
I had too many issues with the Charger front clip, so I decided I would be better off to use this really nice Coronet clip!
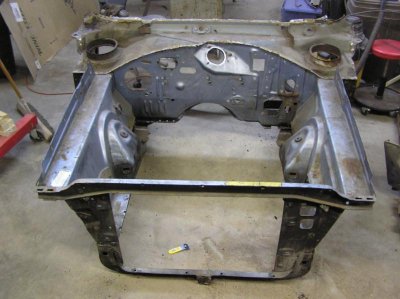
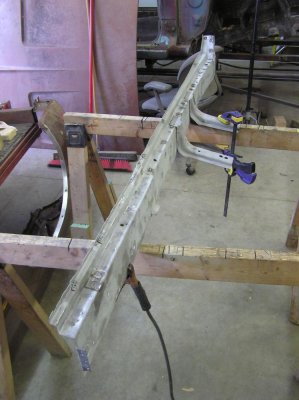
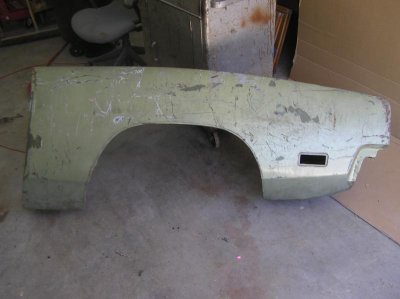
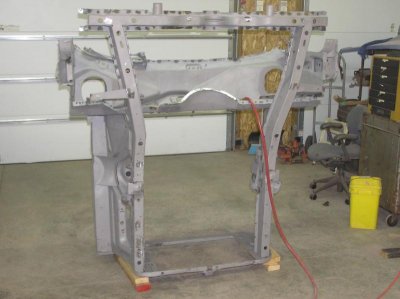
I went ahead and got the front clip, inner and outer rockers, and passenger side front fender blasted.
inner rocker before
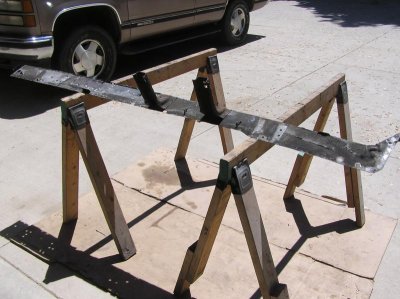
inner rocker after
pass fender before, sorry no after picture
front clip after blasting
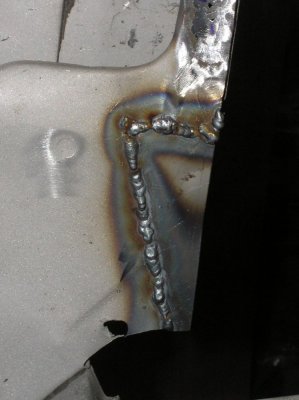
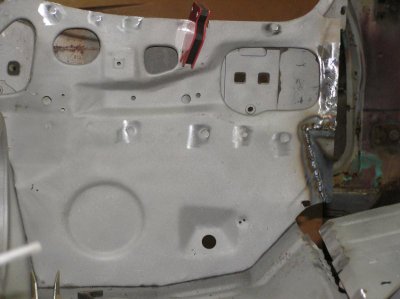
had a little bit of patching do on the drivers side, cowl hinge panel
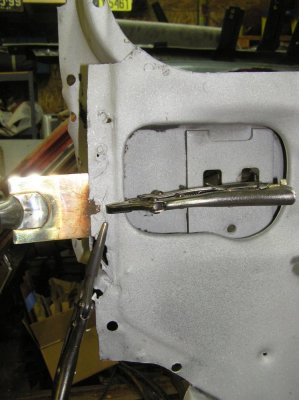
and the pass side hinge panel
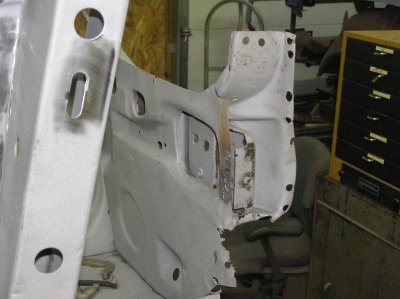
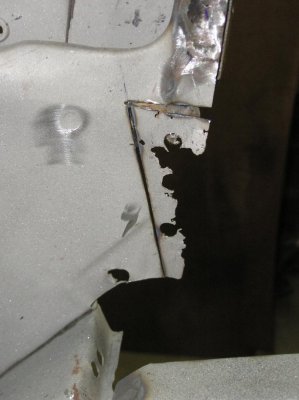
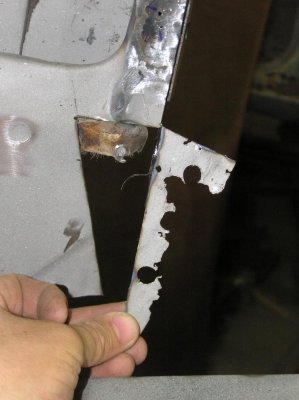
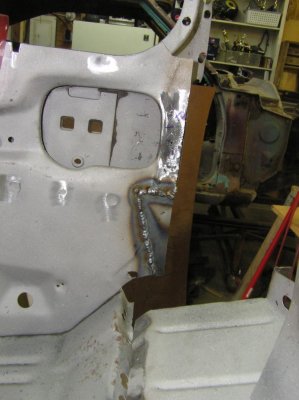
not to bad for my 1st patch


Well it's about time I update this thread....
I've decided to replace the entire front clip with the donor clip from a 69 4 door Coronet.
I had too many issues with the Charger front clip, so I decided I would be better off to use this really nice Coronet clip!

I went ahead and got the front clip, inner and outer rockers, and passenger side front fender blasted.
inner rocker before

inner rocker after

pass fender before, sorry no after picture

front clip after blasting


had a little bit of patching do on the drivers side, cowl hinge panel

and the pass side hinge panel


not to bad for my 1st patch


Mr.SpeedFreak
Well-Known Member
- Local time
- 10:24 PM
- Joined
- Jan 29, 2013
- Messages
- 1,645
- Reaction score
- 1,056
- Location
- Southern Oregon
Wow that is quite a step, that front clip looks great though :icon_thumleft: so your inner rockers did turn out to be wasted? And any luck with the A-pillars?
I was thinking that too, just cut out and weld in your Charger numbers or switch rad supports?
Holy smokes Don - that is some serious metal replacement. What are you going to do about the number on the top of the radiator support?
I was thinking that too, just cut out and weld in your Charger numbers or switch rad supports?
Let me know if you need the A-pillar post, I'm not guaranteeing anything but I have a buddy that has a 68-69 RR shell sitting in a field that I could check out for you. If not I'll be going to the Mopar nats next month and could keep my eye open. Great job on a daunting task, "WOW".
Similar threads
- Replies
- 7
- Views
- 1K
- Replies
- 36
- Views
- 4K
- Replies
- 3
- Views
- 954
- Replies
- 31
- Views
- 2K


