roadrunnerman
Well-Known Member
hey will, that dash does look good.what did you use to clean all the years off of it?Also what kind of paint did you use. Hope you and yours have a merry christmas.
hey will, that dash does look good.what did you use to clean all the years off of it?Also what kind of paint did you use. Hope you and yours have a merry christmas.
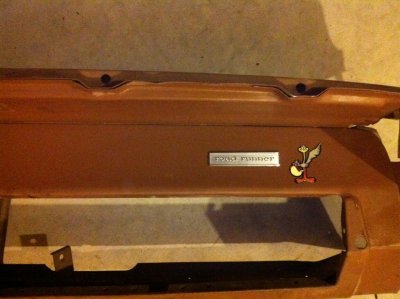
Hey Propwash, that dash turned out awesome! From the angle, I can't see if you have the road runner emblem above the glove box. Here's a picture of a 69 runner dash frame I have that has the emblem I'm talking about. Does yours have that?
Check this out prop, its a " REBUILT 3 SPEED WIPER SWITCH 68-69-70 ROADRUNNER/GTX/CHARGER/CORNET/SUPERBEE"
I forgot to add, According to this guy he takes them apart, cleans and replaces parts, I was thinking maybe if you contacted him, maybe he would point you in the right direction for getting parts and rebuilding it.. I really don't know that much about EBAY, but maybe worth a shot.
Glad the picture could be of some help. To give you some precise dimensions, from the glove box opening to the bottom of the decal, it's 1/2" exact. From the edge of the emblem tangent to the helmet it's 7/16" .
Good deal on your wiper motor Prop, I almost dug out a test i have hear, someone posted a long time ago to leave you to make sure it worked, sounds like you wont need it... Nice pics.. Good luck, enjoy!
Nice work Prop, you're a real pro!
Nice stuff Will! Can I send you my wiper motor since you got it all figured out? :grin:
Nice work with the wiper motor, I will take some red high temp seal on mine too!
Looking good, Prop. Did you think about cad plating the the motor housing rather than the carb finish?? Keep up the good work on bringing this RR back from the grave.
Don't think I wont send it! Lol
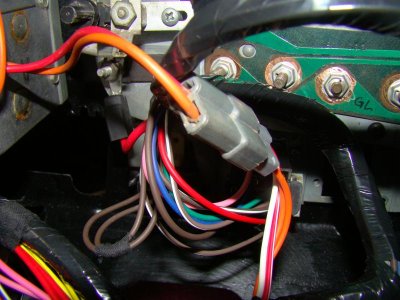
Prop, this is a common problem that I also ran into! The brown wire with the slot in the connector should go on the wiper switch male end with the matching prong on it. By prong, it's a raised area meant specifically for that female end with the relief cut in it. The other 2 brown ones should go to the washer switch.
Here's a crappy pic I took of my wiring harness after installed it in the dash frame. I've checked that it all works so I know it's right.
If you want to do the wiper motor plating "in house", this might work for ya -
http://www.eastwood.com/new-golden-cad-system-w-diamond-clear.html
Hey Fish70
This looks to be a really cool car when done!
Regarding your speakers in the dash, I just wanted to give you my two cent; You need to fill the gaps between the speaker driver and the aluminium adapter. It needs to be air tight if you want any bass and low midrange sounding from them. Also the gap between the aluminium adapter and the dash needs to be air tight. Otherwise the speakers will cancel their own sound as they cannot produce any preassure!
Capsule