• When you click on links to various merchants on this site and make a purchase, this can result in this site earning a commission. Affiliate programs and affiliations include, but are not limited to, the eBay Partner Network.

Hawk-Rod: The Restoration

great job and pics to document it!! A piece of advice, as I learned the hard way...my stock 383 also ran great, and I drove the car many miles with it. Unfortunately, the rubber valve seals were starting to fall apart, and one time seized the oil pump but the engine continued to run. I saved the motor....THAT time....next time...not so lucky....seized engine....
 
great job and pics to document it!! A piece of advice, as I learned the hard way...my stock 383 also ran great, and I drove the car many miles with it. Unfortunately, the rubber valve seals were starting to fall apart, and one time seized the oil pump but the engine continued to run. I saved the motor....THAT time....next time...not so lucky....seized engine....

Hmmm. Thanks - I think (smile).

I have certainly had valve seals get worn and make the engine burn some oil, especially on startup, but I have never had it seize the oil pump. But you make a good point, and changing them with the engine out of the car will be much easier. I need reliability when I drive across the country next year, so this might be something to add to the list. The only problem is the list always keeps growing!

I appreciate the advice!

Hawk
 
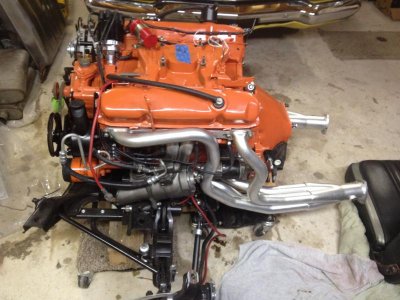
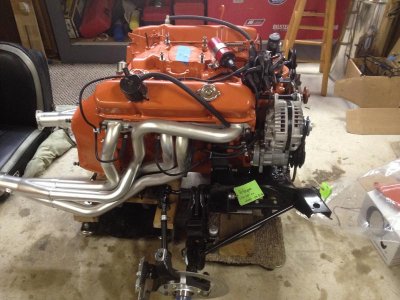
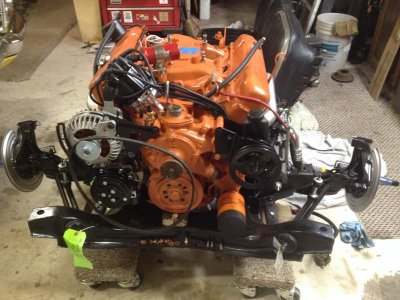
I made some progress on the engine today, and it is nearing completion. I put on the headers, spark plug wires (what a PITA!), starter (PITA also, even out of the car!) and coil, plus some small odds and ends.

I need to finish cleaning, painting and installing crank and water pump pulleys, I need belts, and, of course, I need a working transmission to bolt to the bellhousing. Besides that, it is pretty much ready to install. I will not put on the fuel injection unit until it is in the car. All that wiring mess needs to go through and around the firewall, so I need the car to do that work.

Here is the engine in its current state. Progress may be slow, but it is progress!

Hawk

IMG_2906.jpg

IMG_2908.jpg

IMG_2909.jpg
 
That's some progress right there!!!!!!! Looks awesome sitting there all purdied up.
 
Sure does! That is inspiration for some real fun there.. :) Looks great man!
 
Hawk, Great job and extremely helpful. Have a question that goes back to the dash removal. I also have a 70 RR with Light package. Did you have the buzzer for key in or lights on, or the headlight delay. Not sure if the RR got it, but I did see one pic of the connector that should have had a relay and I did not see it. I was looking for a picture of what they would look like and were they would be mounted. G
 
Hawk, Great job and extremely helpful. Have a question that goes back to the dash removal. I also have a 70 RR with Light package. Did you have the buzzer for key in or lights on, or the headlight delay. Not sure if the RR got it, but I did see one pic of the connector that should have had a relay and I did not see it. I was looking for a picture of what they would look like and were they would be mounted. G

OK, did some digging. It is amazing how you can go through something thoroughly and then completely forget it!
My car has the key buzzer, but did not have the headlamp or buzzer or the headlight delay.

I started to go through my pictures, and realize that it will take me some time to go through my wiring diagrams and again figure out what it what. I don't want to rush and steer you wrong.

I have to take my son off to college, but will be back Saturday. I hope that timetable works OK for you...

Hawk

(So for now, ignore the pictures attached below)
 

Attachments

  • IMG_2377.jpg
    IMG_2377.jpg
    61.5 KB · Views: 623
  • IMG_2382.jpg
    IMG_2382.jpg
    64.8 KB · Views: 617
Nice work dude.

Having the headers on makes the bottom up install that much more of a no brainer.
 
No problem. I am out of town in your neck of the woods this weekend too. What I have found looking at a lot of cars is that a lot of small detailed parts are just left off in a restoration. Reverse lock out, key light, glovebox light, cigar lighter, trunk light, buzzer, heat duct, etc... So it has been hard to find cars that have them. My car is not numbers matching motor/trans, but it was restored with a lot of originality and with upgrades using original 70 mopar stuff. So I have a B body dana rear with 11" drums and B-41/51 added with original parts when the original owner did this restore some 17-20 years ago. I just have a handful of items to do to it to try an make it original in the smaller details. One being to restore the Light package options. Something to do during the winter. Having too much fun driving it right now. G
 
Hawk, Great job and extremely helpful. Have a question that goes back to the dash removal. I also have a 70 RR with Light package. Did you have the buzzer for key in or lights on, or the headlight delay. Not sure if the RR got it, but I did see one pic of the connector that should have had a relay and I did not see it. I was looking for a picture of what they would look like and were they would be mounted. G

OK. I took some time to look at my wiring and took some additional pictures. Again, My car had the buzzer for key in, but not lights on or the headlight delay. My replacement M&H harness has the connectors for them. Let me post some pictures of what I have and I hope this helps you some:

1)Key in buzzer
Here is a picture of the wiring: Two Yellow/black tracer, a Blue/White Tracer and Red
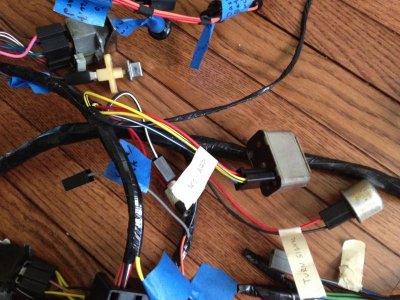
IMG_2951.jpg

The key in buzzer mounts near the ash tray.
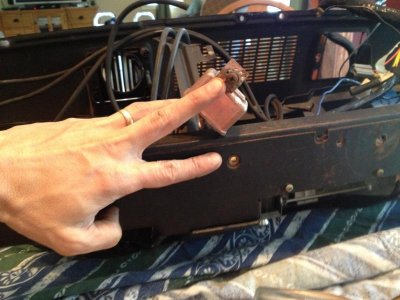
IMG_2382.jpg

2) Lights on buzzer
I do not have this, but here is the wiring where it would plug in, two Yellow/black tracer and two Red. Where it mounts I cannot say. Note also the 4 way flasher at the top of the picture.
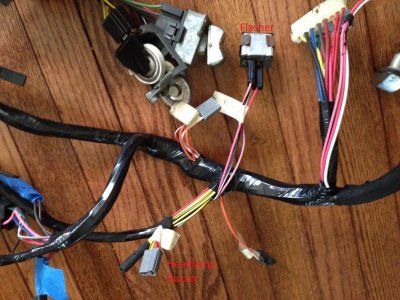
IMG_2949.jpg

3) Headlamp delay
Here is where things get uncertain. As I said, my car did not have this feature, and the new wiring does have provisions for it - I think.
This is a picture from my replacement wiring harness. I believe, but I am not sure, that these wires support the headlamp delay feature. I can tell you for sure this wiring did not exist in my original harness. Wires are Black/Red tracer and Blue/Yellow Tracer on the 'T' connector. Then there is a bullet connector with two light green wires in the upper right of the picture. I also think the taped up green and blue wires laying on my fingers are for this feature too.
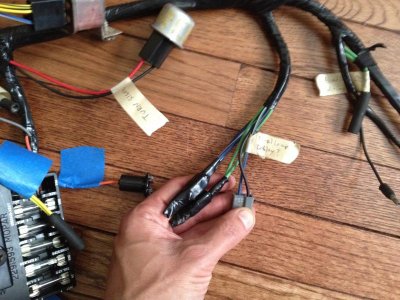
IMG_2953.jpg

Not tons to go by, but I hope this helps...

Hawk

P.S. I am jealous that you are driving yours... (smile)
 
Some Dash Work

So I spent some time with the dash. My radio area had been hacked up by someone wanting to install an aftermarket radio, so I spent some time trying to beat it back into shape. I also bought an AM radio that I plan to have converted to a AM/FM Bluetooth, yada, yada, whizbang thing that will do my taxes too.

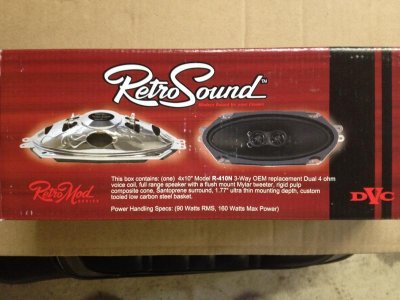
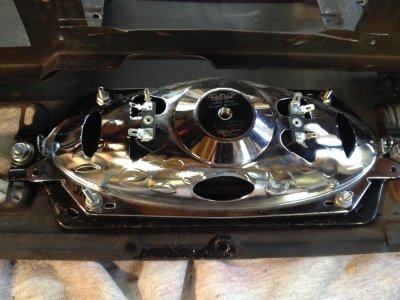
I bought a dual voice coil speaker for the 4x10 opening in the dash.
IMG_2931.jpg

Here is the speaker installed. Note that you need a Chrysler adapter plate from an original speaker so you can attach the new speaker using the factory connection method.
IMG_2943.jpg

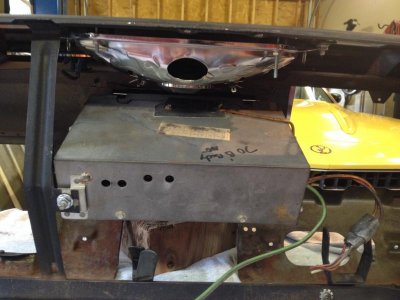
Here is the radio from the back. Note how it is attached to the back of the dash. Note also that there is space between the radio and speaker - no interference!
IMG_2938.jpg

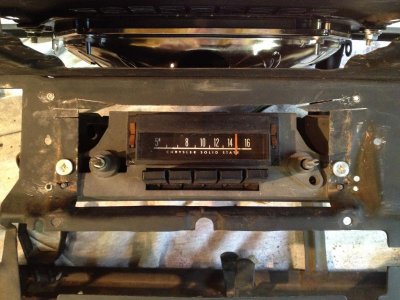
Here it is from the front. Note all the cuts from where metal had been bent out of he way. At least it was still there so I could bend it back - now to weld it back together...
IMG_2942.jpg

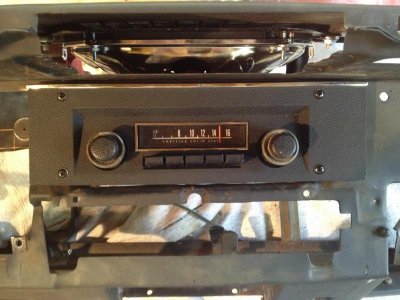
Here is the radio with the bezel attached
IMG_2934.jpg
 
great job and pics to document it!! A piece of advice, as I learned the hard way...my stock 383 also ran great, and I drove the car many miles with it. Unfortunately, the rubber valve seals were starting to fall apart, and one time seized the oil pump but the engine continued to run. I saved the motor....THAT time....next time...not so lucky....seized engine....

I just got back from Corvettes at Carlisle, and I spoke to my Father-in-law about this. He agreed that replacing them is a good idea. Thanks again for the tip - I'll be sure to do this to try and avoid any big problems on the road...
 
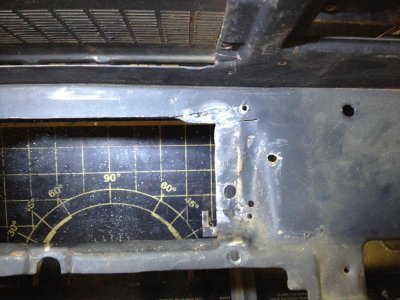
Not too much to show for tonight: I welded up the dash. The radio area had been cut up and bent up, so I had pounded that back into shape and then I lightly welded a few spot welds on the back - I didn't want to warp anything, and I just needed some metal to provide a rigid mounting area. It doesn't look super pretty ('cause I am no expert welder) but it works well and will never be seen anyway. The radio now fits exactly like it should. Here is a picture of one side.
IMG_2958.jpg

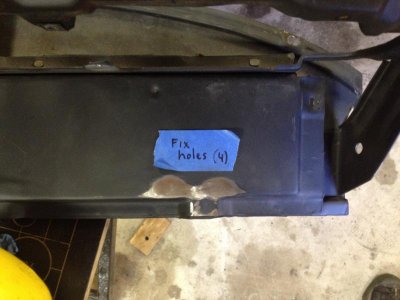
I also welded up holes in the underside of the dash where holes had been drilled to hold tach and oil pressure gauges. Now the dash is ready for paint. Here is one of the areas I welded.
IMG_2960.jpg

Question: My interior is black, but what should the black be? Semi-gloss, flat? other?

Thanks,

Hawk
 
Nice work hawk, the dash frame got a semi gloss suede texture finish (Can't remember name) if you are looking for correctness, other wise I think semi gloss is pretty close, that's what's on mine. Hopefully someone will give you the name.
Dash, steering column and doors all where different paints.
Anyway, although I don't post much, I have been following your thread (and others) and I enjoy every minute of it. You guys are bringing back memories from over 20 years ago when I did my GTX. Thanks

First, thanks for the paint reference The dash looked pretty flat, but it is also almost 45 years old. I bet that 'suede' texture helps to limit the gloss too. While it doesn't have to be absolutely perfect, concourse correct, I want it close.

Secondly, thanks for the kind words. I am glad you are enjoying the posts. :headbang: Hopefully some of them also help people to decide if they like some of the items that I am installing on my car.

Hawk
 
Hey Hawk,

Totally Auto has the (I believe) correct paint in spray can form. The best I can tell you to call and ask them. BTW, they are located in PA.

The Behr
 
Suede dash paint on this page, kinda pricy.

http://www.instrument-specialties.com/products/

Also read on a few different posts that from a spray can, Rustoleum textured black is very close. It has a very fine texture like original and seems to be what people are using as an alternative.
 
Behr and 440+6: Thanks for the paint suggestions - I will look those up. As I rapidly run out of summer, I am feeling stressed about all the stuff that needs paint. It seems like EVERTHING needs a new coat of paint, and I am starting to worry about the amount of time I have left to get this car done. Apex has not been able to devote a lot of time for my car recently, so I don't have the car back yet to start bolting stuff back on it. I hope I can get it back real soon...

I have to keep my fingers cross and hope that I can get all this stuff done over the winter months, but this stuff gets a lot harder when it is cold. Ripping apart the car in the cold is one thing, but putting it back together and fiddling with stuff to make it exactly right is a lot harder. We'll see how it goes...

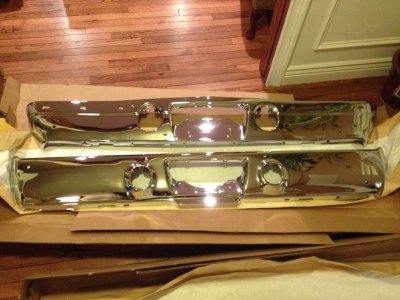
Anyway, to bright news (pun intended!). Tri-City Plating brought up some bumpers to Chryslers at Carlisle, but I rejected them because they weren't quite right. I give them my bumpers as cores (which were pretty nice) and I asked for 'no excuses' bumpers. Well, I got 'no excuses' bumpers! Thanks Tri-City Plating! Nice job!

IMG_2962.jpg
 
Auto Transport Service
Back
Top