• When you click on links to various merchants on this site and make a purchase, this can result in this site earning a commission. Affiliate programs and affiliations include, but are not limited to, the eBay Partner Network.

Hawk's First 727 Transmission Rebuild

Looking good so far. You might peruse the section in your book about the number of springs to use with the 5 disc clutch packs. It would be under the performance mods section.
 
Looking good so far. You might peruse the section in your book about the number of springs to use with the 5 disc clutch packs. It would be under the performance mods section.
Yes, I will use 12 springs with the 5 clutches and steels. That should work well and be pretty bulletproof (unless the idiot that assembles it screws it up!) :rolleyes:
 
So last night, I verified my forward drum/ front clutch retainer and also put back together the big block transmission (no pictures of this). The big block transmission will be sold as a core, but I carefully assembled it with all parts so it can be easily rebuilt. In theory, it could be run, but I would strongly suggest to anyone buying it not to do that.

Forward Drum (Front Clutch Retainer)
Here are the clutches and steels from the two forward drums:
View attachment 1197979

View attachment 1197980
So the big block had (unusually) 5 of each.


Here is the spring arrangement from each.
View attachment 1197982 View attachment 1197983
No, I didn't make a mistake. The big block only had 6 springs. A couple of people I have talked to can't figure out why.

Here is a closeup of a steel spacer from the big block. They are kind of a uniform gray, and these may be "Kolene Steel", that has a gray color and is used in high performance applications.
View attachment 1197981


So, I will end up using the big block forward drum with 5 clutches. This is much better than only 3 in the small block!

So now:
View attachment 1197987

I have ordered new front and rear bands, clutches, bushings and even tools to press the bushings in and out. So now I have to wait for those as the transmission will get a full rebuild. As I am able to, I will begin to rebuild my small block with refurbished parts, which (of course) will be posted here.

Thanks for the help and sticking with me!

Hawk
The steel that you are holding has a burnt look to it, but new steels come with the clutches. It looks like some one has already done some performance upgrades to the BB trans, judging by the 5 clutch discs, missing large spring in the front servo, and elimination of accumulator spring. The number of springs in the front clutch assembly seems to be a personal choice thing. Some people like 6 and others like 15, or anything in between. I like to use 9 or 10, depending on the style of the piston.
I usually find putting the front clutch assembly back together is the most frustrating part of the whole build. There are wide and narrow styles of piston lip seals, depending on the year of the 727. Some rebuild kits include both styles. If you look carefully inside the lip of the seal, there is a 7 digit part # on it. Match this to the # on the kit seal. Carefully work the seals in place using thin feeler stock, being careful not to nick the seals. I find that using assembly lube rather than just transmission fluid makes this easier. Once the inner seal is started in place, I start tapping the outside edge of the piston down working around its circumferance with the end of my wooden hammer handle, while carefully working the outside lip seal in place with the feeler stock. Are you planning on taking the valve body apart, or just flush it out?
Thanks for the great tips. I will follow those as I begin assembly.

I had a gentleman who has done a number of these suggest 12. Having said that, I am happy to consider other numbers of springs. I guess that more springs acts as greater force against engaging the clutches? As a learning tool for me, could you explain why you prefer 9 or 10 vs 12?

With respect to the valve body: There are actually 3 transmissions in play here: Two are the big and small block transmissions that I have pulled apart. The third is an additional small block tranny in the car. This transmission has my original 340 tranny valve body. Around 1982 I installed a shift kit. I did a "mid" range shift kit, so not race but a nice street setup. I have always loved how that shifted, so I planned to reuse that. When I go to install the completed transmission, I will take that valve body and flush it out as well as check to make sure all the little pistons move freely. If OK, I was going to leave it alone. Again, happy to get thoughts on this plan too!

Hawk
 
my Tom Hand manual has a whole section on that seal and how to get it on there correctly. My kit came with a plastic thin tool just for that. Remember to soak the frictions in clean trans fluid before putting them together with the steels.
 
So I made some progress on the case today.

I chased all the threads in the whole case to ensure they were good and cleaned out. I used a drill to run the bit in and out of the holes to speed things up.
20211126_141012.jpg


These threads for one of the bolts that holds the pump were not great. The threads further back were OK, but I decided to fix these.
20211126_150205.jpg


So I drilled, then tapped
20211126_150528.jpg
20211126_150855.jpg


then inserted the heli-coil.
20211126_151204.jpg


I gently filed the gasket surfaces to ensure they were clean and flat and free of debris from bead blasting.
20211126_140401.jpg

After all this mess guess what? Yeah, you guessed it. Clean again. :mad:

Then I supported the back of the case and tapped the outer race of the sprag into the case. I did this slowly and carefully, working my way around the race several times to get the race fully seated.
20211126_161826.jpg


I then put some blue thread-locker on the allen key to lock the race in place.
20211126_162218.jpg
 
Understanding the action of the Front Clutch and springs

OK, so I've been trying to understand the number of springs in the front clutch and what more or less springs does to the behavior of the transmission. The below picture shows 9 springs (this out of my 340 transmission), while the big block only had 6 (but was heavily modified).
20211122_194618.jpg

@Dave6T4 recommended 9 or 10, which sounds very reasonable and the closest to what I had. But others said 12, some seemed to say the more the better, etc. Why? The Carl Munroe book is great and it's packed with information, but it is tough for me to try read and absorb 234 pages worth of information. Plus, there is no index so I can try to look stuff up. If I was doing a standard rebuild I would leave what is in there and move on. But since I am mixing and matching parts I need to better understand what is going on. I still have a LOT to learn!

I finally found the reference in the book that helps me out. Per Carl Munroe "The number of return springs installed in the front clutch retainer has an effect on shift timing on the 2-3 shift. The greater number of springs, the slower the front clutch apply will be." Too many or too few springs, relative the rate the kickdown band applied can cause some issues. On one end, there could be "overlap or stiffness in the 2-3 shift". I think this would be caused by the clutches applying too quickly (too few springs) while the kickdown band is still grabbing. On the other end, the 2-3 shift could "feel too soft or the engine <could> flare on the upshift." I believe this is from a case where the kickdown band has released but the clutches have not yet applied (too many springs).

So if I ran 12 springs, I have a greater chance of the 2-3 shift feeling soft or even having the engine rev a bit while shifting. If I ran 6 springs, I have a greater chance of the 2-3 shift having overlap or stiffness (and I predict some excess wear too since the front band and the clutches are fighting one another). Of course, the rate the clutches apply (i.e. the number of springs you have), is also countered by the rate the kickdown band applies. Changing the ratio of the lever (like I did from a 3.2 to 3.8) will make the kickdown band apply faster (and possibly release slower?).

OK, so all this stuff makes my head hurt again. If I get the mix wrong, I might have to tear the transmission apart to fix it. However, there is a suggested modification to tune this action. Carl Munroe suggests putting a 1/8" NPT socket head pipe plug (with a hole drilled in it) in the case that feeds the front clutch. He suggests putting more springs in the transmission, and then the size of the hole in the plug can alter the rate that the font clutch is applied. Simply drilling a smaller or large hole in a plug can slow or speed up the rate that the front clutch applies. This "tuning change" can be done with the transmission in the car simply by removing the valve body and swapping the plug. Since I don't know what the result of my parts mix will be, I think I will add this modification so I can tune the action of the shifts if I need to. It sounds like good insurance to me.

Sorry for the wall of text here, but I'm trying to explain (my understanding of) the way this works. The above (minus the direct quotes), is my own wording and my plan to move forward. Please feel free to add or correct me as needed. As always, I am grateful for the help and assistance of the FBBO brain trust!
 
The Tom Hand book agrees with yours as far as it applies to the 2-3 shift and number of springs. It also says that the SUPER heavy duty ( Hemi) transmissions had 12 springs and the Heavy duty( 440 Magnum and 426) had 10 or 9 springs.
 
I have always used either 9 or 10 springs in my rebuilds, giving a nice crisp shift from 2 to 3. I have used a spacer in the reverse servo to cancel the effect of the spring. I found that failing to do this made the 1 to 2 shift to bind up. I open up the holes in the valve body separator plate per Trans-Go shift kit instructions. I eliminate that small wall in the valve body per Trans-Go and remove the ball from that cavity only. I also set the pressure adjustment and kick down adjustment per the shift kit specs. This is using all factory springs in the valve body, and the lighter high performance governor weights. I shoot for .025" clearance on rear clutch pack, and . 020" per clutch plate clearance on front clutch pack. 4 clutches = . 080" ; 5 clutches = .100" . Front and rear bands are also set per Trans-Go specs. I use either 4.2 or 3.8 kick down lever. What front servo piston assembly did you use? I really advise against the later "controlled load" assembly because it can affect second gear shift timing. I have here an A&A Transmission "red spring" later style servo piston assembly, high performance governor weight assembly, and rear servo spacer for $100.00US plus shipping if you are interested. This set-up has always worked for me. This is what I run in my own cars and numerous customer's cars. This is for performance street driving and occasional racing using mostly factory parts. Guys with high horsepower cars and full-on racing may build their transmissions differently.
 
Last edited:
Hawk,
As always, knowledge is king. You don't know what you don't know. When members of this forum explain/show what they are doing, it helps everyone. Walking someone through a project is both time consuming (taking pics and such) and intimidating (are members going to strongly criticize my every word). So far, at least from my personal experience, our members are very supportive of anyone bold enough to try.

Keep on doing what you are Hawk, I know that it helps me in my understanding of how things work. And to those members who add input on a build, keep on with this too as there are several ways to accomplish a task. I appreciate all of you as I learn a little more about these cars everyday! What a great forum to be on.
 
The Tom Hand book agrees with yours as far as it applies to the 2-3 shift and number of springs. It also says that the SUPER heavy duty ( Hemi) transmissions had 12 springs and the Heavy duty( 440 Magnum and 426) had 10 or 9 springs.
Haha. I'm not sure Tom Hand agrees with me - more like I managed to understand this part enough to agree with Tom Hand!
With respect to the Hemi Springs: Note that more springs in the Hemi were coupled with the 5.0 ratio kickdown lever. So it seems that more springs and higher ratio levers generally go together.

I have always used either 9 or 10 springs in my rebuilds, giving a nice crisp shift from 2 to 3. I have used a spacer in the reverse servo to cancel the effect of the spring...
...I use either 4.2 or 3.8 kick down lever. What front servo piston assembly did you use? I really advise against the later "controlled load" assembly because it can affect second gear shift timing...
So perhaps then I will settle with a 10 springs. I have a 3.8 kick down lever so hopefully that will work well together. My only fear is that with 5 clutches, it might grab faster so maybe more springs will counteract that?
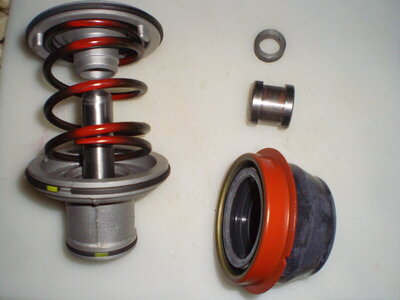
I have both an early style servo out of the big block case as well as a later "controlled load" assembly from my small block case. See pics below (front servo's on the right). However, I saw in a video suggested by @QOTHL (I think this is a Chrysler Tech video on rebuilding), that the servos and castings are not interchangeable? Do you know if I can replace my newer style servo with an older style in the newer casting?
20211122_140629.jpg
20211122_140635.jpg


...I open up the holes in the valve body separator plate per Trans-Go shift kit instructions. I eliminate that small wall in the valve body per Trans-Go and remove the ball from that cavity only. I also set the pressure adjustment and kick down adjustment per the shift kit specs. This is using all factory springs in the valve body...
Yeah, wow, now I need to start better understanding the valve body - the next bit of voodoo magic to comprehend!
I actually found the box and instructions from my valve body modification back around 1982 or so. Since I still have the instructions, I will check them out and hope they are similar to the Trans-Go. I would assume they would be. My recollection was I could modify it for street performance or race, and I did it for street performance. Once I pull the tranny out of the car, I will check and go through the valve body to try and mimic what you did.
20211126_184305.jpg


20211126_184251.jpg


This is using ...the lighter high performance governor weights...
I think, if I remember my reading, that the lighter governor weights will increase the RPM of that the shift happens? I haven't really studied to understand that part yet.

...I have here an A&A Transmission "red spring" later style servo piston assembly, high performance governor weight assembly, and rear servo spacer for $100.00US plus shipping if you are interested. This set-up has always worked for me. This is what I run in my own cars and numerous customer's cars. This is for performance street driving and occasional racing using mostly factory parts. Guys with high horsepower cars and full-on racing may build their transmissions differently.
I will PM you about the parts.
Yes, my car is for performance street driving, so this is perfect - exactly what I need.

Hawk,
As always, knowledge is king. You don't know what you don't know. When members of this forum explain/show what they are doing, it helps everyone. Walking someone through a project is both time consuming (taking pics and such) and intimidating (are members going to strongly criticize my every word). So far, at least from my personal experience, our members are very supportive of anyone bold enough to try.

Keep on doing what you are Hawk, I know that it helps me in my understanding of how things work. And to those members who add input on a build, keep on with this too as there are several ways to accomplish a task. I appreciate all of you as I learn a little more about these cars everyday! What a great forum to be on.
Thank you. And yes, I am EXTREMELY APPRECIATIVE of the members here who are willing to take the time and answer all my basic (or maybe even convoluted) questions. To all of you: a big THANK YOU!!! :drinks:
 
Dang. Now i'm rethinking my 12 springs and 3.8 with 5 clutches.....sigh. Thanks.
 
The way the governor weights work, the heavier the weight is, the earlier (lower rpm) it gets thrown outward by centrifugal force to force the upshift. There is a balance of line pressure versus governor pressure at play here. The lighter weight takes more rpm to make the same movement to complete the upshift. The weight pulls on the thin shaft, which moves the small valve on the other end of it to make the shift. On the subject of the number of springs required in the front clutch assembly, it is a balance between slower clutch apply or quicker clutch release. It is resistance to the hydraulic pressure behind the clutch piston which actually holds the clutch pack engaged.

PB270001.JPG
 
Hawk, you have already been way further into a torque flight than I ever have, but the only thing I can tell you is that the shifts were instant and firm, no lag or overlap. Now that I remember when the builder converted it to full manual shifting, he recommended that I run full line pressure all the time. Because I drove the car on the street I decided to run stock kickdown linkage. This made the shifts at lower speeds firm but not harsh, but may have contributed to more wear on components at lower speeds (line pressure). What I am getting at is maybe the 6 springs was designed to work with full line pressure all the time. You may want to use a closer to stock setup.
 
As Builderguy said Hawk, you're bold enough to try and post for the world to see.
Bravo!
Some pros will cringe, some will giggle, but they would be best to remember how they learned what they know. Our trans pros on this site are more than willing to help, and it is much appreciated. Maybe someday I'll attempt a Torqueflite and will also ask for help.
Show me a T-90 or 833 and I can tear them limb from limb no problems. But an automatic as Hawk says " that's where the voodoo magic happens"
Today's task- rebuilding a Rochester 2 jet from a 66 CJ5 (sticking with what I know)
:lol:
 
I have received many of the parts I need, like the sprag (overrunning clutch) and all my bands and clutches. I'm still waiting on a bushing set and I can't make too much progress until I get those. Finally, I just ordered a couple of parts from Dave6T4 as well. So I can't do too much until I get the bushings, but I still made some progress.

After I cleaned the case and wiped it down with carb cleaner, I installed the outer race of the sprag. This has to be tapped in carefully. I tapped it in using a circular pattern, driving it in very slowly so it wouldn't get cocked sideways in the case. In the picture below, I also laid the inner race into the assembly.
20211126_174303.jpg


I got new springs and rollers since this was recommended.
20211126_161923.jpg


This is what it looks like with them installed. I found the best way was to first install all the rollers and then install the springs. You have to be careful those little springs don't expand and fly away during installation!
20211126_175516.jpg


I then installed the output shaft support (bolted in from the back). A bit hard to see in this view, since all you can see is the center. By the way, I have used a little bit of petroleum jelly and also lots of ATF on key wear parts. Petroleum jelly was what was used by the Chrysler tech video.
20211126_181110.jpg


Finally, I temporarily dropped the low/ reverse drum back in.
20211126_181206.jpg


I'll try to do some work to recondition some assemblies if I can, but I can't make too much progress until the bushings come in. They are supposed to arrive tomorrow through December 2nd, but they haven't even shipped yet. I am a bit worried about both inventory and slow shipping at this point!
 
I will whole heartedly agree with the 12 spring club. When I built that Trans I used a 5.0 lever. Big no no.went down to the 3.8.. and it worked like it should.

17 years bracket racing that 1 transmission.
 
I will whole heartedly agree with the 12 spring club. When I built that Trans I used a 5.0 lever. Big no no.went down to the 3.8.. and it worked like it should.

17 years bracket racing that 1 transmission.
3.8 was what was recommended to me too.
 
Thanks guys. Yes, I will be using a 3.8 lever in my build!
 
Go too YouTube and Nick's Garage just put on a video rebuilding a 727, a very good one to point everybody in the right direction to build your own and save a ton of money plus better workmanship, check it out.
 
Auto Transport Service
Back
Top