• When you click on links to various merchants on this site and make a purchase, this can result in this site earning a commission. Affiliate programs and affiliations include, but are not limited to, the eBay Partner Network.

My $300 a month budget 69 RR project (AKA, Wholly crap, what did I get myself into)

my vent lines was gone when I got my car in '07, no issues yet.
 
If the seams poped because of it being unvented, that would surprise me.. I guess ive seen some strange things with cars but i would think it would have had to be defective myself..
And to be honest i ran into problems with my 73 that was caused because of being un-vented, and yes, i think you will have to vent your tank, it can cause a lot of problems...
 
my vent lines was gone when I got my car in '07, no issues yet.

Thanks Dave mine has run ok, but has leaked bad since i started driving it. Does seem like it could cause a pressure drop at the fuel pump though since a non vented system might create a vacuum. However, it might be so small that it has no noticable effect.

- - - Updated - - -

If the seams poped because of it being unvented, that would surprise me.. I guess ive seen some strange things with cars but i would think it would have had to be defective myself..
And to be honest i ran into problems with my 73 that was caused because of being un-vented, and yes, i think you will have to vent your tank, it can cause a lot of problems...

Thanks Ron, i ordered the vent lines and gtommets today.
 
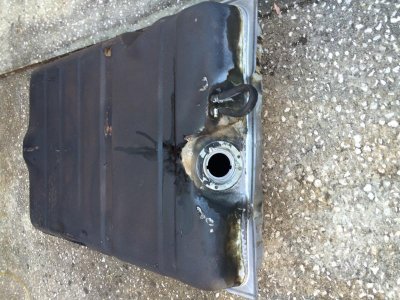
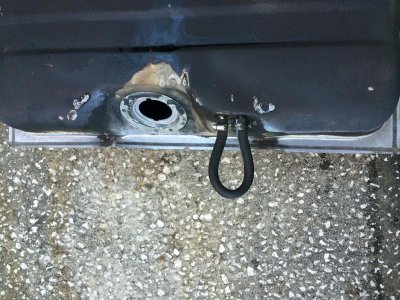
Finally got off my a** and pull the gas tank out yesterday. After having 2 separate shops look at my fuel sending unit seal (and replace it once)... I expected that I was going to find the tank burst at the seams, surely 2 professional shops in a row couldn't have f'd this up? or could they?

photo 1-3.jpg


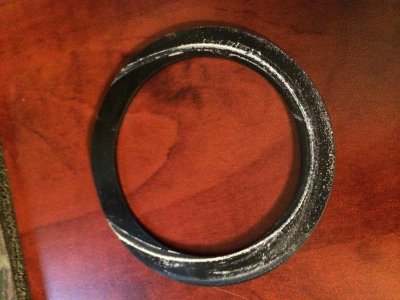
As you can see in the pic, the white circular outline from the lip on the tank isn't quite lined up with the seal (understatement)... gas was sloshing out like crazy.

A couple of other observations....

Vent Lines bypassed as stated previously.

photo 2-3.jpg


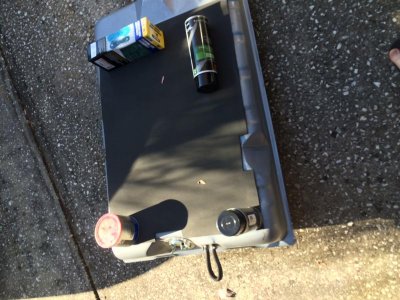
No tank pad, but the tank looks like it was replaced sometime in the past 10 years.

photo 3-2.jpg

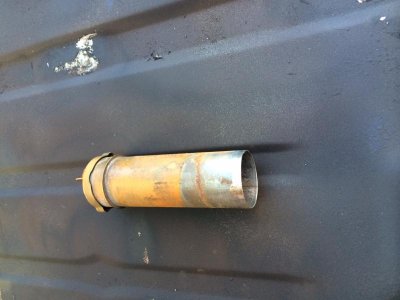
Lastly the filler neck looks wrong? It doesn't have the tab that attaches it to the body... can anyone tell me if that tab is mearly to keep it steady while being filled or does it serve a safety purpose like grounding?

photo 1-4.jpg


Ok, os what I have now to install is....
New Tank
New Sending Unit
New Sending Unit seal
New Vent Lines
New Filler Neck seal
New Tank Pad

I was going to start throwing this all back in today, but now I'm worried that I should be ordering the right filler neck. Especially since if I decide to do it after installing with the old one, it looks like I'll have to drop the tank again.
 
sometimes (most of the time); if you want something done, you just got to do it yourself!
 
sometimes (most of the time); if you want something done, you just got to do it yourself!
Amen! Every time I get lazy and think "this will be a fast, easy job for a shop with a lift" I get burned.

Reeeaaaallllyyy makes me want to spend the money on a lift.
 
I don't think there is any tab. Here is my setup on my 70 Road Runner. Note that this picture has my original CAS filler neck and setup. The only difference from stock is that the stock clamp was a metal band rather than the aftermarket screw clamp. Hope this picture helps a bit...

IMG_1777.jpg
 
Thanks hawk, its that bracket that mounts the neck to the body that is missing.
 
Not sure if this was addressed, but my 69 came with a vented cap and yes, it leaked like a pig on acceleration. Also, I have an aftermarket tank, filler, sending unit, etc. (not sure which make). my filler gasket has that same alignment issue, just seems to be the wrong one - you have to align it perfectly for it to not leak. And I'm pretty sure the PO put the wrong filler neck on mine, as no OEM type gas cap will fit mine - in fact, only a vented cap will work so I soldered the vent closed and just run it. One day I'll replace the filler with the corect one and use the correct non-vented cap.
 
New gas tank, seals etc.. are now in. I have been out enjoying the car and forgot to post pics!

Gas tank replacement was pretty easy overall... hardest part was getting the fuel out of the tank to start with... after that it was relatively easy sailing.

Hearing and seeing how bad you can mess up the sending unit gasket (crunched, pinched, misaligned, etc..) I simply used a little gasket tack, to hold it onto the sender where I wanted it and it went together with no issues.

I also checked/calibrated my sending unit... no big issues, needed to adjust the stop tabs a little, but seemed fine on the bench, however, once I got it in the car, the gauge is reading only 1/4 tank with 10 gallons in it... I'm thinking I have a bad crimp or some other form of resistance in the wiring. I'll start chasing that down shortly.

I did add a tank pad, which cut down on some of the squeaky rubbing noise I was hearing.

I currently do not have the vent lines installed. It looks like the holes in the trunk were never drilled for it, so I will post a request for some pics/measurements elsewhere on the forum.


The tank pad had a little curl to it, so I set it out to relax.. In the end I used a small amount of the 3M trim adhesive to tack it in place for ease of assy.

photo 1-5.jpg

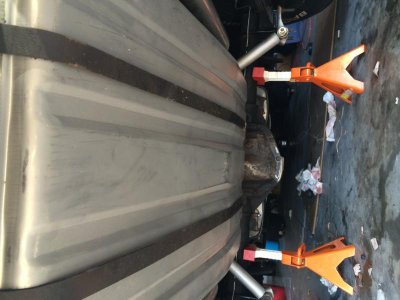
Here's the new tank in prior to torquing the straps down... it went in pretty easy overall. You can see how bad the gas was sloshing out, it took the paint and grime off the bottom of the diff. (Man, I really need to clean my garage floor)

photo 3-3.jpg
 
Thanks Hawk, I appreciate the heads up. I am a little behind in my posting, but it's for a good reason... I've been driving the snot out of my car and loving it!

- - - Updated - - -

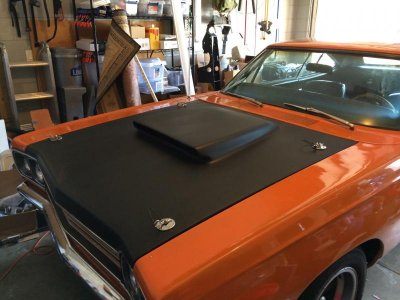
I did manage to finally convert over to a lift off good with the pins I got for Christmas... One thing I learned in the process... Its tough to drill fiberglass and get a nice clean hole in the end.

image.jpg

- - - Updated - - -

Best thing,,, no gas leaks!
 
It looks great!

Thanks Hawk! Now if I could just figure out how to keep the tires gripping the pavement, I'll be in good shape (she's got some power that's for sure, I can burn rubber through all 4 gears).
 
Thanks Hawk! Now if I could just figure out how to keep the tires gripping the pavement, I'll be in good shape (she's got some power that's for sure, I can burn rubber through all 4 gears).

That's a nice problem to have! I'll be happy when mine even starts!
 
Good job on the tank install and great to hear you're out enjoying the heck out of her! Send some of that Florida sun north!
 
Thanks Hawk, I appreciate the heads up. I am a little behind in my posting, but it's for a good reason... I've been driving the snot out of my car and loving it!

- - - Updated - - -

I did manage to finally convert over to a lift off good with the pins I got for Christmas... One thing I learned in the process... Its tough to drill fiberglass and get a nice clean hole in the end.

View attachment 241318

- - - Updated - - -

Best thing,,, no gas leaks!

I do think its a master piece! I love it.......

- - - Updated - - -

Made a decent wall paper to! :)
 
Been a while since I posted, thought I'd check back in... My car is currently off the road because a certain dumbass decided it would be a good idea to trade a working carb for a 670 CFM Holley Street Avenger of unknown origins... turns out it was thrown together from a variety of parts and non-functional.

So currently working on sorting out that mess (I'm starting to really hate carb work). Also gonna pull the cover on my diff to see what's what and start ordering parts to lower gearing down to something more manageable.. most likely 3.54's.

After that, I had been wanting to start building a motor, but I might hold off till next year (taxes hurt me bad this year) and just do a cam swap on my current motor to get rid of the 509 cam that is just too much for my needs considering I'm running the car down in the 1K -4K RPM range most of the time.
 
Auto Transport Service
Back
Top