• When you click on links to various merchants on this site and make a purchase, this can result in this site earning a commission. Affiliate programs and affiliations include, but are not limited to, the eBay Partner Network.

Re-Rebuilding the 440-493 in a 1970 Charger

The engine & trans "cart" is done. I don't know what to call this thing....Jig? Cart? Stand?

24 R.JPG
27 R.JPG
30 R.JPG
32 R.JPG


The K member support pads have these rubber cushions to protect the paint.

36 R.JPG


Total cost......ZERO!
Well, I did use MIG wire and gas. I already had the materials here though. It looks a bit like a junkyard implement but it is sturdy.
 
With the "cart" done and set aside, I'm ready to take in as much information as I can to formulate a plan for the rebuild. I'm the curious type so I'm on the hunt of why this cam went bad after running fine for so long.
Once I pulled the intake and saw the cam condition, I instantly went to the inclination of never running a flat tappet cam again. I should admit that I make impulsive moves sometimes and other times I drag my feet making decisions. There is a lot to learn about making a switch to a roller cam whether solid or hydraulic. The B/RB series engines were discontinued before roller cams became commonplace. Because of this, retrofit lifters carry some compromises and some drawbacks. For one, the lifter bores in all big blocks are designed around the height of the solid and hydraulic flat tappet size. In short, the lifter bores are short.
A 1990 LA series engine for example would be a great candidate if I wanted to build a roller small block engine because the factory made changes to account for the specific needs of a roller cam.
I wasn't ready for the expense of converting to all that is needed. I'm not closing the book on it but aside from the cost of the lifters at $800 and UP, the cam, $500 and UP, there is the pushrods, the distributor drive gear and the timing set and cover. I didn't know that I'd need a timing set with a bearing on the back and a button on the front. I'd need some manner to prevent cam walk since roller cams don't have tapered lobes to push the cam rearward.

Here comes some preliminary autopsy work. Here are the lobes from rear to front.

43 R.JPG


# 7 intake lobe looks worn.

44 R.JPG


Below is cyls 3 and 4. This is the worst of it.


45 R.JPG


Notice the shiny strip in the middle with the dull finish on the edges? What is that?
46 R.JPG


One of the things that I am clinging to is that IF I knew what went wrong, I could avoid doing it in the future. For the sake of economics, going back to another solid flat tappet would be the choice. I'm not living on Top Ramen here but I don't have money falling out of my pockets either.
The wear patterns on the 528 cam look vastly different from the Lunati cam I ran for several years. See pictures below:


47 R.JPG
48 R.JPG
49 R.JPG

50 R.JPG

51 R.JPG


Notice that all the wear is to the rear side of the lobes? They all look even too.
 
The Lunati cam ran fine and obviously has no unusual wear as far as I can tell. This tells me that whatever led to the failure of the 528 might not be related to the engine block in terms of lifter bore angles. The '509 cam I ran for 8-10 years prior to the Lunati looked great when I pulled it out too. I was told that the MP cams had less taper than most aftermarket cams so the lifters are less likely to spin.
I spoke at length with Dwayne Porter this afternoon. I was looking for assurances on which way to go with all of this. He told me the pros and cons of roller cams and the accommodations needed to get them to work in an engine never designed for them. I was looking for some advice to sway me one way or another. He did a great job of laying out the information as he knew it. He said that proper lubrication plays an important role in all of this....and here is where I may have made a mistake.
From 2006 when I wiped out my first cam, I started paying attention to the special needs for the flat tappet engines. We all have heard of the reduced zinc and how new oils don't use or need it since everything new is roller this and roller that.
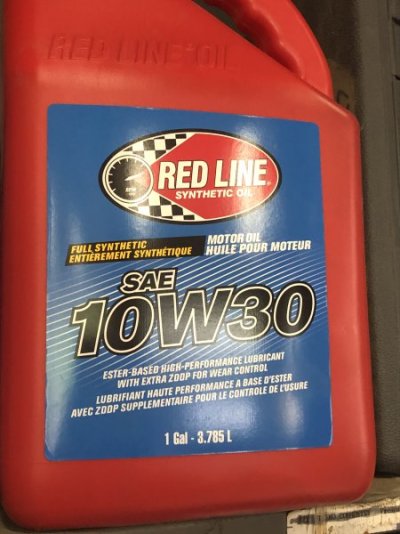
I used Valvoline VR1 for the most part for many years with this 528 cam. Sometime about a year ago I started using this oil:


37 R.JPG

It seems okay, right?

38 R.JPG

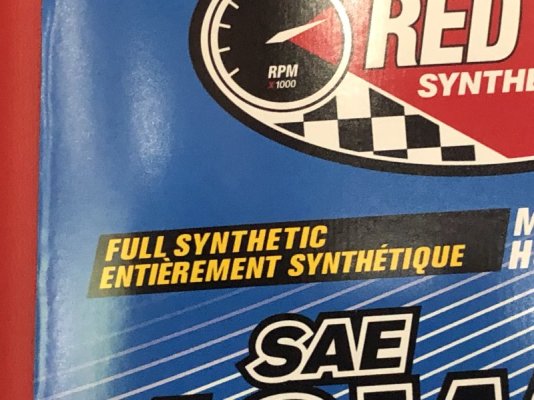
Synthetic is good, right?
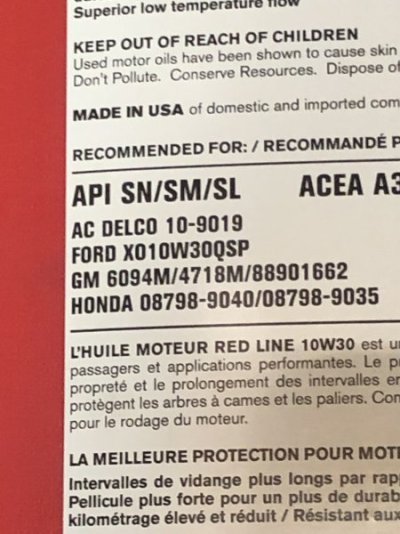
Well what about this?


40 R.JPG

When I told Dwayne about this oil he seemed to stop in his tracks. I told him that I used this along with the Comp Cams break in supplement. He said that he isn't a fan of supplements because the chemicals they have in them may not be compatible with the oil and actually cancel each other out.....PLUS this oil that I have been using is a high detergent blend. He said that the detergent actually can strip the zinc from the lifters and lobes leaving them LESS protected than a non detergent oil.

1 FPP.JPG

My lack of knowledge may have caused this early failure. I read "synthetic" and "ZDDP" and thought that it would buy me extra protection. He suggested a product called "Driven" in a thicker weight than the 10w30.
 
Why is the wear pattern towards the rear?
Can the rear cam plug cause an issue?
Seems like the lifers are not centered on the cam lobes.
 
Why is the wear pattern towards the rear?
Can the rear cam plug cause an issue?
Seems like the lifers are not centered on the cam lobes.
Looking at the 528 still in the engine, the lifters don't always sit directly in line with the lobes. It might be different depending on the cam manufacturer.
The wear at the rear of the lobe seems to mean that the highest point of the taper is at the rear to keep the cam pushed to the rear of the block.

41 R.JPG


42 R.JPG


The lifter diameter is .904", the lobes are maybe 5/8" ?

I was pointing out how the Lunati had consistent wear patterns while this 528 does not. To me, that leans to a manufacturing issue. Dwayne said the MP cams have very little lobe taper compared to aftermarket cams.

Sometimes you can piece together what happened by the signs of wear. Three lobes going bad from what I can see with the cam still in place is one thing. They could be just three with the rest of the lobes in perfect shape OR they could just be the first three lobes to go bad with the rest just a few hundred miles from following the same fate.
 
Lots to dissect from your postings , but,
Why not caliper each lobe and share the actual #s. That will answer your ground down lobe theory
 
Nothing to do with lifter bore angles...etc, etc. The block ran fine for the first 40+ yrs of it's life, correct?
I spelled out the problem in post #7.
Wear on the rear of the lobe is normal because the lobe has a slight front to rear taper.
 
At this point, I am just a Carpenter that loves these cars but is not an expert on them. I am taking in all input from people and trying to make sense from it all. Some stuff makes more sense than others.
The Lunati cam and lifters survived but I ran Valvoline VR1 almost exclusively.

47 R.JPG


I liked how it performed. The car was the fastest it has ever been with this cam. I was getting tired of the rough idle but in my own notes, the complaint was in regards to sitting in "drive" at stoplights. The idle vacuum in gear was low and required the use of a vacuum pump to power the brake booster.
I have a manual transmission now. Half of that scenario doesn't pertain anymore. I still have the vacuum pump but have considered a switch to a manual brake setup anyway.
It is suggested to be installed at 106 degree centerline. I ran it there but later advanced it 4 degrees. From there, it picked up some bottom end and idled a little better. It is tempting to slip this back in since it ran well and since there would be no risk of wiping it out during "break-in".
 
With the tko it would be tempting to throw that one back in and go back to vr1
 
I agree. The manual transmission changes matters a lot.
Regarding the lower idle vacuum issue....I really wish that I could switch to a manual brake setup that worked well. The simplicity and reduced weight & clutter would be great. In 2012 I tried switching and used 4 different master cylinders with different bore sizes. All gave a firm pedal with terrible braking action. I may have had a disc/drum proportioning valve in the car though. That would have disrupted the system a bit.
 
I hate the generic GM style power setup in my Charger - but it was my dad's car and that's what got put in it circa 2009. I would love to go manual as well. I have OEM disc/drum in my Fury with OEM manual brake pedal and I tried a couple different 80's oem MC's with a Wilwood prop valve. It's still a very firm pedal and you really need to mash it to lock up. But I have room for the turbos and don't have to worry about a check valve to not blow boost into the booster!
 
There will be several hurdles that I will encounter along the way. I was just thinking of the air conditioning. I want to repaint at least some of the engine bay so somehow I need to either evacuate the system that I JUST had filled so I can disassemble it all or find a way to work around it.
Just take it apart you cheap *%^&&$. :lol:You wont be able to do a really nice job with it hanging in the way.
 
Ha ha, yeah.
Part of the issue is that I wonder about cracking the system open and contaminating it. I don't know much about A/C systems but I thought once opened, I'd need another receiver-drier plus the refill charges.
Looking at the engine bay yesterday, the areas that need repainting can be easily masked around. The firewall and aprons are fine. The shock towers and frame rails need attention.
 
ideally you'd plug the dryer while the system is open. Then draw it back down. I've done it, recommended or not.
 
Just put a piece of tape over the ends of the hoses and lines when you take it apart and you will be fine. Its not like the dryer is going to be out in the weather exposed to the elements. The tape will keep any bugs dirt or debris from getting inside the system also.
On reassembly you are going to need to evacuate the system to remove any moisture and check for leaks before you charge it. R134 is fairly cheap if that's what you are using. I am sure you will do the right thing. :thumbsup:
 
Busy day.....lookie what I did!

73 R.JPG


I got a bit of a later start but was lucky to have the day off to do this today.
So often when a big project awaits, I delay and put it off until I'm ready. Mary pushed me into doing this today and I'm glad she did.
This is my first time removing an engine and transmission this way. Nobody was around so I did it myself.
I was careful to disconnect and remove everything that could snag, drag or hang up. The wiring on these old cars is so simple! The A/C compressor is still connected. I was able to swing it over to sit on the core support. This bottom removal is great. I was able to leave the radiator and shroud in place.

58 R.JPG


59 R.JPG


I took the fan off though.

This method requires removal of the steering column and shifter.

60 R.JPG


I raised the car up and used THIS tool to remove the torsion bars:

61 R.JPG


62 R.JPG


Tighten the Two 3/8" bolts and tap it rearward to dislodge the torsion bars.....

64 R.JPG


It helps if you remembered to grease them when you first installed them.
 
I wheeled the cart over and positioned it close to where it needed to be. The transmission support is a little further back than ideal but it worked okay.

65 R.JPG


There are a few ways to do this. Some have the brakes intact and connected to the spindles/knuckles and leave the upper control arms alone. I didn't want to bleed the brakes after this job is done so I disconnected the calipers and hung them above the UCAs with bailing wire.

67 R.JPG


I slowly lowered the car and checked and adjusted the position until the cart was in the correct position.

69 R.JPG


There are a LOT of things to remove to do this job. I was a bit nervous that I'd forget something or run into some sort of problem. I must be lucky. The K member bolts came out easier than the ones I wrenched on in junkyards.

71 R.JPG


75 R.JPG


It seemed to roll quite easily. I continue to be amazed.


76 R.JPG


Now comes time for the autopsy....
 
Anti-freeze is very harmful to pets so I had to be careful to soak up all the spills. We have 4 dogs so I had towels ready to keep ahead of them.
With the engine out in the open like this, it is much easier to see the oil leaks. These valve covers look nice but don't seal all that well. I've tried a few different types of gaskets and I still get leaks.

80 R.JPG


81 R.JPG


I've had an oil leak from the timing cover area which sort of looks like it is coming from below the fuel pump.

82 R.JPG


Here comes trouble....

77 R.JPG


79 R.JPG


The engine didn't smoke but the intake runners are wet with oil and the plugs look like a combination of oil and a rich A/F mixture. Please correct me if I am wrong about that!

The timing cover leak could be partly my fault. Somehow, I forgot the oil slinger. The timing set was still nice and tight. I was amazed to see that it had no slop at all. Cloyes FTW.

I've had this This block of wood for at least 35 years. Here come the lifters.....

83 R.JPG


You can see that heavily dished one, right? The open holes in the block of wood are the lifters that required vice grips to pull out. I thought I was going to have to remove them from underneath.

87 R.JPG


Yep....S E V E N lobes and lifters were on their way out.


85 R.JPG


These lobes are the worst.


85 R_LI.jpg


I did take the hex pre-oil rod and ran the oil pump before I took this apart. Dwayne Porter told me that the EDM hole on the bottom of the lifter does shoot out oil on the lobes and he was right. In my case, most of the lifters shot oil and a few did not.
Here is a thought....MAYBE one lobe went, then the debris from the shavings was in the oil and it accelerated the wear to the other lobes?
I'm going to take the dial calipers to the cam tomorrow to see how many others were ready to go. It won't change anything, it will just be for my own "amusement".
 
This all happened pretty fast. The car was running great until it didn't.

87 R (2).JPG


To recap, 8 years or so ago, I was still working on trying to eliminate the detonation problem I was having. I had these same Edelbrock heads and the "famous" 292/509 cam. My calculated compression ratio was approximately 10.9 to 1. I'm at 500 feet above sea level and the best fuel we have here is 91 octane. I could putt putt around and be fine but that sure defeats the purpose of a hot rod. If I wanted a cruiser, I'd have left the 318 in the car. Anything past 1/2 throttle and it would knock. Here is the weird part though....Every bit of info that I'd heard stated that detonation leaves marks in the pistons that look like it was hit with an ice pick. ALL my pistons looked like this one...

493 piston 8.jpg


It defied what I was told but I was sure that it knocked. I had several threads going on several web forums. Advice ranged from pull the engine and replace the pistons to use a bigger cam with a later intake closing along with slow the distributor advance rate.
I did try slowing the advance rate. It didn't help. I tried a bigger cam and in a strange twist, that cam actually had an earlier intake closing than the '509 and it made it knock WORSE!
I was hesitant to pull the engine then so I went with a band aid that some suggested, others criticized and few were 100% sure of. I pulled the heads and installed .075 thick Cometic head gaskets. This dropped the compression ratio to 10.1 and the engine didn't knock anymore....most of the time.
I knew that it wasn't the best way to get there but it did work. For years I have thought that if I have to open this engine up again, I'm going to do it right. The 440 Source has pistons in stock in the size that I need with a 24 cc dish. If I zero deck the block and use a common Fel Pro .039 head gasket, I can be at 9.8 to 1 with .039 quench. Yeah, slightly less compression and the benefit of squish-quench too. I don't know if quench has any effect on power but I remember that it does help with detonation tolerance. It would be nice to be able to run 89 octane if 91 isn't available at a station on a road trip.
 
Even at 9.8:1 you will need 91 octane

You were at 10:1 before and had some knocking

You are just dropping 0.2:1 Yes the quench will help a little.

But you drive the car frequently and in real life… not on the Internet. And with CA spec fuel. Trust your experience
 
Last edited:
Auto Transport Service
Back
Top