• When you click on links to various merchants on this site and make a purchase, this can result in this site earning a commission. Affiliate programs and affiliations include, but are not limited to, the eBay Partner Network.

Re-Rebuilding the 440-493 in a 1970 Charger

I have Edelbrock Performer RPMs, lightly ported.
It is a big cam but it ran real strong. I'm not against running a smaller cam but I always get nervous about cam break in.
 
Last edited:
I had an epiphany late yesterday after thinking about your CC woes and the same woes of many others. The bumpstick in my Indy engine is a custom grind CC, SFT unit. The engine was put together and dyno'd in 13 by Indy, has not been run since. Since its a custom grind, makes me wonder if they, CC, were better at the qc issue than they might be with off the shelf units. I think I might make the switch to solid roller down the road before it goes in the car for good. Especially since I have great access to it being on a stand.
 
I have heard conflicting comments on camshafts. I grew up thinking that they were surface hardened to resist wear. I thought the term was “Parkerizing”.
I have since heard that they are not. I’ve read that they are just machined cast iron.
This is in reference to flat tappet cams.
I had a Comp Cam for the 383 in Jigsaw that had jagged edges on several lobes. I could have smoothed them over with a file but I was told that going so could affect the surface hardness. I sent it back.
 
Last edited:
Parkerizing is the black/dark gray finish they have when new. It apparently doesn't do much for long-term protection, as you've noticed by looking at a used cam. The lifter trail is always shiny where it's worn that outer layer off. That doesn't mean anything's failing, it's normal...so I always figured the parkerizing was to keep any corrosion away until the cam is in full operation. You can pay a little extra to have a cam 'nitrided', which I've always done, and have never lost one....yes, even several Comps (ooooh **** knock on wood!!)
 
Last edited:
I finally got the time to degree the cam.
A week ago, I had checking springs on the #1 valves but changed them back. Now I had to put them in again to do the work.
There are a few ways to change the springs. One is the hand held spring compressor....
551 R.JPG


552 R.JPG


This is great when the heads are off the engine.
I have the heads in place now and they are torqued to 70 ft-lbs as directed.
To change springs with the heads on, you need to keep the valves up and in place. You can use compressed air to pressurize the cylinder. I've done that before. Another method......

549 R.JPG


I read about this....with the engine about 45 degrees BTDC, you feed the cotton rope into the spark plug hole....

554 R.JPG


Then you rotate the crank toward TDC until it stops. This means the rope is pressed between the piston and valves so the valves can't drop into the cylinder. Now you can remove the springs.

550 R.JPG


I used a magnet to collect the valve locks.


556 R.JPG


553 R.JPG


555 R.JPG
 
With the checking springs in place, I used the brass piston stop to determine TDC. It was within 1 degree of the harmonic balancer and timing cover.
The cam card shows that when installed at ZERO, (Dot to dot) the installed centerline is 106 degrees. I ran it before at 106 and while it ran fine, I wanted to see how it would run at 102...4 degrees advanced from the recommended setting.
I set it at the 4 degree advance setting on the crank sprocket and after checking it all, it is exactly at 4 degrees.
I used the Intake Centerline method instead of checking each opening and closing point. I did check the lift number and it is right on target there too.

555 S.JPG


I watched a few YouTube videos to refresh my memory on how to do the degree work. I don't do enough of these to just jump in and do it right.

I installed the lifters but one didn't want to go in all the way. These are not new, they have been in THIS engine before with THIS cam until around 2014.

558 R.JPG

I put on some stronger glasses to see better but I couldn't find any obstruction. The lifter went in upside down and stopped at about the same spot.
Could the lifter be touching the cam journal? Does the cam need to slide back a bit?

559 R.JPG


Maybe.....

560 R.JPG


Yep, that was it. I've never seen that before.

With the cam timing confirmed, I can install the timing cover, oil pickup, windage tray and pan. All of these things can be done a little at a time. I am busy next Saturday but with any luck, I may complete the engine build this week. I do need to RE-confirm the bell housing runout since the block has been moved around a bit. I just don't know if the special offset dowels may have moved since I pulled this all apart.
With all the time and money, I don't mind spending a little more time to get things right. This project would have been more fun if there weren't so many delays. I pulled the engine 4 months ago tomorrow.
 
Looks like you’re taking time to get all those little details sorted out and this motor should serve you well for quite a while. As always awesome work and keep the updates and pictures coming.
Thank you for taking the time to keep everyone updated as your mission approaches the finish line.
 
If you have advanced the cam, you will have also reduced the intake V to P clearance slightly.
 
Thank you. With the dish in this piston design, I expected to have plenty. I didn't measure it but I did push down on the rocker arms with the crank at 10 degrees before TDC, at TDC and 10 degrees after TDC. There is still well over 1/4" of clearance.
The final compression ratio will be 9.8 to 1, slightly lower than the previous 10.1 to 1. This combination will have a .041 quench distance compared to the .87 that I had before so that should make up for the slight drop in compression.
that's a pretty nice quench and the 9.8:1 should be happier on the street also. Did you ever have detonation running 10.1:1?
 
Thank you. With the dish in this piston design, I expected to have plenty. I didn't measure it but I did push down on the rocker arms with the crank at 10 degrees before TDC, at TDC and 10 degrees after TDC. There is still well over 1/4" of clearance.
The final compression ratio will be 9.8 to 1, slightly lower than the previous 10.1 to 1. This combination will have a .041 quench distance compared to the .87 that I had before so that should make up for the slight drop in compression.
I'd think having the cam advanced 6 will be what makes the difference for street snappiness compared to last time. Well, that and your manual transmission!
 
I had this cam set up this same way before I pulled it out and put in the '528. By the specs, I expected it to be a bit soft on the bottom end but it actually performed great.
 
that's a pretty nice quench and the 9.8:1 should be happier on the street also. Did you ever have detonation running 10.1:1?
Detonation?
Rarely...and when it did, it was brief. Nothing like when I was closer to 11 to 1. Many members here advised against thicker head gaskets but it did work in my case.
It did knock on the last drive before I pulled the engine in June but with 4 lobes almost rounded off and another 6 starting to go, that was to be expected.
 
While you have it on the stand, put a paint mark on both the outer ring of the balancer and the inner hub pointing at each other. Make sure you can see them with the pulley on. This way you can see if down the road the outer ring starts to slip.
 
Good idea. This balancer was new in 2004. Prior to that, I built 2 other 440s with cast cranks.
 
I installed the lifters but one didn't want to go in all the way.
Perhaps when you were brush cleaning the oil galley prior to assembly a bit of cast iron folded over into the bore and needs to be removed. Feel with your finger for a smooth bore, deburr with a knife and a magnet. You want to make sure those lifters spin freely or the previous cam break-in will be irrelevant.
 
Advancing the cam 4* shifts the power range approx 200-400 rpm lower.
 
I got a little more done today.

I changed out the checking springs....

562 S.JPG
562 R.JPG


Oil pump pickup is in.
563 R.JPG


I don't know if this is common practice but I smeared pipe dope on the threads.

564 R.JPG


565 R.JPG


With the Jigsaw 383, I used THIS on the oil pan and windage tray...

566 R.JPG


The 383 does not leak.

569 R.JPG


Hopefully this one will retain the oil on the inside too.

I lashed the valves. The cam card calls for .020 intake and .022 exhaust. Since I have aluminum heads, I set the lash cold... .006 tighter to .014 intake and .016 exhaust to account for the heads expanding during warm-up.

I used a cheap mechanical oil pressure gauge and pre-oiled the system using a 1/2" Milwaukee drill. At speed, it showed 50 psi. I rotated the crank slowly while running the drill. Oil made it to the top...

572 R.JPG

575 R.JPG


With a little luck, I am hoping to be able to get the whole shebang back in the car by Sunday afternoon. Plenty left to do, though.
I want to re-verify the bell housing runout. It should be fine but I want to be sure.
Motor mounts, fuel pump, water pump, alternator, crank pulley, idler pulley....
Flywheel, clutch, pressure plate and bell housing too.
I already cleaned all the bolts and other hardware so assembly should go quickly. I'll probably repaint the headers and pulleys.
I have thought of how this whole project should result in the car being faster than ever.
The engine will have slightly lower compression but real quench. This should allow me to run the timing a bit further out. I had it at 18-19 initial and
32 -33 total. It might benefit from 2 more degrees of total timing, it might not. @Beanhead came through with an FBO spark box and coil that I'll swap in after the car is up and running. This cam is much bigger than the '528....that will result in some increase. The fresh piston rings should improve matters. The standard volume oil pump draws less HP than the high volume pumps that I have used before. The shorter rear tires will have the effect of a gear swap from 3.55 to 3.86.
I'm still anxious to see how well the hydroboost brakes work. After the engine is back in, I'll need to have hydraulic lines made.

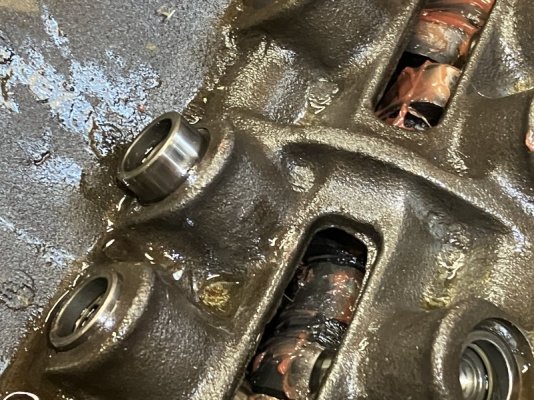
567 R.JPG
 
Last edited:
Auto Transport Service
Back
Top