Even the smallest part's need attention. Looks like you're doing a good job. Have fun building the motor. I had my motor guy build mine and just did not have enough time to do the motor and get the car done also. Keep us up on the build. Blue.
You are using an out of date browser. It may not display this or other websites correctly.
You should upgrade or use an alternative browser.
You should upgrade or use an alternative browser.
Rebirth of my 1970 GTX!
- Thread starter t.flatt
- Start date
t.flatt
Well-Known Member
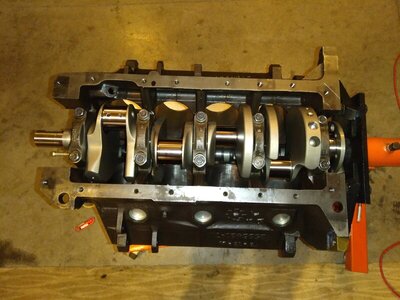
Exactly! It will be very cool to hear it run knowing everything was checked, done right and assembled by me!Excellent. You don't want to hope that the clearances are right, you want to know that they are right. Check especially the mains, both size and taper. You want absolute max taper of .0005"
Enjoy the build. It is really cool when you get an engine running that you have built - very satisfying!
t.flatt
Well-Known Member
Thanks for the tips! I'm getting more comfortable with the mics and bore gauge so I'm most likely going to recheck everything and see if I get different numbers that my first go around.I built race engines for a living for years. I also built restored mopar engines before that. With that being said, setting that dial bore gauge to the desired test setting is a challenge. It is an art that takes a lot of patience and practice to get it right. I bought a bunch of sunnen dial bore gauges and their set up fixtures so I could be absolutely certain the measurements I was getting were correct. I used one like yours for years, my machinist still does, lol, I just double check it all with my stuff. It is 1000 times more accurate than plastigauge. I commend you on trying to do it correctly.
Do yourself a favor and set oil clearance targets for rod bearings, main bearings, pistons, etc. I begin by labeling every piston and rod A through H with a sharpie. Then I mic the crank and record those measurements to the .0001". Next, I install all the rod bearings into the rods and torque them to spec. Then I take the median of the rod journal measurements and check the clearance measurement on each rod and record it next to the letter. Then you go back and move the rods to whichever journal gives that rod the closest to your target clearance, then assign that rod the cylinder number. I use an engraver to mark the cap on the side, top and bottom. Pistons are similar. Takes me 8 to 24 hours to assemble and blueprint an engine this way. There's a lot more to it but this will help you get started. Good luck!
Excellent, that is how you learn. It took me years to get where I am now. Can't rush it. Most common mistake is overtightening the mics when measuring.Thanks for the tips! I'm getting more comfortable with the mics and bore gauge so I'm most likely going to recheck everything and see if I get different numbers that my first go around.
t.flatt
Well-Known Member
t.flatt
Well-Known Member
Here is a demonstration of the wrong way to check cam lobe lift.

t.flatt
Well-Known Member
Well, ****. I've been trying to get my rocker arms set up. I was going to measure cam lobe lift quickly and got frustrated setting up the dial indicator to measure at the edge of the lifter so, I tried to measure at the pushrod. After messing around with the dial indicator set up you see above, I realised that is pointless. The pushrod moves way to much to get an accurate reading. Valve movement is what I'm after, so I moved on to that. Started to set up the dial indicator for that and a part on the the cheap *** Harbor Freight magnetic base breaks! I guess I'll have to find something else to work on tonight...
t.flatt
Well-Known Member
Well, I guess the valve train didn't want to get worked on this weekend. The goal was to get the rocker arms perpendicular to the valve stem at half valve lift. I can eyeball half valve lift (dial indicator is down for now) good enough. Stacked up shims to raise up rocker shaft and now the adjustable pushrod is too short. And, I need more shims! I might look into the B3 stuff for this.
t.flatt
Well-Known Member
t.flatt
Well-Known Member
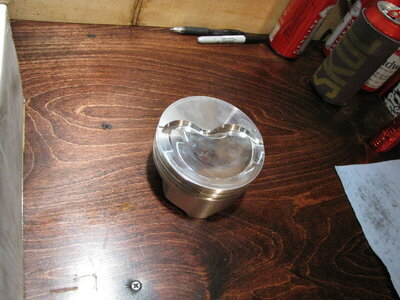
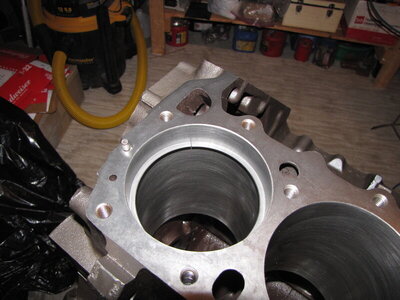
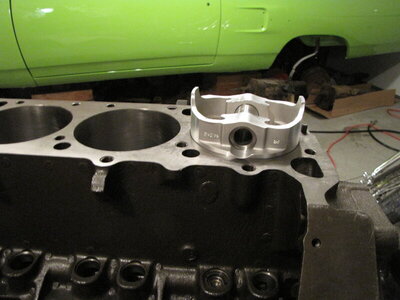
I used a piston to square them in the bore. So far, it seems getting this motor together has been a lot of doing the same thing over and over and over and over again until its perfect! With some good music in the garage its been lots of fun! I can't say how many times I squared a ring in the bore but it kept me busy for at least a couple nights. Same for the rocker shafts. Take it off, add a shim and put it back on to check... take it off, add a shim and put it back on to check... take it off, add a shim and put it back on to check...


t.flatt
Well-Known Member
I brought the heads to the machine shop so they can make sure the valves are seating, put some new springs on and make sure everything else looks good on them. When I get them back I'll send some measurements to Mike at B3 Racing Engines so he can make spacers to get the rocker geometry correct. The goal is to get the rocker arm perpendicular to the valve at half valve lift. After putting thousands and thousands of dollars into the motor and many more thousands into the car it seems like a no brainer to get this right! Yeah, it will work just bolting it together but when changing to roller rockers other things need to change so it all works like a well rehearsed symphony in there! At least I hope it does...
t.flatt
Well-Known Member
Rich H.
Well-Known Member
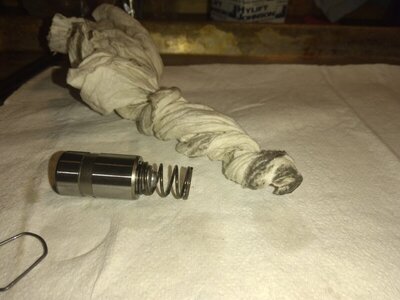
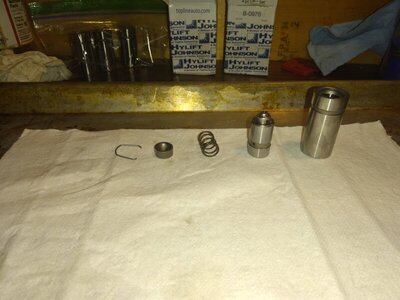
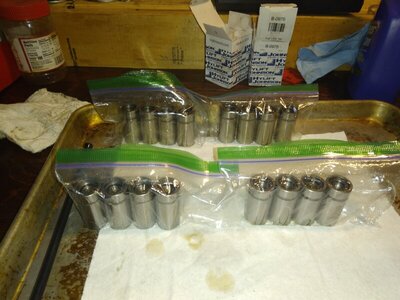
Although slow and tedious work, that is really a great idea to disassemble and clean all 16 one at a time. I did the same back around 2012 with an NOS set of mopar performance lifters saved from the '90s and....yeah....Lots of machining debris found, same as yours.
Also looked at lifter crown on a surface place with a .001 feeler gauge, just to get some kind of a feel what was what. Not sure if I'd recommend that to anyone, as I ended up going through two sets of lifters to get one set that I liked.
Also looked at lifter crown on a surface place with a .001 feeler gauge, just to get some kind of a feel what was what. Not sure if I'd recommend that to anyone, as I ended up going through two sets of lifters to get one set that I liked.
Good to do. The lifter crowns are critical to the lifter spinning and the cam not getting wiped out. If I recall, more recently there were quite a few lifters that were made wrong and were essentially flat - not good!Although slow and tedious work, that is really a great idea to disassemble and clean all 16 one at a time. I did the same back around 2012 with an NOS set of mopar performance lifters saved from the '90s and....yeah....Lots of machining debris found, same as yours.
Also looked at lifter crown on a surface place with a .001 feeler gauge, just to get some kind of a feel what was what. Not sure if I'd recommend that to anyone, as I ended up going through two sets of lifters to get one set that I liked.
t.flatt
Well-Known Member
Slow and tedious is right! I had a small one man party in my garage when I finished the last one!! I'll have to make sure they aren't flat as well.Although slow and tedious work, that is really a great idea to disassemble and clean all 16 one at a time. I did the same back around 2012 with an NOS set of mopar performance lifters saved from the '90s and....yeah....Lots of machining debris found, same as yours.
Also looked at lifter crown on a surface place with a .001 feeler gauge, just to get some kind of a feel what was what. Not sure if I'd recommend that to anyone, as I ended up going through two sets of lifters to get one set that I liked.
t.flatt
Well-Known Member
t.flatt
Well-Known Member
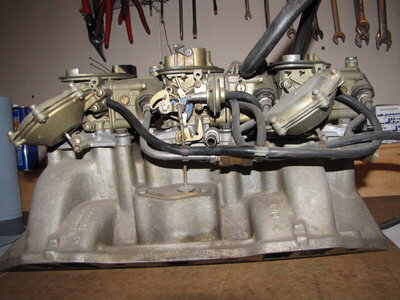
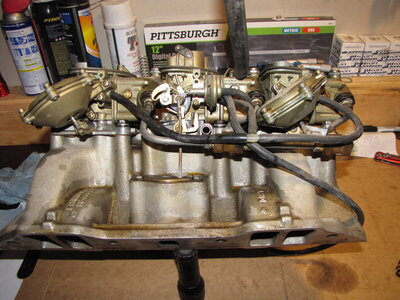
Now we are getting somewhere!

If you haven't already done so...
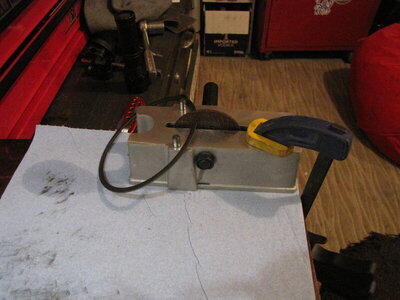
...before you get too far putting those carbs back together, make sure the body of the carb is absolutely flat. Over many years of people overtightening the bowls, the carb pulls out of shape. This leads to finicky operation and inability to tune the carb due to leaks. If not flat, take a large flat file and file the body flat.
Edit: I found a picture of one I did a while back. You can see the dark spots are the low areas. You can see how it was high around the screws.
Last edited:
t.flatt
Well-Known Member
Yes, thanks for reminding me!! I was about to ship them off to get replated. I'll have to check that before I send them.If you haven't already done so...
...before you get too far putting those carbs back together, make sure the body of the carb is absolutely flat. Over many years of people overtightening the bowls, the carb pulls out of shape. This leads to finicky operation and inability to tune the carb due to leaks. If not flat, take a large flat file and file the body flat.
Edit: I found a picture of one I did a while back. You can see the dark spots are the low areas. You can see how it was high around the screws.
View attachment 1250637
Similar threads
- Replies
- 106
- Views
- 7K
- Replies
- 0
- Views
- 168

