• When you click on links to various merchants on this site and make a purchase, this can result in this site earning a commission. Affiliate programs and affiliations include, but are not limited to, the eBay Partner Network.

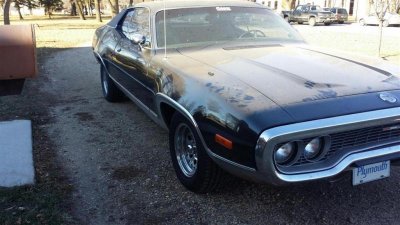
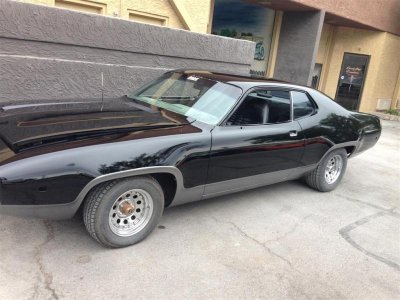
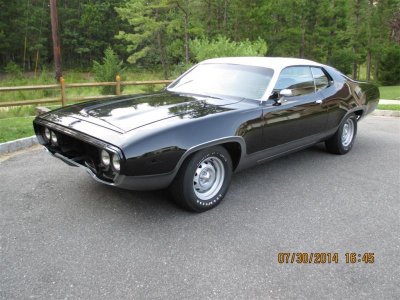
She's a keeper! 72 Plymouth

Thanks again for the compliments. I am awestruck by it everytime I look at it myself. Still doesn't even seem real sometimes. I just love it.

73SwingerDart - I do not know of anyone reproducing those Satellite grill emblems. I have several but they are all in about the same condition as yours or worse. I saw the thread on your car and judging by the work you did on that grill, you can probably touch up that red, white, and blue paint to make it a bit more presentable. That's a nice car you have there with a lot of potential. Mine was FE5 Rallye red originally but I just don't care for red on my cars so I changed it to that new Header Orange. And mine came with the little 318 and that's what it still has but I bought a 440 and had it built up, lots of good mods, and my guy is just waiting on the new trans to get back from the builder, then we are gonna stab the whole new drivetrain in this puppy. I can't wait.

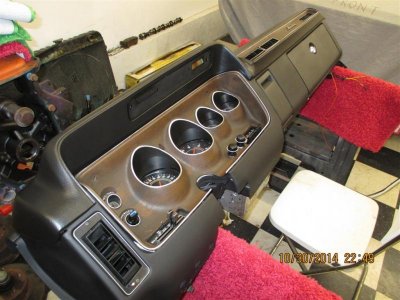
OK, back to the car... Today I spent the whole day getting my dash looking good. It turned out nice. SEM landau black works great. I shot several coats over the original dash pad (which for some reason, hasn't cracked YET). I shot the whole dash and steering column, basically everything except the wood grain stuff. Then I spent a few hours pinstriping that silver border around all the wood grain panels on the dash and around the gauges/vents to freshen up the looks a bit. I know with my luck, as soon as I install that windshield the damn dash pad is going to crack and it'll be a huge pain in the *** to replace because the windshield is in my way... I will go down that road when it happens though. For now I will just enjoy it looking really good and I'll be thankful for that.

I sure do love this car. I've already had three people asking what I want for it... I'm not selling it though.

The first one of these cars I bought was a 72 SSP like this. I got it back in the 90's. I think I was 19. It was rough and rusty. I bought it from a guy who was going to send it to the junkyard. When I brought it over to show my Dad, he thought it was the ugliest thing he'd ever seen. I think he actually called it a "piece of ****". I worked my butt of on that car. I was a single guy right out of high school and I'd been on my own for a while. I used to not run the AC or heat in my house to keep my bills low so I could afford to fix my Plymouth. Here's a pic of it. Yeah I lived in a tiny trailer house at the time but I had been on my own since I was 16.

24ht2.jpg


The next time I took it over to my Dad's place he was blown away by how good it looked. After having scrimped and saved and worked myself hard to save that car, an illegal with no insurance or driver's license wrecked into me and totaled that car. It really broke my heart. It took me almost 20 years before I could buy another one (the black car in my 1st post). Now my Dad is proud of what I can do and that makes me proud.

Funny thing about my orange car: It was built on 5-26-72. 5-26-53 is my Dad's birthday so he turned 19 the day this car was built. I think that's pretty cool that it shares my Dad's birthday.
 
Great looking car brother, nice job! Love the recap too and she was built on your dad's birthday to boot. :headbang:
 
Awesome story Magnes...I want to see pictures of that dash!
Keep up the good work.
Todd in Tulsa
 
Beautiful car. The History of the design for this generation B Body is credited to John Herlitz. Timeless, and you have one of the best examples.
 
Very nice, that car sure looks great in orange!
 
I want to see pictures of that dash!

Todd in Tulsa

I will post some up soon. I cant take very good pics in the garage unfortunately.

I spent the better part of today getting everything ready to install the headliner. Insulated the roof nicely. If the weather is nice tomorrow, I will go ahead and do the headliner. I'm looking forward to getting that done so I can get the interior sealed up by installing the front and rear glass. My last car I did the headliner myself and it turned out pretty good but it was a pain to do with the glass limiting access to the edges and limiting my ability to get enough leverage to pull out the wrinkles. Hopefully this time it will be a lot easier.

I've been torn about what I should do as far as the stereo in this car. Cutting up the dash for a modern headunit wasn't even an option. I pulled the AM radio, cleaned it all up, touched up the knobs, and re-installed it today but last night I bought the equipment that will work as my stereo.

I'm just going to use my phone or ipod as my headunit. That way it's easily hidden or removable. Run the signal to a 4 channel Pioneer amp mounted in the trunk under the package tray area out of sight. Then I'm going to mount 2 6x9" Kickers hidden in the package tray where the original 5x7's went. Up front I am going to use some spare kick panels I have and mount some Kicker 5.25" in them and then those 2 front speakers will be the only visible evidence of the upgraded stereo set up. This way I should be able to not only listen to music the modern way but I can hear my phone's nav through the speakers and also use the speaker phone more effectively (should the need arise) without being distracted. It should work out fine. All in, with wiring kits etc, it was $250 which isn't half bad actually and it will be plenty loud enough for me when I feel the need to rock out.
 
Here's a couple pics of the dash. I was cleaning up the floorboard yesterday and it got a bit dusty. I'll clean it all back up once I get the carpet in.

e965vr.jpg


23u7l01.jpg


I swapped out the original steering wheel center from the "woodgrain" Satellite Sebring Plus piece to the piece you see there which came out of my Satellite Sebring parts car. I've got the little RR decal on the way for this steering wheel center which will make it a little more Road Runner'ish. I'm not trying to make a Road Runner "clone" per say, but I'm making myself a car that incorporates the fun stuff that was available at the time. You know, I'm going to drive this car around, take it to some small shows, go to Cruisin' the Coast, and stuff like that... Anyone who REALLY knows these cars will know it's not original and I'm not trying to fool anyone. A kid seeing this though is going to be more inspired by a Road Runner than they are by a Satellite (I know I was) and, to me, the coolest thing that could happen is I could help inspire some kid to get into this hobby.

OK, back on topic... I went out on a limb with this part... Decided against having someone come out and do the headliner for me so I did it myself. This is the second one I've done on a B body. The first one I did came out OK. This one turned out better. A pro could have done better than this but I want to learn how to do it and there's no better way to learn than by getting your hands dirty, or in this case - gluey.

2z8x3pe.jpg


auxi5c.jpg


I'll tell you what... My right thumb is SORE from pushing on that headliner material to get it as tight as I could before hooking it on the barbs around the perimeter of the roof. I think it will tighten up a bit more in places as I bolt on some of the accessories and possible some of the waves will work out with some heat. Anyway, I feel ok about it. Doesn't look bad to me. My thumbs are going to need a day to recover though, ouch.
 
Thanks for the dash pictures...looks great! I like the headliner work also. Where did you get the material for the headliner? A kit that you ordered?
Mine needs one also. I havent decided if I will go back with all white interior of change to all black.
Sure would like to see interior pic of seat and carpet once you get it all back togather.
Thanks for sharing!!!! Great job!
 
magnes that is one sweet ride ., love the orange and the wheel selection. its gonna be awesome....
 
Great looking car. Keep up the great work. look forward to seeing the progress.
 
Thank You! I appreciate the good feedback. I've caught a little flak from a select few for not taking it back to original but I'm keeping all the original parts and nothing I'm doing can't be undone at a later date should a fully restored 1972 Satellite Sebring Plus become a desirable car again. The reality is that Satellites aren't in high demand so I think it's fine to just do what I want with mine. Should I decide to sell it at some point, like with the black car, I will fully disclose the modifications done. But I can't foresee me ever actually selling this one.

73SwingerDart: I bought this headliner from Year One. It was a good "kit". I say "kit" because really all you get it the headliner and some spare material for recovering the sunvisors with. I would advise buying their headliner glue. I don't like the spray on stuff. If you go this route, I would suggest NOT applying the glue around the entire perimeter of the headliner but instead: Run your bows through the headliner in the right order, install the bows to the roof of the car, let the headliner hang in place, hook the rearmost bow with the 2 small 6" long "hooks" and THEN apply the glue to ONE side of the headliner and roof at a time (start at the front), let it sit for a few minutes, and then attach and work that side. Most videos say to apply it all around the perimeter of the headliner and roof then install but if you do it this way, you have GOT to be quick. For me, this install took several hours to get it and the glue will dry in an hour. Anyway, I know that all is a little confusing, it's hard to explain until you try it. - And, if you you want it to be perfect, unless you've done some of these before and have some experience, I would suggest letting a pro do it for you. Another tip: It is best to do this with the front and rear glass out of the car. Another thing to mention is: The less stuff you have to work around on the interior, the better. Do yourself a favor and pull the seats out at least. Plus, you don't want to drip any of that glue on your nice new carpet etc.

I will definitely post pics of the seats, carpet, trim, and door panels installed once I get them done. All the parts for the interior that are not new will get a fresh coat of the appropriate shade of SEM "paint" before they get installed so I will be starting on that tomorrow and working on that all this coming week.
 
I got out my boxes of interior pieces this morning and laid out everything side by side. Many of the originals to this car, which are white, were really weathered badly. It seems that the white plastic really doesn't hold up as well as the colored pieces do. Even the white painted metal trim pieces were in bad shape with surface rust seeping through.

2ih4k82.jpg


Luckily I had 2 of almost everything so I was able to pick and choose through it all to get the best pieces.

fa32mg.jpg


All of the green pieces are out of my parts car. It really goes to show how much better the colored trim held up over time considering that the green parts car has sat outside almost it's entire life in the sun and rain, and on the other hand the car I am working on (that had the white interior) sat in a warehouse for 20 years out of the weather but STILL the white weathered the test of time worse than the green.

Anyway, I just thought that was interesting.

Lucky for me again, I have an auto paint supply store right down the road from me so I went down and bought some more SEM Landau Black to do the console with and I took one of my new Legendary seat bottoms down there with me so they could match it and mix me up a quart of SEM white that I will use to shoot all these miscellaneous interior parts the appropriate shade of white.

On the way home, I stopped by my buddy's shop to check on the 440 build. Shouldn't be too much longer before it's ready. The 727 is still at the tranny shop. I try not to pressure these guys and that keeps my price down, allowing them to work on my stuff as time permits them (fill in work). But my friend does know that once I put the car in his shop, I will be chomping at the bit to get it back ASAP. I even offered him my free labor for the entire time he has my car and that will allow me to learn some more 1st hand. He was all over that. He gets free help and I get to learn from an experienced Mopar mechanic. Hell, I've got time... Why not?

This project gets closer to completion with each passing day and I find myself growing more and more attached to this awesome vehicle by the minute.
 
Really nice job. I must say that the hood scoop that you put on looks really slick and mends well with the car even though it is not a factory item, share with your mopar brothers where you obtained that? I am trying to purchase an SSP 72 and would love to have that same scoop rather then the R.R hood because the car i am trying to purchase has the optional rally stripes and those can not be used on the R.R. hood. Keep us posted.
 
Really nice job. I must say that the hood scoop that you put on looks really slick and mends well with the car even though it is not a factory item, share with your mopar brothers where you obtained that? I am trying to purchase an SSP 72 and would love to have that same scoop rather then the R.R hood because the car i am trying to purchase has the optional rally stripes and those can not be used on the R.R. hood. Keep us posted.

Thank You, I am glad you like it. That 1st SSP I had (back in the late 90's) came with this scoop on it so I found the exact same scoop and did this as my own way to tribute that 1st SSP, a car that was taken from me well before its time. Eventually I plan on replacing it with an Air Grabber setup but I'd rather hold on to the money for that for a while, rock this little scoop, and finish out my car.

Anyway, this thread will answer all your questions... I eventually figured out where the scoop came from. They are readily available, easy to modify, not very expensive, and they fit the regular Satellite hood perfectly (IMO) while adding a little sportiness to an otherwise dull hood design.

http://www.forbbodiesonly.com/mopar...identify-this-hood-scoop&highlight=hood+scoop
 
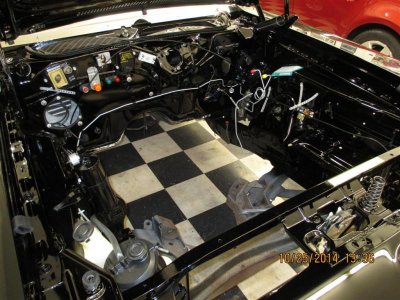
72sat31 (Large).jpg72sat129 (Large).jpgIMG_0275 (Large).jpgIMG_0366 (Large).jpgIMG_0454 (Large).jpgIMG_0465 (Large).jpgMagnes it was cool talking to you via PM the other day. We are kinda in the same spot since I have to do my interior too. I'm changing from Black to White interior because like I told you I'm mimicking my first SSP. My car was damaged by the shipper on it's way here from AZ. so I'm a couple of months behind you in assembly. I've done 2 or three headlines myself but because it's always years between it's like learning all over again! I usually use the little bottle of contact cement that you can purchase at any hobby place or Home Dept. Spraying does get messy. I dyed a mint Tan dash pad the other day and got my dash back together, just waiting on help to put it back into the car. I hope to be driving mine by next summer or so, since it arrived damaged I took drivetrain out and did the engine compartment and started the interior work. The original plan was to put on the trim and get to interior one winter and engine/compartment another butt...
Ron
 
It was good to talk to you as well Ron. Sorry I couldn't help you out with the odds and ends you were looking for. Your build is looking nice. It's going to look like a tuxedo when you're done, classy. I wish you the best of luck with it.
 
New windshield installed and put the back glass in it today. I'd take a pic but that's not much to look at, lol.

Some of the stereo equipment is beginning to show up.

I've been working on the seats for the last couple days. To be honest, I was expecting better from Legendary. There's some issues with that back seat and it's not the installation. You can measure the differences from side to side where some of these seams aren't uniform before it's even installed. Then the upper seat back doesn't line up with the seat bottom seams like you think it would. The piece of vinyl material directly in the center of the seat is just too big. I added foam in order to fill out the area but the way it is really makes the seat back look too puffy. Anyway, it is what it is and I did what I had to do to get rid of the wrinkles.

Wrinkles... That's my next bitch with Legendary. I spent like $700 on these seat covers and they take the back seat covers, fold the back seat top and bottom sections into THIRDS, stuff them into the box, and ship them like that. So when I get them the seat back and bottom have 2 big creases. Doing that wrinkles the crap out of the covers and does it in the hardest part of the seat to get the wrinkles out. No matter how tight you pull them, you aren't getting those out. I had to use heat to help with this process but I don't want to overheat them so I'll just let it be. It will just take a lot of time for them to relax out. All they had to do was fold them in HALF, and put them in a little bit bigger box. That's it.

Anyway, I'm working on the fronts now. I hope they go better than that back did. At least THESE aren't folded all up.

Progress is progress
 
Last edited:
Alright, so the glass is all in and the car can be sealed up... Which is good since I am now finished with the seats.

73iauv.jpg


You know, in my post yesterday I was quite frustrated. I had some trouble with these seat covers that I haven't had with others. Possibly my expectations were too high, I don't know. The rear seat top was a pain but I think the slight wrinkles (from packaging) will work out in time with some heat soak from being in the car. The front seat bottoms went perfectly. The front seat tops were kind of a pain because they wanted to crease where the head rest area meets the side bolster area. I was able to remedy this by PACKING that area with even more foam.

The seats were in really good shape before I recovered them, the driver's seat was the only one that was torn at all. I could have just re-dyed the front pass side and the rear seat with some SEM paint but I went ahead and replaced them all. The seat buns were in excellent shape but I still had to cover them in foam padding to build them up enough to fill out those Legendary covers.

Like with the headliner: An upholstery shop could have done better. That being said, I don't think I did too bad of a job.

I'll tell you one thing... My damn hands HURT. Lots of pulling, stretching, and squeezing. I put some of those covers on, took back off, back on, etc until I got them to a point where I could live with them.

Anyway, I'm glad that's done and now I can move on to wiring up the stereo and installing that.

I bought a Pioneer 4 channel amp. It says it's a 760 watt amp but it really puts out 60 watts RMS to 4 speakers. I bought some Kicker 3-way 6x9"s for the rear deck and some Kicker 5.25"s for the front kick panels. I'm not cutting up the dash, so I'm leaving the AM radio in place, hooked up to a single dash speaker. The main stereo system will be fed by an ipod or my phone. Lots of the time when I drive, I listen to old movies so this works great for me. I can have music, netflix, navigator, etc and not ruin the vintage look of the car. Everything will be hidden with the exception of those front speakers that will be mounted low in the front kick panels.

I'm waiting on a nice, non-rainy day so I can clean all the interior parts in preparation for the SEM paint. All the trim will be getting the proper colors. I think I can get it all cleaned and shot in a day. The interior will really come together at that point.

So anyway, that's it for now. I will update again when there's more to update about.
 
... I bought this headliner from Year One. It was a good "kit". I say "kit" because really all you get it the headliner and some spare material for recovering the sunvisors with. I would advise buying their headliner glue. I don't like the spray on stuff. If you go this route, I would suggest NOT applying the glue around the entire perimeter of the headliner but instead: Run your bows through the headliner in the right order, install the bows to the roof of the car, let the headliner hang in place, hook the rearmost bow with the 2 small 6" long "hooks" and THEN apply the glue to ONE side of the headliner and roof at a time (start at the front), let it sit for a few minutes, and then attach and work that side. Most videos say to apply it all around the perimeter of the headliner and roof then install but if you do it this way, you have GOT to be quick. For me, this install took several hours to get it and the glue will dry in an hour. Anyway, I know that all is a little confusing, it's hard to explain until you try it. - And, if you you want it to be perfect, unless you've done some of these before and have some experience, I would suggest letting a pro do it for you. Another tip: It is best to do this with the front and rear glass out of the car. Another thing to mention is: The less stuff you have to work around on the interior, the better. Do yourself a favor and pull the seats out at least. Plus, you don't want to drip any of that glue on your nice new carpet etc....

Cheers.

My Sebring will need a new headliner, these tips will come in real handy. Nice work, your car looks great!
 
Auto Transport Service
Back
Top