• When you click on links to various merchants on this site and make a purchase, this can result in this site earning a commission. Affiliate programs and affiliations include, but are not limited to, the eBay Partner Network.

The Willomet Charger

Are you going to follow the project when it's in Vegas? I'm going.
Yessir. It’s a sculpture for Seymour and in partnership with Miller Welders and SendCutSend. There’s a whole video we’re putting together to support that coincides with their 75th anniversary. They’ve been family owned from the start, and that’s pretty rare.

I’ll be there for setup at Seymour’s booths, and then Tue and Wed for meetings.

A full week is a bit too long to be in Vegas.

David
 
Bit of a catch up. I thought this door rust repair project would take a weekend plus a weeknight or three.

It took a month.

The car must have set under a carport. The driver side is in excellent shape while this passenger side must have taken on some rain from being at the edge of coverage. The PO scabbed in some junk so the filler would take. This low crown panel with a key body line turned out to be a real challenge. High crown panels are easy by comparison.

IMG_9796 (1).JPEG


IMG_9794 (1).JPEG


IMG_9795 (2).JPEG


I had to make this particular patch three times before I got it right. Low crown is hard, but I'm a little better at it now.

IMG_0001 (1).JPEG


IMG_0020 (1) (1).JPEG


With limited access to the backside of the panel, planishing was a challenge. I spent an entire day with a slap hammer and shinking disc to get this smooth within .035". I only know it's that tight because I couldn't fit my TIG filler under the lower points.

IMG_0052 (1).JPEG


IMG_0091 (1).JPEG


IMG_9850 (1).JPEG


DSC00590-2 (1).JPEG

Even though it'll be stripped off at the paint shop, I put a coat of Seymour's filler primer and sealer primer just so it looks good while I fit the rest of the body panels. This burned a lot more time than I would have liked, but learned a lot along the way.

David
 
Looks so simple but it’s so challenging. Results look great!
Thanks man. Seriously, that's the hardest panel repair I've ever done. An AMD door skin would have gone a lot faster, but it felt good to save this one.

I got these AMD tubs about 95% done before I was burned out on them. Picking them back up, I used the planishing hammer to fine finish the reworked front radius and flanged the rear similar to the inner edges.

IMG_0523.JPEG


Silicon bronze is my go to for making a weld look like it's bent sheetmetal.

IMG_0519.JPEG


IMG_0522.JPEG


IMG_0525.JPEG


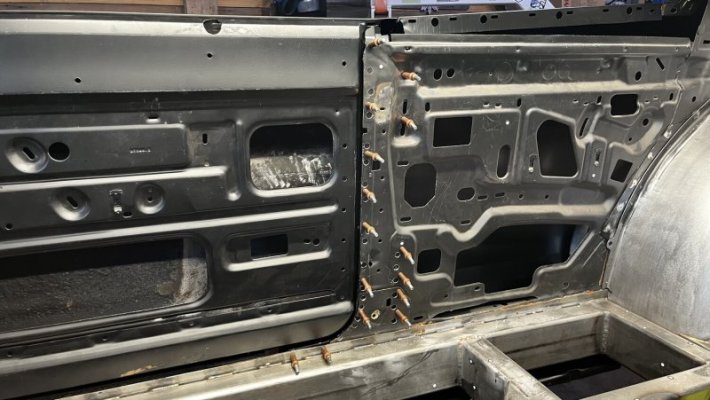
New passenger door jam.

IMG_0663.jpeg

Everything in the unibody that can get a dimple and get stronger and a bit lighter, will.

IMG_0621.jpeg


IMG_0595.JPEG


IMG_0592.JPEG


Now, to make a big leap in assembly.

IMG_0623.jpeg


The go-kart is about to get a lot bigger.

David
 
You do amazing work!
Thank you. The car is teaching me a lot.

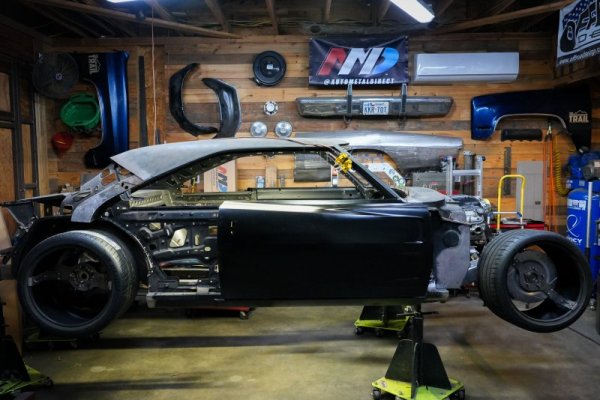
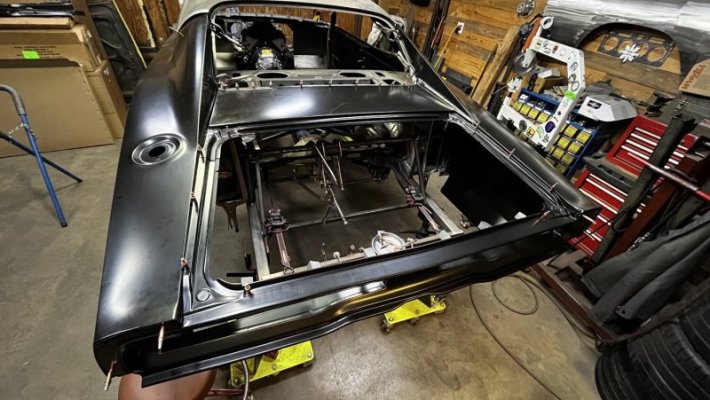
A childhood of assembling general lee models has paid off, and my welding project has finally turned into a charger.
IMG_0664.jpeg


IMG_0670.jpeg


IMG_0688.jpeg

OE truck fit check, and everything is gapped pretty well with just minor fitting of the rear deck filler panel.

IMG_0693.jpeg


Front fenders ended up hanging pretty easily once the doors were fit, and I built a quick structure to make adjustments a bit easier. We put the tram gauge on the car and verified key dimensions side to side are identical. That was actually a huge relief.

IMG_0711.jpeg


And something I've been excited about for months now...

IMG_0721.jpeg


IMG_0683.jpeg


IMG_0719.jpeg


That was my super bowl.

A few details. I picked 68 fenders and quarters because the marker light holes are smaller and easier to fill. The fenders will be modified to have a 1970 forward edge that matches the bumper, and I'll reference the pair of '70 fenders I have as a template. The front suspension is set about 2" forward from OE, so the arches will get moved and modified to fit the 305s at full lock.

The Speedkore hood is 21.5lbs where the factory one weighs 70 (that figure includes a bunch of pecan shells a mouse stored in there at some point). The trunk lid is 13.2lbs versus 34.5. All together, it's about a 70lb reduction that would have otherwise set high in the car.

I still have a ton of work to get the body locked down, but the first orders of business are reorganizing my shop to accommodate this seventeen footer. It was pretty easy to work on it when it was just a go kart, but that day has passed. And, getting a green laser because my red one is almost impossible to use with the lights on, and the long body line won't forgive a half-baked effort.

It'll be good to take a break from all the body setup, so steering column and headers are probably next.

David
 
Last edited:
Please post pictures & advise of the 70 fender conversion, I was thinking of doing this to my 68 fenders for a Daytona nose, Thanks, Charlie
 
Please post pictures & advise of the 70 fender conversion, I was thinking of doing this to my 68 fenders for a Daytona nose, Thanks, Charlie
It's going to take some figuring, but I will absolutely share results.

David
 
Auto Transport Service
Back
Top