• When you click on links to various merchants on this site and make a purchase, this can result in this site earning a commission. Affiliate programs and affiliations include, but are not limited to, the eBay Partner Network.

1970 Coronet R/T Project (Dasfusca's Car)

All the dash lights work now. NAPA sells the sockets. The bulbs are #158. Even the parking brake warning light and the turn signal indicators work. Not sure about the high beam light. The head lights aren't wired yet. I am putting in a headlight relay.

IMG_5337.JPG
IMG_5327.JPG
 
Last edited:
The low horn does not work. I cleaned the Point like contact but it is still giving me trouble. If I can't get it fixed, I am going to buy the OER Horns.


IMG_5341.JPG
IMG_5342.JPG
 
I worked on the key options. The annoying key in buzzer works now. The grounding screw did the trick.
IMG_5318.JPG

IMG_5321.JPG


The ignition key light works too. It comes on when you open the driver's door, lights up the ignition key hole, and goes out in something like 10 seconds. I am not sure it was worth the cost of the new resister. But it is cool that it works. NAPA Sells it. Part Number AR613.
IMG_5324.JPG
IMG_5320.JPG
IMG_5333.JPG
 
I installed the headlight relays. My switch now stays cool. I am pretty happy with it. It’s generic so I altered it a bit. Was easy to put in and only cost me $60. All my original wires stay intact with no cutting. I don’t have to worry about replacing a switch or melted headlight harness because of over heating. The headlights should be brighter.

I do NOT like the way it hooks up directly to the battery. I am going to run a 12 gauge wire directly to the starter feed bolt. I am going to rap the entire thing so it blends in.

C0D31E75-F6DF-47E9-A83E-980E0F790634.jpeg
6D56B85E-09E2-4215-BCA0-5B28B63350A7.jpeg
2A51CD00-0C56-4083-985E-2146D5A7F8F4.jpeg
4907364E-3DFA-4BD4-9A47-5DA9AABE4BA8.jpeg
079FA7A1-C6FD-42B0-B67A-36091A5D08DB.jpeg
0E176BA8-3C73-4D34-9104-130C9A9199DB.jpeg
D8CF2E65-F2ED-4062-AD95-144D2197B3D5.jpeg
8710E366-FF5B-420F-9DD5-83413309EA72.jpeg
2E43F2BD-6757-4CDE-8253-485FA8B19774.jpeg
 
I cleaned up the ram-air. I was going to paint it, but I think it looks good. What is the glue they held the wings on with?


16B3B442-5E23-4165-8465-A1E36DDF8839.jpeg
720F672C-7EBE-470C-98F6-CD9DD0A9CF65.jpeg
44E1A42D-9282-4F28-8072-EF4CFC35B5C0.jpeg
 
The new screws and clips for my ram air came today. The old ones were so rusty the clips broke off.
D8976B50-8DA0-4D8C-ACBE-6FBD8C17497A.jpeg
F51A1AAC-AB8C-454A-8F26-245D449FCD2D.jpeg
4AF2E61B-57AE-4E8B-91D5-85F853A4D743.jpeg
 
Nice job guy's. Hey is that bed liner on the bottom of the car. It is a good Idea. Did mine also. Glad I did. Easy to clean.
 
finally an update, wondering how you were making out, I was gonna drop you a text..... I been patiently waiting for a ride :poke:
 
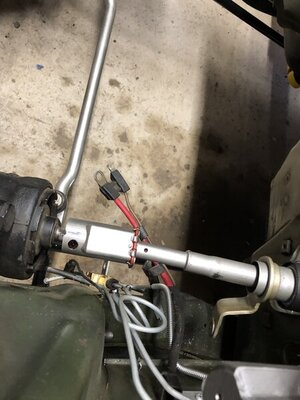
I learned something today. Passenger side Exhaust manifolds won’t fit if your head studs are too long. So I cut them down. If I would have put them on the engine before installation, they would not be able to be removed without moving the engine. Also the steering column is in they way of the drivers side. That has to be moved.
4B283396-4812-4D04-BED8-37DDC7DA40C0.jpeg
C1B9C1CD-EA2D-45E6-9DD3-E27801024D4C.jpeg
4464EB7C-FADF-4377-8F75-AE987C9D9B09.jpeg
 
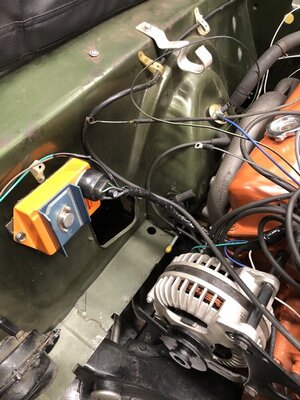
Starter is in. Power steering is in. Installing Classic Auto Air. I installed the ECU orange box. Here are some pictures.
A40E983B-239B-4E3E-9021-F3B3205DAE84.jpeg
C1342EA3-785C-419D-925E-9FB24ED1AF80.jpeg
79FE2550-399C-41B2-AED9-67D658A2CACB.jpeg
A75E487F-98C3-4FAD-8998-A3A2D0B371EF.jpeg
73BC4147-32E7-4D05-8D78-5A3EE97F1038.jpeg
54793E44-4F87-4B60-A068-1AF5F59D8879.jpeg
35BC6027-ED83-4747-85BC-B01ABCE74BFA.jpeg
04F13366-68BD-411A-8774-571AD967CE19.jpeg
165EB469-D005-4611-9047-C873C26357CD.jpeg
 
Exhaust is going on. I got it from Accurate exhaust. It is the H type. Make sure the manifold holes are 24 inches apart before you install.
E6874D91-A3EF-478A-9412-919997CC446B.jpeg
4D4C2B58-A769-4145-ABB9-78A97F9D7144.jpeg
 
I had to move the ECU. It was in the way of the new Air condition. So I put it under the washer bottle. I had to redo the wire harness to run the other way. So I added the A/C compressor wire to it.


568014AA-B374-4AEB-B3FB-4D67CF92A1C7.jpeg
23395603-1AFF-4EC9-91D1-4D60564D225D.jpeg
 
Looks great, but you'll run out of gas really quick!

Seriously, nice work. You are getting close!
Two more weeks and it will be running and driving. No windows or interior, but I’ll be able to pull it off the lift with its own power.
 
Auto Transport Service
Back
Top