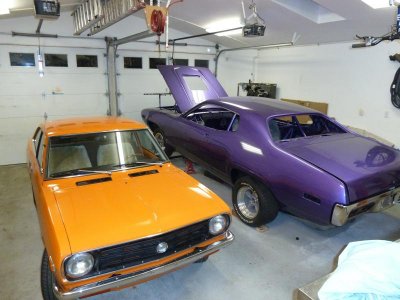
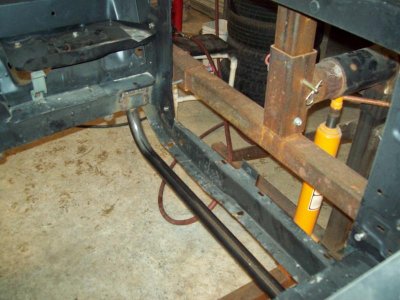
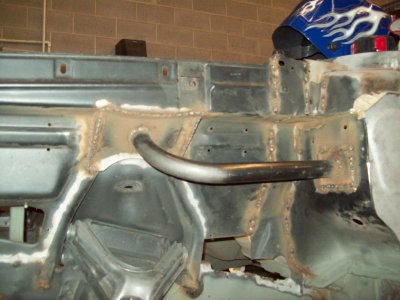
Great work Dangina. Ive checked this thread before from time to time but I finally took the time to read everything. Looks like you know what you want & you stick with the job til you have the results you were looking for. You wont look back thinking wishing you had done things differently because you have the patience to do the job rite the first time. By the way thanks for the info about the fender braces & radiater support piece. Il give them a try. You were a big help.
no problem glad I could help!!!
Been busy trying the past couple months, been trying to work on the car whenever the little guy is sleeping, I pulled apart the 400 and took it into the machine shop. Its a good virgin block and will work great for my 470" kit from muscle motors (which has been 2 months and still haven't recieved it yet)

Installed the headliner from year one (which is from PUI) I would not reccomend getting it from them as they sowed 2 bows in the wrong spot and I realised this wasn't gonna work after we had already cut up the material. So with summer coming fast I drilled new holes, sowed on extra fabric on the front to make this work. Its ok but not great. I will replace it with one from legendary down the road when i have more time to do so, but for now it'll work.
painting some forgotten interior parts
washed the seat belts with laundry soap in a tub, then washed them off and dried them with the air gun. They look like new!
Installed the rear panels - had to repair one of them, turned out pretty good
- - - Updated - - -
installed front and rear speakers
http://s187.photobucket.com/user/y2kdano/media/1971%20Plymouth%20Roadrunner/IMG_20130309_191456_zps84d57a4d.jpg.html"]
[/URL]
http://s187.photobucket.com/user/y2kdano/media/1971%20Plymouth%20Roadrunner/DSC_0173_zps4dd10228.jpg.html"]
[/URL]
http://s187.photobucket.com/user/y2kdano/media/1971%20Plymouth%20Roadrunner/DSC_0175_zpsf769d027.jpg.html"]
[/URL]
http://s187.photobucket.com/user/y2kdano/media/1971%20Plymouth%20Roadrunner/frontspeakers_zps0a882bfa.jpg.html"]
[/URL]
so I built my own hydraulic clutch bracket from 1/8" plate for my wilwood compact 7/8" MC:
http://s187.photobucket.com/user/y2kdano/media/1971%20Plymouth%20Roadrunner/CAM00003_zpsf5f8014e.jpg.html"]
[/URL]
http://s187.photobucket.com/user/y2kdano/media/1971%20Plymouth%20Roadrunner/CAM00004_zpsbe0fceec.jpg.html"]
[/URL]
http://s187.photobucket.com/user/y2kdano/media/1971%20Plymouth%20Roadrunner/CAM00009_zps7e849b13.jpg.html"]
[/URL]
added spacers and welded on the nuts and drilled out the stock holes:
http://s187.photobucket.com/user/y2kdano/media/1971%20Plymouth%20Roadrunner/CAM00014_zps07356802.jpg.html"]
[/URL]
http://s187.photobucket.com/user/y2kdano/media/1971%20Plymouth%20Roadrunner/CAM00017_zps19995edf.jpg.html"]
[/URL]
http://s187.photobucket.com/user/y2kdano/media/1971%20Plymouth%20Roadrunner/CAM00019_zpsfe8608e5.jpg.html"]
[/URL]
http://s187.photobucket.com/user/y2kdano/media/1971%20Plymouth%20Roadrunner/CAM00021_zps5c7410cc.jpg.html"]
[/URL]
drilled out the angle for the MC, didn't like the angle of first try which is why you see unused holes:
http://s187.photobucket.com/user/y2kdano/media/1971%20Plymouth%20Roadrunner/CAM00024_zpsf68d528b.jpg.html"]
[/URL]
http://s187.photobucket.com/user/y2kdano/media/1971%20Plymouth%20Roadrunner/CAM00025_zps71a38227.jpg.html"]
[/URL]
http://s187.photobucket.com/user/y2kdano/media/1971%20Plymouth%20Roadrunner/CAM00027_zps193c4d00.jpg.html"]
[/URL]
http://s187.photobucket.com/user/y2kdano/media/1971%20Plymouth%20Roadrunner/CAM00030_zps60f9ee12.jpg.html"]
[/URL]
cut off any extra unsed weight
http://s187.photobucket.com/user/y2kdano/media/1971%20Plymouth%20Roadrunner/CAM00032_zpse5d671eb.jpg.html"]
[/URL]
http://s187.photobucket.com/user/y2kdano/media/1971%20Plymouth%20Roadrunner/CAM00034_zps84ff9702.jpg.html"]
[/URL]
paint!
http://s187.photobucket.com/user/y2kdano/media/1971%20Plymouth%20Roadrunner/DSC_0143_zpsdbb5b9e6.jpg.html"]
[/URL]
http://s187.photobucket.com/user/y2kdano/media/1971%20Plymouth%20Roadrunner/DSC_0146_zps8bbbf8bb.jpg.html"]
[/URL]
http://s187.photobucket.com/user/y2kdano/media/1971%20Plymouth%20Roadrunner/DSC_0148_zps48e80818.jpg.html"]
[/URL]
the firewall wasn't perfectly straight so I had to cut somemore off, final look:
http://s187.photobucket.com/user/y2kdano/media/1971%20Plymouth%20Roadrunner/DSC_0150_zps75e2774a.jpg.html"]
[/URL]
installed!
http://s187.photobucket.com/user/y2kdano/media/1971%20Plymouth%20Roadrunner/DSC_0155_zps8859251f.jpg.html"]
[/URL]
found a graet place to mount my wilwood bottle for the MC:
http://s187.photobucket.com/user/y2kdano/media/1971%20Plymouth%20Roadrunner/DSC_0153_zps0b1df54c.jpg.html"]
[/URL]
little guy dropped in to see what I was doing:
http://s187.photobucket.com/user/y2kdano/media/1971%20Plymouth%20Roadrunner/DSC_0162_zpsa8ea591d.jpg.html"]
[/URL]
installed dash and for the insert It wasn't as bad as the instrument cluster for wear, so I tried the method of clear paint and painted the edges with the silver paint pen. Its too shiny and about two shades darker than my cluster now so I may change one or the other down the road but for now its going in:
http://s187.photobucket.com/user/y2kdano/media/1971%20Plymouth%20Roadrunner/IMG_20130412_175337_zps405397cf.jpg.html"]
[/URL]
rear seat mockup:
http://s187.photobucket.com/user/y2kdano/media/1971%20Plymouth%20Roadrunner/IMG_20130412_175320_zps85800d3d.jpg.html"]
[/URL]
installed the front and rear windshield yesterday:
http://s187.photobucket.com/user/y2kdano/media/1971%20Plymouth%20Roadrunner/IMG_20130412_144818_zpsffb97c4a.jpg.html"]
[/URL]
http://s187.photobucket.com/user/y2kdano/media/1971%20Plymouth%20Roadrunner/IMG_20130412_151818_zps8d44d4dc.jpg.html"]
[/URL]
now time to pull out that rear!!!!!


