• When you click on links to various merchants on this site and make a purchase, this can result in this site earning a commission. Affiliate programs and affiliations include, but are not limited to, the eBay Partner Network.

1972 Satellite / GTX RestoMod

Thanks, this is a good product:thumbsup: I like it.
but you know, I was just thinking, picture in your mind the dash installed - painted the Cherry Bomb Pearl and eventually the black floor carpet installed. The bucket seats are black with red piping. Now even with the AC system installed under the dash, there is going to be an area where the white is going to show above the carpet and below the dash, it will not look good, so there will be a small area that we will have to paint flat black in order to hide the white heat barrier.

The white colored heat barrier was great to see where to apply it over the grey sound deadener, but if we had to do it over again, we should have switched the colors around, used a white sound deadener and a grey heat barrier.

Oh well, not a big thing to fix. You always have to think 5 steps ahead of where you are.:rolleyes:

I thought of that also when ordering. The sound deadener only comes in black. The ceramic coating comes in black or white. If we used the black ceramic coating, it still comes out kinda charcoal grey. I ordered my product from Jegs. They had the best price and more options. 4 Gal of sound deadener and 4 Gal. of ceramic coating with spray gun and mixer was $647.05 (ordered 8-8-16)
 
An outstanding account of the work so far. This project and a few others is making me want to start another some day soon. :thumbsup:
 
For the lizard skin, my car is in bare steel. I was going to epoxy and paint the interior floor. But considering the paint costs and the benefits of lizard skin I will probably go that way instead. The question I have, is, since it has been sandblasted Should I bother to seam seal it after epoxy, or can I epoxy and use the lizard skin as a seam sealer?
 
For the lizard skin, my car is in bare steel. I was going to epoxy and paint the interior floor. But considering the paint costs and the benefits of lizard skin I will probably go that way instead. The question I have, is, since it has been sandblasted Should I bother to seam seal it after epoxy, or can I epoxy and use the lizard skin as a seam sealer?
Lizard Skin is water based. So epoxy prime and seam seal first.
 
Ok, so an update.
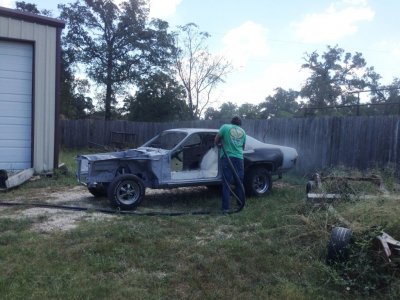
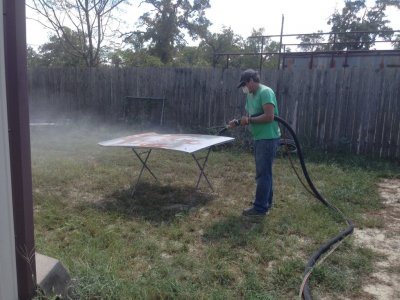
I started the media blasting process. Now the process I have used in the past on other projects has been dry soda blasting along with garnet or aluminum oxide for rusty areas. My blaster had a portable trailer with an industrial unit that had multiple tanks for the soda and other more aggressive media and could switch back and forth. He used to come to my shop to do the blasting. Well my blaster is not mobile anymore and established a shop down in San Antonio a little too far away so I've been looking for an alternative.

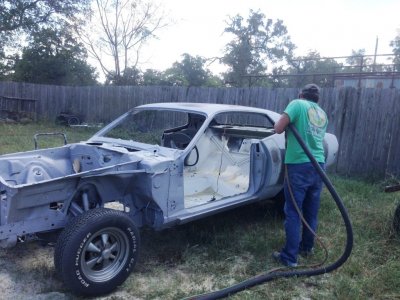
So an acquaintance of mine has a shop just down the road, and he has an industrial blasting unit that uses a wet process using ground glass. You add a 50 pound bag of ground glass, 5 gallons of water and a rust inhibitor chemical into the mixing tank. He told me I could use his system to do the stripping. I've done blasting before so it isn't new to me, but this method was.

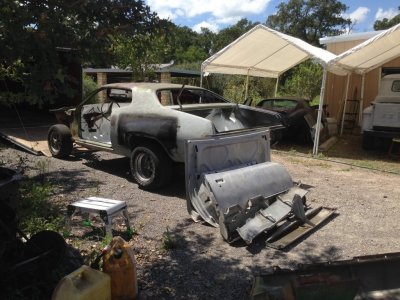
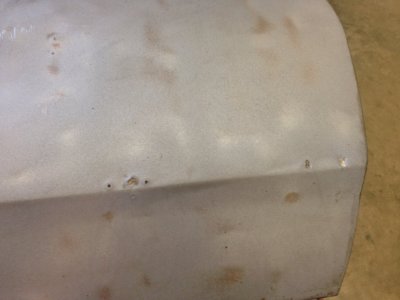
Anyway I started stripping a front fender first and then moved on to some other pieces. about 45 minutes later, I looked back at the fender I had done first and you can see in the picture what happened. It flash rusted bad. I don't like to do things twice so I stopped, stepped back and reevaluated this process. The other pieces I stripped seemed to be fine but they also started to flash rust but not as bad.

Now I don't know what happened, the chemical I added to the mixing tank was supposed to protect the metal from flash rusting, but it didn't work as advertised. I brought everything back to my shop and started working on cleaning and DA sanding the stripped pieces to get them painted with epoxy primer before they could flash rust just as bad.

IMG_0780.JPG View attachment 361005 IMG_0790.JPG
 
Last edited:
To continue, here is my take on media stripping. I have done it myself using soda, aluminum oxide, coal slag (black beauty) plastic beads and other media. There are a lot of different types of media used in stripping vehicles. I have even used Walnut shells to polish a cam or crank shaft but it is more for polishing and is not used in stripping paint. But never, ever use sand.
Now soda removes paint but it will not remove rust. It can remove body filler but it takes a little time to eat it out. It leaves the metal in great shape and doesn't etch the metal. The metal will look like it just came from the stamping machine. Once soda blasted the metal can set for a long period without flash rusting because the soda protects it. But it can be a pain to clean it off the metal. You have to wash and wash (soap and water and immediately air dried with compressed air) to remove the soda, if you don't get it clean the paint wont stick. But once clean, you do not have to DA sand the metal before priming. Just use an epoxy primer and your good to go.

Now a more aggressive media like ground glass (consistency of fine sand) is great for removing paint and rust at the same time but it will etch the metal. Its not as difficult to clean the metal to get rid of the glass particles as in soda but you have to DA sand the metal to get a smooth surface using 180 to 400 grit paper. If you don't DA sand the metal and just paint, the resulting paint will look like it has a lot of orange peel when in actuality its the etching of the metal from blasting that makes the paint look that way. So with this type of media there is some sanding involved.

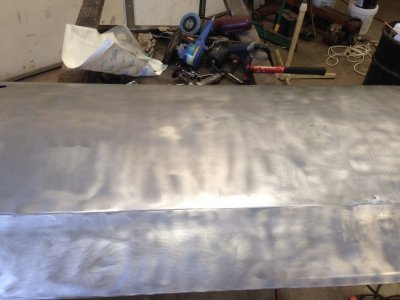
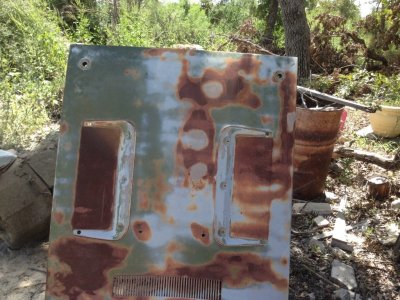
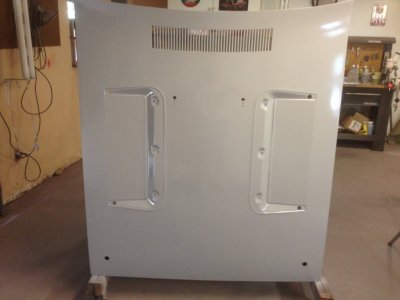
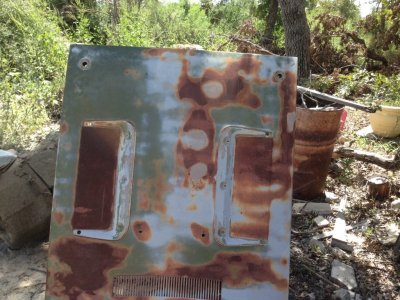
With this car we have to use a more aggressive media because there is a lot of rust to be removed. See the pic of the hood. Now in the media stripping process add in wet or dry blasting. With dry blasting there is a lot of dust floating around and if you don't do it right you can over heat or stress the metal. With wet blasting, no dust and it keeps the metal cool but you have to add a rust inhibitor to keep the metal from flash rusting because of the water. Now this is the first time I have used wet blasting, and I don't like it! I added the chemical to keep the metal from flash rusting but for whatever reason it didn't work to my satisfaction.

So I have to re-blast the front fender I did first and a few places on the truck lid that flash rusted. They are just too bad to try and sand it out or off. At least the other parts I wet blasted I can work with because they didn't have time to flash rust. I would tell you what I did with the other pieces to keep them from flash rusting but you wouldn't believe it, you would say Oh My God! You didn't! But as I saw it, it was an emergency at the time, and I didn't want to re-blast every part I had just done.

Ok, I'll tell you, I first thought of diesel fuel because of the oil in it and I had 5 gallons at hand, but that is way to dangerous. But I just happened to have in my truck some cans of, wait for it,,,, WD40, and I sprayed down the parts. It kept the other parts from flash rusting at all, no flash rusting. But WD40 has silicone in it that is an absolute no, no having around painting.

For the other parts with WD40 on them I set up a three stage cleaning station totally separate from each other to eliminate cross contamination of silicone. First stage coating and soaking the part with engine foamy degreaser then scrubbing with a brush. Second stage washing with dawn grease and oil cutting soap, the kind they use on wildlife caught in oil spills. Third stage another washing with this soap and scrubbing with a brush. Then a complete rinsing and compressed air drying. Then a complete wipe down with a paint wax and grease remover.

Added - I thought about using oven cleaner like I have used on really dirty / oily engines, but that would probably harm the bare sheet metal, causing probably something like streaking and discoloration.

Live and learn
IMG_0781.JPG
 
Last edited:
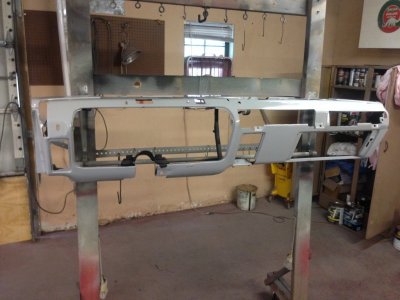
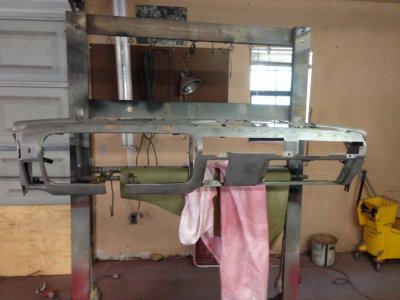
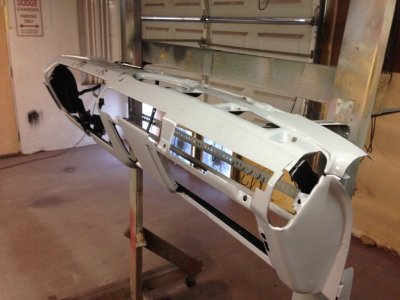
Mean while I have cleaned and primed the dash, rear valance and front upper grill support. In the pics you can see the dash after media stripping and after I had cleaned it then after I painted it with epoxy primer.

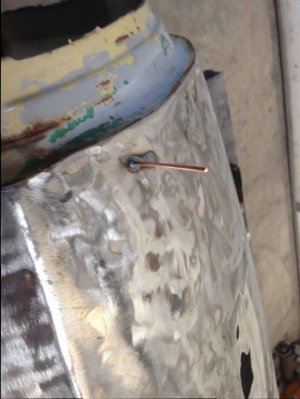
I'm also working on the passengers door after media stripping. Welding up holes where a screw-in dent puller had been used and probably chrome trim holes.and DA sanding it getting it ready for primer. Back in the day all you had to pull dents was the old screw-in slide hammer tool but you had to drill holes in the metal to use it. After pulling the dent all you could do was fill the hole with bondo. You can see in the other picture where today you can use a pin welder and use a special slide handle puller that clamps on the pin and pulls the dent. Now all you have to do is cut off the pin and grind down the nub, no holes.
You can see the door metal texture after media blasting it with ground glass and after I DA sanded it.
IMG_0787.JPG IMG_0782.JPG IMG_0785.JPG IMG_0791.JPG IMG_0789.JPG IMG_0519.JPG
 
Last edited:
Mean while I have cleaned and primed the dash, rear valance and front upper grill support. In the pics you can see the dash after media stripping and after I had cleaned it then after I painted it with epoxy primer.

I'm also working on the passengers door after media stripping. Welding up holes where a screw-in dent puller had been used and probably chrome trim holes.and DA sanding it getting it ready for primer. Back in the day all you had to pull dents was the old screw-in slide hammer tool but you had to drill holes in the metal to use it. After pulling the dent all you could do was fill the hole with bondo. You can see in the other picture where today you can use a pin welder and use a special slide handle puller that clamps on the pin and pulls the dent. Now all you have to do is cut off the pin and grind down the nub, no holes.
You can see the door metal texture after media blasting it with ground glass and after I DA sanded it.

View attachment 361029 View attachment 361030 View attachment 361031 View attachment 361033 View attachment 361035 View attachment 361036
Did you soda blast the dash? I am at this point where I need to strip my dash frame down and paint it. I was thinking of having it powder coated, but the turn around time is about a month plus. I like how yours is turning out.

Craig
 
Did you soda blast the dash? I am at this point where I need to strip my dash frame down and paint it. I was thinking of having it powder coated, but the turn around time is about a month plus. I like how yours is turning out.

Craig
Hello Craig, No I didn't use soda, I used the ground glass to strip it, then I cleaned it, then hand sanded it with 180 grit paper and over all with 400 grit, then cleaned it again. The back side of the dash is painted with rustOleum flat black primer, the front side is painted with epoxy primer. Here is another pic of the dash.

Added - I have a small syphon feed blasting gun that I have used for small parts like brackets and such. I also have a blasting cabinet. I have used the small syphon gun with its portable container behind my shop to strip medium sized parts like a dash board setup on a stand. A dash type panel has a lot of bends, profiles and backside offsets that are hard to get at to properly strip it down. My syphon gun is small and can get at those complicated bends, it can be used with media like plastic beads, aluminum oxide and the like.

Steve

IMG_0786.JPG
 
Last edited:
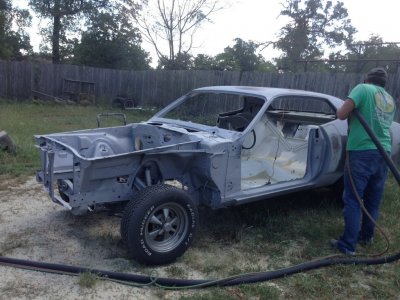
Well we've finished the media stripping, completing the task using ground glass in a dry application. It did a great job removing the rust especially on the hood. Stripping using a dry application did not create much dust.
After completion we uncovered some other areas on the body that will need metal replaced.
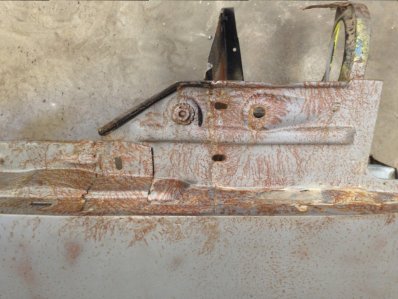
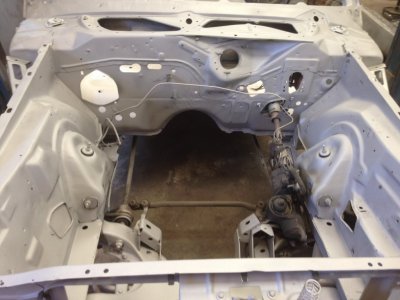
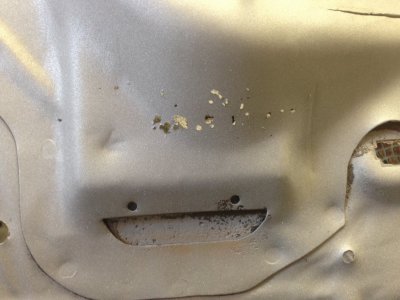
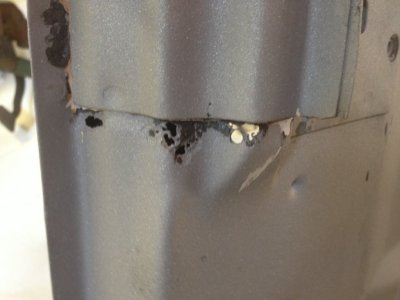
Remember when we replaced the roof piece on the drivers side "A" pillar, now we'll have to replace some metal on the passengers side "A" pillar. There are also rust through places on the passengers side door jam, across the top of the roof, on the fire wall and the rear trunk lip and left side lower gutter area.
Also we are continuing with welding up holes in the door, cleaning the pieces and then applying an epoxy base primer paint.
The passengers side front fender has numerous holes in it where a big dent was pulled out using a screw in dent puller.

Will post some rust through pics so you can see the trouble spots on this car and maybe compare it with your own. All in all with the amount of rust showing through the paint, indicating more problem areas, I was surprised that there were not more areas that will need metal replaced. It really is not in that bad of shape.

Even looking at the body, stripped naked, the car looks better already.

Steve

IMG_0801.JPG IMG_0803.JPG IMG_0804.JPG IMG_0805.JPG
 
Last edited:
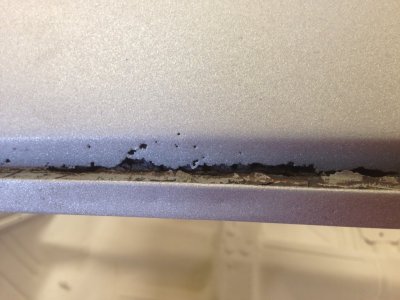
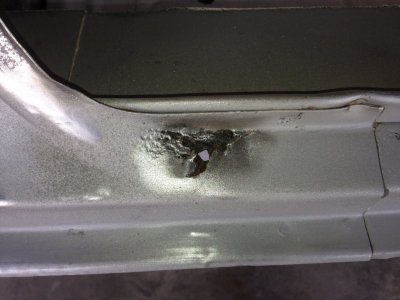
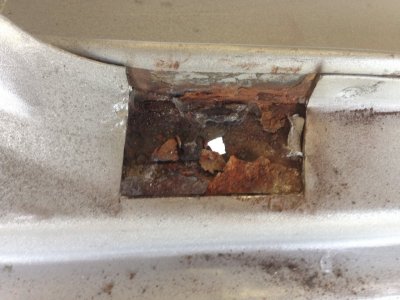
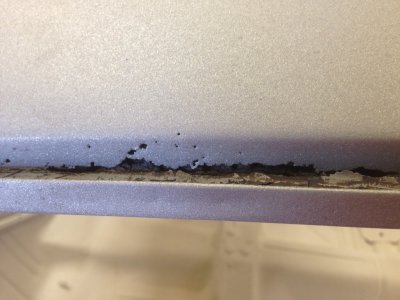
Here are some additional pics after stripping. The drip rail on the passengers side as you can see is missing a lot of area. On the right side front door jam area the rust through was under the seam sealer. Most of the seam sealer on the car was already gone due to drying, cracking and falling out. A lot of the seam sealer between the door jams and the firewall was old, dried out and falling off, this is where rot through has occurred. the one area of the firewall is in the middle where the fresh air intake is and where there is a drain location.

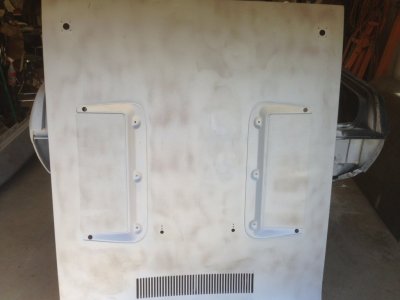
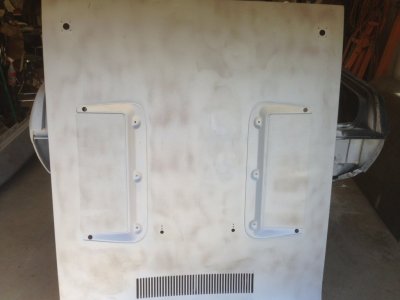
The engine housing and the hood came out great! It was 94 degrees out today and it was hot doing this job.

Added: Look back a few posts and see what the hood looked like before media blasting, it came out great. We'll do a little DA sanding with 180 then follow that up with a little 400.

IMG_0806.JPG IMG_0807.JPG IMG_0808.JPG IMG_0810.JPG IMG_0811.JPG
 
Last edited:
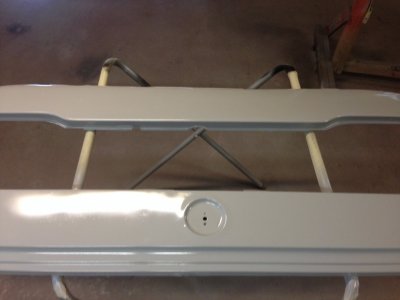
Just a few pics of the hood before media stripping, after and painted with an epoxy primer. got to do some minor body work on dents yet.

IMG_0781.JPG IMG_0811.JPG IMG_0813.JPG
 
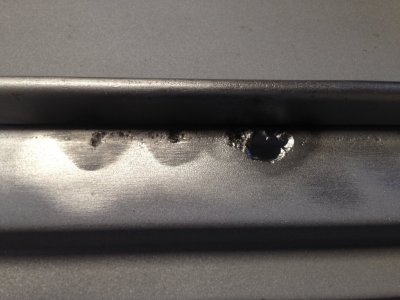
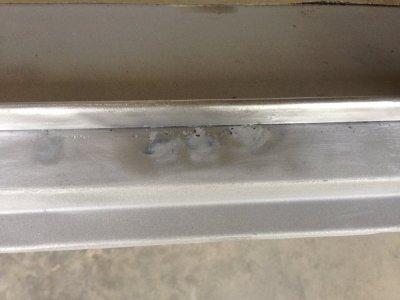
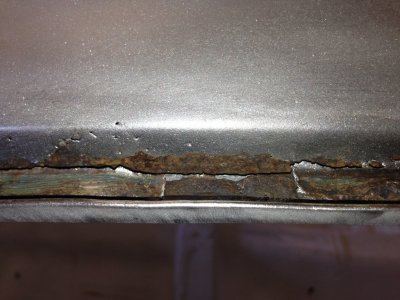
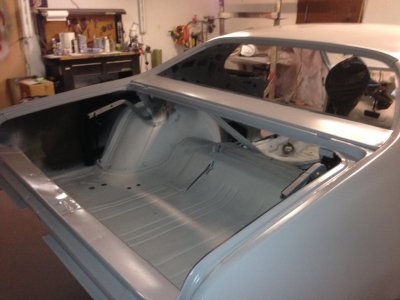
We continue to complete body work on the Satellite. As you see in the pics after media blasting we found some areas that need additional repair. Along the lower trunk lip were several areas we need to fix. The smaller holes we filled with a liquid metal filler and sanded down.
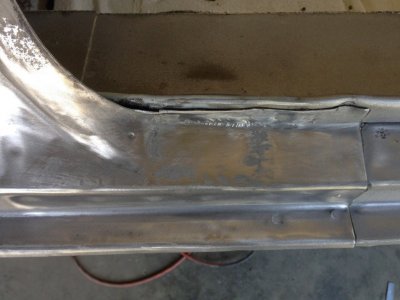
The larger area on the left round down we knew would be worse underneath than what it seemed once we removed the top layer of rusted metal. We are going to have to rust treat the underneath metal, fill in the underneath hole, then cut a piece of new top metal and butt weld it in place to fix this particular place. Edit: You can see the new piece we cut and welded in place to fit this.

What we are contemplating is how to fix the rust area on the right side drip rail. this is an area of about 12 inches of the drip rail. (Last picture)
We could just fill it with plastic body filler or a liquid metal product, sand it down and call it good, but will the rust come back? Some how you have to treat the underneath metal to stop the rust before you fill in the gap, other wise it could come back.
We could cut out a section of the bad metal, treat the underneath metal for rust, fab a new piece of metal and butt weld it in place. You would have to do this in such a way as to make a nice visual repair before top filling to complete the repair. This would be a very small width but very long piece of metal with a couple of bends and contoured to fit the shape of the roof. The new metal piece would also have to bend up and over the roof line a little ways. Not exactly an easy fix. Its also an area that would be difficult to get a grinder in there to sand down the welds when completing the welding process. Metal warping would be a problem due to the small metal area and the heat generated by welding.

There is always a right way and a wrong way to do things, especially if you want the repair to last.
What would you all do? Just fill it in, or replace the metal?

IMG_0820.JPG IMG_0824.JPG IMG_0826.JPG IMG_0827.JPG IMG_0810.JPG IMG_0829.JPG
 
Last edited:
Lookin good!
 
thanks,
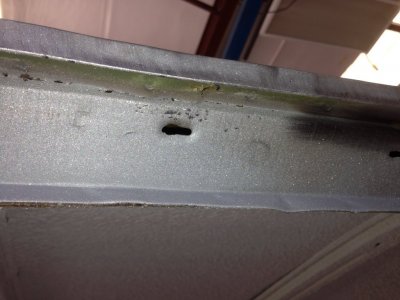
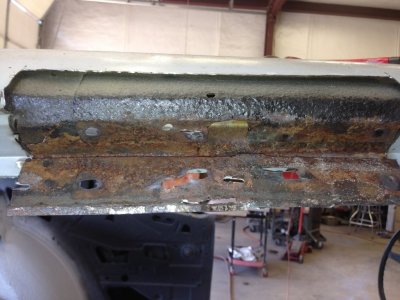
Now for the right side drip rail. Of course no parts exist to fix this so you have to get a donor piece or fabricate from scratch. You can see the under side of the drip rail where it has rusted through in one pic. This is a complete piece that also has the outside rail where the chrome trim would attach.

The other pic shows the top side roof skin that folds over and welds down into the drip rail. Both pieces need to be fabricated. The roof skin and the drip rail.

To fix this right we would have to cut out a section of the roof skin about 12 inches long and wide enough to extend up into the top of the roof. Also wide enough to get in there and rust fix the inner frame.
Then we would have to fabricate the drip rail, that's not so easy to get the right bends and end up with the outside chrome trim rail matching up with the existing rail.

IMG_0830.JPG IMG_0833.JPG
 
Last edited:
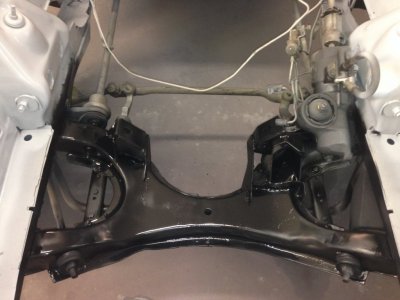
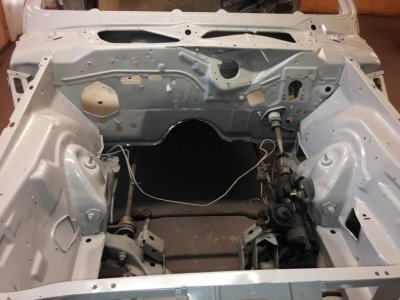
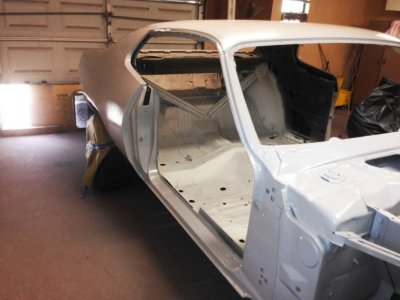
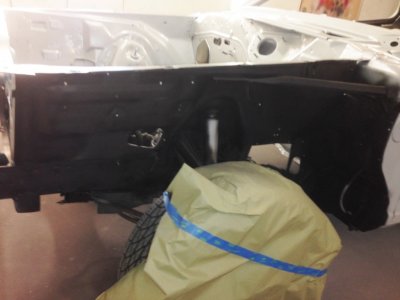
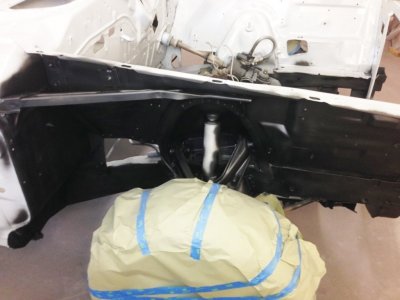
Continuing on, Epoxy primer applied and the front outside inner fenders are done as well as the K-frame. Now we can work on the final body filling the panel repairs and block sand it down.

Mean while we are working on the deck lid, right side door and right front fender, When they are ready we will epoxy prime them

We will get the body back over to the other shop and work on fixing the right side drip rail. Once done we'll epoxy prime the repair.

Coming up real quick we'll cut in the final top coat, base / clear in the body door jams, top of the rockers, trunk gutter and engine housing. We will also final paint the inside of the doors in preparation for hanging them on the body. We already have the fender brackets, door hinges and the like done and painted, ready for installation.

The front suspension will come out of the car eventually and be rebuilt or replaced so a lot of that did not get painted at this time.

IMG_0837.JPG IMG_0839.JPG IMG_0834.JPG IMG_0836.JPG IMG_0838.JPG IMG_0840.JPG IMG_0835.JPG
 
Last edited:
Howdy, along with epoxy priming all the body parts after stripping, I have been media blasting and priming brackets. Also fixing the additional rust through areas that media stripping uncovered. I have also been working on the right side drip rail rust through area.

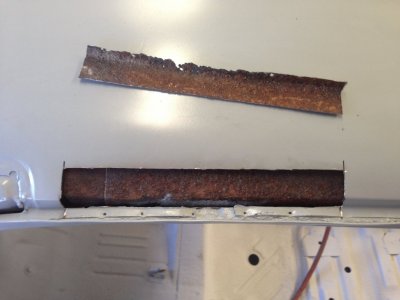
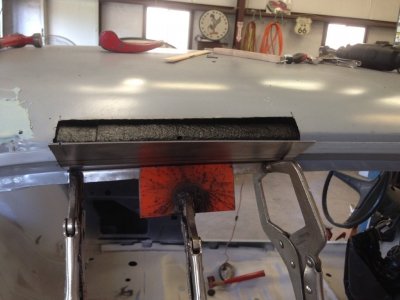
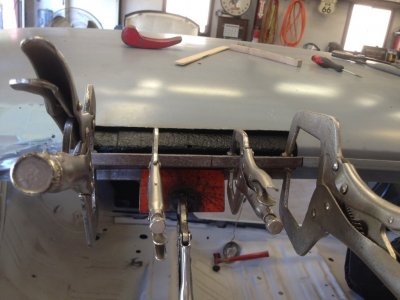
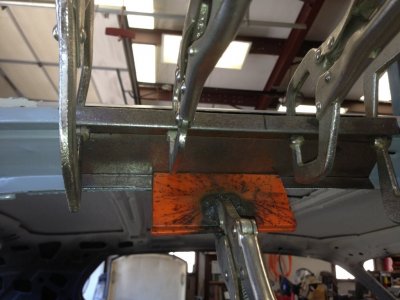
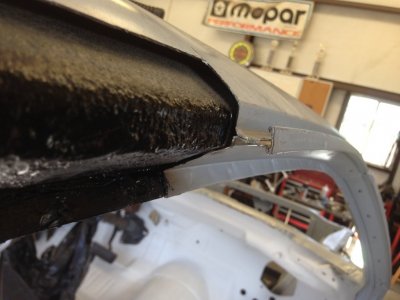
The right side roof skin /drip rail rust damage will be a real challenge. I am approaching this fix in a cautious, planned strategy. No aftermarket parts exist for this area, only salvage yard parts which could be difficult to find. If you just go in there hacking out the old rusty pieces you could be left with no clear path for repair. So First I cut out the bad metal on the top roof skin piece as you can see in the pics. This piece can be fabricated from sheet metal with a little patience and the right tools. Once I got this piece cut out I can see the inside frame and how much rust there is underneath and deal with it.

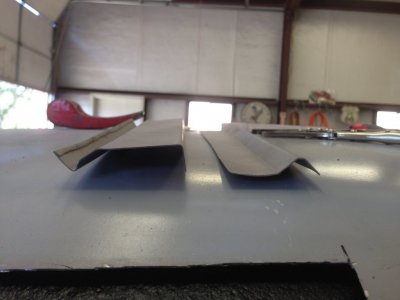
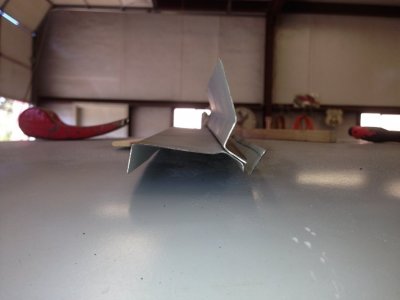
The next phase is to deal with the underside of the drip rail. This piece will be difficult to fabricate because of the complex bends. So once I had dealt with the top side, I started to fabricate the underside piece BEFORE I cut it out of the car. If you cut it out first and then find out you can't fab the new piece your screwed.

It took me a couple of tries bending a new sheet metal piece until the third try, I started to get it right. Lots of measuring, lots of trial fittings. Even trying to get the roll over pinch on the top so that the chrome trim with fit and so that after welding in the part, it looks natural and not a hack job. This piece is also not straight it curves or rounds down toward the end of the drip rail. This curvature was difficult to recreate.

Now once I was assured that I could make the new piece and that it would look natural, I started to cut out the old underside roof rail and exposed a new area for rust treatment. It isn't as bad as I feared after cleaning it and treating with a rust treatment. I used a combination of a standard air cut off tool with a 3/16 metal cutting disc and a drimel cutoff tool disc so that I did not have to over cut the area.

See next post

IMG_0851.JPG IMG_0852.JPG IMG_0854.JPG IMG_0855.JPG IMG_0860.JPG
 
Last edited:
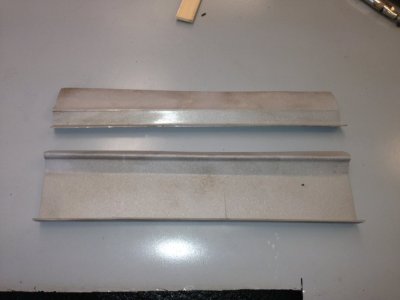
/now I have the new pieces fabricated. I used my sheet metal break to create the bends. I had to start with the inside bends first and slowly worked toward the outside finally creating the chrome trim side rail and folding over the top pinch that the chrome trim snaps on to.

Man I'll tell you this was challenging to get the bends right and the angles just right so that the new pieces will fit right in place.
If you don't get these pieces correct the chrome trim either will not fit or will not stay snapped onto the outside rail. Now once I get the underside rail panel fitted and partially welded on I will pinch the gap closed on the bottom side of the chrome trim side rail.

And if you are not planning on reinstalling the chrome trim you have to get the side rail correct or it will look like a hack job. It will stand out like a sore thumb especially since it is eye level and its the first thing people will see.
You can see in the pics how the new pieces I fabed fit together and also see a pic of how the pieces fit together on the existing roof where the new pieces will weld on.

Once I had the pieces fabed and satisfied with the fitment, I cleaned them up in the blasting cabinet and painted them with a self etching weld through primer. Now its time to weld them in. Now I will have to go slow in welding so as not to warp the pieces and continue to test fitment and adjust as necessary to get the final positive results. I'll post more pics of the welding process and the final result.

IMG_0856.JPG IMG_0857.JPG IMG_0859.JPG IMG_0861.JPG
 
Last edited:
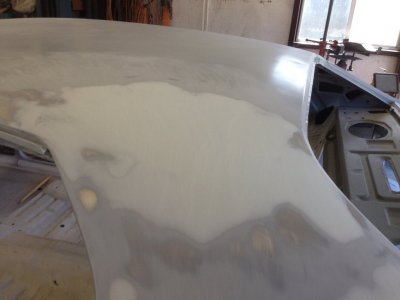
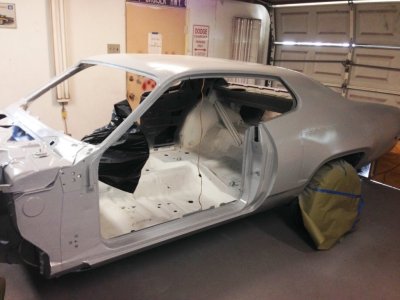
We are still working on the project, however our timeline for finishing the project mid Oct got blown out of the water. After media stripping we found other areas of rust we had to address. The right side drip rail area we had to repair took some time to fabricate and weld in the replacement pieces. Also we had already started the body work phase of the project, smoothing out the areas where the replacement panels were installed.

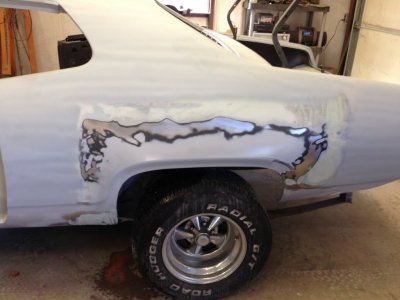
Body work takes a lot of time to get it right, to end up with smooth straight body lines, "swoops" and arches. I'm somewhat embarrassed to say I have had real problems getting the body lines right on the left rear wheel well arch. Recall we used a patch panel on the left wheel well arch. I'm still working on it but it has slowed me way down on our timeline. Also on this panel we have to smooth out the area where the rear bumper fits, there was some bad dents in this area and also to enclose and smooth out the body arch for the side marker light. At the time we ordered, this was the only panel available to fix this area instead of the complete left quarter that was out of stock. Now the complete left rear quarter is available. Normally it is much better and faster to use a complete panel that has complex bends and arches. You can install the whole thing and you don't have to contend with smoothing out body lines. It is frustrating to have this much trouble getting the body lines correct but I'll get it done right!

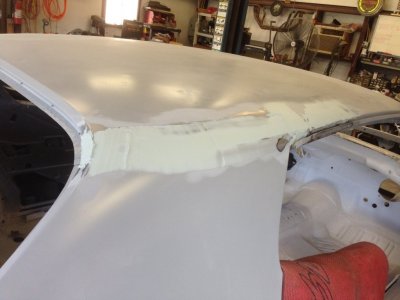
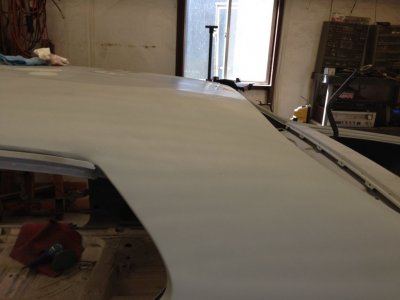
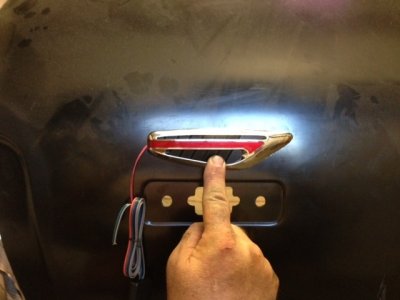
The right side complete rear quarter was available and we replaced it with very little body work needed to complete it. We enclosed and smoothed out the rear side marker light arch in preparation for installing the custom side market lights we chose to use for this build. I included a pic of the new side marker light we will be using on the rear. Also we have to smooth out the roof "C" pillar arches where the new right rear quarter panel attaches to the roof and on the left where media stripping took out some of the factory body solder seem. Please ignore the "C" pillar pics where it looks like there are stripes in the paint. After smoothing out this arch a self etching primer was applied to protect the area until final painting. It will all get wet sanded down with 600 grit before final painting.

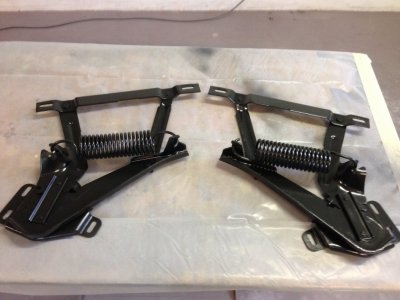
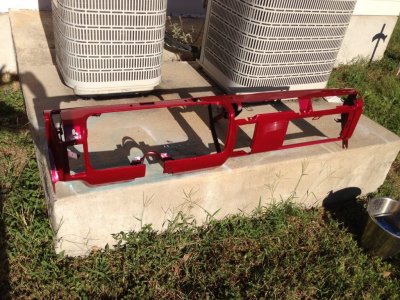
At the same time all this is going on we are working on media stripping and final painting subassemblies like the hood hinges and final painting the dash. I've included a pic of the final painting of the metal dash subassembly - came out really great! Now you can realize what the cherry bomb red pearl will look like. Its hard to see in the pic but the paint has an even metal flake and pearl contrast to it.

Also final painting the inside of the doors and deck lid / gutter, body door jams, all in preparation for installing these subassemblies to the body. All this has to get done first so that we can paint the car put together. Recall that we are two tone painting with cherry bomb red pearl and a Tahitian metal flake black cutting an angled diagonal line from the front fenders transitioning up to and across the rear flat part of the deck lid. A rear deck spoiler will also be installed that will be apart of this transition. To get this right the car has to be final painted put together.

IMG_0865.JPG IMG_0866.JPG IMG_0867.JPG IMG_0868.JPG IMG_0869.JPG IMG_0870.JPG IMG_0478.JPG
 
Last edited:
Auto Transport Service
Back
Top