• When you click on links to various merchants on this site and make a purchase, this can result in this site earning a commission. Affiliate programs and affiliations include, but are not limited to, the eBay Partner Network.

$500- 68 charger

That lip don't look too bad. I honestly thought it would be more rotten then that. You gotta be getting pretty excited. Refreshing once you get to the point of putting on new quarters or skins. Especially with how rusted/rotten of a car you've had to deal with up to this point. Good job!
 
Finally after 5 weeks this monster comes in. I posted early about ordering this compressor from Northern Tool for $380 total. Now I have to wire and plumb it which will be another $100. Keeping fingers crossed it will not be a pos. 11.5 CFM@ 90 so I think that will help me with the blasting and the air saw. Been kinda lazy with the car work and busy at real job work. Got next three days off so may get some car work done hopefully.

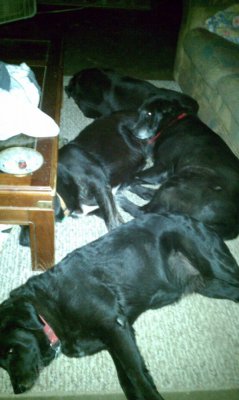
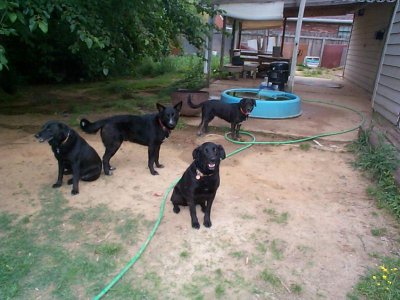
you got to love & to have an A-Typical Lab helper there for support too...LOL... hey life & work always messes up our car plans... get R' done
 
That lip don't look too bad. I honestly thought it would be more rotten then that. You gotta be getting pretty excited. Refreshing once you get to the point of putting on new quarters or skins. Especially with how rusted/rotten of a car you've had to deal with up to this point. Good job!

Yep, I'm happy with the condition of the lip, it's just surface rust. But honestly I was surprized to see any, I thought that area/connection would have been sealed somehow. I will blast it, as well as everything else I'm covering up with this job and maybe some rust-bullet and/or some kind of rust inhibiting sealer or something.. And yep the adrenaline is starting to pump a little more with this step. I would have never pictured myself doing very much of what I'm doing to this car, but the help in this forum has increased my knowledge, drive and confidence, BIG THNX TO ALL OF YOU GUYS!
Funny but it seams that other than the interior floors, most of the bad rust on this car was from the rear wheels back., Guess it was truly a rusty a$$ charger.

- - - Updated - - -

you got to love & to have an A-Typical Lab helper there for support too...LOL... hey life & work always messes up our car plans... get R' done

Yep, I have lots of supporting "Lab Assistants"... I sleep good on that couch!
 

Attachments

  • DCP03829.jpg
    DCP03829.jpg
    73.9 KB · Views: 757
  • IMAG0019.jpg
    IMAG0019.jpg
    77.6 KB · Views: 766
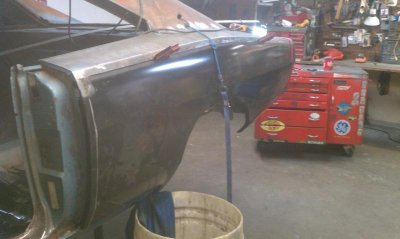
1st test fit of new skin, over most of old skin. Looks ok but might be about 1/4" to long. Its an AMD skin so I hoped it would be exact. Gotta tinker with it a little more so maybe it will fit better after that.
 

Attachments

  • IMAG1171.jpg
    IMAG1171.jpg
    41 KB · Views: 772
You are making great progress - brings back memories from my project last winter. Take your time and get it fitting perfect before you start welding.
 
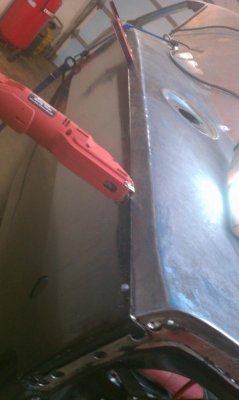
I finally made the big cut. I used the new skin as a guide for the saw to cut off the old skin. I will work on the wheel house now.
 

Attachments

  • IMAG1180.jpg
    IMAG1180.jpg
    50.3 KB · Views: 753
  • IMAG1181.jpg
    IMAG1181.jpg
    54.2 KB · Views: 747
Rock N' Roll! Looking forward to seeing your Charger with those fresh skin's sitting on her hips. Very cool stage of the resto.
 
Yep, I have lots of supporting "Lab Assistants"... I sleep good on that couch!

You have a whole damn Black Lab pit crew there...LOL... Looks like allot of helpers, looks like a great pack, ya gotta love them Labs... The cars looken' great, keep up the good work...
 
Looking good daytona, she's coming along nicely :icon_thumleft:
I know that nervous feeling well about cutting into the quarter, was really worried about doing my lower quarter patch but once you get into it it's really not bad at all. Just take your time with it and it'll come out great
 
Rgr tht, I'm starting the wheel house de-humping tonight-fri. Just worked a tough week/5 days at the old factory and have the weekend to work on the car now. Pics to come...:grin:
 
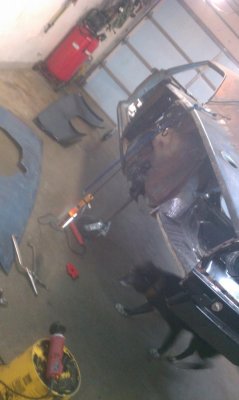
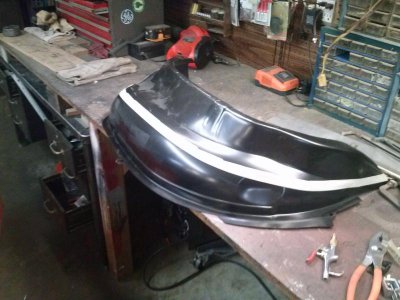
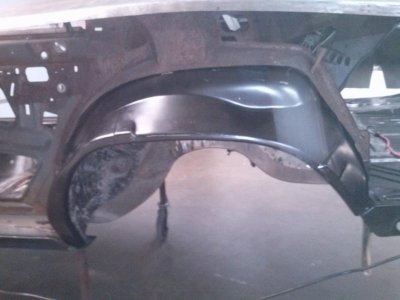
Got some work done tonight. I cut the new wheel house half in half, and it fits good. Will cut the old part off tomorrow and butt weld it in. This may sound goofy, but after I weld this in I will make the pieces to do the de-hump, weld them in, and cut off most of this new house half patch. This is the only way I can think to make sure the lip will be in the right spot. Somewhat the same way I'm thinking of doing the mini tubs, if I do them later. It seams easier to me to start with the stock stuff in place and mod it rather than starting in mid air.
 

Attachments

  • CAM00004.jpg
    CAM00004.jpg
    64.9 KB · Views: 736
  • CAM00009.jpg
    CAM00009.jpg
    41.2 KB · Views: 743
Last edited:
If you are thinking of mini tubbing it after why not just put wheel tubs in now and save a **** load of work. JMHO!
 
I thought about that but I would rather use the stock wheel houses now, and I'm not sure I really want to do the mini tubs or not. If I do it will be after I get the car running, a year or more from now. Are there any steel wheel tub kits made for 68-70 chargers that will go in and match the lip of the quarter without fabricating it? Stock stuff is easy for me to figure out but fabbing up non stock stuff is more than I want to do right now. You have a good point tho.
 
Mines all done (dehumped) and 12" will fit with an inch clearance on both sides so the question is "do you want more than 12". Lookin good
 
I thought about that but I would rather use the stock wheel houses now, and I'm not sure I really want to do the mini tubs or not. If I do it will be after I get the car running, a year or more from now. Are there any steel wheel tub kits made for 68-70 chargers that will go in and match the lip of the quarter without fabricating it? Stock stuff is easy for me to figure out but fabbing up non stock stuff is more than I want to do right now. You have a good point tho.

Any aftermarket wheel tubbs are not fit to match the wheel lips, they go straight across and butt into the sides of the 1/4 panel and you would leave about an 1/8" all around and then cualk around the whole side where it meets the 1/4 panel. Most are aluminum but I made mine out of steel. Here are a few pics of what I did just so you get an idea and a little food for thought.

P1020182.jpg


P1020180.jpg


P1020175.jpg
 
Mines all done (dehumped) and 12" will fit with an inch clearance on both sides so the question is "do you want more than 12". Lookin good
And that is without mini tubs?

- - - Updated - - -

Any aftermarket wheel tubbs are not fit to match the wheel lips, they go straight across and butt into the sides of the 1/4 panel and you would leave about an 1/8" all around and then cualk around the whole side where it meets the 1/4 panel. Most are aluminum but I made mine out of steel. Here are a few pics of what I did just so you get an idea and a little food for thought.

Those do look nice,. but I think I want to stay a little closer to stock. Thnx for the suggestion anyway.
 
Yes, that's nothing done except dehumping. My wheel wells measure 14" from lip to inside tub, 7" both ways from axle flange "zero offset". I wouldn't mind having more tire seeing how I'll be running street tires but 12" is pretty wide and the price and availability of wider rims and tires is enough to make me call it good.

- - - Updated - - -

Any aftermarket wheel tubbs are not fit to match the wheel lips, they go straight across and butt into the sides of the 1/4 panel and you would leave about an 1/8" all around and then cualk around the whole side where it meets the 1/4 panel. Most are aluminum but I made mine out of steel. Here are a few pics of what I did just so you get an idea and a little food for thought.

P1020182.jpg


P1020180.jpg


P1020175.jpg
I've never seen anybody weld a tub directly to the quarter panel. I've always seen them use a panel that fit the fender lip like the factory and spot welded in the same as original. Is that a RR, do you still have it or have some pics looks pretty cool.
 
Auto Transport Service
Back
Top