• When you click on links to various merchants on this site and make a purchase, this can result in this site earning a commission. Affiliate programs and affiliations include, but are not limited to, the eBay Partner Network.

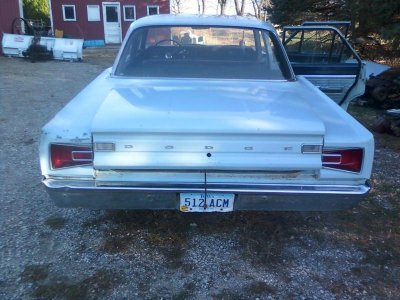
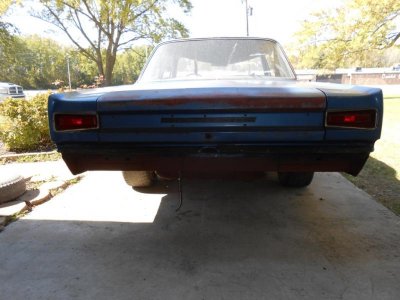
66 Coronet Deluxe

Wednesday's progress - finally in the shop!

Well, got her in the shop the other day, what a relief to finally get time to work on this terlit. The plan was to hang the brakes so it could go on the trailer to storage but soon discovered I got the wrong shoes for the rear so the crusty tank came out instead. Onward and upward......

Shop.jpg


Got a sinking feeling that maybe, just maybe the wire ties and worm clamps are not original from ma Mopar....

Rig2.jpg


Maybe the same for the goo-fest attempt at sealing the leaky tank - not original? :icon_puke_l:The black goo had the tank strap fused to the tank but the air saw made quick work of that (sorry for crappy pics)

Rig1.jpg


Some numbers on top of the tank, hidden under the insulation mat thingy. Kidding aside, I have no idea if the tank is original but I think it might be. Not sure what to make of the numbers anyway.......

Tank.jpg


I've got a new Canuck tank/strap/sender from Spectre and everything looks nice with their stuff (sorry no picks of new tank). Old sender has seen it's days:

Sender01.jpg


Ran out of time so I decided to stop here so I can replace the brake lines and hose on the rear axle next. It looks to be much easier to do with the tank out of the way for that. Got her off the lift and we managed to make room to keep it in the shop - woo-hoo!


Resting.jpg


The freshly painted wheels sure look nice eh?

- - - Updated - - -

Today's progress revolved around leaving the car where it sits, no lift time for now. So I went after the front end since I have most everything to fix what's bad there (ball joints, brakes, shocks etc). Note the only body rust through on this one is at the lower fenders. This will get the cave-n-pave later, patch panels would be a waste of money for this.

FrontRIGHT.jpg


I've only done a handful of upper ball joints on Mopars and this was the first time I got one out with just a breaker bar size ratchet. What a relief that was. The plan is to upgrade the (wasted) tie rods using later larger CBody stuff, parts ordered and mind you, they are cheaper than the locally found BBody stuff. Stay tuned.
 
You sure are doing a great job on this! The old sending unit definitely has seen better times..:)
 
Looking good.

I'm leaving in an hour to go check out that 66 coronet I showed you on Craigslist. Cross you fingers for some good parts!
 
kb, fingers crossed, hoping you score on that!

Only update for today is the right front stuff was disassembled and parts degreased. I'm going to take the time to paint all the pieces, knuckle, backing plate, etc. Also determined the C Body tie rod sleeves might be a bit too long to work, the used one I have in spares bin is a 1/2" longer than the ones on the car now. I won't know for sure until I get the tie rods in hand for a mock-up. More pics to follow.
 
Your lucky to have a wife that digs old cars, mine on the other hand "if it's not new it's not cool". I managed to find a little middle ground, I picked up a totalled 2007 Aspen fully loaded with the 5.7 hemi "compromise". Anyways, love the car.
 
My X wife just didn't get it about our relationship with cars. Whenever she washed her car, she didn't wash the wheels/tires because they were on the dirty ground anyways and to her, they were only for getting from point A to point B and you had better not ever floor it! When I met her she had a 75 Pacer and I wondered what kind of a good looking woman would buy one of these. She bought it because it had a good sounding radio. Just don't ask me why I married her because I can't answer that one....
 
kb, fingers crossed, hoping you score on that!

Only update for today is the right front stuff was disassembled and parts degreased. I'm going to take the time to paint all the pieces, knuckle, backing plate, etc. Also determined the C Body tie rod sleeves might be a bit too long to work, the used one I have in spares bin is a 1/2" longer than the ones on the car now. I won't know for sure until I get the tie rods in hand for a mock-up. More pics to follow.


Thanks for the wishes of luck but unfortunately it was a complete loss. would be good for a few parts for somebody with a complete rust bucket but it was far from rust free. Engine was stuck and was just a small block LA. (maybe 273? or transplanted 318). Sat outside for 3 years with no back window and the trunk not closed. No interior, no dash parts, (just frame)....rear end was an 8 3/4 but just a 741 case open carrier (well i assumed open). So yeah no go.
 
Well, I am fortunate that my other half is into old Mopars, but we're not technically married :hello2:. Besides, she has no idea this car exists, so she hasn't had a chance to bitch about it yet ! :laughing1:

- - - Updated - - -

kb67, that's a bummer about the rust bucket, hope it wasn't too far a drive to check it out, that's never fun. You gotta do it sometimes though, you never know.

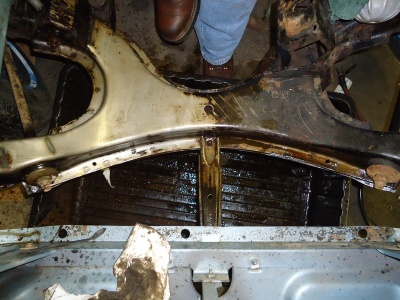
Oh, and speaking of rust bucket - the other day I found that the rt end of the TBar crossmember on my car is rusted through ! Crapola! (I knew there was some scale on it but once I started poking around with it on the lift I noticed it was pretty bad. I was cleaning the packed dirt out of the frame rail and xmember and big holes appeared. I'm thinking about maybe going with one of those rust repair sections from the Rust Technicians place or might get silly and do it my self and build onto that with subframe connectors. Was hoping to not get to involved with this right now, but sooner the better I suppose.:icon_sad: More pics soon.
 
Oh, and speaking of rust bucket - the other day I found that the rt end of the TBar crossmember on my car is rusted through ! Crapola! (I knew there was some scale on it but once I started poking around with it on the lift I noticed it was pretty bad. I was cleaning the packed dirt out of the frame rail and xmember and big holes appeared. I'm thinking about maybe going with one of those rust repair sections from the Rust Technicians place or might get silly and do it my self and build onto that with subframe connectors. Was hoping to not get to involved with this right now, but sooner the better I suppose.:icon_sad: More pics soon.

Yeah if they are small holes you could probably just weld some steel over it and make it as strong or stronger. If they are very large I say start drilling and replace it with a repop. Mine was just too far gone not to.

Keep in mind replacing it also means the trans needs to come out.
 
Merry Christmas!

Santa stopped by to deliver my usual sack of coal and he urged me to post an update, so here we go:

A lot of stuff going on in the shop so things got a little scattered. The brakes/suspension got a little more attention and after pulling the valve cover, the engine got yanked so another domino falls (repeat after me: This is NOT going to be a project, this is NOT going to be a project, this is NOT......). OK, so the mill is packed with sludge worse than anything I've ever seen so she'll get a date with the dingleballer and go back together with a basic overhaul. Now for the ****:

A little artistic license on the knuckle/brake refinishing (cast finish on spindle, stainless on the bolts, semi gloss on the backing plate and flat black on the ball jernt)
RtFrtRefinishing.jpg


So the right front is back together temporarily to get her rolling again for the engine pulling and engine bay cleaning. A little embarrassing to do it like this, it was painful to not clean and paint everything but the bushings look good and well, life goes on....
RtFrtReady.jpg


The little piglet gets yanked. Dirty little thing ain't she?
UhOh.jpg


DirtyWhore.jpg


Original Auburn Clutch. Kinda cute ain't it?
OEAuburnClutch.jpg


We serviced our mini-jet blast machine the same day so I decided to use the nasty old solvent for one final task - desludging the piglet:

BlockBasting.jpg


Decided to see what the deck was going on it seems OK there:
DeckCheck.jpg


More to come on the brakes/suspension/engine but here's some engine bay prOn.....

Before pics:
EngineBayBefore1.jpg


EngineBayBefore2.jpg


An amazing 50 degree day in an early December midwest allowed for this:

Cleaning3.jpg


After pics (WOW)

cleaning1.jpg


Cleaning2.jpg


So that's it for now, Santa is dozing off (he just drank my last beers) so I gotta get him back to his sleigh. Stay tuned for more shenanigans.

- - - Updated - - -

Yeah if they are small holes you could probably just weld some steel over it and make it as strong or stronger. If they are very large I say start drilling and replace it with a repop. Mine was just too far gone not to.

Keep in mind replacing it also means the trans needs to come out.

I've decided to patch the crossmember for now, with the engine out, I've got too much going on now so I'm already skeered this will never end. The wheels are already turning for this thing eventually inheriting the magnum/46RH that currently resides in my battered daily driver '95 Dakota so I'm relieved in knowing this will all get addressed properly on the next go-around.
 
Santa stopped by to deliver my usual sack of coal and he urged me to post an update, so here we go:

A lot of stuff going on in the shop so things got a little scattered. The brakes/suspension got a little more attention and after pulling the valve cover, the engine got yanked so another domino falls (repeat after me: This is NOT going to be a project, this is NOT going to be a project, this is NOT......). OK, so the mill is packed with sludge worse than anything I've ever seen so she'll get a date with the dingleballer and go back together with a basic overhaul. Now for the ****:

I've decided to patch the crossmember for now, with the engine out, I've got too much going on now so I'm already skeered this will never end. The wheels are already turning for this thing eventually inheriting the magnum/46RH that currently resides in my battered daily driver '95 Dakota so I'm relieved in knowing this will all get addressed properly on the next go-around.

Wow does that engine bay look great...come do mine! haha mine needs fresh paint though anyway so thats a spring project.

Patching the cross-member will be fine, just make sure you get your patch over good metal too.

the 95 Dakota is a perfect donor! that OBD 1 system lends itself well to being stripped down into the Coronet to keep the fuel injection if you so desire. I take it the "Magnum" is a 318? If not I know a guy we can pick up a runner relatively cheap.
 
It sure did clean up nice! What did you use to clean it? Looks like new paint...
 
Thanks for the kind words fellas :icon_lol:

I used full strength Purple Power but didn't leave it on there too long. I quickly swished it around with a regular kitchen dust broom and followed up with a cheesy electric pressure washer. I was amazed at how well it cleaned up and in person it really does look almost like new paint. :hello2:

Wow does that engine bay look great...come do mine! haha mine needs fresh paint though anyway so thats a spring project.

Patching the cross-member will be fine, just make sure you get your patch over good metal too.

the 95 Dakota is a perfect donor! that OBD 1 system lends itself well to being stripped down into the Coronet to keep the fuel injection if you so desire. I take it the "Magnum" is a 318? If not I know a guy we can pick up a runner relatively cheap.

I will post later when I patch the cross member. My plan is to do my usual routine by making a cardboard template that will get me to solid metal and copy that to steel. I'm thinking it should go pretty easy :eusa_pray:

This car keeps showing me that it's cleaner than I originally expected so there's little doubt this will get a drivetrain upgrade in the future. My Dakota donor is an '95 so it has the magnum motor and (thankfully) the simple overdrive trans albeit a lock up converter style, but I can live with that.

More to come, I hope to get the brakes and fuel tank hung soon.
 
Ok, to compliment our conversations in PM...take a look at these two photos to see the difference in the rear sheet metal between 66 and 67..notice the lines on the curves of the trunk...

The 66 was my parts car

1111150034.jpgDSCN1763.jpg
 
Thanks for clearing that up for me, you saved me heaps of brain damage with this! :headbang:

I'll try to get an update here soon, I've gotten some little stuff done, mostly corner cutting butchery but it's been fun anyhow.
 
hard to believe that that big car was pulled around by " a leaning tower of power " looking great...love the narrations!
 
I got an intern!!

A little update, more progress on the underhood detailing and my older brother just became my intern!
He's not exactly a "car nut" but he's really getting into this now and helping me with tons of stuff in the shop and with the car. His latest work includes cleaning every single contact in the underhood wiring harness and carrying on with my soon to be patented Paint-In-Place or "PIP" System. If you're a purist, please shield your eyes you're probably not going to like this.

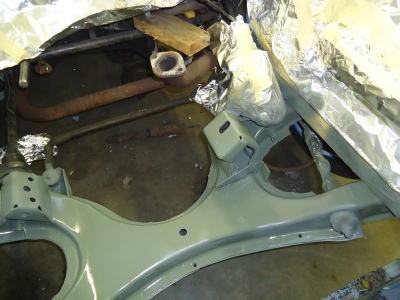
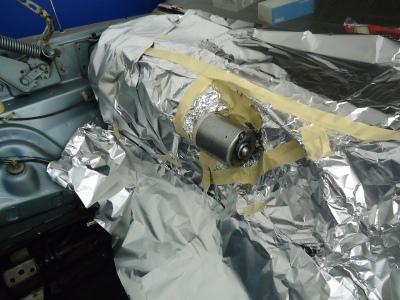
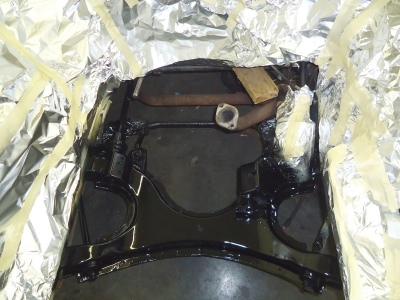
You know the drill, don't tear a good car apart if you can't put it back together right, yah, that's it. So my bro did a killer job cleaning up and refinishing the wiper motor and the K-member (topside for now) in-situ. No abandoned projects here, just clean and paint in place and move on. I hope I get credit for at least keeping within my means, the last thing we need is another abandoned Mopar project rotting in a field somewhere.....

K member PIP process -
Side by side prep work comparison. Most of this was cleaned with Purple Power and elbow grease with a little work with the Crud Thug in the nooks and crannies.

474519[/ATTACH]"]
KMember1.jpg


Oh yah, here's our first attempt at custom tin-work - no, we're not quitting our day jobs:laughing7:


474521[/ATTACH]"]
Tinworkharhar.jpg


Prime and paint;

474523[/ATTACH]"]
KMember2.jpg


474525[/ATTACH]"]
KMember3.jpg


Wiper prep;

474527[/ATTACH]"]
WiperPIP1.jpg


Prime and paint;

474529[/ATTACH]"]
WiperPIP2.jpg


474531[/ATTACH]"]
WiperPIP3.jpg


I just realized I managed to lose the "after" pics so it looks like the wiper trans part is painted black but it was just the motor can, the rest was precisely masked. I'll work on pics of that. Speaking of losing things, my bro knocked this out in about the same time that it took me to find my car keys so, he got the gold star that day! More to come - stay tuned if you dare.

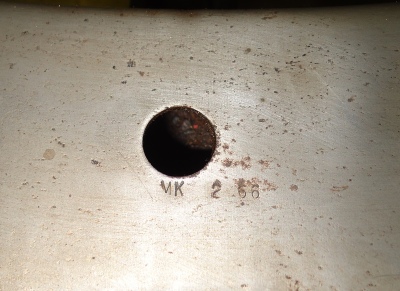
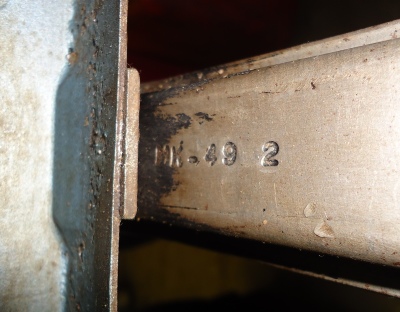
Almost forgot these from the number geek corner, stampings revealed on K member and K member to core supt reinf bracket - yah, I geek out on this sh@t;

474533[/ATTACH]"]
KMember4.jpg


474535[/ATTACH]"]
KMember5.jpg
 

Attachments

  • KMember1.jpg
    KMember1.jpg
    77.6 KB · Views: 74
  • Tinworkharhar.jpg
    Tinworkharhar.jpg
    73.9 KB · Views: 68
  • KMember2.jpg
    KMember2.jpg
    56.4 KB · Views: 68
  • WiperPIP1.jpg
    WiperPIP1.jpg
    67.2 KB · Views: 73
  • KMember3.jpg
    KMember3.jpg
    66.4 KB · Views: 70
  • KMember4.jpg
    KMember4.jpg
    63.9 KB · Views: 73
  • WiperPIP3.jpg
    WiperPIP3.jpg
    69.5 KB · Views: 70
  • WiperPIP2.jpg
    WiperPIP2.jpg
    46 KB · Views: 65
  • KMember5.jpg
    KMember5.jpg
    51.9 KB · Views: 72
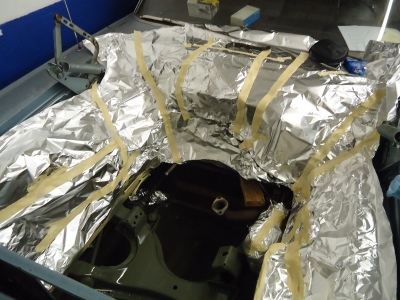
an Intern...Nice! Wish I could find one. Nice touch on the Tin foil. Works great for wrapping presents as well...lol Hey, whatever works for ya..

Looking sharp
 
Auto Transport Service
Back
Top