• When you click on links to various merchants on this site and make a purchase, this can result in this site earning a commission. Affiliate programs and affiliations include, but are not limited to, the eBay Partner Network.

68 RM23 Roadrunner, The rebuild of an old friend

I think you'll have a winner when your done 68, You just cant beat the birds and that's one nice nest its in, very cool clock bud!!! Good luck to you...
 
Looking good Runner 68'
Glad I finally met you!
I hope you enjoyed Edwards AFB....

"super-bee_ski"
 
Looking good Runner 68'
Glad I finally met you!
I hope you enjoyed Edwards AFB....

"super-bee_ski"

Thanks Ski, good to finally meet you too and thanks for the awesome tour of a portion of your world.
You have one of the coolest jobs on the planet.
 
I came across this pic the other day. I realized I hadn't posted a picture before I tore it down. This was taken the weekend I started the tear down. The young man in the picture is now 16 years old. I need to get my $hit together and get going.

Ben_Bird.jpg

Ben_Bird.jpg
 
I figured I would dust off this old thread today as I was finally able to start work on the car today. I can't believe it has been over 2 years since I last posted. I realize most of you guys have given up on me but the flame still burns.

Spent most of the day fitting the US Car Tools sub-frame connectors. When they said a little grinding on the high spots may be needed and they weren't shitting. Spent about 6 hours today just on the driver side. Factory floor pans and it's never been in a wreck. Pretty shitty fit out of the box in my opinion. yes, I ordered the right ones.

Anybody else out there work with these? I realize there are other threads out there but nothing that sheds light on the level of effort to fit them. Trying to get them within 1/16th of an inch along the entire length if I can, maybe I'm being too **** retentive? I hate welding over too much space.
 
Last edited by a moderator:
Glad you are back on it!

I didn't install mine, the bodywork guys did. Mine were not fitted 100% flush, and welded in multiple spots along their length on the floor, but they were not 100% welded. At first this really bugged me, but (a) you can't see it and (b) they are still just as stiff.

So really, some of the stuff you will be doing is cosmetic and only seen by someone laying on their back under your car rather than functional.
Thanks, that's kind of what I'm thinking at this point. Get them as close as I can knowing there will be some goober welds here and there. After the under coat who the hell will know?
 
I will be right along with you on time frame. When I get brother in laws satellite finished I am starting on me a 1969 RR 383 4-speed car. I am planning on "years" of work both because it will take me that long and the money being spread out over time will be the only way possible. Just the few days I have been part of this forum has showed me so much about taking time to fix stuff as it comes apart and put it up for later.
 
Jesus F@cking Christ! I figured I would dust off this old thread today as I was finally able to start work on the car today. I can't believe it has been over 2 years since I last posted. I realize most of you guys have given up on me but the flame still burns.

Spent most of the day fitting the US Car Tools sub-frame connectors. When they said a little grinding on the high spots may be needed and they weren't shitting. Spent about 6 hours today just on the driver side. Factory floor pans and it's never been in a wreck. Pretty shitty fit out of the box in my opinion. yes, I ordered the right ones.

Anybody else out there work with these? I realize there are other threads out there but nothing that sheds light on the level of effort to fit them. Trying to get them within 1/16th of an inch along the entire length if I can, maybe I'm being too **** retentive? I hate welding over too much space.
Your stressing to much, get them close them tack them in the tight spots that fit the way you want then lightly hammer the floor down to them. Easy and you'll never be able to tell as long as you don't beat dents in it.

Glad to see you back at it.
 
Moving at a snails pace here. Frame rails fitted.

I'm going to mock the body back together before I weld the connectors in just to check fit and panel alignment as the the body work was done in pieces and the car has been apart for quite a while.
Body Metal Direct seems to be the best approach these days for the parts I need whereas Year One was the choice years ago when I started this project. Now Year One seems to be very proud of their parts price wise compared to the competition. Anybody have input on either of these? Just going to get new door hinges and the fender rear splash shields.

Any input is appreciated.
 
Glad your are still going on your car!

AMD makes great stuff and is sold through several places, including Summit. The only thing I purchased through Year One were a few wiring harnesses that were on sale. Another good place is Classic Industries, they have a ton of stuff. For specialized parts, plenty of places to look including Mancini Racing, Brewer's, and 440 Source.
 
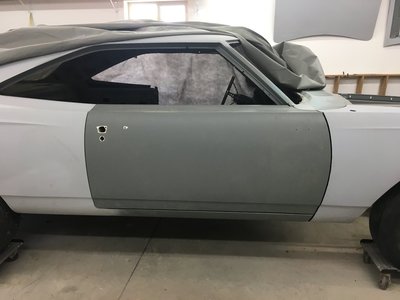
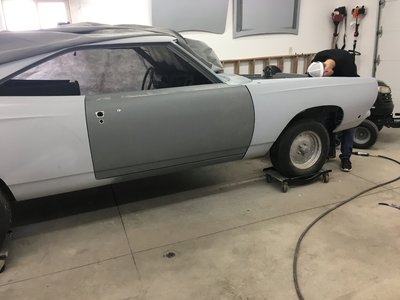
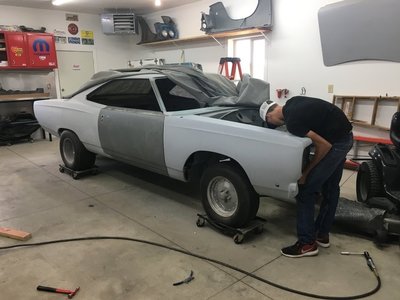
Moving sloooow here for anyone who is till following this thread but gaining a little momentum since I started this thread. In the process of mocking up the body before we weld the frame rail connectors in. I realize I probably don't need to do it but a very good friend and body shop owner suggested I do it as the car has been apart for 12 years and the body work was done in pieces. Below are pics of the passenger side. Fitting together well, at least good enough to weld the rails in. We'll tear it back apart to paint the hidden surfaces after the rails are in.

I will start another thread on this topic as I doubt this build gets little exposure but does anyone have a blowapart diagram of which fasteners go where on the fenders? The fender bolts are pretty obvious but the stud and nut fasteners are what's confusing me. Any intel would be appreciated. After all, it has been a while since I tore it down and the pictures I took obviously aren't as good as I thought.

IMG_0876.JPG IMG_0877.JPG IMG_0878.JPG
 
Great to see you are making some nice progress there Runner. :thumbsup:
 
Fender needs to come back about a 16th and the door up a 16th but close enough for what we're doing at this point.
 
Here are a couple of pics of my car as I tore it apart. Not sure if these help, but here they are...

Hawk

IMG_1539.JPG
IMG_1540.JPG
IMG_1541.JPG
IMG_1561.JPG
 
Moving sloooow here for anyone who is till following this thread but gaining a little momentum since I started this thread. In the process of mocking up the body before we weld the frame rail connectors in. I realize I probably don't need to do it but a very good friend and body shop owner suggested I do it as the car has been apart for 12 years and the body work was done in pieces. Below are pics of the passenger side. Fitting together well, at least good enough to weld the rails in. We'll tear it back apart to paint the hidden surfaces after the rails are in.

I will start another thread on this topic as I doubt this build gets little exposure but does anyone have a blowapart diagram of which fasteners go where on the fenders? The fender bolts are pretty obvious but the stud and nut fasteners are what's confusing me. Any intel would be appreciated. After all, it has been a while since I tore it down and the pictures I took obviously aren't as good as I thought.

View attachment 439257 View attachment 439258 View attachment 439259

Glad to see you are still making progress
 
Glad to see you are still making progress
Hello TH. Glad to see you're still breathing. The young man in the pics is my youngest and is responsible for kicking me in the @ss to get going on this project. He has been bitten by the bug and we're currently bartering with a family member between a 73 Chally and a 71 Duster for his first car. I'll keep you all posted on how that one shakes out.

BTW, we got the driver's side fitted today. Didn't fit as well as the pass side and I thought it was the "clean" side. Still a few adjustments to make.
 
Auto Transport Service
Back
Top