• When you click on links to various merchants on this site and make a purchase, this can result in this site earning a commission. Affiliate programs and affiliations include, but are not limited to, the eBay Partner Network.

'69 charger r/t-se: Building my dream car

That can be a hard thing to do "follow instructions". Looks great, what did you use for the wrinkle finish? I really like it and will keep it in mind next time I need to paint some motor parts.

Who needs instructions!!!! Dive right in. LOL
 
just like putting Ikea furniture together, don't need the directions (useless anyways)
 
Haha yeah "dive right in" is usually the way I go so I guess it's about time something gave me some trouble. :icon_blackeye:

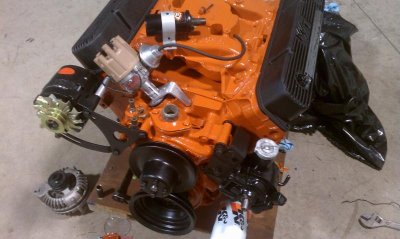
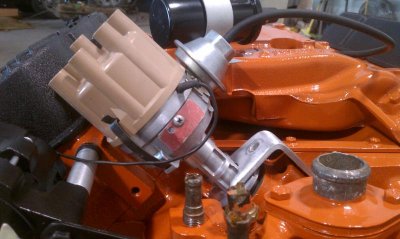
Still moving along detailing stuff for the motor, some scotch brite and a little brake cleaner later the original distributor cleaned up pretty nice

IMAG1664.jpg

IMAG1662.jpg
 
just like putting Ikea furniture together, don't need the directions (useless anyways)

Until something doesn't fit and you realize while you are at part Z that you have to take it apart because you were supposed to insert item C into part D before connecting part E.
 
with that Ikeas crap, you get there weither you read the directions or not!
 
Some Chinese directions probably would've been more helpful than what I got (read: "nothing") when I loaded up the 1,000 pieces of this car down in L.A. lol. I'm really thankful for my local mopar friends, and all you guys on here and the Charger forum. Not much I can't figure out with all of everyone's help :notworthy:

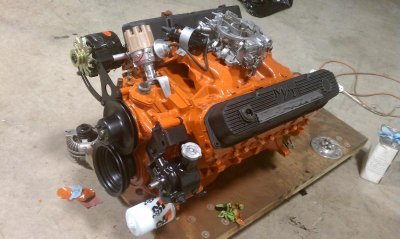
Well the original Carter avs cleaned up awesome :toothy5: hopefully it works as good as it looks but I'm gonna give it a shot before I go rebuilding it.
IMAG1731.jpg

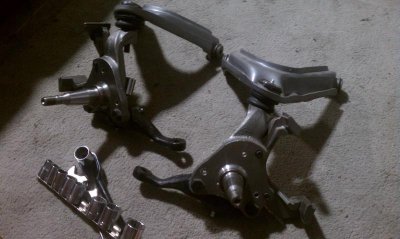
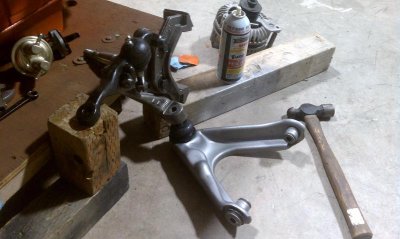
But I also ran into a little roadblock, have to switch sides with my spindles for some brake caliper clearance reasons (basically going from a front-hung to rear-hung setup). but I had to pull the upper control arms with them because for some reason the upper balljoints refuse to come loose. Figured if I pulled it all out together it'd give me more room to beat them apart easier, but still won't budge. Anyone got any suggestions or trick to doing this?
IMAG1685.jpg

I'm gonna use some pb blaster on them later and see if that helps. Maybe a bigger hammer? Lol :icon_scratch:
 
Your project is sure looking good. I bought a front end tool kit from Mancini years ago that came with a piece for removing the ball joint stud.
 
Thanks Elk and that'd probably be a good thing to invest in, not much fun messing around bashing on stuff. But luckily the pb blaster and my mcguyver'd up block setup did the trick lol

IMAG1736.jpg

Not sure why I didn't use PB Blaster in the first place, that stuff always works wonders for me. Just let it sit and soak in for a couple minutes and the balljoints tapped right out :icon_pray:
Naturally I screwed up some threads on the stud like I was trying not to do, but I chamfered them with a little cutoff wheel and the nut threads on fine now.

Hopefully there's no major issues switching the balljoints tomorrow. Damn near broke my hand slipping and smashing it on the table when I put them on the first time. The bolt holes on the balljoint are just a hair off from the ones on the spindle, first bolt goes fine but then the second one takes some colorful language :banghead:
 
Progress is a good thing.... Mutha Freaken Sum A Beachen Lower ball joint Bolts
 
just watch one of the furnance fighting scenes from Christmas Story to make sure you're using the correct words.....:angry9:
 
just watch one of the furnance fighting scenes from Christmas Story to make sure you're using the correct words.....

"IT'S A CLIIIIIINKERRRRR!!!"

Actually didn't go as bad as I thought it would. Using an impact wrench with the 160 psi air here at work was definitely a little more efficient than trying to do it by hand.
:head_smack:

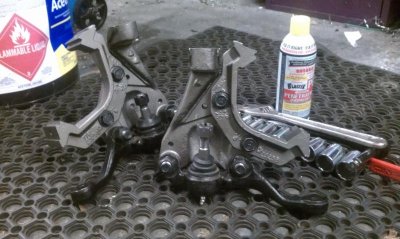
Balljoints swapped and all set up for rear-hung calipers :icon_cool: just gotta throw everything back in and I can finish plumbing my brakes and put the steering back in.
IMAG1738.jpg
 
Thanks guys and hope everyone had a good 4th! :eek:ccasion14:

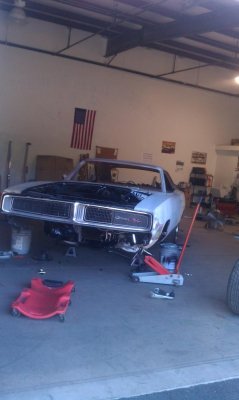
I spent most of my 4 day weekend either at the river or lighting off fireworks, but still made room for some Charger time. Put the front end back together and got her back rolling again, and a quick roll outside for some much needed shop cleaning :icon_cool:
IMAG1752.jpg

IMAG1753.jpg

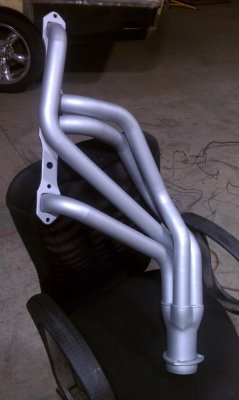
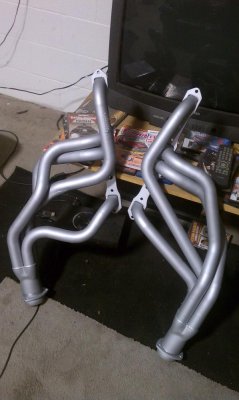
Also got my headers painted with vht ceramic high temp silver. Just went over them really well with scotch brite to take off the little surface rust that was starting, and wiped them down with denatured alcohol and a tac cloth before paint.
IMAG1791.jpg

IMAG1794.jpg

Still moving along with the motor, too. Tonight I'm gonna take a shot at removing an exhaust stud that's broken off slightly deeper than flush with the head. I've been soaking it the past few days with pb blaster and got a good centered start punched in the middle of it. Keeping my fingers crossed that I'll be able to back it out with an easy-out but I don't think it's gonna be much fun

Also I've been waiting for damn near 2 months for a billet rear main seal from mancini racing and keep getting told it's on backorder :banghead: but I noticed the other generic rear main seal kits come with a rubber seal like the mancini one would, so the only difference would be the cnc-machined retaining block.

So is that worth waiting for or should I just cancel my order and go with a generic one? Anyone have experience with one vs the other? Other than the broken exhaust stud, it's basically the last thing holding me up from dropping the engine in. :waiting:
 
Ya gotta love the little frustrations if life. It's getting closer to completion though.

Haha yeah I shoulda known it wouldn't be that easy. But at least I work in a machine shop that makes cutting tools, so there's no shortage of carbide drills laying around. Gonna give that a try tonight, probably just drill the entire stud out and retap the hole
 
Damn Easy Outs eh?.........Flip a coin if they're going to snap or not. I have a Snap On set that i've busted 3 bits on and those are premium tools. Best bet it to get as close to the original snapped bolt/stud as you can. Heating it up sometimes helps. Good luck!
 
Yeah they really need to rename those damn things lol.

I probably should've heated it up to begin with but thought the 5 day PB Blaster soak would be enough. It's the end stud that goes through the water jacket though so the corrosion's probably got a deathgrip on it.

Anyway I think me and my dad are gonna make a couple carbide spade drills mainly to drill out the broken off easy-out, then just drill the whole stud out. Sounds like a more reliable plan than more easy-out fun :shruggy:
 
Auto Transport Service
Back
Top