• When you click on links to various merchants on this site and make a purchase, this can result in this site earning a commission. Affiliate programs and affiliations include, but are not limited to, the eBay Partner Network.

'69 charger r/t-se: Building my dream car

Keep it up brother ... btw those pics remind me of a 'Jack the Ripper' movie .. ouch
 
Last edited:
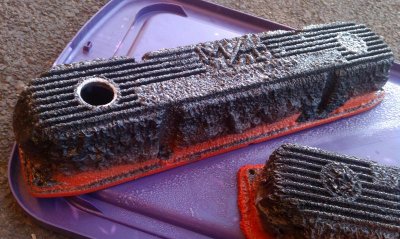
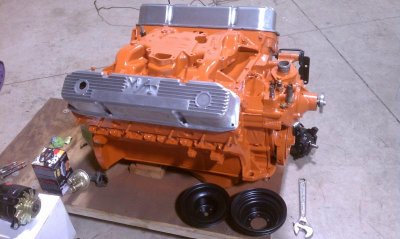
Tonight I'll be finishing up that welding, but I thought I'd post some pics of what I've been doing with my valve covers. (screwed up the wrinkle paint a while ago so just left them on my motor unmasked when I painted it)

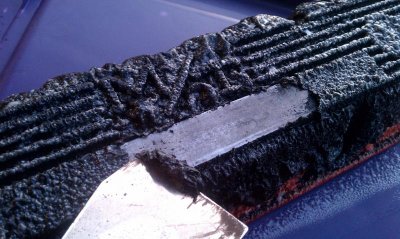
I went over to Napa and got some Duplicolor rattlecan paint stripper with low expectations, but come to find out that's some seriously nasty $hit! This is not even 30 seconds after I sprayed them:
IMAG1478.jpg

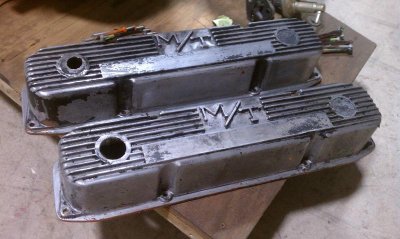
And after letting them sit for a few minutes, the paint would literally just fall off
IMAG1491.jpg

After round 1 of paint stripper
IMAG1492.jpg

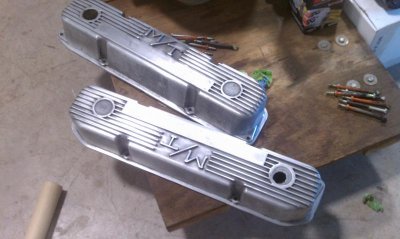
After round 2, still left some crud between the fins and stuff, so after this picture I hit them really well with some scotch brite pads
IMAG1505.jpg

Finally completely cleaned up, scuffed and ready for another shot at the black wrinkle finish. Just waiting for a hot day this week that I can let them cook out in the sun for a while and hopefully get some better results.
IMAG1548.jpg

IMAG1550.jpg

- - - Updated - - -

Keep it brother ... btw those pics remind me of a 'Jack the Ripper' movie .. ouch

No kidding! My buddy Mike said I need to name it the Frankencharger after all this surgery, but I'm glad I put all the time and energy into fixing everything properly. This car doesn't deserve the BS "repairs" that were in place when I bought it :eusa_doh:
 
That's for sure! Whoever made the attempt to "fix" the body of my car before I owned it definitely didn't do me any favors. Would've been a hell of a lot easier if they had just left it alone lol

Well hopefully both of us can be back on the road soon. Did you ever drive your Charger before you started the build?
Nope, when I took possession of it there was no motor, trans, interior, windows and the only thing bolted on it was the sheet metal and suspension. Come to think of it I've only been in a few old Mopars, my cousin had a 1963 Polara, I had a 1973 Sat, and a friends 1967 Sat. Needless to say I'm looking forward to it.
 
Sounds like a Chevelle i bought once, except i did get the windows! lol You both are doing a great job on these Mopars, Good luck continued to ya's!! :)

- - - Updated - - -

Great job on those valve covers, i think there my favorite ones for looks..
 
Something that works awesome for paint removal is paint stripper followed by a power washer, messy but does a great job. Did this on my front valence and it looked like it was pulled right out of the stamping die at the factory, wear goggles, long sleeves gloves, you get the point. Motor looks great.
 
The valve covers look pretty tuff just like they are in those pictures
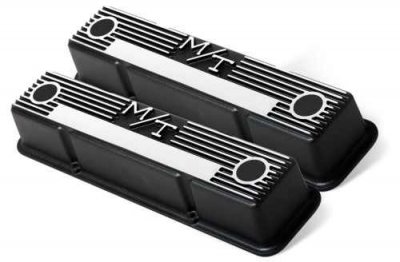
Yeah I do kinda like them just how they are, but I really like the look of the black wrinkle finish with the fins and lettering polished.. :eusa_think:
sbcb.jpg

Thinking it might go better with all my pulleys and accessory stuff being black I'm not sure..
IMAG1559.jpg

And thanks 747, I'm definitely gonna be trying that next time I have to strip something. Probably would've been a lot faster than scotch brite haha
 
Yeah I do kinda like them just how they are, but I really like the look of the black wrinkle finish with the fins and lettering polished.. :eusa_think:


Thinking it might go better with all my pulleys and accessory stuff being black I'm not sure..
I'm thinking it looks very Day 2 as is but the black wrinkles will look good too. Dare to be different though :)
 
Great looking car and some awesome work on the restoration so far. Well done!!
 
Thanks guys :icon_thumleft: I got some time to work on the car last weekend and finally finished up getting the braze removed and rewelded on the driver's side quarter and the vinyl top trim holes plug welded. I'll get some pictures up later when I start grinding the welds and cleaning everything up

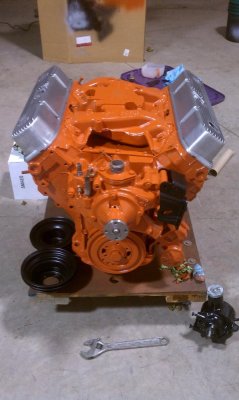
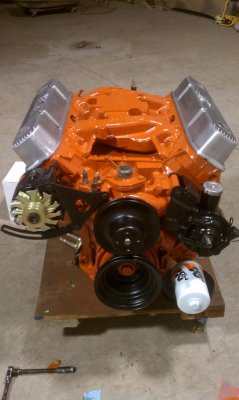
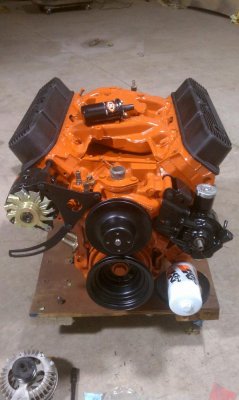
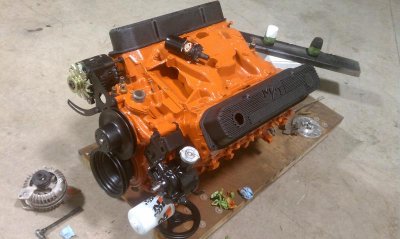
And I ended up giving the wrinkle finish another shot, this time let the valve covers cook in the sun for a while, followed their application instructions exactly, cleaned them probably 3 or 4 times, etc. :banghead: but finally really happy with how they came out :eek:ccasion14:
IMAG1572.jpg

IMAG1574.jpg
 
That can be a hard thing to do "follow instructions". Looks great, what did you use for the wrinkle finish? I really like it and will keep it in mind next time I need to paint some motor parts.
 
Motor looks great. And your right, those valve covers matches every thing else on the outside. Kinda doing the same thing with my motor, only it's turquoise.
 
Cool ... how far are you from putting the motor in/firing it up?

I wanna see it run.. :poke:

wanna trade a Camaro for it?
:headbang:

Mike..
 
Yep! That engine looks great and those M/T make it even better, sets it off perfectly..
 
Thanks guys, I'm a little surprised it came out this nice but hard work and good prep pays off I guess haha
:eek:ccasion14:

That can be a hard thing to do "follow instructions". Looks great, what did you use for the wrinkle finish? I really like it and will keep it in mind next time I need to paint some motor parts.

Haha yeah and this stuff is pretty picky with application I guess, one of the covers started to go sideways but I gave it another coat right away and luckily it came out alright :icon_pray:

But it's just an aerosol can VHT "high temp" black wrinkle finish I bought over at Napa. Looks great if you apply it right lol

And Mike, pretty much anytime! Mike Devee has a rear main seal on order for me with Mancini Racing I'm still waiting on, but once that's changed the motor's going in. Then it will just be some odds and ends getting sorted out before a test fire. The closer it gets to firing the harder it is to wait haha
 
Last edited:
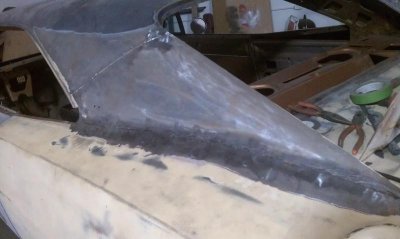
Last night I got some time to put the finishing touches on the never-ending driver's side quarter surgery. Finally ground the welds down and went back over a couple spots I missed. She ain't real pretty yet, but it's miles better than the braze/bondo hack-job that was there before.
Emergency surgery was a success :chain saw:
IMAG1634.jpg

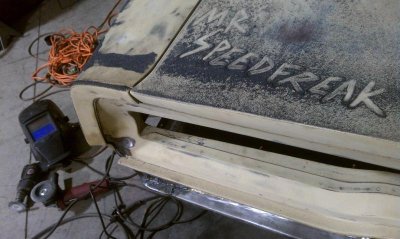
And took a second in the middle of grinding to snap this shot, might make a poster out of it to hang in the shop since I'll be using it as the "shop name" :icon_thumleft:
MRSPEEDFREAK.jpg

So tonight I'll probably clean up my distributor, get some All-metal laid on those upper quarter seams, and start polishing the fins and lettering on the valve covers.
Keepin' on! :icon_cool:
 
Coming alone nicely, cool old vintage look on the M/T valve covers, are you going to expose the aluminum on the fins & pad or leave it how they are, painted over ?? just curious, maybe I missed it somewhere...
 
Coming alone nicely, cool old vintage look on the M/T valve covers, are you going to expose the aluminum on the fins & pad or leave it how they are, painted over ?? just curious, maybe I missed it somewhere...

Thanks Bud, they definitely showed their age before and came on the motor so as far as I can tell they're probably a true-blue day two mod someone made quite a while ago. Part of the car's history now so it was important to me to use em. And yep I'll be polishing the fins and lettering :icon_thumleft:
 
Auto Transport Service
Back
Top