Just barley, I'll have to get some custom lines with the service ports pointed other than up to work, but doable.
You are using an out of date browser. It may not display this or other websites correctly.
You should upgrade or use an alternative browser.
You should upgrade or use an alternative browser.
69 gtx
- Thread starter 69 GTX
- Start date
By the way for any of you buying a six pac coil bracket, Mega parts 35.00 + 7$ s&h Year one 69.95 + 15 s&h.
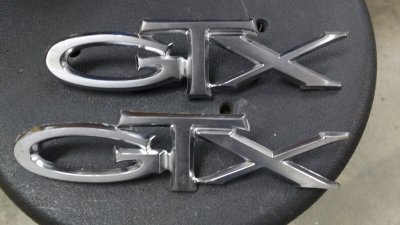
I used paint sticks to bolt them to for easier handling during paint.

I used semi gloss black so I can tell when the coats are dry enough for the next coat. 2 coats of black. I did both sides so that there wouldn't be a edge for the weather to get under.
I peeled off the tape before it got to dry. You can use the knife to touch up some of the paint if needed if the paint is still soft. I hit them next with 2 coats of semigloss clear, again both sides. Then I let them sit for about 10 min then loosened the nuts and stuck a piece of wire between the emblem and paint stick so it would dry to the stick. I should of used a couple washers when I bolted them on, but they turned out ok. Ready t bolt on now once they've dried for a couple days.
Last edited:
daytona kid
Well-Known Member
Nice!
showard
Well-Known Member
Looks great.
moparnation74
Well-Known Member
Some do not even know how much time was invested in doing that one emblem! Looks brand new, great work!
Where the drain cockpit goes.I have 3 or 4 of the solid state ones from a seller on ebay. Switched over my 62 and running the same setup on my 69.
By the way, where does that anode screw in? Great idea as I have an aluminum radiator and water pump.
Some do not even know how much time was invested in doing that one emblem! Looks brand new, great work![/QUOTE
It took me about 2-3 hours to strip, tape, & paint them.]
Makes me look like a hobo. I hosed mine down with semi gloss and sanded the overspray off the GTX face lol.
No judgement 3. The end goal is all the same, cruising with a big smile!
Last edited:
Similar threads
- Replies
- 7
- Views
- 1K
- Replies
- 22
- Views
- 838
- Replies
- 13
- Views
- 3K
- Replies
- 4
- Views
- 471
- Locked
- Replies
- 1
- Views
- 996


