• When you click on links to various merchants on this site and make a purchase, this can result in this site earning a commission. Affiliate programs and affiliations include, but are not limited to, the eBay Partner Network.

70 Coronet Wagon Driver

i tried to think of something to say but,
its All so Impressive And Inspiring that ill just say this instead.
subscribed.
 
Put the engine & transmission together on the K-frame from underneath. Piece 'o cake.
Yep, it's a piece of cake...you can do this single handed if necessary.... (I did get a couple of buddies to help as it was my first time)
upload_2017-1-20_9-30-50.png

upload_2017-1-20_9-32-19.png


And I used the same cradle a few years later combined with a Hoist - removed assembly in under 4 hours with no help.
upload_2017-1-20_9-42-22.png
 
How did you refurbish your light fixtures? They look great; I'm redoing my '63 Plymouth and have to do the same..
Thanks
 
My brother was concerned about clearance between air cleaner and hood with the intake I bought for the new engine we're putting together so we temporarily installed tranny with bare block, heads, intake and carb. He was right, not enough room. I don't want to cut hood up as I want the "stock" appearance on the outside for sleeper mode. Ended up buying moroso low profile/drop down air cleaner, but it's still a little tight. I'm going to look for a 2.5" filter to replace the 3" and see if that gets what I need. Otherwise we'll need to machine the intake a bit too.

What intake did you buy ? looks like edelbrok RPM to me. How much clearance do you have from carb to hood ?

I'm looking to build a B block with RPM intake and a airgrabber oval filter. And i'm a bit considered by clearance to ...
 
Try a company called Aveco

440, thanks for the link. A lot of great stuff there, but no luck on finding my trim clips. I'll keep hunting.
 
How did you refurbish your light fixtures

Ron, all that I did was bead blast the housings and then spray painted with "chrome" colored paint. I thought it looked very similar to original so I went with it.
 
What intake did you buy ? looks like edelbrok RPM to me

Elliot, you guessed right. Edelbrock Performer RPM. As far as clearance, there wasn't any. The air cleaner cover was definitely hitting so what we've decided to do is "massage" a crease in the cover of the air cleaner to clear the hood support frame. We also need to add two small reliefs to the support frame, but these should be minor. This is in addition to machining the manifold, but not sure how much my brother is planning to take off just yet. I'll ask where he ended up when he finishes it this week if you're interested.
 
Put a few more hours in on the wagon this weekend. After giving up on the LED conversion in the tail lights and front marker lights because I couldn't get fronts to blink on their own, I switched them back to incandescents so I could start putting dash back together.

I was able to leave the LED's in the instrument cluster so those are nice and bright. Got all the dash panels reinstalled along with new glove box liner. Just need a new bulb for ashtray to get that back in.

image.jpeg


image.jpeg


Today I worked on installing the new woven vinyl mat I bought to replace what was dry rotted on the floor panels in the rear of the wagon. I just cut the pieces to size and applied glue to bond to sheet metal. Convinced my brother to come over and lend a hand positioning pieces to keep from getting glue everywhere. He didn't have anything better else to do since he was sitting at home trying to recover from pneumonia in one lung, LOL. For the piece behind the rear seat I'm glad I saved the original as it helped a lot for using as template. I think this color and pattern sets off the otherwise dull interior color.

image.jpeg


I only have the large piece that covers the rear footwell to finish it off, but the appearance is really growing on me. I originally looked at a totally different color, but my girls convinced me to go this route.

If anyone needs vinyl like this for their projects, let me know and I'll give you contact.
 
Ejl, all I can say this is gonna bee so cool when you get done with it. I love it. Very nice job
 
Put a few more hours in on the wagon this weekend. After giving up on the LED conversion in the tail lights and front marker lights because I couldn't get fronts to blink on their own, I switched them back to incandescents so I could start putting dash back together.

I was able to leave the LED's in the instrument cluster so those are nice and bright. Got all the dash panels reinstalled along with new glove box liner. Just need a new bulb for ashtray to get that back in.

You need a electronic flasher for the LED bulbs.. Old school flashers use the resistance in the bulb as a self check.. No resistance, like with an LED, no flash..
 
Ejl, all I can say this is gonna bee so cool when you get done with it. I love it. Very nice job

Many thanks USA. I fell like I'm getting close to seeing her on the road and I'm getting excited to turn her loose.

You need a electronic flasher for the LED bulbs.

Thanks Derwud, but I already tried this. I originally bought the LED flasher relays for both the normal and emergency flashers. I'm assuming all cars have two different flasher relays like my wagon does?? When that didn't work, I bought the grounded LED flasher relays with still no luck. I can get the rear tail lights to work fine, but nothing on the fronts so after screwing around with it for 3+ weeks, I gave up and went back to original style bulbs.
 
Thanks Derwud, but I already tried this. I originally bought the LED flasher relays for both the normal and emergency flashers. I'm assuming all cars have two different flasher relays like my wagon does?? When that didn't work, I bought the grounded LED flasher relays with still no luck. I can get the rear tail lights to work fine, but nothing on the fronts so after screwing around with it for 3+ weeks, I gave up and went back to original style bulbs.

I wonder if you got some bad bulbs.. I have had bad luck with some of the LED bulbs out there.
 
The polarity may be wrong. Switch the connections on the front. LED's only work one way unlike incandescent.
 
Elliot, you guessed right. Edelbrock Performer RPM. As far as clearance, there wasn't any. The air cleaner cover was definitely hitting so what we've decided to do is "massage" a crease in the cover of the air cleaner to clear the hood support frame. We also need to add two small reliefs to the support frame, but these should be minor. This is in addition to machining the manifold, but not sure how much my brother is planning to take off just yet. I'll ask where he ended up when he finishes it this week if you're interested.

Yes I'm interested by your mod ! Let me know about them.

I'm going B block with the same intake. And I will try to make an air grabber oval filter from a 69 Roadrunner fit. I have seen some one modified the air cleaner to make it fit on a 440/ stock hood. B block are about 1.5 inch lower so it should be a better fit :)
 
Yes I'm interested by your mod

Elliot, I'll let you know how much was machined off the intake once I confirm with my brother.

I finally finished installing the new vinyl in the back of the wagon.

image.jpeg


Next project is cleaning out all the broken glass and dirt from inside the tailgate so I can the new glass installed. Figured I'd completely tear it down to ensure everything functions before I mount back on the car.

image.jpeg


image.jpeg


image.jpeg


The button on the safety switch wasn't working so I had to tear it down and rebuild.

image.jpeg


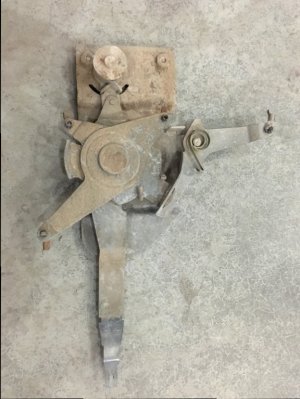
The only thing that concerns me at this point is the window motor. It looked pretty bad when I pulled it out. I tried testing it to see if it still worked but all I got was sparks. May as well try and rebuild this too before I look to buy a replacement.

image.jpeg


The inside of the motor looks better than I thought it would. Rebuilding and getting it to work may be easier than I thought.

image.jpeg


image.jpeg


image.jpeg


I'm looking to get everything cleaned up and reinstalled this weekend. I'll post more pics then. image.jpeg
 
The before and after on the interior is phenomenal.

Thanks Phil. It has come a long way from the dirt bowl I bought. Last piece of that puzzle is the headliner. Most of it is gone but the piece above the front seat. Planned on pulling that down and determining best way to replace it. It appears to be particle board material. Since I seriously doubt I can buy a direct replacement, need to determine if I can fabricate some other type of particle board or thin sheet of wood to fit. My brother also thought we may be able to convert to fabric headliner via the spare bows from my parts car.
 
Finished cleaning all the parts for the tailgate.

IMG_0654.JPG


Took some time for my brother and I to get the motor working, but it's fully operational now. Once we bench tested it, we used liquid seal to help protect it. I believe the motor housing had a similar rubber coating on it from the factory, like it was dipped or something.

IMG_0684.JPG


The key switch in the tailgate wasn't working either so I had to tear that down and clean/rebuild. Works great now.

IMG_0677.JPG


I was able to gorilla the gate back onto the car by myself. Thank god I had the air lift to help support it. I had my brother come over and help me adjust the hinge to get it aligned, but in all it works well now.

IMG_0691.JPG


I have to tweak the passenger side upper latch a bit to get it to actuate properly, which is also affecting the safety circuit breaker function, but it shouldn't be too difficult. Once that's corrected, we can put the glass in and adjust that as well. Before I got the gate back on I pulled what I was told was new glass when I bought the car from the box to check fit to the opening. To my surprise, it isn't new glass. I was a little concerned at first thinking it was the wrong glass, but it does fit the car. I'm kind of stoked that it isn't new glass because of the cool sticker that was on it.

IMG_0676.JPG


Nice original look to match the rest of the outside of the car. I'm liking it a lot......
 
Auto Transport Service
Back
Top