• When you click on links to various merchants on this site and make a purchase, this can result in this site earning a commission. Affiliate programs and affiliations include, but are not limited to, the eBay Partner Network.

71 Road Runner Restoration Started

Practice Practice Practice .......

Today I fired up my neighbors Mig welder and dialed it in for welding on thin sheet metal.

Once that was done, I practiced on some scrap metal pieces.

I really like the results. His welder is much more precise in adjustment and does a better job than mine.

So hopefully tomorrow I can make some progress and post some photos.

It will be a little while before the engine build starts. I'm still short a few small parts.

Stay tuned !!!!!!
 
:icon_bounce::icon_bounce:Hey, don't feel bad. My wife says i'm a few French fries short of a happy meal, but I get bye.
 
Today I fired up my neighbors Mig welder and dialed it in for welding on thin sheet metal.

Once that was done, I practiced on some scrap metal pieces.

I really like the results. His welder is much more precise in adjustment and does a better job than mine.

So hopefully tomorrow I can make some progress and post some photos.

It will be a little while before the engine build starts. I'm still short a few small parts.

Stay tuned !!!!!!

You mean to tell me there's something you are not already an expert at? I know you will be soon enough and I'm looking forward to the results
 
Metal Fab Day

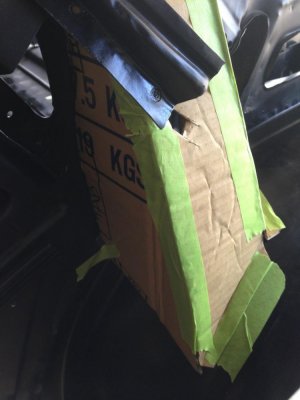
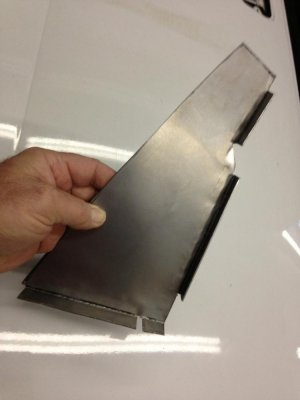
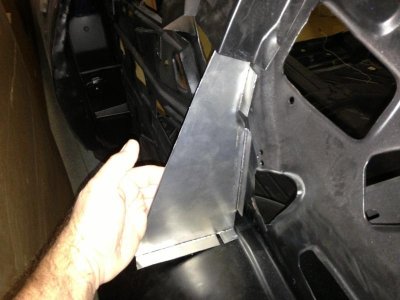
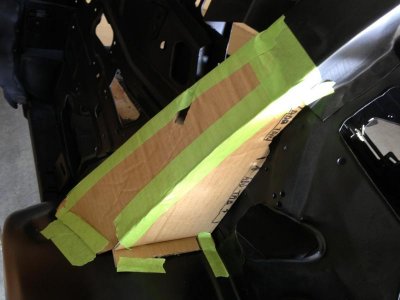
Today I started with cutting metal for the internal roof support that was damaged on the driver side.

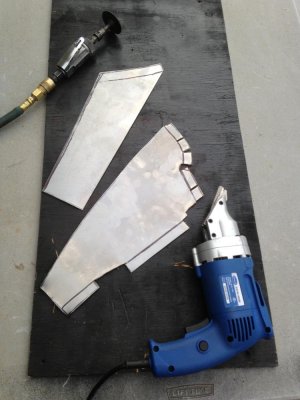
I simply used cardboard as an initial pattern.

- - - Updated - - -

IMG_4906.jpg

- - - Updated - - -

I used the passenger side to make the pattern. Then I simply flipped it over in a "mirror image" fashion.

- - - Updated - - -

IMG_9402.jpg

- - - Updated - - -

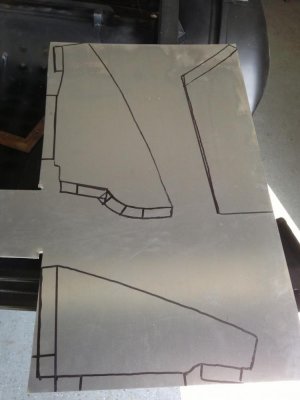
Then I simply traced the cardboard outlines on the 18 gauge metal.

- - - Updated - - -

IMG_3255.jpg

- - - Updated - - -

Then it was only a matter of cutting the parts out..................

- - - Updated - - -

IMG_8804.jpg

- - - Updated - - -

And making a few bends.................

- - - Updated - - -

IMG_6593.jpg

- - - Updated - - -

This is where the first part goes. It will need a little tweaking here and there to make it fit just right, but you get the general idea. Once all 3 pieces have been cut and fit correctly, I will weld them all together and then weld them permanently in place as a one piece unit.
 
"You mean to tell me there's something you are not already an expert at? I know you will be soon enough and I'm looking forward to the results"

Thanks for the kind words Tallhair. But I'm not even close to what I would call an expert.

I have a messed up work schedule coming around. I may not be able to get much more done on the car for a few days or so.

Hang in there with me, and stay tuned ..........................

Thanks
 
You do make it look like expert work! You come up with some cool ways to make what you need, my favorite i think is the indentations with carving out the 2-4 to make the panel look original.. Great idea's and do seem to work perfect...
 
A Little More Progress...................

Today I managed to get out in the shop and cut out the last two parts. I didn't get much done, but anything is better than nothing.

- - - Updated - - -

IMG_2946.jpg

- - - Updated - - -

They still need to be bent into shape.

- - - Updated - - -

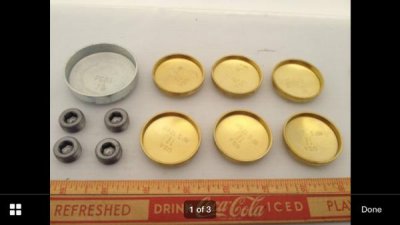
Then I ordered the brass freeze plug kit with pipe plugs for the bare 440 block. A local auto parts store was one of the least expensive places to buy the set.

It's sold by Pioneer, part # PE114B, out the door for less than $10, and I should get them by Friday at the latest.

That doesn't happen too often !!!!!

Know I'm only a few fries short of a Happy Meal...................LOL

- - - Updated - - -

as quoted by roadrunnerman.

- - - Updated - - -

IMG_6241.jpg

- - - Updated - - -

I found this generic picture, but you get the idea.

Have a good one..................
 
440 Engine Stand Mods

Today the weather has been bad down here. It's been a little chilly and raining all day, so I decided to make a few parts inside and keep the shop doors closed.

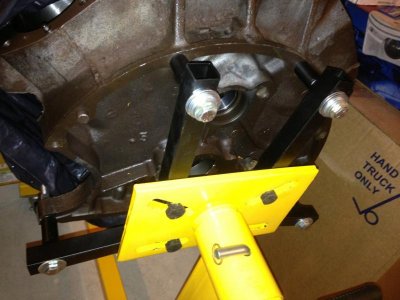
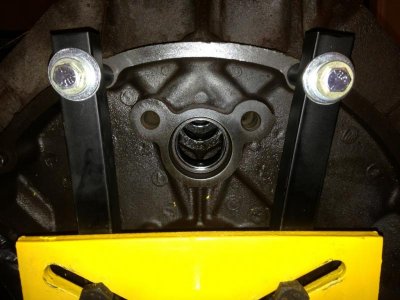
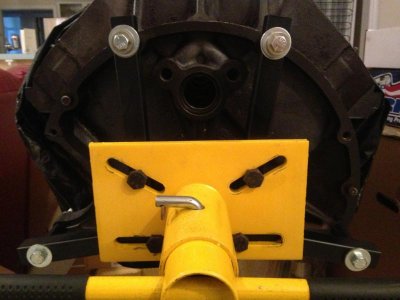
Previously I had the 340 engine from the Duster on this engine stand. However when I went to install the 440 on it, I could only get 3 of the 4 adjustable mounting arms to bolt in place. ( Plus I still have to install the rear camshaft plug and I did not have access to this area.)

The problem was that the mounting arms were too short.

So I made a new set of arms that are 1 1/2 inch longer. Now the problem is solved. All 4 mounting arms are bolted to the block and I was able to raise it enough to gain access to the rear of the camshaft.

- - - Updated - - -

IMG_5079.jpg

- - - Updated - - -

The new arms are painted black, so they are kind of hard to see.

- - - Updated - - -

IMG_0933.jpg

- - - Updated - - -

But you can see how much it raised the block. Now I can install the cam plug and rear oil galley plugs while it's bolted in place.

- - - Updated - - -

IMG_0608.jpg

- - - Updated - - -

If the engine is too top heavy I can lower it some the change the center of gravity.

- - - Updated - - -

Hopefully tomorrow I can get the sail panel supports fitted to the car.

Have a good one..................
 
IMG_7333.jpg

- - - Updated - - -

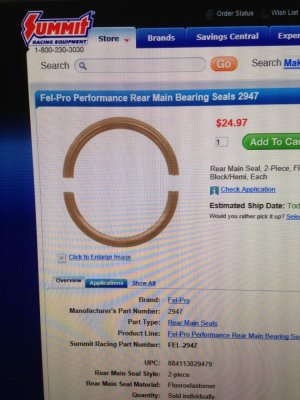
Just ordered the rear main seal from Summit. It should be here in a few days. The side rail gaskets are not included. This one is supposed to be better than the standard seal for performance applications or for cars that may end up sitting for extended periods of time.

- - - Updated - - -

I included this picture in case any of you were building a big block Mopar. The part number and price are in the photo.
 
Honey Do List ..........

Sorry I haven't posted much lately on this thread. There hasn't been much to write about. I've been busy doing other things.

My step son has been going through a rough time lately. That's part of the reason he moved in with us last July. He lost his home, went through a divorce, is filing bankruptcy, and after he moved in with us we found out he is an alcoholic.

I'm sure that was the cause of most (if not all) of his troubles. We tried to get him help with it, but he doesn't want to help himself. So.................

He moved out on Saturday and now has an apartment on his own. This will hopefully be a step in the right direction for him.

Saturday was spent moving his stuff and trying to get him back on his feet.

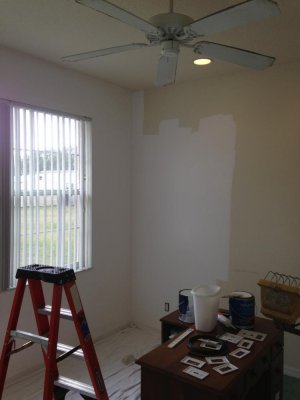
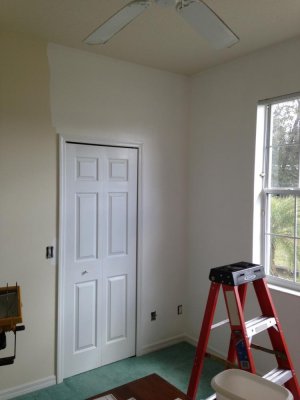
Yesterday was spent painting his old room. His mom wanted to have a sewing room / hobby room for herself since she is getting ready to retire soon. I set it up for her like she wanted it.

This is the least I could do for her. The misses has been through a lot here lately.

- - - Updated - - -

image.jpgimage.jpg

- - - Updated - - -

His room needed a good cleaning. We never went in there so he could have his privacy. That was a mistake on our part. Take a look at the ceiling fan. You will see what I'm talking about. He wasn't raised like that.
Its sad that people can live and function like that. Alcoholism is another one of the many terrible diseases.

- - - Updated - - -

My Mopar addiction is my disease. Who else has a fresh 440 block on an engine stand in their home??? Lol
 

Attachments

  • image.jpg
    image.jpg
    38 KB · Views: 444
  • image.jpg
    image.jpg
    38 KB · Views: 447
  • image.jpg
    image.jpg
    37.8 KB · Views: 469
  • image.jpg
    image.jpg
    37.7 KB · Views: 444
Hi airgrabber,

I had a quick question for you. I am going through the exact same resto as you with my 72 roadrunner and noticed your going from a column to floor shifter. My brother converted the column a long time ago but he put a direct shifter in the car because it was a bench. I since then have gotten buckets and want to make it a console car just like you. I have the brackets but my question is how hard is it to find a complete shifter linkage set up and is it hard hard install. Its hard because I dont know what its supposed to look like and I have only ever dealt with columns in my limited dealings. Would it be better to go without a console in your opinion. I have been following your thread and I am in awe of your amazing work. Its so cool to see someone doing the exact same thing as me(but much much better than I!) Thanks!
 
Shifter Linkage D.I.Y.

Plymouthman,

What I would do is start looking here in the "for sale" posts to see if anyone has a complete linkage assembly for sale. If you don't find one, try posting a "Part Wanted" add here. They are still around, you just need to dig a little sometimes to find one. The linkage assembly you are looking for should fit any B or E body ('Cuda / Challenger) car from 1971 to 1974.

The 1970 linkage was a one year only item and has a reverse lock out rod that goes to the steering column, plus they had a round wood grain colored plastic shifter ball with a center button. There are several other small one year only differences like the spelling on the gear selector indicator (one says slap stik I believe, and another is that it takes a different black slider plate that has a round hole in the center where the 71-74 ones have a rectangular shifter hole)

All 71 -74 slap stick shifters used a T Handle on the shifter.

If it were my car, I would definitely go with a center console for several reasons. First, they just look cool !!!!!!!! 2nd, they are necessary if you are going to install a "Slap Stick" shifter, because the console covers the shifter mechanism and linkages.

Do you have the correct console mounting brackets and bucket seat reinforcement plates ??? You will need these parts too to do the job properly.

I don't have an extra one for sale. The ones I have are for my other project cars. I do have a few pictures so hopefully they will help. The linkage is not hard to install. In fact very soon I will have to weld in the console brackets on the 72 Satellite, and I can go through that with a step by step posting for you.

Until then, I can only post a picture of the linkage that will be going in the car soon.

It sounds like you have a nice car there. I'd love to see some pictures of it, or even better start a thread on here with it. If you have any more questions please don't hesitate to ask. I'll try to steer you in the right direction. There are a lot of people here on FBBO with more knowledge than I. Just ask and someone here will know the answer.

Thanks again for the compliments. Anyone can do the same things that I do with their cars. You can too. It takes time and patience / attention to detail. Having the proper tools for the job helps too.

We all run into what I call "speed bumps" from time to time.

Hope this helps. I'll send you a PM.

- - - Updated - - -
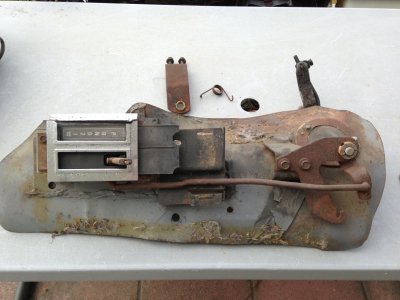
IMG_0825.jpg

- - - Updated - - -

IMG_0874.jpg

- - - Updated - - -

IMG_8630.jpg

- - - Updated - - -

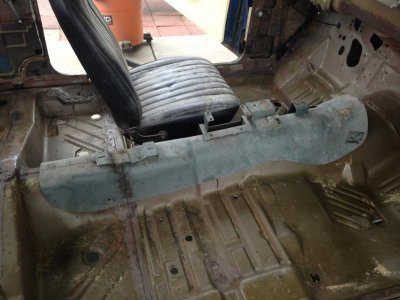
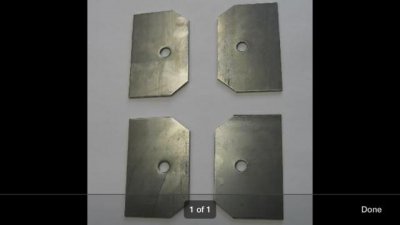
Seat / Floor pan reinforcement brackets...............

- - - Updated - - -
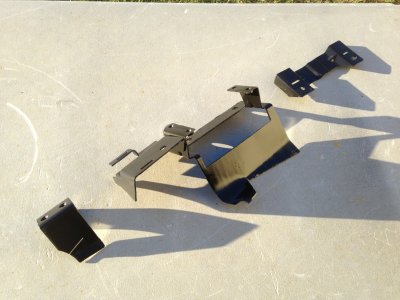
IMG_3761.jpg

- - - Updated - - -

Console and shifter mounting brackets.
 
Sorry for not posting anything for a while. A lot has happened on the home front, (mostly good) but nothing on the car unfortunately. I got some more stuff done around the home.

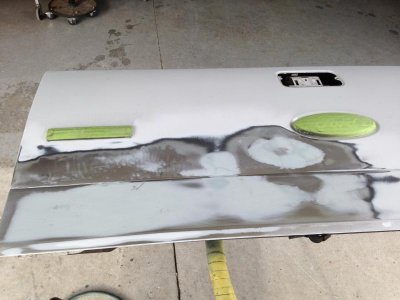
One of my friends dented the tail gate on his truck trying to hook up a trailer by himself. So I told him that I could fix it for him if he bought the materials and paint.

Sorry but it's a Ford. Oops. I said the "F" word.

I told him that had his truck been a DODGE, it would have destroyed the trailer. (just kidding)

So I will be busy for a few days now fixing it up for him.

- - - Updated - - -

image.jpg

- - - Updated - - -

This is after most of the dents have been pushed out and a few coats of filler applied. It still needs a lot more work.
 
Sorry to hear about all of the drama, wish I had some words of advice but it's usually something they learn on they're own or never learn "best wishes to him". Mopars aren't a disease they're a cure "it's all in how you look at it" haha. Keep up the good work
 
Auto Transport Service
Back
Top