• When you click on links to various merchants on this site and make a purchase, this can result in this site earning a commission. Affiliate programs and affiliations include, but are not limited to, the eBay Partner Network.

71 Road Runner Restoration Started

Cave Man Style !!!!!!

71AG, you have surpassed any level of amazement I had when you first started this thread. Did you use a flange tool after you cut out the holes.

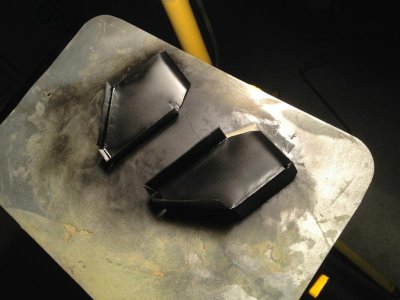
No, the only tools I used were 3 different sized hammers (a large and a small Ball Peen), a vise, a set of electricians lineman's pliers (klines), a "Uni" bit, and a short piece of a 2 X 4 .

- - - Updated - - -

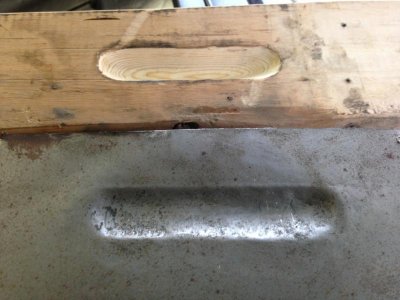
No. I simply secured the patch to the wooden blank that had a groove cut into it. That way it wouldn't move as I was trying to hammer in the channels.

- - - Updated - - -

I used a sandpaper roll from a cylinder head porting kit to grind out the recess in the wood. IMG_9964.jpgIMG_9964.jpg
- - - Updated - - -

View attachment 161521

- - - Updated - - -

The top photo was a test run on a scrap piece of metal to see how it would turn out.

- - - Updated - - -

Holy crap Louis!! That patch looks great. Did you just use a hammer to make those recessed areas or did you hammer in a round bar or something?

No I just used the wooden blank and the round end of a ball peen hammer.

- - - Updated - - -

I placed the round end of the ball peen over the groove, then hit it with a plastic coated dead blow hammer so it wouldn't move. I'd be weary about striking one hammer with another metal one. I had a piece of shrapnel from one get lodged in my hand years ago by doing that. Every since then, I haven't done it again. Now I even make sure the end of my punches all stay ground down too. It only takes once...........

- - - Updated - - -

I always wear glasses too................

- - - Updated - - -

Once I had the rough shape of the channel formed, I removed the patch from the wooden form. Then I laid the metal patch on the flat surface of my vice and straightened it out using the vise as a back stop instead of the wood. It made the grooves nice and flat. It takes some time, but it can be done. Just take your time and be patient with the metal.
 
71agRR, Thanks for taking the time to show us how you did this.
It really helps us "rookies"!
I have an idea for the admins....
Add a "How to thread" to the different threads you already have


Engine, Trans & Driveline
Electrical & Ignition
Brakes, Suspension, Rims and Tires
Heating, Cooling & AC
Exterior, Paint & Bodywork
Interior
Restoration

each of these threads would have a sub thread "HOW TO" that would be stickied so it would stay at the top of the page.
This would be really handy for those of us still learning!
Maybe we all could chim in and someone could do that for us?
 
I'd be glad to help out !!!!!

71agRR, Thanks for taking the time to show us how you did this.
It really helps us "rookies"!
I have an idea for the admins....
Add a "How to thread" to the different threads you already have


Engine, Trans & Driveline
Electrical & Ignition
Brakes, Suspension, Rims and Tires
Heating, Cooling & AC
Exterior, Paint & Bodywork
Interior
Restoration

each of these threads would have a sub thread "HOW TO" that would be stickied so it would stay at the top of the page.
This would be really handy for those of us still learning!
Maybe we all could chim in and someone could do that for us?


I have posted several how to articles. I can post a bunch more if it helps out my fellow Mopar loving gear heads!!!!

Thanks for the compliments everyone. I'm not a "know it all" by any means. But if I can help someone out I don't mind at all.

Ive had several of my questions answered here by fellow members. I'm just trying to repay the favor to someone else.

Thanks again.

FBBO ROCKS!!!!!!
 
image.jpg

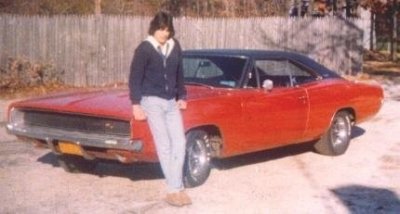
Been enjoying your work. Man you are ambitious! Can't wait to start on my 73 RR project, I will start a thread soon. When I saw the pic of your 70 Charger, I felt the need to share a pic of my first love. I was 18 in this pic in 1978 with my 68 RT Charger. I paid. $750 for it and it had power windows too! I knew it was a special car but being young and dumb and broke I sold it to experience other cars. I will be following along with your "reality" show. Take care, Jack.
 
View attachment 161679

Been enjoying your work. Man you are ambitious! Can't wait to start on my 73 RR project, I will start a thread soon. When I saw the pic of your 70 Charger, I felt the need to share a pic of my first love. I was 18 in this pic in 1978 with my 68 RT Charger. I paid. $750 for it and it had power windows too! I knew it was a special car but being young and dumb and broke I sold it to experience other cars. I will be following along with your "reality" show. Take care, Jack.

Jack i think we have all been there with these cars, some we should have never got rid of so you arent alone, Looks like a nice Charger to.. Good luck on your 73 Road Runner!!
 
Hey 71RR, I too have been enjoying your 'how to' threads and would welcome anything you have to offer that shows off your expertise. I am going to be starting my 73 Charger build later in the year and have already picked up so much valuable info from you. Keep up the great work and look forward to reading future posts.
Heck, one day you might even get back to the Roadrunner LOL.
Cheers
Jason
 
Jack that's a sweet ride!!! I've always liked the 68 especially after watching the movie "bullet". I hear ya!!! We all have had a few cars we wish that never got away.

- - - Updated - - -

Jason, hopefully some day I can get cracking on the RR again. I have been working on some small things here and there for it. An example was when I restored the interior window trim, I did all of the trim for both cars.

Hopefully if I can manage that a little here and a little there, it will help when it's time to get the project started back up.

Thanks again everyone for the compliments.

- - - Updated - - -

I'm going to contact the machine shop later today and let you know the progress.
Yesterday we ordered the SKAT rods and 10.5 to forged lightweight pistons.
 
Machine shop info

Yesterday the misses and I stopped by the machine shop to see how things are going and to talk things over with John.

The block has been sleeved on the front 2 cylinders and all cylinders are rough bored at .030 over. The deck height has been squared up to the factory specs of 10.725 by machining down the head gasket surface.

The align bore / honing is done.

The original forged steel crank was in very good condition. All it needed was a good cleaning and polish. So that means standard sized rod and main bearings. This was the determining factor on what the next step was going to be......

Now we are at the point to where parts are needed.

I wanted the engine to have a compression ratio in the neighborhood of 10.5 to 1 so I could run it on the street with 93 octane gas.

I ended up ordering a set of SCAT H beam rods with 7/16 bolts. Theses rods weigh about the same as a set of factory LY 440 rods but are much stronger. I also wanted to have floating pins and thought about dropping the wrist pin down to a .990 size to save some weight.

But by doing this, the piston ends up being a little heavier than a piston with the stock 1.094 pin.

The final choice I made was for the 1.094 stock pin size, with the stock rod length. It only ended up being 3 grams heavier as advertised. I am sure I probably went a little overkill with this. But money spent on a new set of rods is good insurance.

I went with a set of SRP forged lightweight pistons that are advertised weighing around 645 grams. They are 10.5 to one compression with an 80 CC combustion chamber. I can vary this a little with different head gaskets.

These pistons weigh a WHOLE lot less than the stock piston, so the engine will accelerate quicker while placing less stress on the rods. We also ordered the matching piston ring set.

Then I picked out a good set of rod and main bearings. I went with a full groove main set of Vandervell performance bearings that are now sold by Clevite.

We are estimating this setup will get us in the 500+ HP range with the cam and heads I have for this engine.

It should be a fun combination.

If the crank needed turning, I was going to go the stroker route.

The parts should be delivered to the machine shop in a few days. When they do, the cam bearings, brass freeze plugs and distributor bushing will be installed.

Then the final honing with torque plates will be done, and they can balance the rotating parts.

If things go as planned, I may have everything back home by early next week.

I will definitely be posting some photos of the assembly. I've pulled the engine stand out .......

Have a good one !!!
 
Getting Ready....................

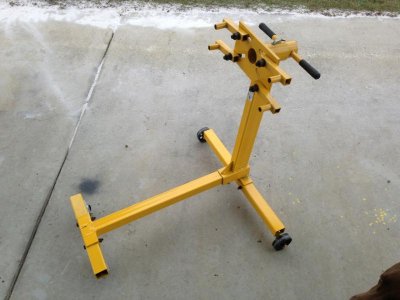
Today I cleaned up the trusty old engine stand in preparation for the "Home Coming" event. Also pulled out my rear end stands getting ready for the 8 3/4 set up work.

That's about all. Pretty boring uneventful day. Had to take care of some other things around the house.

- - - Updated - - -

IMG_5190.jpg

- - - Updated - - -

Mabel wanted to help too. You can see her head in the bottom corner of the picture...................

- - - Updated - - -

Mabel wanted to help too. You can see her head in the bottom corner of the picture...................
 
Going Back Together.................

Today my neighbor stopped by to ask me to help him with his 57 Chevy "Gasser" project for a few minutes. He needed help with placing the 8-71 blower on top of the engine. He is the same person who let me use his 2 post lift to install the engine in the Duster. (a good neighbor to have, LOL)

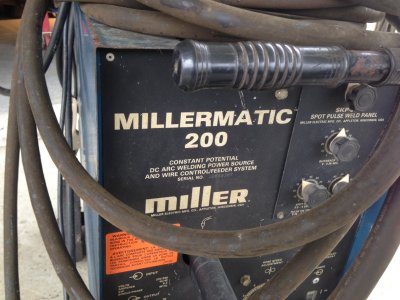
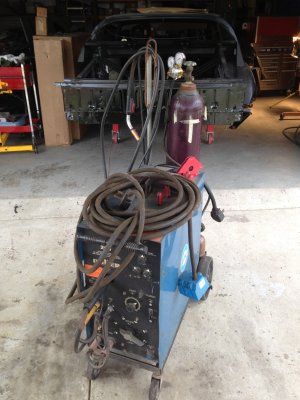
While I was there he offered to let me borrow his Miller Mig welder. His welder is a WHOLE lot better than mine and has better adjustments. He said that since I am replacing the panels on the Satellite, why not give his a try. So we loaded it up and it's now in my shop.

IMG_8154.jpg

- - - Updated - - -

IMG_7341.jpg

- - - Updated - - -

I's sure there will be a learning curve, so I will have to practice with it a little before I actually use it.

- - - Updated - - -

IMG_3556.jpg

- - - Updated - - -

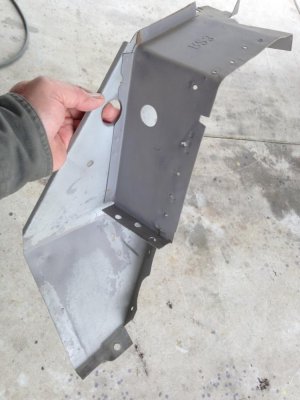
So I started getting busy with the parts I fabricated. They were glass beaded and then painted black. While they were drying, I glass beaded the end part that connects the quarter panel to the rear of the car.

- - - Updated - - -

IMG_2859.jpg

- - - Updated - - -

Then it was painted too.

- - - Updated - - -

- - - Updated - - -

View attachment 162055

- - - Updated - - -

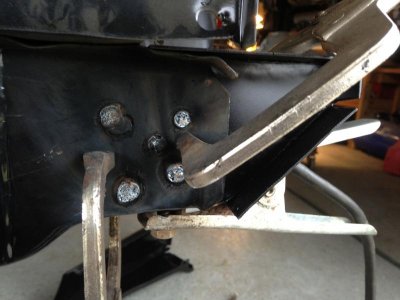
Then I started the welding. First I test fit the new part I fabricated to see how it worked. Luckily, it fit like it should. So I marked it out and clamped it in position. Then I plug welded it in place.

- - - Updated - - -

IMG_7528.jpg

- - - Updated - - -

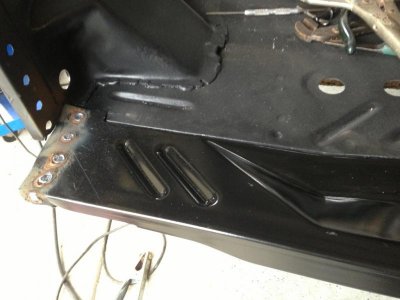
Then I fit the trunk floor extension and welded it in.

- - - Updated - - -

IMG_5221.jpg

- - - Updated - - -

IMG_8166.jpg

- - - Updated - - -

And just to be safe, I tack welded it along the top seam as well. This area will eventually be covered with seam sealer, so none of this will be visible.

- - - Updated - - -

View attachment 162060

- - - Updated - - -

Then I welded in the last part for the day.

- - - Updated - - -

IMG_8433.jpg

- - - Updated - - -

IMG_2592.jpg

- - - Updated - - -

IMG_6780.jpg

- - - Updated - - -

These plug welds will have to be flapped down and checked for holes. Once that is done, and everything looks OK, then this side will be ready to hang the passenger side quarter panel. But that is still some time away from being done. I still have to weld in the same parts on the driver side, plus the wheel housings, and fabricate the parts for the roof sail panel reinforcement, before even thinking about hanging on the quarters.

So there is still much work to be done.

The machine shop said the parts for the engine may show up next Monday.......................

That's all for today. Have a good one.
 
This is a trial run to tease us on how cool that 71 AG RR resto thread is going to be and that means amazing because this thread is so incredible already .. great work brother.
 
Last edited:
Machine Shop Report

This is a trial run to tease us on how coll that 71 AG RR resto thread is going to be and that means amazing because this thread is so incredible already .. great work brother.


Thank you Sir for the kind words!!!!!

- - - Updated - - -

John from Express Engines called me this afternoon with some good news!!!

The pistons and ring set arrived this morning, so they were able to finish up the final honing work with the torque plates on.

- - - Updated - - -

The block work will be done as soon as the new cam bearings and distributor bushing are installed. It may even be finished now as we speak.

John said he was expecting the Scat H beam rods to arrive late today. When they do, he can start on the balancing work.

- - - Updated - - -

He said he was hoping to have everything done by Tuesday, providing there was not any parts delivery problems.

- - - Updated - - -

I'm really getting anxious now!!!!!!

It looks like I may soon be posting some pictures of the engine build.

- - - Updated - - -

I will DEFINITELY keep you all posted ..........

- - - Updated - - -

Take care, and have a safe, quiet evening.
 
Inner Wheel Housing Installed

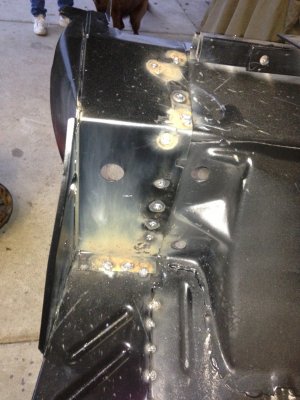
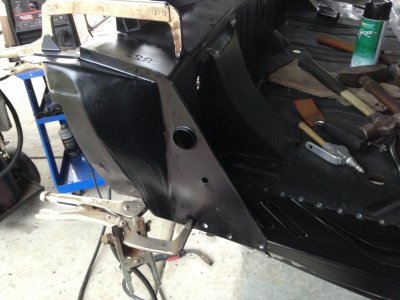
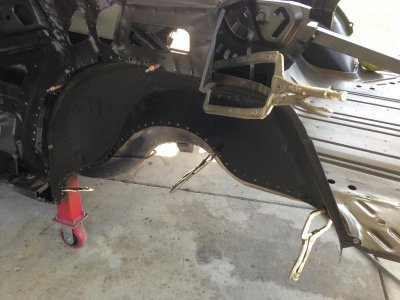
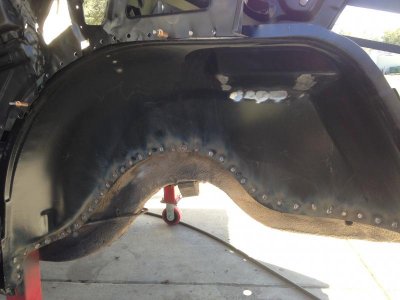
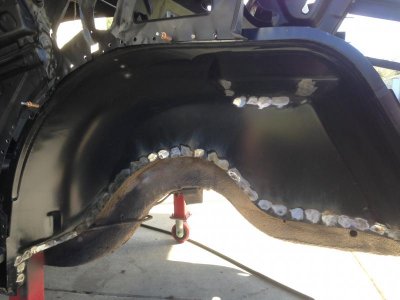
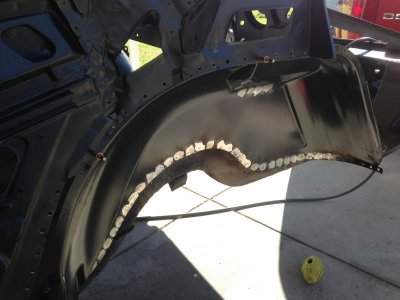
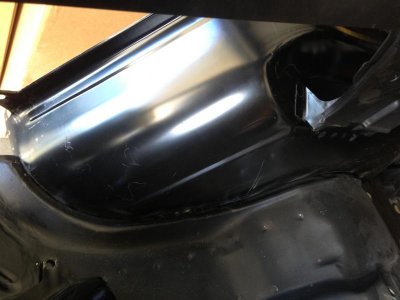
Today I made some progress on the Satellite. After some final fitting, I welded the inner half of the wheel housing in place on the driver side. The new sheet metal fit like a glove. (I'm happy to say).

- - - Updated - - -

image.jpgimage.jpg

- - - Updated - - -

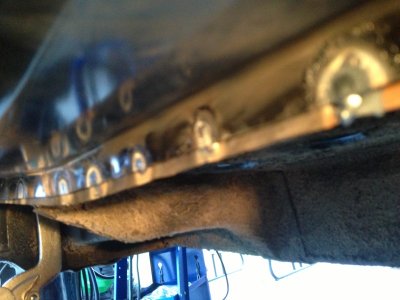
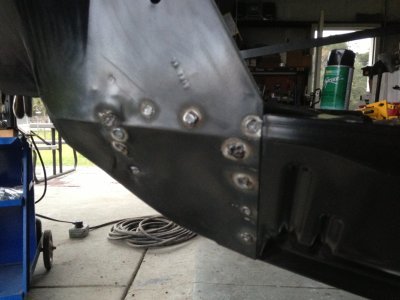
After the initial plug welds were completed, I went back and ground them down smooth to make sure they were good and solid. A few still had pin holes, so I simply added another tack weld over the hole.

- - - Updated - - -

image.jpgimage.jpg
 
Here is a photo showing how nice everything is lining up on the seams.

- - - Updated - - -

image.jpg

- - - Updated - - -

Today was also good in another way. I met a fine young gentleman named Cody, who is working on a 73 Charger Hard Top. His car has great potential. He has a 383 that he wants to install in place of the current 318 in the car.

I showed him the FBBO website and encouraged him to sign up and introduce himself along with his car.

He seemed very enthusiastic about it and will hopefully join our ranks.

- - - Updated - - -

Hope your weekend was a good as mine was.

Stay Tuned !!!!!!!
 
Looks great and thanks for sharing the word with young Cody .. he'd be wise to come over and learn from a Master Craftsman like yourself. Hopefully he's signs up
 
X 2 Do hope he joins in on the fun! Some great work bud and really looking good!! !
 
Cody just introduced himself and posted a few pictures of his Charger on the welcome wagon.

Please go over and give him a warm FBBO welcome. It's great to see the younger people take interest in the older Mopars.

He's a good guy.

He goes by Lawnchairr

Thanks.
 
Auto Transport Service
Back
Top