• When you click on links to various merchants on this site and make a purchase, this can result in this site earning a commission. Affiliate programs and affiliations include, but are not limited to, the eBay Partner Network.

71 Road Runner Restoration Started

Things are really moving along nicely - sucks about the pillar support damage though. Just another hidden surprise most of us end up finding when we strip down these cars. I like your attitude towards it though. Get a plan, repair, and put it behind you.
Those power shears are really nice for sheetmetal work aren't they? I use them almost daily in the HVAC business. I do have a good story about them. Over 35 years ago we replaced a heating system for an older gentleman about 10 miles away from us. His house was totally littered with inventions and things around that made everyday life easier. When we started using our power shears on his job, he told us the story of how he invented them years ago as a young man. He didn't have the money to file for a patent and start the production process, so he asked his best friend to loan him the money. If I remember correctly, it was $20k-$25k. When all the smoke cleared, the man telling the story ended up with $80k and his "best friend" pocketed 2 million. And to top it off, the friend stole this mans wife also. It affected him so much that he never filed another patent the rest of his life, and believe me - he had many things that he could have.
 
Inspiration.....................

Thanks for the very cool story H2E !!!! Just think of the things that gentleman could have accomplished if things would have gone the other way...............

You just never know in advance what curves life will throw your way next.

I guess this "parts car" turned into something more, which is good. I know we can't save them all, but this one is a very good example of what can be saved. We can now consider it a "Practice" car for the 71 Road Runner. Like I mentioned in an earlier post, I've been way overdue to have a street driven Mopar of my own. I've been too busy with everything else.

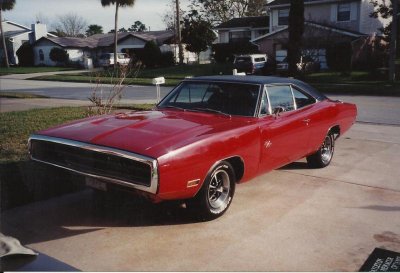
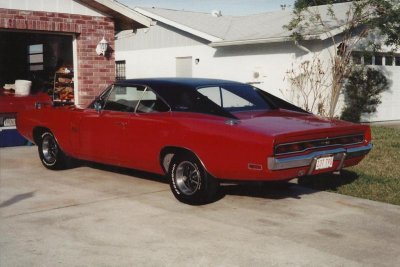
So I'll post up the some pictures of my last car. I will look at it from time to time as inspiration. 003.jpg005.jpg


I'm headed out to the shop now. Sparks will be flying !!!!!

Stay tuned.................
 
71airgrabberRR,

I've been meaning to ask you about the primer you sprayed on your 72. Can you tell me a little bit more about it? Both of my projects are pretty much equal parts surface rust, rattle can primer and thin, weathered original paint. I'm toying with the idea of stripping them down and priming them in black as you did.

Did you just DA the car with 80 grit? I'm alway wearing of using power tools on the body for fear of destroying the bodylines on the panel. How do you treat surface rust? Does that primer seal the surface against rain and humidity? Are you treating that primer coat as just a temporary protective finish or will you do your final paint and bodywork over it?

Thanks
 
I stopped by here before going out today looking for a little information, I should have known to come right to this for some added inspiration real quick! That is one beautiful 70 bud!!!
 
Things are really moving along nicely - sucks about the pillar support damage though. Just another hidden surprise most of us end up finding when we strip down these cars. I like your attitude towards it though. Get a plan, repair, and put it behind you.
Those power shears are really nice for sheetmetal work aren't they? I use them almost daily in the HVAC business. I do have a good story about them. Over 35 years ago we replaced a heating system for an older gentleman about 10 miles away from us. His house was totally littered with inventions and things around that made everyday life easier. When we started using our power shears on his job, he told us the story of how he invented them years ago as a young man. He didn't have the money to file for a patent and start the production process, so he asked his best friend to loan him the money. If I remember correctly, it was $20k-$25k. When all the smoke cleared, the man telling the story ended up with $80k and his "best friend" pocketed 2 million. And to top it off, the friend stole this mans wife also. It affected him so much that he never filed another patent the rest of his life, and believe me - he had many things that he could have.

Man that is a sad story H2E. I feel for that guy and hope the friend rots in hell

- - - Updated - - -

Thanks for the very cool story H2E !!!! Just think of the things that gentleman could have accomplished if things would have gone the other way...............

You just never know in advance what curves life will throw your way next.

I guess this "parts car" turned into something more, which is good. I know we can't save them all, but this one is a very good example of what can be saved. We can now consider it a "Practice" car for the 71 Road Runner. Like I mentioned in an earlier post, I've been way overdue to have a street driven Mopar of my own. I've been too busy with everything else.

So I'll post up the some pictures of my last car. I will look at it from time to time as inspiration.


I'm headed out to the shop now. Sparks will be flying !!!!!

Stay tuned.................

You need no practice brother
 
Man that is a sad story H2E. I feel for that guy and hope the friend rots in hell

- - - Updated - - -


You need no practice brother


I agree with you Tall hair. There is a special place for people like that guy. You reap what you sow, as they say. His will be coming to him in due time.

Thanks for the compliments everyone. I got a lot done on the car today. Took some pretty good pictures too. Right now we are headed to a nearby Christmas party. Hopefully I can post some more when I get back.

- - - Updated - - -

Chase 383 I will answer your questions shortly. I used Southern Poly urethane as the primer. More to follow.
 
What a Party !!!!

71airgrabberRR,

I've been meaning to ask you about the primer you sprayed on your 72. Can you tell me a little bit more about it? Both of my projects are pretty much equal parts surface rust, rattle can primer and thin, weathered original paint. I'm toying with the idea of stripping them down and priming them in black as you did.

Did you just DA the car with 80 grit? I'm alway wearing of using power tools on the body for fear of destroying the bodylines on the panel. How do you treat surface rust? Does that primer seal the surface against rain and humidity? Are you treating that primer coat as just a temporary protective finish or will you do your final paint and bodywork over it?

Thanks

Chase 383,
The primer I use on my cars is made by Southern Polyurethanes. It's a 2 part epoxy. I like to use the black as a starting point / first coat. That way when you are sanding your normal gray colored primer it shows when you are getting close to breaking through to bare metal. It acts like a sealer also, so once you spray it on, the car will not rust, as it does when you just spray a regular "rattle can" gray on bare metal. You can also spray it over all of your body work just before your normal base coat starts. Body fillers adhere to it very well. You can go on their web site and read about it to get more information.

I use it as a base for all of the other body work that follows. I initially used this for metal protection on this car. I like the look though. It looks tough............ kind of sinister.

With this car I sanded it down to bare metal using my DA sander and 80 grit paper. I only went this route because the finish on most of the car was the original paint. If your car has a lot of paint on it, I highly recommend that you try to get it media blasted if that is an option. The bare metal is the best way to start and after its blasted, it has a finish that the epoxy primer can bite into. If you stay in one spot for a length of time with a sander, it may be possible to damage a body line. But I think you would really have to mess up in order for that to happen.

As far as a rust treatment, I like the old stand by.......... Ospho. Just follow the directions and you will be fine.

I hope this helps..........................

- - - Updated - - -
IMG_1141.jpgIMG_1244.jpg

- - - Updated - - -

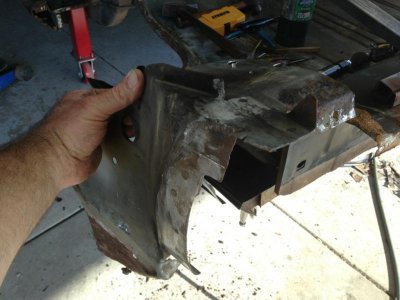
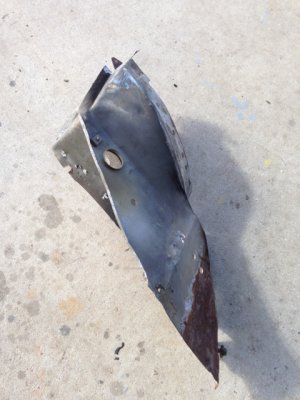
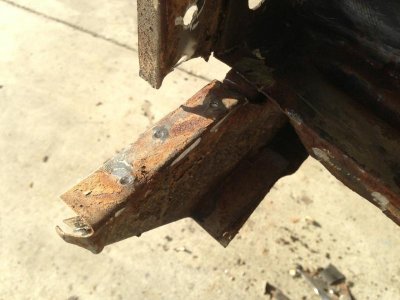
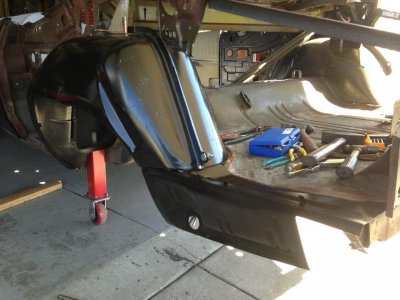
Yesterday I was cutting off the trunk floor extension on the passenger side. That was when I realized that it is actually installed before the rear quarter panel reinforcement brackets. So in order to get all of the original metal out, I had to drill out the spot welds and separate the end caps from the rear of the car.

- - - Updated - - -

IMG_0483.jpgIMG_4724.jpg

- - - Updated - - -

This is the part that I was trying to get to.

- - - Updated - - -

IMG_4321.jpg

- - - Updated - - -

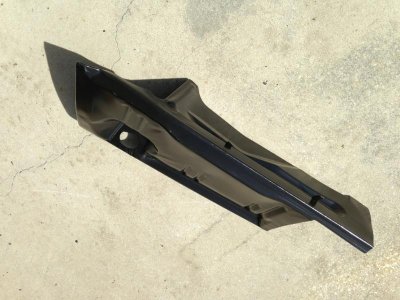
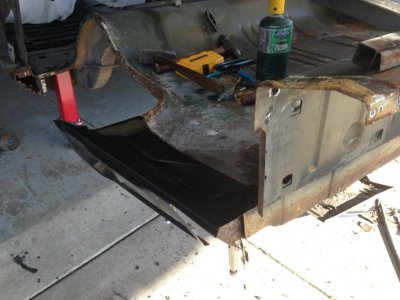
Once this was done to both sides, I test fitted the new AMD trunk floor extension on the driver side. I have to say, I am very impressed so far with how it fit.

- - - Updated - - -

IMG_5925.jpg

- - - Updated - - -

IMG_5882.jpg

- - - Updated - - -

Now I know why they offer the quarter panel with the brackets............ I probably should have ordered them too. So if any of you are getting ready to replace the trunk extensions / quarters on your 71 -72 Plymouth, learn from my mistake.

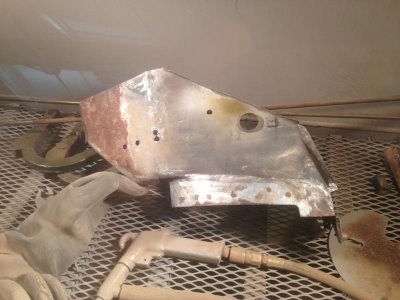
My original parts should clean up decently in the blast cabinet though.

- - - Updated - - -

IMG_4841.jpg

- - - Updated - - -

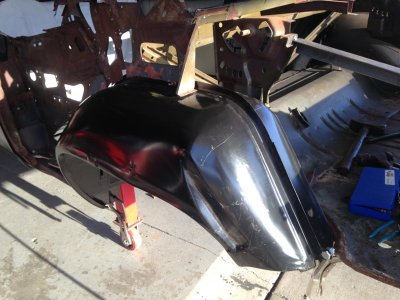
Then I mocked up the inner wheel house opening. Again, the fit was very good.

- - - Updated - - -

Then I started cutting off the trim work from around the passenger side quarter panel. I have most of the original quarter panel removed now.

- - - Updated - - -

That was yesterdays progress................

Then the misses and I went to the Christmas party when she got home form work. It was a GOOD one !!!!!! Needless to say, she drove home........... I had a good time blowing off some steam with my buddies from work.
VB%20toast.gif


- - - Updated - - -

So today I made some more good progress.....................

- - - Updated - - -
IMG_0707.jpg

- - - Updated - - -

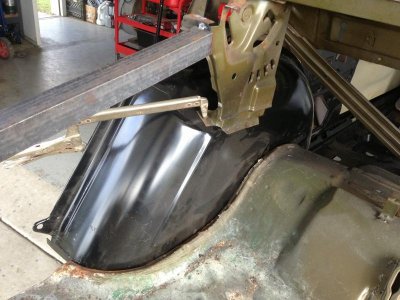
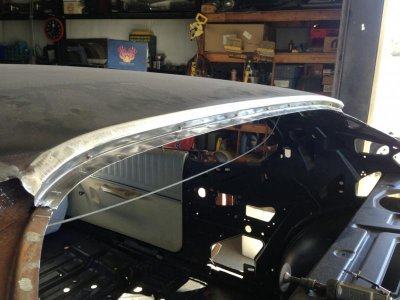
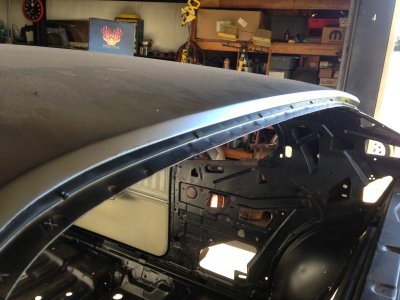
I cut out the damaged section of the inner roof support. The I hammer / dollied the inner sheet metal into correct position. Once everything looked good, I gave it a test fit with the inner wheel house section.

- - - Updated - - -

IMG_8797.jpg

- - - Updated - - -

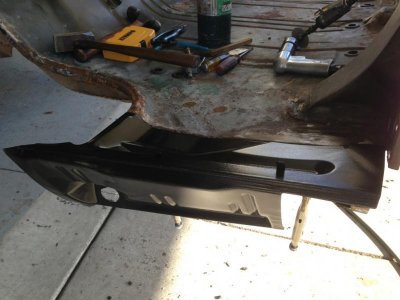
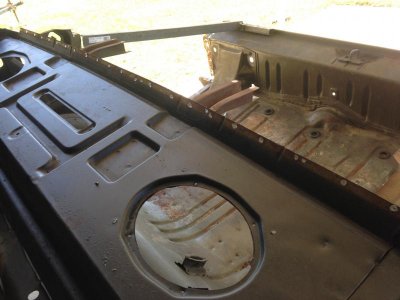
Here is another photo of the trunk floor extension.

- - - Updated - - -

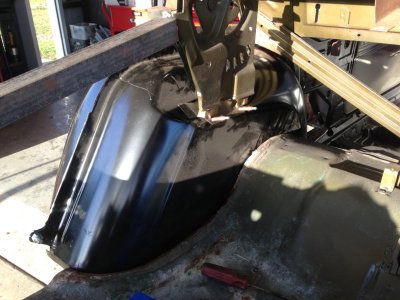
Once I was happy with the fit of the inner wheel house, I used 2 1/2 bolts and bolted the outer section in place against the inner. On these wheel house sections, the factory had 3 1/2 alignment holes that make sure the halves are properly positioned.

- - - Updated - - -

IMG_1403.jpg

- - - Updated - - -

You can see one of the bolts in this last picture. It is at the lower right hand side at the very end of the wheel house.

- - - Updated - - -

Then I used a few of the the Cleco's to secure the two sections in place once everything was aligned.

- - - Updated - - -

IMG_0468.jpg

- - - Updated - - -

These parts will come back out again before too long. This is simply the "mock up" stage. I want to make sure all of the metal is in the proper position before any welding is started.

Once the few remaining outer trim strips from the passenger side quarter are removed, I will burn out / wire brush the remaining seam sealer in the trunk floor area.

That will be followed by some blasting work.

Stay tuned !!!!!!!!!!!!!!!!!

Merry Christmas.
 
Thanks for another interesting update 71AG and Merry Christmas to you an yours

- - - Updated - - -

That FE5 and black top goes so well together. Very sweet combo

attachment.jpg
 
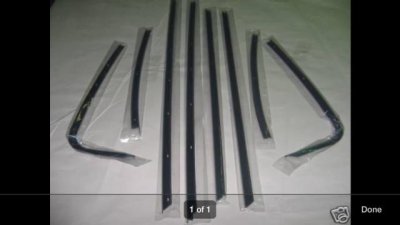
I was thinking about everything that is attached to the rear quarter panels in some form or another. Then I realized I did not have the window "fuzzies" or cat whiskers as they are sometimes called. I wanted to have the mounting holes for these parts figured out now while this area is still easily accessible. They are kind of hard to get to once the panel is welded in place.


IMG_5056.jpg

- - - Updated - - -

So I ordered a set. This is the picture that went with the item.

- - - Updated - - -

IMG_9374.jpg

- - - Updated - - -

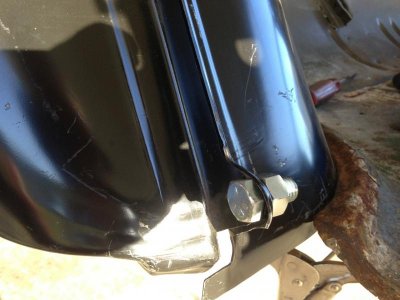
This is a close up of how I temporarily bolted the inner and out wheel housings together. There is another bolt on the front. This keeps the parts in perfect alignment while everything is being test fitted prior to final welding.

- - - Updated - - -

It's raining here right now, but it should clear us soon. I'm headed out back to the shop.......................

- - - Updated - - -
Hopefully the passenger side quarter panel parts will arrive today. That would make for a perfect Christmas !!!!!
 
Man you've got it all figured out. Neat little trick with that that big *** tractor bolt
 
Christmas Eve Progress

Man you've got it all figured out. Neat little trick with that that big *** tractor bolt

Yeah, the bolt is 1/2" X 1". They are just there to hold the wheel house halves together temporarily. The bolt will come out after the parts are welded together.

First thing this morning I went out and looked at the quarter panel where the rear driver side window "cat whiskers" mount. The holes are already there, so I guess I jumped the gun a little quick on that one. It looks like AMD did their homework on this part. The real truth will show when I install it. So far I have to admit, the fit on everything has been very good.

- - - Updated - - -

IMG_1267.jpg

- - - Updated - - -

After checking on the mounting holes for the cat whiskers, I started burning off all of the old butyl tape that was left around the back window. Then I wire brushed it down to clean bare metal.

- - - Updated - - -

IMG_2972.jpgIMG_3025.jpg

- - - Updated - - -

Then I did the same with all of the remaining seam sealer inside the trunk area. You can see that even the factory parts had gaps when they were installed from the factory.

Then I sprayed some black on the bare metal around the back window.

While this was drying I finished removing all of the small edge pieces that were left from the original quarter panel.

- - - Updated - - -

IMG_6222.jpg

- - - Updated - - -

The I test fit the trunk floor extension with the wheel house in place. The fit was very nice.

- - - Updated - - -

IMG_6898.jpg

- - - Updated - - -

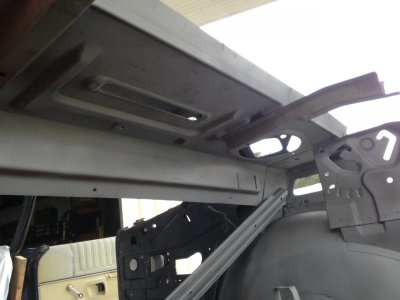
Here you can see the package tray area after the last bit of the Dutchman panel was cut away.

- - - Updated - - -

IMG_6607.jpg

- - - Updated - - -

Then I went on to clean the end brackets in the glass bead cabinet.

- - - Updated - - -

IMG_2799.jpgIMG_3660.jpgIMG_3876.jpg

- - - Updated - - -

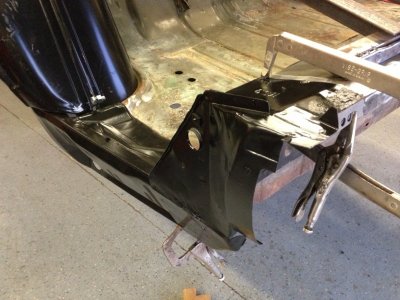
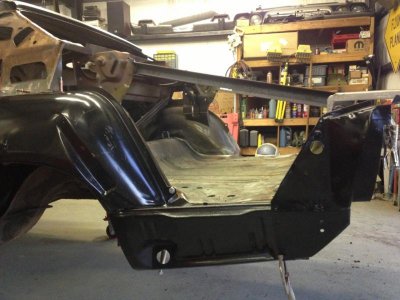
Then the part was painted and placed back into position. For now it is held in place with vise grips. I still have to drill a few holes for the cleco fasteners, then the vise grips will come off.

- - - Updated - - -

I heard form the machine shop today. They said that the front 2 cylinders will need to be sleeved. Then they will bore the block at .030 over.

They said it might be done by New Years Eve.

Merry Christmas !!!!!!!!!!!!!!!!!!
 
Yeah I knew it was temporary .. just thought it's a great idea and the mock up results look great! Thanks for the tip and the update
 
Damaged Window "Fuzzies" Arrived

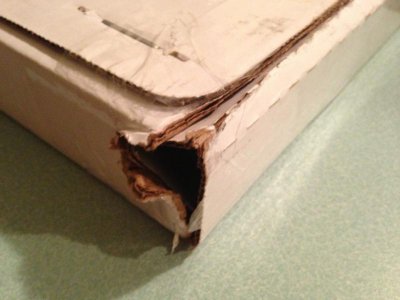
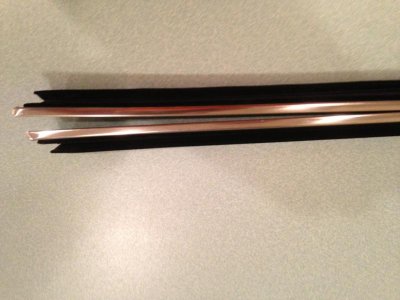
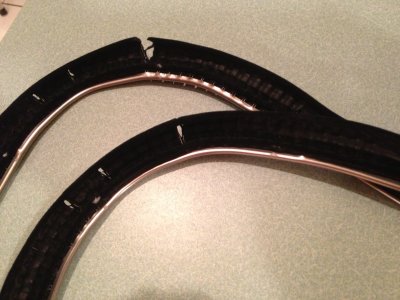
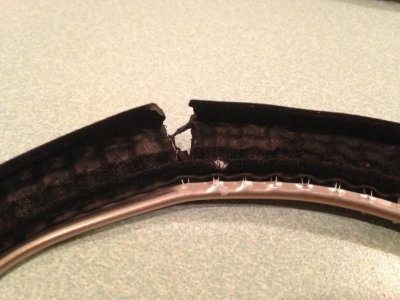
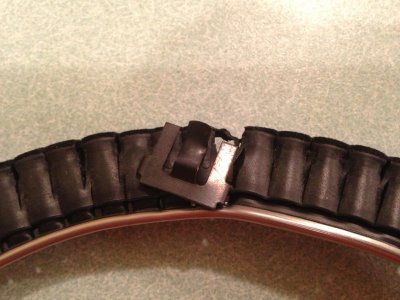
Yesterday when the wife got home from work there was a box sitting by our garage. Inside was the window felts. The shipping was pretty fast, but the package was damaged and was marked "received in damaged condition". I'm pretty sure this was marked that way by the local Post Office. Several of the parts inside were hanging out of the end of the box. These were the damaged parts. I contacted the seller to see what the next step is so I can get the damaged stuff replaced.

It's a shame the "cat whiskers" were damaged, because the parts look to be a decent reproduction of the originals.

On a better note, I did some research on forged pistons for the 440 engine. I have found some that are as light as 612 grams at .030 over.

I'm looking at a Compression ratio in the area of 10.5 to 1, since I will be running aluminum heads, and want to run 93 octane pump gas.
Then I saw that 440 source offers a set of stock length new rods with 7/16 " ARP bolts for close to $300 a set. If I went this route, they are also lighter than the stock rod and offer the benefit of being new and having bigger rod bolts. This would make the engine rev quicker with everything being lighter.
Now I need to stop by the machine shop and ask them if they have ever balanced out a stock forged steel crank with parts this light, (or will it cause them any problems?)

But then the Stroker kits still look good too................:grin: I'll have to do some math $$$$$$$$

While I'm in the area, I might drop off a 727 to have it freshened up. The one I'm planning on using already has the Hemi 5 to 1 band lever installed. I have a nice TCI 3500 stall for it.

We are fortunate here to have a local transmission shop that builds race transmissions and torque converters. They have built a few for me in the past. They can go from mild to wild depending on what you want.

This car will be street driven, but I want it to have a good hard shift.
:3gears:
Some of my old cars back in the day would chirp the tires when you drove out normal at a stop light, when the transmission shifted into 2nd gear. (But the tires weren't that good back then either.)

Anyhow, I'll keep you posted with progress.....................
 
71AG,

I have to say I love reading your posts. Your work is amazing to me and is a blue print of exactly what I want to do to my 72 roadrunner. Thanks for sharing your rebuilding process with all of us!
 
love the work so far. I just finished up my charger last summer and have a 72 satty on the way can't wait to get back at it!
 
Somebody has been buisy, progress is looking great with all the new metal the fit looks really good in the pics too.
 
Today's Events

A lot happened today..................

First off I started the return process for the damaged window fuzzies / "cat whiskers". I sent them a lot of photos of the damaged shipping box and parts. I'll keep you posted on how that goes................:angry5:

Then I dropped off the 727 at the transmission shop to get "Tweaked" a little.:beavisnbutthead:

I do most of my own work , but when it comes to automatics, I've only done a few things like swap out torque converters, valve bodies, adjust bands. Once I replaced a tail shaft extension housing when mine "somehow broke"......... :3gears::3gears::angel5::angel5: Sorry Dad..............

I just don't feel comfortable tearing into one. I've seen it done a few times, but it was YEARS ago. Some things are better left to the experts.

- - - Updated - - -

When I returned home I contacted Ted Stephens to find out the status on the passenger side sheet metal. Ted traced the shipment for me and it looks like it might be delivered to the body shop on Monday. The holidays and people being off from work because of that have caused the little delay. I'm good with that and totally understand. Family always comes first.

- - - Updated - - -

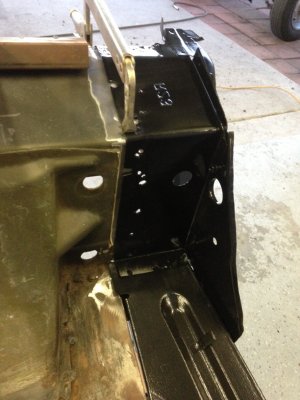
Then I removed the AMD parts that I had test fitted on the driver side in preparation for blasting.

Once that was done, I started on the passenger side. I'm very happy with how the car is cleaning up so far. It does look like I will have a few small holes on the driver side of the trunk floor. I will know more when I get there..............

- - - Updated - - -

So I put away my 4 legged helpers, and got busy. I didn't want them to be nearby and possibly get injured. Plus I was wearing a respirator, and they were not.

- - - Updated - - -

IMG_8091.jpg

- - - Updated - - -

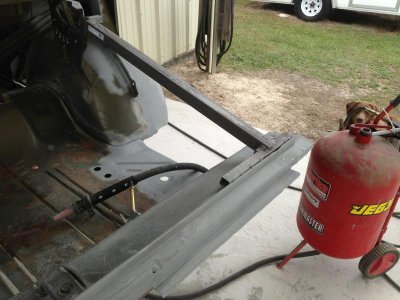
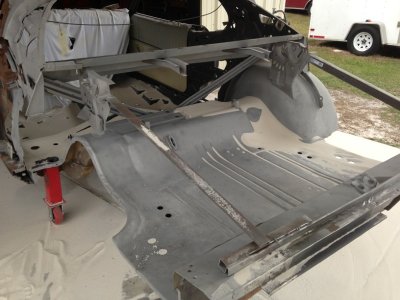
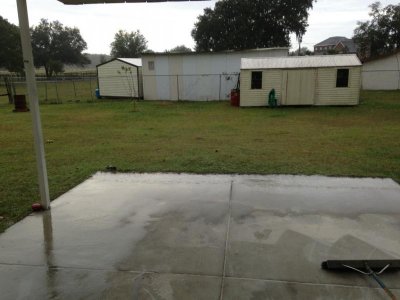
Once the old material was emptied from the hopper, I decided to call it a day. The weather has been kind of dreary with light rain on and off all day.

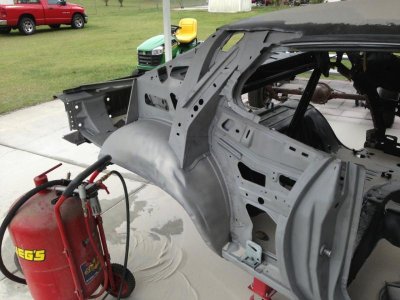
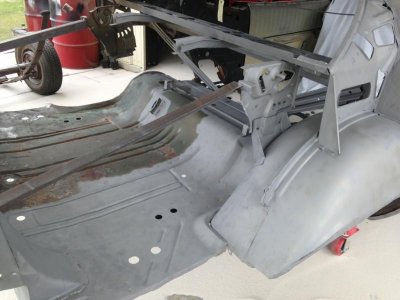
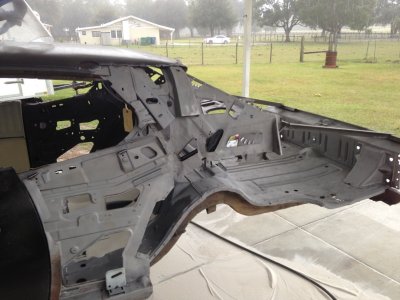
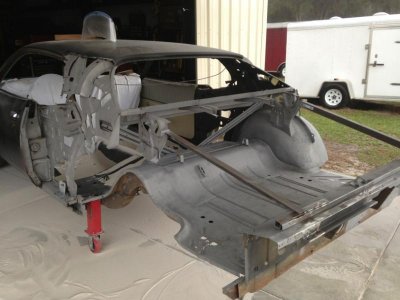
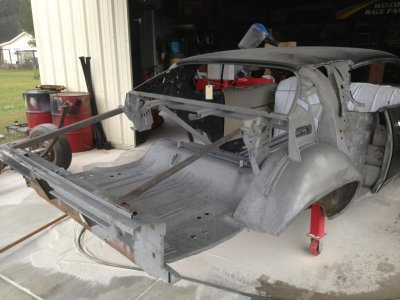
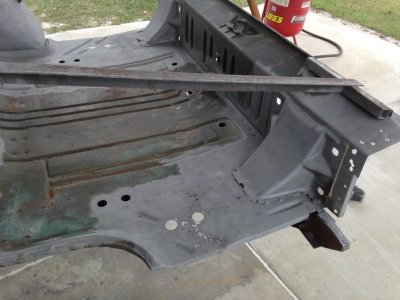
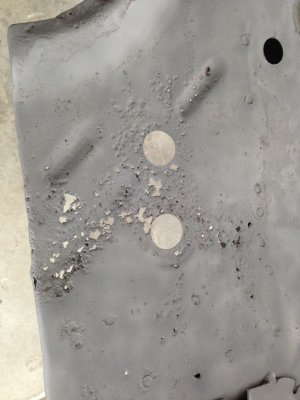
The gray areas above are the places that are now bare metal. I need to get the rest of the trunk area blasted and primed before it starts to flash rust with the humidity.

- - - Updated - - -

So I let my 4 legged helpers back out, and they had to check out what was going on............

If you look close just behind the blaster you can see my Chocolate Lab. The German Shepard was camera shy today..............

- - - Updated - - -

Hopefully tomorrow if the weather cooperates, I can finish up this area.

Stay tuned......................

and have a good night.

- - - Updated - - -

IMG_3624.jpgIMG_4090.jpgIMG_9339.jpg

- - - Updated - - -

IMG_3398.jpg

- - - Updated - - -

IMG_3471.jpg
 
Blasting away....................

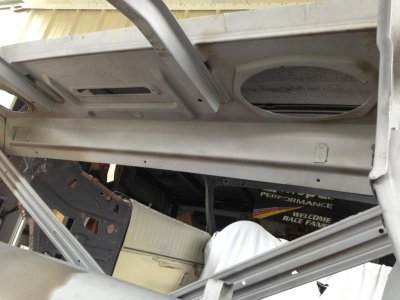
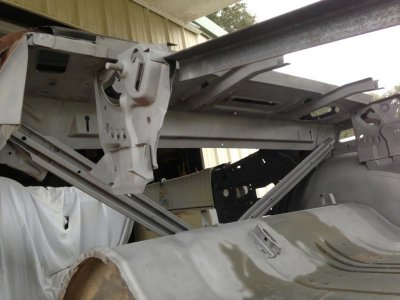
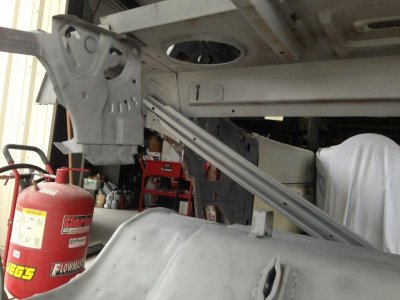
A good portion of the day was spent blasting all of the internal areas of the 72 Satellite, while I can still get to them. Follow along with the pictures. They will show the progress.............

- - - Updated - - -

IMG_5287.jpg

- - - Updated - - -

IMG_2119.jpg

- - - Updated - - -

IMG_1007.jpg

- - - Updated - - -

IMG_2675.jpg

- - - Updated - - -

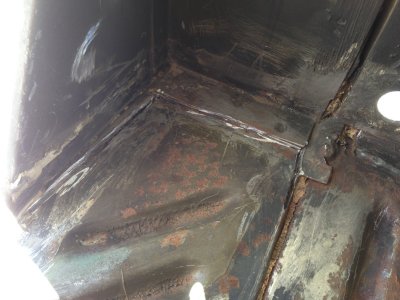
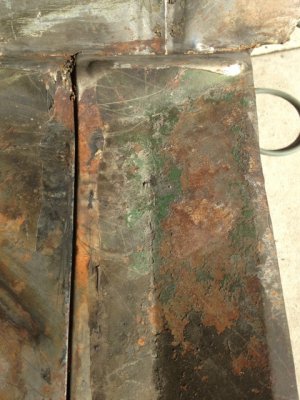
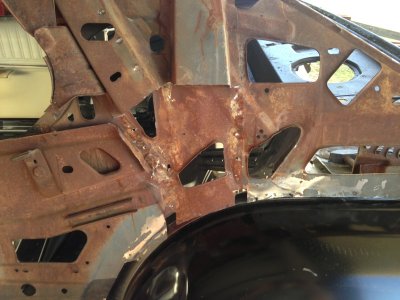
Here in this picture you can see the area that I mentioned in an earlier post. I will have to cut out a section of the trunk floor and fabricate a patch.

- - - Updated - - -

IMG_6614.jpg

- - - Updated - - -

IMG_4073.jpgIMG_4328.jpg

- - - Updated - - -

IMG_2467.jpg

- - - Updated - - -

IMG_4318.jpgIMG_5878.jpgIMG_6858.jpgIMG_8879.jpg

- - - Updated - - -

Then it started raining heavier and I had to quit for the day.........................

- - - Updated - - -

So I pushed the car back in the shop and blew it dry with the air hose. Hopefully it will not flash rust.

- - - Updated - - -

IMG_7300.jpg

- - - Updated - - -

Hopefully tomorrow I can finish up with the blasting. I only have one small section by the driver side door jamb, and the section across the back where the rear bumper is mounted.

Then I will spray it all in black epoxy primer like the rest of the car is.

That's all for today!!!!
 
Auto Transport Service
Back
Top