• When you click on links to various merchants on this site and make a purchase, this can result in this site earning a commission. Affiliate programs and affiliations include, but are not limited to, the eBay Partner Network.

71 Road Runner Restoration Started

I wish I could find the forum I read this on but, people were swearing by using clecos for buttwelding by using small copper washers on the cleco with one washer on top of the panel and one below. Many posts stated that they worked much better than the Eastwood mini clamps (or whatever they're called :)) I want to say it was on a hot rodding forum of some type. I'll have to Google it.

Nice progress as always!
 
71airgrabberRR looks like allot of good hard work, keep it up & good luck
 
Sparks flying part 3..........

71airgrabberRR looks like allot of good hard work, keep it up & good luck


Thanks Budnicks.

- - - Updated - - -

Today was spent cutting out all of the little pieces that were left connected after the majority of the sheet metal was cut away the other day.

- - - Updated - - -

After all of these little pieces were removed, I spent some time with the hammer / dolly to make sure the edges of the trunk floor lined up with the inner wheel house.

- - - Updated - - -

I did a test fit of the inner wheel house just to see how close this new AMD part would be. I am very pleased with the outcome.

- - - Updated - - -

Then I just had to set the new one piece quarter panel roughly in position.

- - - Updated - - -

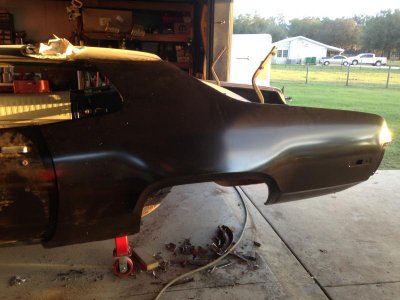
I snapped a few photos. Remember, it's just loosely in place. It's not even being held by any clamps.

- - - Updated - - -

image.jpg

- - - Updated - - -

image.jpg

- - - Updated - - -

I'm really liking it!!!!!

- - - Updated - - -

That's all for tonight ...............
 
Hi 71 Airgrabber,

I have been reading this post and have to say you do AMAZING work. I wish I had a shop for my 72 so I could do the same thing. Quick question for you. I have the dash out of my bird to replace the wiring harness(Electrical fire) and need to replace the dash pad as well. Did you need the original dash pad to use the one you used or is it just a nice cap? Mine was so cracked that I threw it away and don't want to spend $400 plus bucks on a new if I can have new with out paying for it. Thanks for your help and I love reading about your restoration projects.
 
Dash Cap, Metal Work etc....................

Hi 71 Airgrabber,

I have been reading this post and have to say you do AMAZING work. I wish I had a shop for my 72 so I could do the same thing. Quick question for you. I have the dash out of my bird to replace the wiring harness(Electrical fire) and need to replace the dash pad as well. Did you need the original dash pad to use the one you used or is it just a nice cap? Mine was so cracked that I threw it away and don't want to spend $400 plus bucks on a new if I can have new with out paying for it. Thanks for your help and I love reading about your restoration projects.

Plymouthman, Thanks for the compliments !!!!!

The dash on my 72 Satellite is the original core with a nice plastic slip on cover. In order to use the cover you need the original dash pad core so that you have something to glue it to. Its not "show quality", but it does look 100% better than it did before the cover was installed. The cover was made by "Dashcaps" and I bought it from Dante's Mopar EBay store. It cost right around $100, but it was money well spent.

I have an extra factory dash pad core that needs a cover so shoot me a PM if you need one. Shipping for an item that big might be expensive though, sorry.

- - - Updated - - -

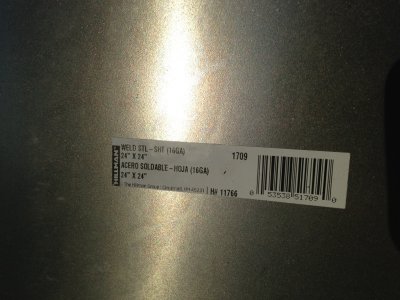
Today I stopped by a local home improvement store and picked up a 2X2 section of 16 gauge sheet metal.

- - - Updated - - -
IMG_2545.jpg

- - - Updated - - -

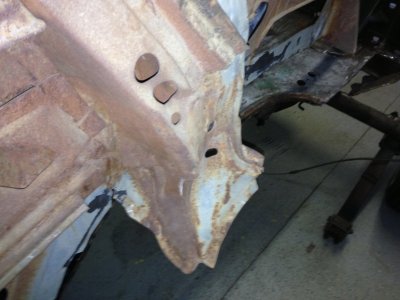
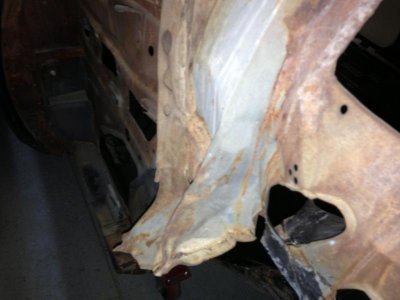
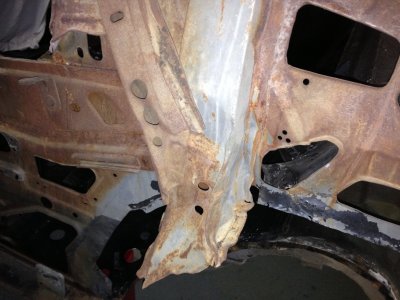
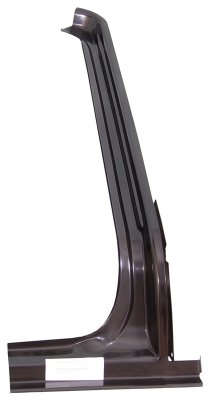
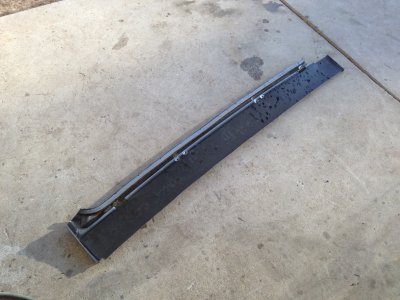
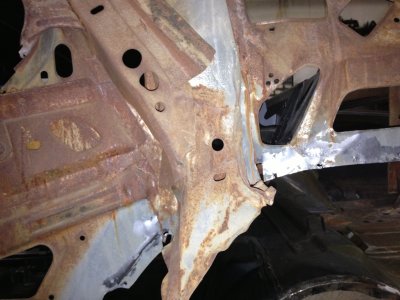
The 72 Satellite took a pretty hard hit on the driver side rear wheel well area some time during its previous life. After the quarter panel was cut off, I found out that the B pillar support was damaged.

- - - Updated - - -
IMG_8089.jpgIMG_8553.jpgIMG_0306.jpgIMG_6115.jpg

- - - Updated - - -

Luckily the damage stopped there. (that and the parts I just cut off) It did not spread through to the trunk floor or under the seat pan. The frame rails haven't moved either. This car drove NICE and tracked straight before I started the tear down process. Otherwise it may have ended up as it was originally intended for. (As a parts donor for the 71 Road Runner).

- - - Updated - - -

This damaged area measures out to be originally made out of 18 gauge rolled steel sheet metal. My plan is to cut off the affected area and form a new one using the other side as a guide pattern. I'll just make it a mirror image. The 16 gauge metal is the next size bigger in thickness. It will be harder to bend, and I may have to end up cutting out individual parts, then weld them together to make the "finished" part.

- - - Updated - - -

So if you read between the lines, the passenger side quarter panel is coming off next........................... along with the lower trunk floor extension, and Dutchman panel.

But at least this way, I can get to the hard to reach spots while I blast the trunk interior. It will all be better in the end.

Do it Once, do it Right !!!!!

- - - Updated - - -

650-1471.jpg700-1472-R.jpg825-1471-R.jpg840-1471-R.jpg

- - - Updated - - -

So this is what my bank account will look like soon...............

- - - Updated - - -

untitled.jpg

- - - Updated - - -

Have a good one.....................
 
That sucks finding the damage, but with your attitude towards it, "do it once, do it right" with your skills seeing your work, im sure it will turn out right for sure!.. I put one of those dash covers, caps on my 73 when i re-did the dash with some new updates and i like it, As you said its not show quality but it sure makes a big difference in the car and the bank account! That quarter really looks great sitting on there, great work your doing on this and good luck with your repair work!
 
Damn man I'm sorry to hear such a rust free car is dammaged but like Ron I'm glad you are able to roll with hit.
 
Ordered some Christmas goodies for the Satellite

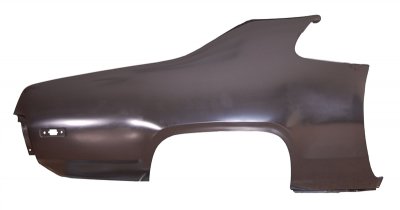
I just ordered the AMD parts listed above for the passenger side of the 72 Satellite along with the new Dutchman panel too.

Hopefully the new parts will arrive in about a week. That will be just in time for Christmas if it works out as planned.

My friend with the Mopar restoration shop is letting me have the parts delivered at his business. That will help a little with the shipping charges.

I will keep you posted with the delivery.

Merry Christmas !!!!!!
 
Merry Christmas to you and your family Louis! Really sounds like you have things covered, some new metal is always good to bring them back to life!
 
I just ordered the AMD parts listed above for the passenger side of the 72 Satellite along with the new Dutchman panel too.

Hopefully the new parts will arrive in about a week. That will be just in time for Christmas if it works out as planned.

My friend with the Mopar restoration shop is letting me have the parts delivered at his business. That will help a little with the shipping charges.

I will keep you posted with the delivery.

Merry Christmas !!!!!!

Thanks and we're all looking forward to some more 71AG action photos brother .. Good luck with the parts delivery I hope everything goes smoothly so you can get to work
 
Catch up Maintenance Today.

A good portion of the day was spent doing some routine maintenance on my other Dodge vehicles.

The other day when we parked the Durango in our driveway, the misses noticed a small oil leak under the engine. I checked it out and determined the power steering pressure hose was leaking. So today I replaced the hose, and while I was at it, changed the oil / filters in the Durango and my Ram 1500 Hemi. I always use Mobil 1 synthetic oil in my personal cars.

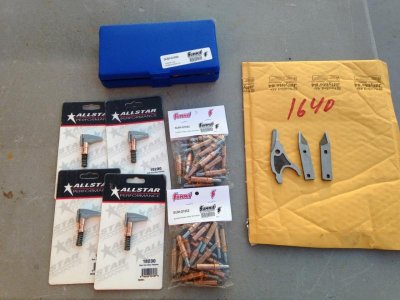
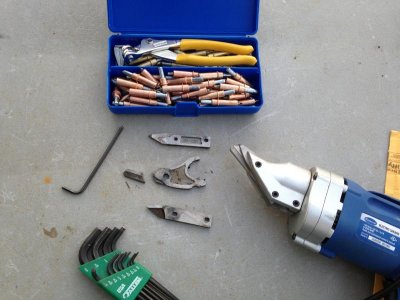
I was expecting the delivery of the new replacement metal shear blades today, and they arrived along with the Cleco fastener set.

- - - Updated - - -

IMG_5787.jpg

- - - Updated - - -

So after the maintenance was done, I replaced the blades in the shear.

- - - Updated - - -

IMG_4355.jpg

- - - Updated - - -

So if everything goes well tomorrow, I will get busy removing everything from the passenger side on the 72 Satellite.

- - - Updated - - -

So Tallhair, maybe tomorrow evening I can post up some more "in action" photos..........................

Merry Christmas.

- - - Updated - - -

Merry Christmas to you and your family Louis! Really sounds like you have things covered, some new metal is always good to bring them back to life!

Merry Christmas to you and your family too Ron !!!!!
 
"Merry Christmas", looks like the fun is about to begin haha. Sucks to hear about the damage but what are you gonna do but fix it and make it even better than it was. This is gonna be a sweet car "love the front end of these cars".
 
Passenger Side Quarter Panel Removal

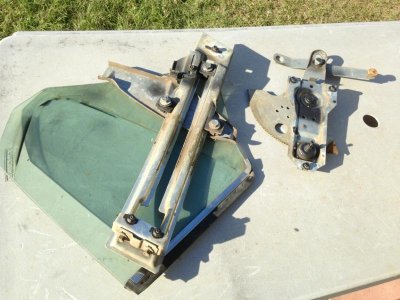
Today started out in a similar fashion as it did when I removed the driver side quarter. First off I removed the quarter glass and window track.

- - - Updated - - -

IMG_7266.jpg

- - - Updated - - -

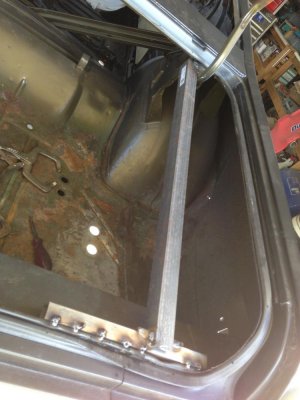
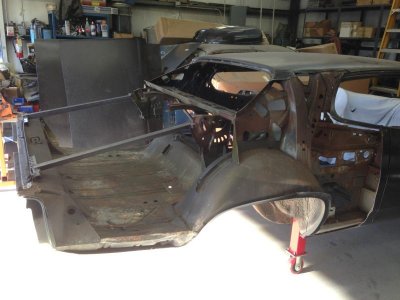
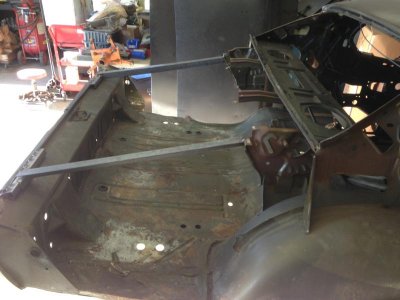
Then I welded up some bracing to hold the back half of the car in alignment when the quarter panel is removed.

- - - Updated - - -

This is just a mirror image of what was done on the driver side earlier.

- - - Updated - - -

IMG_5105.jpg

- - - Updated - - -

Then the metal cutting fun began.............

- - - Updated - - -

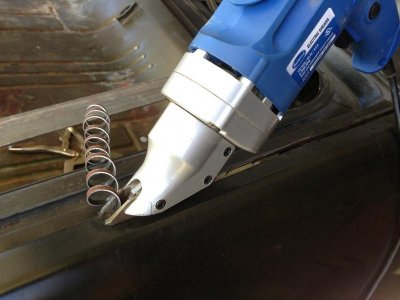
I used both my cut off wheel and the new metal shears for this work. I am really happy with how quick the job was when using the shears. It must have saved me around 1-2 hours worth of traditional cutting using a cut off wheel.

- - - Updated - - -

IMG_4951.jpg

- - - Updated - - -

IMG_4193.jpg

- - - Updated - - -

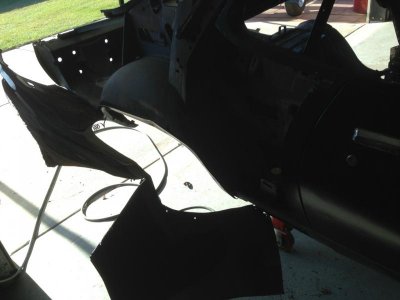
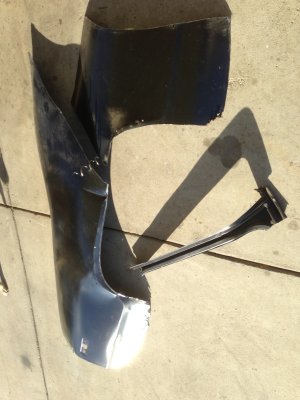
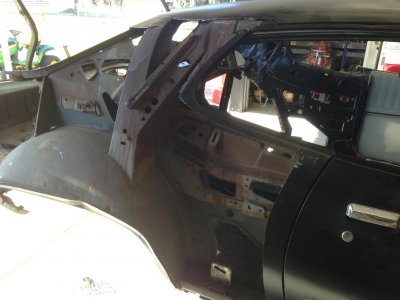
Before I knew it, the majority of the passenger side quarter panel was cut away. This took about all of 30 minutes, and I didn't hurry. I didn't want to take a chance on breaking the new shear cutting blades....................

- - - Updated - - -

IMG_9933.jpg

- - - Updated - - -

IMG_4873.jpg

- - - Updated - - -

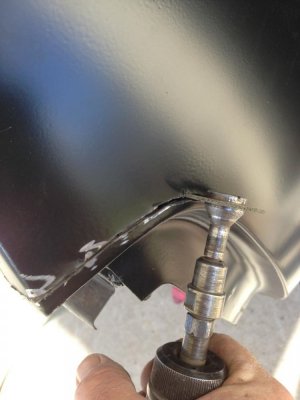
The trim work still needs to be done along the edges where the quarter was cut away.

- - - Updated - - -

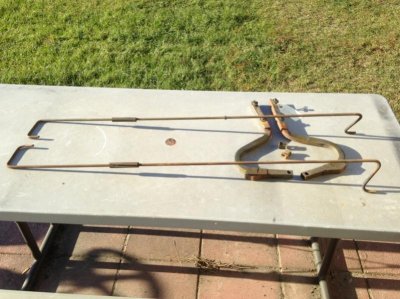
Then I removed the trunk lid torsion bars and hinges.

- - - Updated - - -

IMG_2967.jpg

- - - Updated - - -

This was followed by the Dutchman filler panel.

- - - Updated - - -

IMG_3572.jpg

- - - Updated - - -

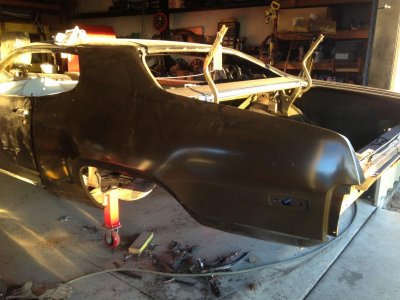
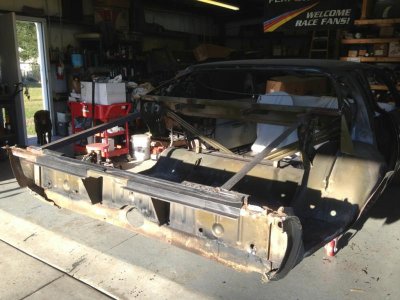
This is how the Satellite looks now........................

- - - Updated - - -

IMG_3579.jpgIMG_5654.jpgIMG_6551.jpg

- - - Updated - - -

IMG_0031.jpg

- - - Updated - - -

I still need to cut away the trunk floor pan / turn down extension.

- - - Updated - - -

Now I can get to everything for a good blasting.

- - - Updated - - -

Have a great evening.

Merry Christmas !!!!!!!
 
Those quarters go up higher in the roof line that I thought. Great progress you're making. I stayed in all day and baked cookies.
 
I stayed in all day and baked cookies.

You did what?!?! Wait......making cookies means lots of sacrificial taste testing cookies along the way. Well played sir, well played.


Great looking work on the satty '71! Gotta love new tools, especially when they work. You know, now that I think about it, it's like Christmas at your house every day. LOL I'll probably end up with a $9 mall watch and a dollar bin nose hair trimmer...But you, shiny new Mopar parts and get'er done tools! Lucky man, lucky man indeed.
 
Very nice! Do you have to start a pilot hole or anything when using the shears? They look like they cut very nicely!
 
Surgery 101

Thanks for the kind words everyone. The word "cookies" sounds pretty good to me!!! I personally like chocolate chip.....

I'm lucky with how high the quarters extend up towards the roof line. Now since the steps have been taken to properly replace both quarters, I am much happier. Otherwise I would have had to try and patch a few areas on the passenger side.

Im hoping the end result will turn out better. Time will tell on that one.

The new AMD parts haven't arrived at my friends shop yet. Possibly on Monday they could show up.

Yes in order to use the electric shears, a pilot hole has to be cut into the panel. I use my cut off wheel for that and make the width of the kerf cut about 1/4". It has to be wide enough for the cutting blade to drop down into the panel.

One other thing I found out through trial and error is that you can not go all the way down to the edge of a panel as you are cutting. There has to be enough room to allow for the movement of the cutting blade.

Hope this helps.

Have a safe evening.

Merry Christmas.
 
good to see you finally taking that parts car apart ........:toothy3::toothy3::toothy3::icon_santa:
 
Auto Transport Service
Back
Top