• When you click on links to various merchants on this site and make a purchase, this can result in this site earning a commission. Affiliate programs and affiliations include, but are not limited to, the eBay Partner Network.

71 Road Runner Restoration Started

440 Source Heads

How do those heads look? I'm considering a set.

I'm hopefully going to order pistons and rods soon too, probably from them. I'm .040 over on my 440 GTX. it's not a matching block, so i'm not too worried about building it up.

sjd

I was curious myself when these heads arrived. So I pulled an intake and exhaust valve to see just what the bowl area and runners looked like. I had a bare stock 906 casting to use as a comparison. I have to admit, I was impressed with the heads. They look like the runners are more of a straight shot than the standard 906 casting. Plus they have undersize 11/32" valve stems, and back cut valves, which help a little with flow numbers. The factory mopar heads all have 3/8 inch valve stems.

Plus I like the fact that they can be installed and painted the same color as the rest of the engine, sort of "camouflage" and sneaky. They look almost like the factory style heads when installed. You have to look VERY close to notice any difference. (which is very minor and nearly impossible to see when installed in the car with all of the accessories.).

Before I purchased this set, I compared the advertised flow bench numbers, and if memory serves me correctly, they outflow a trick set of 906's by about 30%.

So for me it was exactly what I was looking for. Another benefit of running an aluminum head is that you trick the engine into believing its running a lower compression ratio because of the additional cooling effect properties of the aluminum. For example a 10.5 to 1 engine behaves as if it was a 9.5 to 1 engine. Plus you have hardened seats and don't have to worry about running unleaded gas or adding an additive.

Hope this helps.
 
Sheet metal tools........

Several days ago I ordered a few tools that have been on my "bucket list". I have managed to do body work without them until now, but I figured with the quarter panel replacement coming up soon on the 72 Satellite, that now would be a good time to get them.

I purchased these items pictured below so we will see how good they are.

- - - Updated - - -

image.jpg

- - - Updated - - -

image.jpg

- - - Updated - - -

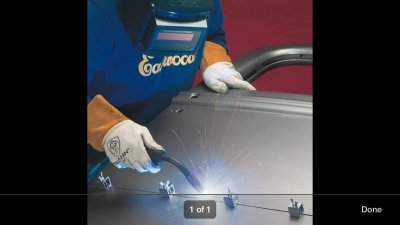
I have a total of 8 clamps on the way. They are coming from the Eastwood Company in PA.

Hopefully in a few days I can post some "in action" pictures.
 
I was curious myself when these heads arrived. So I pulled an intake and exhaust valve to see just what the bowl area and runners looked like. I had a bare stock 906 casting to use as a comparison. I have to admit, I was impressed with the heads. They look like the runners are more of a straight shot than the standard 906 casting. Plus they have undersize 11/32" valve stems, and back cut valves, which help a little with flow numbers. The factory mopar heads all have 3/8 inch valve stems.

Plus I like the fact that they can be installed and painted the same color as the rest of the engine, sort of "camouflage" and sneaky. They look almost like the factory style heads when installed. You have to look VERY close to notice any difference. (which is very minor and nearly impossible to see when installed in the car with all of the accessories.).

Before I purchased this set, I compared the advertised flow bench numbers, and if memory serves me correctly, they outflow a trick set of 906's by about 30%.

So for me it was exactly what I was looking for. Another benefit of running an aluminum head is that you trick the engine into believing its running a lower compression ratio because of the additional cooling effect properties of the aluminum. For example a 10.5 to 1 engine behaves as if it was a 9.5 to 1 engine. Plus you have hardened seats and don't have to worry about running unleaded gas or adding an additive.

Hope this helps.

yeah! it helps a lot!!! Thanks so much!

sjd
 
Several days ago I ordered a few tools that have been on my "bucket list". I have managed to do body work without them until now, but I figured with the quarter panel replacement coming up soon on the 72 Satellite, that now would be a good time to get them.

I purchased these items pictured below so we will see how good they are.

- - - Updated - - -

View attachment 156481

- - - Updated - - -

View attachment 156482

- - - Updated - - -

I have a total of 8 clamps on the way. They are coming from the Eastwood Company in PA.

Hopefully in a few days I can post some "in action" pictures.

I have not as yet used the butt clamps on a car but i have played a little with them using them with some extra metal to see how good they work, and i think there a great add on for your shop, I think it was here someone said don't tighten them to much or there hard to get back out, something like that.. Good luck..
 
Air Compressor Motor Died ......................

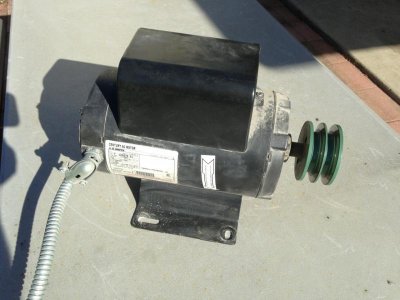
This morning I went out to the shop and started cutting off the console brackets from an original floor pan that I scored a few weeks ago. As I was cutting I noticed a loss in air pressure.

- - - Updated - - -

IMG_8955.jpg

- - - Updated - - -

I went over and saw the circuit breaker had tripped. It was not a good sign.

- - - Updated - - -

So I took down the motor information and went on line starting to see just how expensive this could end up being. A new motor to replace the one on my compressor was going to cost around $420.

I decided to pull the motor and take it to a local motor shop.

- - - Updated - - -

IMG_8242.jpg

- - - Updated - - -

IMG_2273.jpg

- - - Updated - - -

Lucky for me it was only a capacitor. So I was up and running again for less than $20 !!!!!!

I gave the repairman a good $$$ tip for being honest and fixing the motor ASAP. It was the least I could do. Besides, Christmas is right around the corner.

- - - Updated - - -

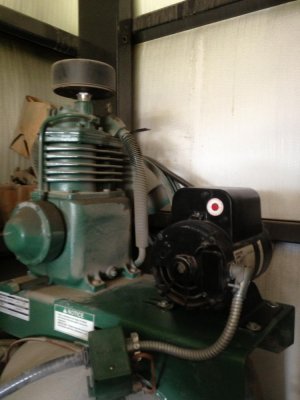
So I just finished installing it................ Back in gear again !!!!!!!!!!!!

Dodged a big bullet on that one............. Someone upstairs must be looking out for me.

- - - Updated - - -

IMG_6695.jpg

- - - Updated - - -

So now I'm headed back out to the shop to see if I can finish the brackets. Hopefully tomorrow I will get started on removing some sheet metal on the Satellite Sebring.

- - - Updated - - -

The welding clamps and metal shear just arrived .............. I was getting ready to log off and I heard the delivery truck....

Its been a good day !!!!!
 
I'll say it's been a good day, great in fact and here's to you for taking care of an honest dude with you know a little something for the effort :)

Glad to see you posting some updates again buddy
 
I decided to pull the motor and take it to a local motor shop.

Lucky for me it was only a capacitor. So I was up and running again for less than $20 !!!!!!

I gave the repairman a good $$$ tip for being honest and fixing the motor ASAP. It was the least I could do. Besides, Christmas is right around the corner.

- - - Updated - - -

So I just finished installing it................ Back in gear again !!!!!!!!!!!!

Dodged a big bullet on that one............. Someone upstairs must be looking out for me.

- - - Updated - - -

So now I'm headed back out to the shop to see if I can finish the brackets. Hopefully tomorrow I will get started on removing some sheet metal on the Satellite Sebring.

The welding clamps and metal shear just arrived .............. I was getting ready to log off and I heard the delivery truck....

Its been a good day !!!!!

Great news 71airgrabberRR on the motor and the "fair" motor shop ! ! ! Even more Kudos to you for tipping them for their work ! ! ! Not too many people appreciate honest work and are willing to tip for it to boot.

It was a good day - you're going to like both of them, I've got them both and use them both. Have fun !
 
A Good Day got EVEN Better !!!!!

Thanks for the compliments.

I have always felt that honesty is the best policy, even when it hurts. When someone treats me fairly or is kind, I try my very best to return the courtesy. I'm sure this guy who fixed my compressor motor could have cheated me, but he didn't. For his honesty he received a reward, and in my book it was just. I don't mind taking care of someone who is more than fair.


I think he was surprised. I'm sure he has little kids, and like I said before, Christmas is right around the corner. Hopefully he can put it to good use for his family.

There is an old saying............ "You reap what you sow."

So if you live in my area and need an HONEST shop for electrical motor stuff, shoot me a PM. I'd be glad to send him some customers. I can't talk highly enough about the whole experience.

- - - Updated - - -

What happened after the compressor was back in service....................

- - - Updated - - -

IMG_0530.jpgIMG_3761.jpg

- - - Updated - - -

I was able to finish up the console brackets. I glass beaded and painted them, so they are ready to weld in now.

- - - Updated - - -

Then I turned my attention to removing everything in the rear of the car so that I could start cutting / welding on the quarter panel.

- - - Updated - - -

IMG_0374.jpgIMG_1001.jpg

- - - Updated - - -

Spark and gasoline don't mix to well with me unless its in a combustion chamber. So out came the fuel tank..................

- - - Updated - - -

This was followed by the trunk lid, and rear bumper..........

- - - Updated - - -

IMG_5567.jpg

- - - Updated - - -

Then out came the rear lower valance.

- - - Updated - - -

IMG_3428.jpg

- - - Updated - - -

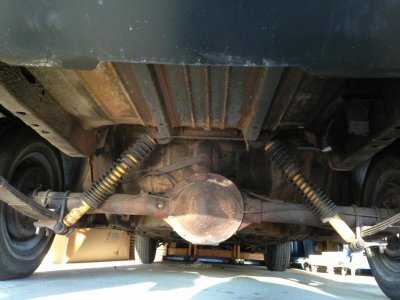
Then the rear end assembly with leaf springs followed next.

- - - Updated - - -

IMG_9524.jpg

- - - Updated - - -

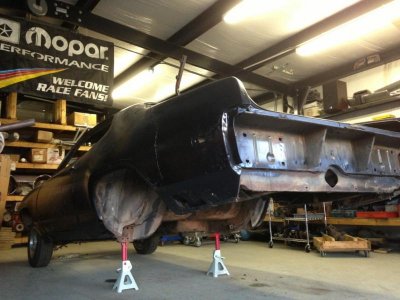
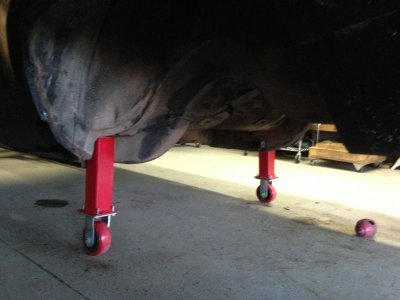
Once this was done, I installed the rear frame rail supports I made that allow me to roll the car around without a rear suspension installed.

- - - Updated - - -

IMG_3290.jpgIMG_6620.jpg

- - - Updated - - -

The next step will be to add a little reinforcement brace and take some measurements before I do any cutting.

So, if everything goes well tomorrow, I'll start the cutting and making some sparks....................

Stay Tuned !!!!!!!

Have a good night.
 
Congrats on the motor progress "sounds like it's going to be a handful on the road".
 
Some fine progress happening here. You people who live in an 'all year long is good working weather' environment are to be envied.
 
Coming along real good and fast, i like those frame rail supports, Makes things a little easier i can only imagine! And that was a good thing giving him a tip, you don't hear that much anymore but of course, usually you don't hear of someone being honest as he was which is great to hear!
 
Very nice. I can't wait to see how the shears work out. I was thinking about getting one of those, as well. Nice to see your compressor is back up and running.
 
Sparks are Flying !!!!!!

Very nice. I can't wait to see how the shears work out. I was thinking about getting one of those, as well. Nice to see your compressor is back up and running.

I'm very pleased with the outcome of the compressor too. Thanks.

The shears worked really good. They zipped through the metal like hot butter, without using any pressure against the tool. I think I made a mistake though. I started making a cut and tried to turn the tool a little while cutting. It was a gentle curve, but a curve no less.

It made the cut just fine. But what happened next may have been a result of the turn.

I was making the final cut vertical towards the roof line and ran over a section of metal where the repair panel had over lapped the original. As soon as I hit the double layered metal, the cutter blade snapped off.

I wasn't running the tool flat out or pushing it too hard. I don't know if the broken cutter was caused by my previous attempt to make a slight curve while cutting, or if it was because of the "sudden" double layer of metal.

Then when I ordered the new set of cutting blades, they were almost half the price of what the total price was on the tool. So if you need to get a set of replacement cutting blades, don't be surprised by the sticker shock.

The jury is still out on this one................. It was probably due to my "operator error".

- - - Updated - - -

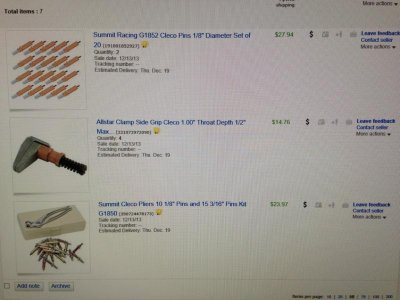
While I was ordering stuff, I ended up ordering a set of Cleco Fasteners. This was another tool I have always wanted to get, so I can scratch that one off the "bucket list" too.

- - - Updated - - -

IMG_0497.jpgIMG_3608.jpg

- - - Updated - - -

I figured the cleco's might be a little easier than having to deal with a bunch of vise grips. I'm trying something new this time.

- - - Updated - - -

I ended up getting a lot of metal cut from the Satellite Sebring. It's dinner time, so I'll post up some pictures afterwards.
 
Sparks are Fyling Part #2

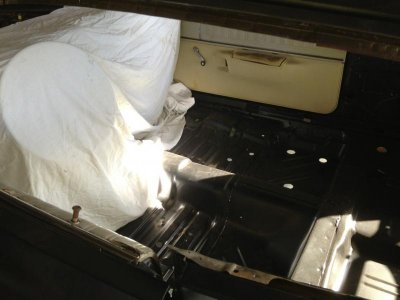
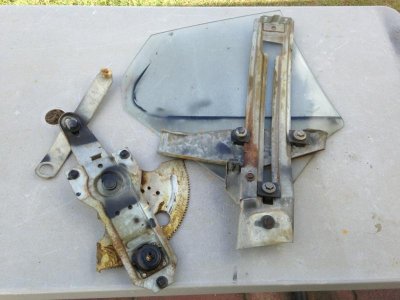
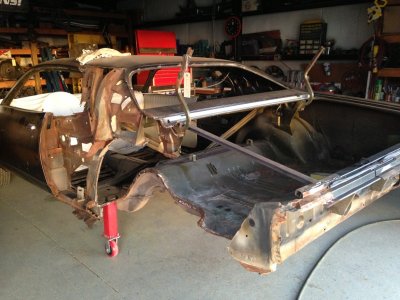
IMG_4516.jpgPrior to doing any cutting, I had to remove the driver side rear quarter glass and window tracks. This was followed by removing the front bucket seats. I don't want any stray sparks messing anything up. I also placed a cotton cloth cover over the dash to help protect it too.

- - - Updated - - -

IMG_5820.jpg

- - - Updated - - -

Then I took my measurements and wrote them down for later reference.

- - - Updated - - -

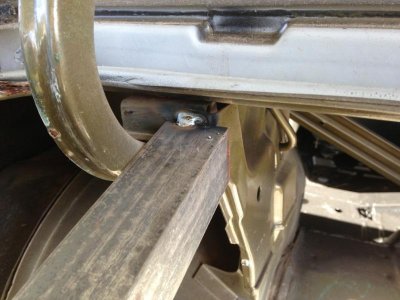
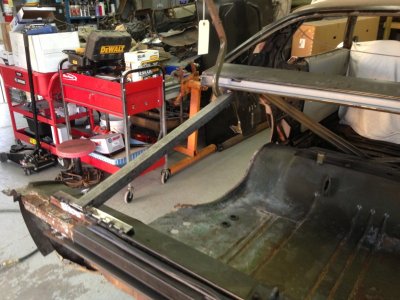
This was followed by making a brace to help keep the rear tail panel in position once the trunk gutter and upper quarter panel was cut away.

- - - Updated - - -

IMG_0882.jpg

- - - Updated - - -

I wanted to make the brace so that I can close the trunk lid as part of the mock up before any welding is done.

- - - Updated - - -

Hopefully it will clear the bracing when it's closed.

- - - Updated - - -

IMG_7981.jpg

- - - Updated - - -

IMG_0636.jpg

- - - Updated - - -

Once the bracing was in position, I started cutting out some metal, starting with the trunk gutter first.

- - - Updated - - -

IMG_0035.jpgIMG_0249.jpgIMG_0533.jpgIMG_6229.jpg

- - - Updated - - -

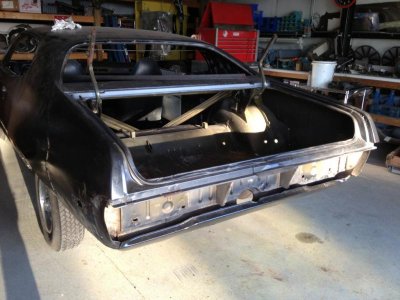
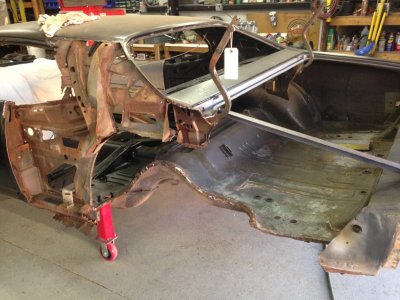
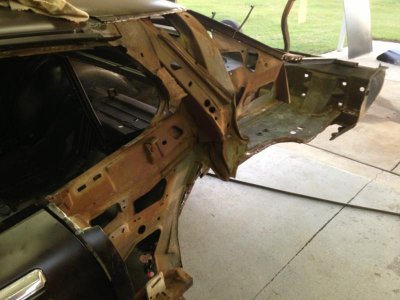
This is what I ended up with...........................

- - - Updated - - -

I still have to finish removing the rest of the original quarter panel in the areas around the door jamb, roof top edge, rear window opening, front portion of the wheel well, and front lower area along the rocker panel.

For now the metal has been trimmed up fairly neat. The majority of the bad parts have been removed.

- - - Updated - - -

I'm still debating whether or not to replace the Dutchman panel, or try to fix it with some sheet metal patch work. I has some rust issues where the trunk gutter is attached to it.

- - - Updated - - -

650-1471.jpg
 
The jury is still out on this one................. It was probably due to my "operator error".

While I was ordering stuff, I ended up ordering a set of Cleco Fasteners. This was another tool I have always wanted to get, so I can scratch that one off the "bucket list" too.
I figured the cleco's might be a little easier than having to deal with a bunch of vise grips. I'm trying something new this time.

The broken bit is pretty unusual - I don't think it was operator error nor the curve - it really sounds like it was a faulty bit.

I learned about clecos from my buddy - fantastic little devices for working with metal - neat way to hold metal pieces together
( doesn't work very well if you're trying to butt weld the panels )

You're really tearing into your car ! ! ! Good job ! ! !
 
Good planning, 71airgrabberRR. But the cotton cloth on the dash would be better if was woolen, cotton catches with any spark. At least keep it damp. You can also say some heavy duty aluminum foil over parts you want to protect from sparks.

Looking good!
 
Now that's tearing into it, looks like you've got your work cut out.
 
Good planning, 71airgrabberRR. But the cotton cloth on the dash would be better if was woolen, cotton catches with any spark. At least keep it damp. You can also say some heavy duty aluminum foil over parts you want to protect from sparks.

Looking good!

Good point and advice Photo. Wool will not burn so it can't catch fire. FYI another cool thing about wool is it will not absorb moisture
 
you're this far into it, might as well get a new dutchman.
 
Auto Transport Service
Back
Top