Great work on the welding repairs ! ! ! Keep it up ! !
You are using an out of date browser. It may not display this or other websites correctly.
You should upgrade or use an alternative browser.
You should upgrade or use an alternative browser.
71 Road Runner Restoration Started
- Thread starter 71airgrabberRR
- Start date
71airgrabberRR
Well-Known Member
71airgrabberRR
Well-Known Member
Driver Side Wheel House Completed
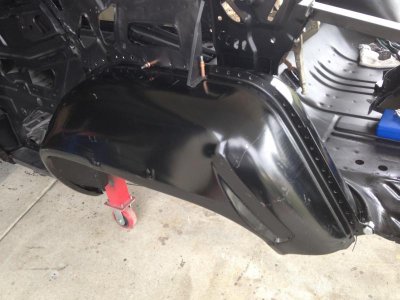
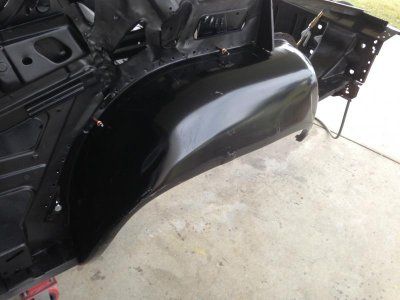
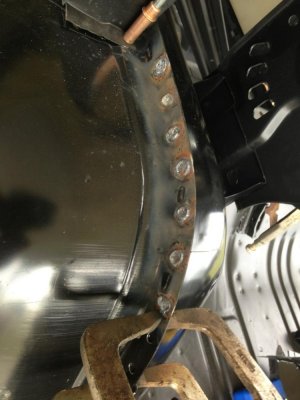
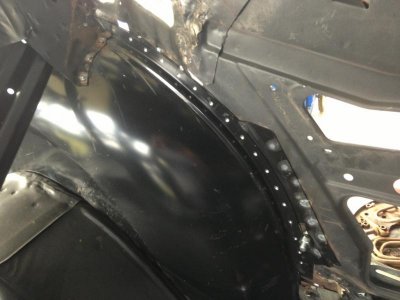
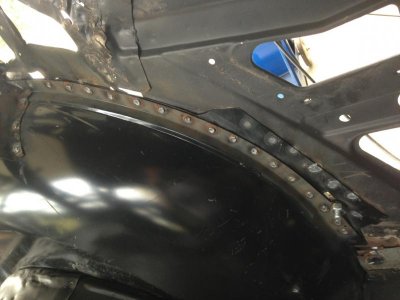
Today I was able to finish up the installation of the outer wheel house. Now that assembly is completed.
- - - Updated - - -
- - - Updated - - -
- - - Updated - - -
- - - Updated - - -
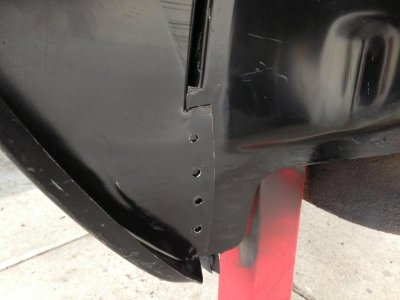
Then I ground all of the welds down and filled in any pin holes that I found.
- - - Updated - - -
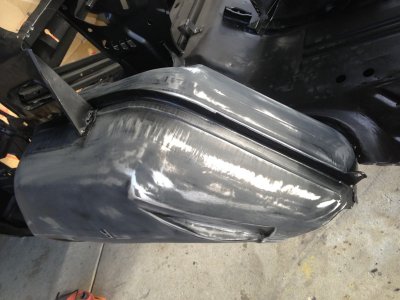
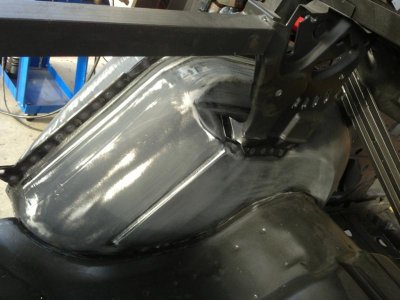
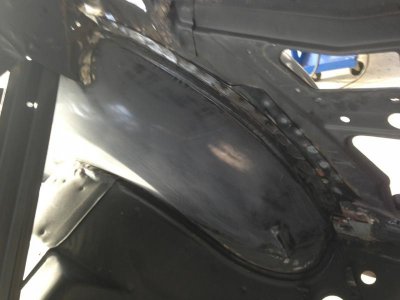
Once that was done and I was happy with the welds, I sanded both halves down in preparation for epoxy paint.
- - - Updated - - -
- - - Updated - - -
- - - Updated - - -
- - - Updated - - -
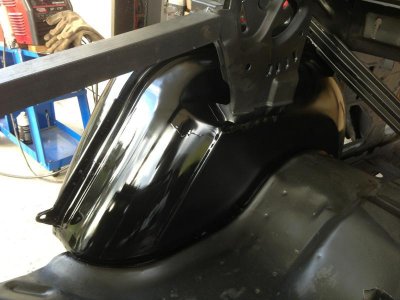
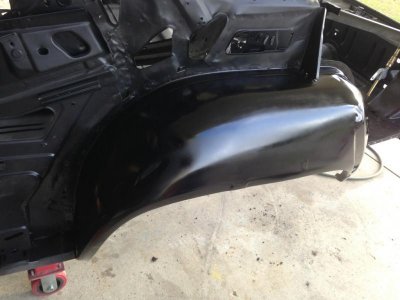
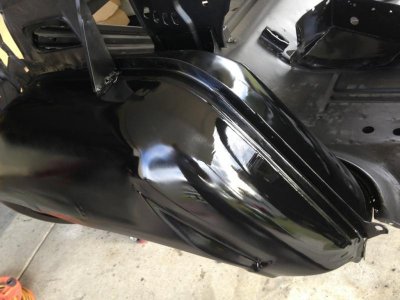
Then I sprayed the epoxy. Here is what it looks like now......................
- - - Updated - - -
- - - Updated - - -
That HUGE run will get sanded out................. OOOOOPS !!!!
- - - Updated - - -
- - - Updated - - -
- - - Updated - - -
Hopefully tomorrow I can start welding in the trunk floor extension and end cap.
Stay tuned...............
Today I was able to finish up the installation of the outer wheel house. Now that assembly is completed.
- - - Updated - - -

- - - Updated - - -

- - - Updated - - -

- - - Updated - - -
Then I ground all of the welds down and filled in any pin holes that I found.
- - - Updated - - -
Once that was done and I was happy with the welds, I sanded both halves down in preparation for epoxy paint.
- - - Updated - - -

- - - Updated - - -

- - - Updated - - -

- - - Updated - - -
Then I sprayed the epoxy. Here is what it looks like now......................
- - - Updated - - -

- - - Updated - - -
That HUGE run will get sanded out................. OOOOOPS !!!!
- - - Updated - - -

- - - Updated - - -

- - - Updated - - -
Hopefully tomorrow I can start welding in the trunk floor extension and end cap.
Stay tuned...............
Ron 73
Deceased, But not forgotton
Extremely nice Louis! You work is just plain inspirational..
- Local time
- 6:11 AM
- Joined
- Mar 14, 2012
- Messages
- 19,912
- Reaction score
- 42,856
- Location
- Surrey, B.C. Canada
That HUGE run will get sanded out................. OOOOOPS !!!!
Stay tuned...............
But the huge run looks so factory correct!
71airgrabberRR
Well-Known Member
More welding done..................
Photon you are very correct.............. It does look like a factory run LOL.
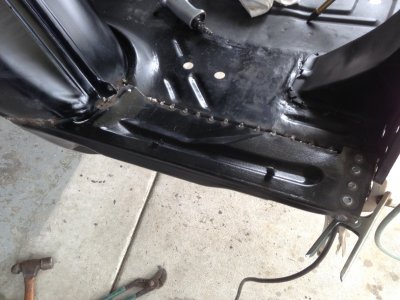
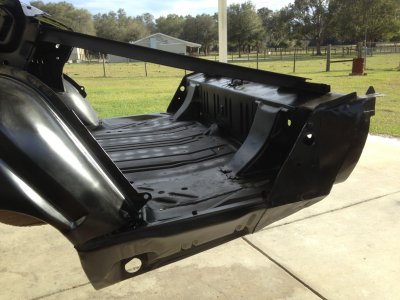
Today I was able to install the remaining inner parts on the driver side.
- - - Updated - - -
- - - Updated - - -
- - - Updated - - -
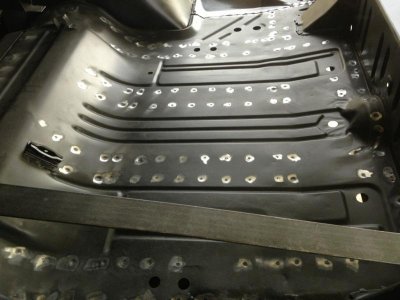
Earlier in my haste to get the bare metal painted in the trunk area after it was blasted, I forgot one step that I normally do prior to painting. On a lot of the factory spot welds, there are sharp jagged little pieces of metal that stick up around the edges of the weld.
What I normally do is grind these off with a flap wheel prior to painting the epoxy. It saves yourself from getting a lot of cuts on your fingers later when you are sanding in and around these areas.
- - - Updated - - -
- - - Updated - - -
So I went back and did it today after the welding was done. Then I simply used rattle can black to cover the bare metal areas.
- - - Updated - - -
- - - Updated - - -
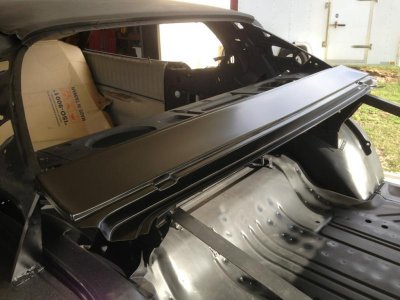
Then I placed the Dutchman panel in place. It's just sitting there for now. I wanted to see how it lined up after all of the internal parts were welded in position.
I'm happy to say that it lined up perfectly with the marks I made on the original parts.
- - - Updated - - -
- - - Updated - - -
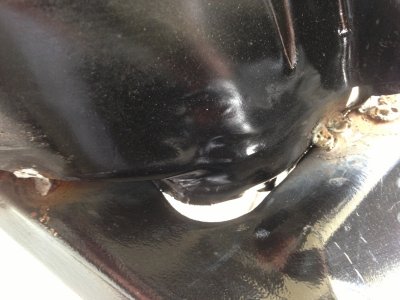
So far this is the only gap that I found on the new AMD parts. This is on the driver side rear section of the wheel well where it attaches to the trunk floor extension.
But to be fair, on the other side, the factory parts had an even larger gap.
I have been VERY happy with their fit so far. I hope it continues when it's time to install the quarters.
- - - Updated - - -
I hammered the gap closed as far as it would go. Seam sealer will cover all of this soon.
That's All Folks !!!!!!!!!!!!!!!!
Have a good one.
Photon you are very correct.............. It does look like a factory run LOL.
Today I was able to install the remaining inner parts on the driver side.
- - - Updated - - -

- - - Updated - - -

- - - Updated - - -
Earlier in my haste to get the bare metal painted in the trunk area after it was blasted, I forgot one step that I normally do prior to painting. On a lot of the factory spot welds, there are sharp jagged little pieces of metal that stick up around the edges of the weld.
What I normally do is grind these off with a flap wheel prior to painting the epoxy. It saves yourself from getting a lot of cuts on your fingers later when you are sanding in and around these areas.
- - - Updated - - -

- - - Updated - - -
So I went back and did it today after the welding was done. Then I simply used rattle can black to cover the bare metal areas.
- - - Updated - - -

- - - Updated - - -
Then I placed the Dutchman panel in place. It's just sitting there for now. I wanted to see how it lined up after all of the internal parts were welded in position.
I'm happy to say that it lined up perfectly with the marks I made on the original parts.
- - - Updated - - -

- - - Updated - - -
So far this is the only gap that I found on the new AMD parts. This is on the driver side rear section of the wheel well where it attaches to the trunk floor extension.
But to be fair, on the other side, the factory parts had an even larger gap.
I have been VERY happy with their fit so far. I hope it continues when it's time to install the quarters.
- - - Updated - - -
I hammered the gap closed as far as it would go. Seam sealer will cover all of this soon.
That's All Folks !!!!!!!!!!!!!!!!
Have a good one.
71airgrabberRR
Well-Known Member
This might be my last post for a little while. I have been getting sick over the past few days, and it's starting to get the best of me.
I need to get some rest so I can get over this crap.
I need to get some rest so I can get over this crap.
- Local time
- 3:11 PM
- Joined
- Oct 16, 2013
- Messages
- 1,611
- Reaction score
- 2,773
- Location
- Kiel Germany (back again)
Hope you get well soon 71RR. I can't wait to see those quarter panels on the car
- Local time
- 8:11 AM
- Joined
- Jan 1, 2013
- Messages
- 8,050
- Reaction score
- 3,465
- Location
- Mascoutah, Illinois
I've had some crap for about a week and a half and it sucks but I'm on the other side and feeling a little better. Good luck and hope you get well soon
roadrunnerman
Well-Known Member
As much and as hard as you've been working on this car, i'm surprised that you haven't been dragging yourself out to the car like a zombie with it's legs ripped off. Take a few days off to get yourself back to 100%. OH!!!!!!!!! And just to forewarn you, don't think you have to work twice as hard to make up anything for our benefit. I know that's what you are thinking, isn't it. LOL.
usaroadrunner
Well-Known Member
dam that looks nice...get better so i can check out the next installment.
71airgrabberRR
Well-Known Member
Walking Dead
I'm feeling a lot better now............
So tomorrow,
- - - Updated - - -

As much and as hard as you've been working on this car, i'm surprised that you haven't been dragging yourself out to the car like a zombie with it's legs ripped off. Take a few days off to get yourself back to 100%. OH!!!!!!!!! And just to forewarn you, don't think you have to work twice as hard to make up anything for our benefit. I know that's what you are thinking, isn't it. LOL.
I'm feeling a lot better now............
So tomorrow,
- - - Updated - - -
71airgrabberRR
Well-Known Member
Picked Up my 440 Today
Today I received the much anticipated phone call from Express Engines. John told me that my engine was ready to pick up.
So off we went !!!!!!!!!!!!
- - - Updated - - -
- - - Updated - - -
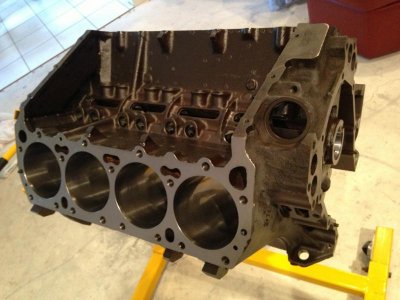
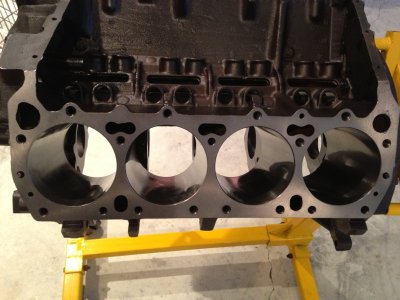
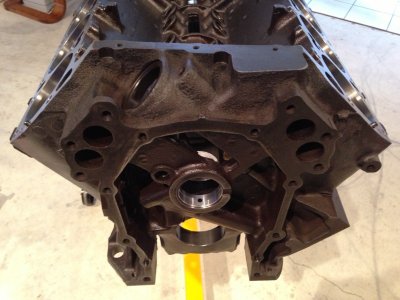
Here is the block. I am very happy with how the machine work looks so far.
- - - Updated - - -
- - - Updated - - -
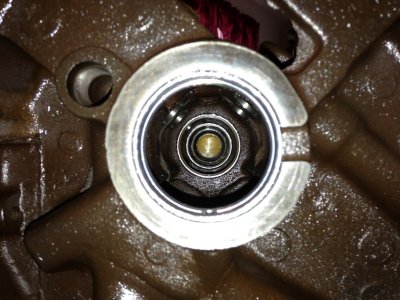
New cam bearings.
- - - Updated - - -
- - - Updated - - -
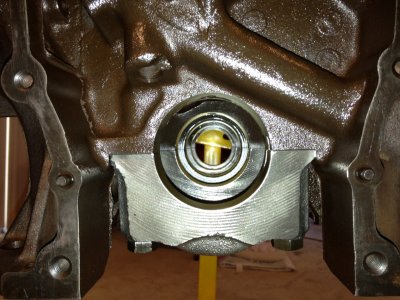
Align bored / honed.
- - - Updated - - -
- - - Updated - - -
Decked / squared up the block. Final honing was done with torque plates.
- - - Updated - - -
- - - Updated - - -
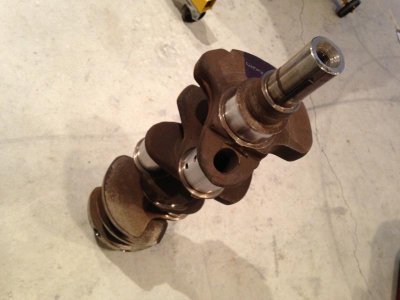
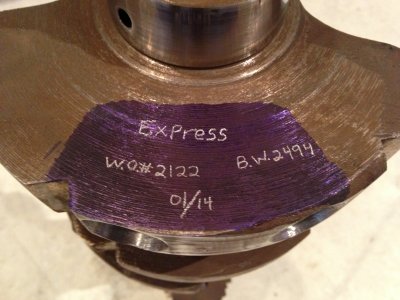
Cleaned and polished the standard crank.
- - - Updated - - -
- - - Updated - - -
Then everything was balanced.
- - - Updated - - -
- - - Updated - - -
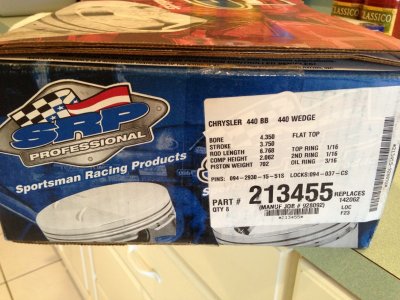
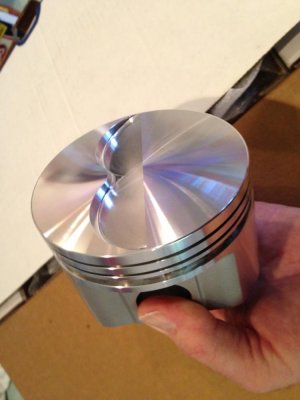
New .030 over forged SRP 10.5 to 1 pistons
- - - Updated - - -
- - - Updated - - -
- - - Updated - - -
- - - Updated - - -
- - - Updated - - -
- - - Updated - - -
- - - Updated - - -
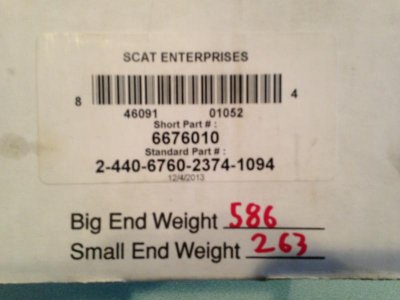
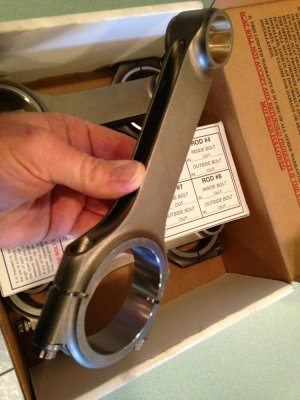
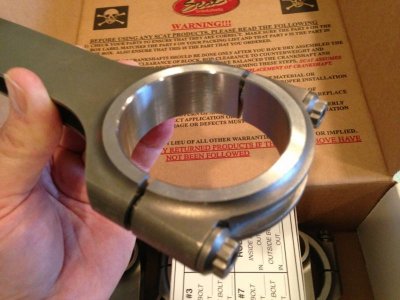
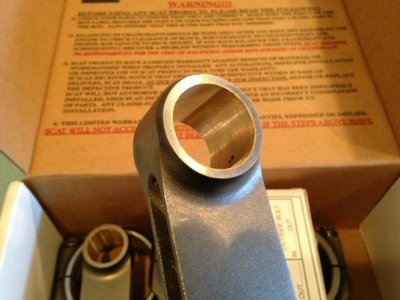
A new set of Scat H beam rods with floating pins.
- - - Updated - - -
- - - Updated - - -
- - - Updated - - -
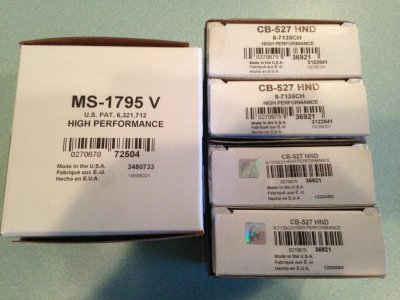
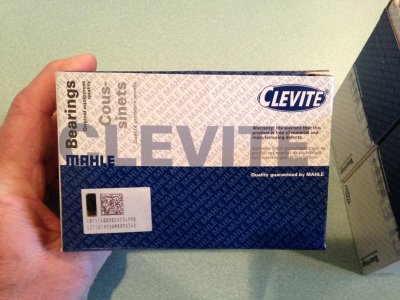
Clevite "Vandervell" main and rod HP bearings.
- - - Updated - - -
- - - Updated - - -
Here is a final photo of the block.
It looks like I will be starting some assembly work soon. First I need to get a set of brass freeze plugs and camshaft plug, along with a Viton rear main seal set.
- - - Updated - - -
I will be posting some good "assembly" photos along the way.
Stay tuned.................
Today I received the much anticipated phone call from Express Engines. John told me that my engine was ready to pick up.
So off we went !!!!!!!!!!!!
- - - Updated - - -

- - - Updated - - -
Here is the block. I am very happy with how the machine work looks so far.
- - - Updated - - -

- - - Updated - - -
New cam bearings.
- - - Updated - - -

- - - Updated - - -
Align bored / honed.
- - - Updated - - -

- - - Updated - - -
Decked / squared up the block. Final honing was done with torque plates.
- - - Updated - - -

- - - Updated - - -
Cleaned and polished the standard crank.
- - - Updated - - -

- - - Updated - - -
Then everything was balanced.
- - - Updated - - -

- - - Updated - - -
New .030 over forged SRP 10.5 to 1 pistons
- - - Updated - - -

- - - Updated - - -

- - - Updated - - -

- - - Updated - - -

- - - Updated - - -

- - - Updated - - -

- - - Updated - - -
A new set of Scat H beam rods with floating pins.
- - - Updated - - -

- - - Updated - - -

- - - Updated - - -
Clevite "Vandervell" main and rod HP bearings.
- - - Updated - - -

- - - Updated - - -
Here is a final photo of the block.
It looks like I will be starting some assembly work soon. First I need to get a set of brass freeze plugs and camshaft plug, along with a Viton rear main seal set.
- - - Updated - - -
I will be posting some good "assembly" photos along the way.
Stay tuned.................
There is no other part of the build I look forward to more than building the motor "Merry Christmas". Those are some nice looking parts you got "I really like the bushed rods".
- Local time
- 8:11 AM
- Joined
- Jan 1, 2013
- Messages
- 8,050
- Reaction score
- 3,465
- Location
- Mascoutah, Illinois
Very very sexy 71AG ... missed your posts brother
Ron 73
Deceased, But not forgotton
That engine is going to be some kind of a cool build with some hot results for sure, Great looking block and parts! Good luck with the build man...
Propwash
Well-Known Member
- Local time
- 8:11 AM
- Joined
- Oct 29, 2009
- Messages
- 9,710
- Reaction score
- 4,327
- Location
- Island of Misfit Toys
Metal work is looking good! Who-Hoo.....engine looks nice, Mowwwwwpppaaaaaaaaa!
fd2blk
Member
- Local time
- 9:11 AM
- Joined
- Jan 5, 2014
- Messages
- 19
- Reaction score
- 2
- Location
- Charleston South Carolina
This is great thread considering I am starting restoration on my 71 roadrunner. Keep up the good work:VB toast:
rsd859
Well-Known Member
Love it!!! Cant wait to see more!
Similar threads
- Replies
- 178
- Views
- 14K
- Replies
- 0
- Views
- 230
- Replies
- 10
- Views
- 1K

