• When you click on links to various merchants on this site and make a purchase, this can result in this site earning a commission. Affiliate programs and affiliations include, but are not limited to, the eBay Partner Network.

8.75" set up - questions - help

Mark - Everything was set up and installed when I noticed the pinion issue. I talked to the supplier and he claimed I had the "wrong shims" and he sent me some larger ID shims. This did seem to work, but he has no interest in taking the gears back. Since I've spent $200 on them, I'd rather try to get them to work than start over.

I have no information on the previous setup. This case was bare, and the sure grip came out of another case that had a totally hosed and monkeyed set of gears in it. The Sure Grip seemed fine, but that's about it.

Supershafts- We did make minor adjustments- after failing to get a good pattern off a .090-ish starting point and going a few thousandths at a time in either direction, we tried the two large jumps to see what would happen. I tried .084, .086, .088, and .090, among several others. I probably set this thing up and patterned it 20 times. I'm not saying I know what I'm doing by any means, but the description above was intended to be an overview. At lot more went into this than just that.

And I don't take offense by any means- but I would definitely say I learned something from this. Once isn't enough, but you have to start somewhere right? I'll see if I can break it down and get pictures for .002+/- this weekend.

I appreciate all the feedback- hopefully this will help out others too.
 
The amount of pinion shims that you used sounds excessive. Most of the time pinion shim thickness is .018 to .040. This isn't set in stone of course. If you were planning on another gear set anyways maybe it would be worth your while to buy a pinion depth tool and set these gears up again. I generally don't like to change a set up once they have been run any significant amount of time but your only out labor.
 
One comment about the amount of pinion shims. The pinion gear shoulder has a defect. It has a step in it that is maybe .020" or more lower. All the gears I have seen have a nice radius leading into a square flat shoulder all the way out to the large OD. This is not the case here.
 
The amount of pinion shims that you used sounds excessive. Most of the time pinion shim thickness is .018 to .040. This isn't set in stone of course.

That's not correct, some 8.75's do use adjustments in the .016 to .040 range which are usually the 742 and the 489 use adjustments in the .080 to .100 range
 
A little heads up on how you mark your gears for the pattern check.....I like to paint the pinion with the white or yellow grease and then rotate it through the ring. Imo, it leaves a much easier to read pattern than painting the ring and then rotating. It's in your face that way.
 
I apply it to the ring and use a flat bar brake which i apply force to simulate the pressure on the ring to make the pattern as close as possible to what it will really look like, the pin applied method works also
 
So when I break this thing down again this weekend, what do you you all want to see pictures of? I'm sure you want the questionable pinion... I'm thinking +/- .002 on the shims with pattern... what else?

When I talked to the vendor in question here, he told me these gears should set up near .090". This was after I had already come to the conclusion that ~.086" was as good as it gets. The manual states .084" to .1" was normal.

When I patterned it, I did apply force to the carrier with a bar and cranked the pinion with a ratchet. Hard to do by yourself, but I did have load on the ring gear.
 
I don't think pictures are gonna help. I think you need a new set of gears.
 
http://www.moparmusclemagazine.com/howto/mopp_0308_mopar_rear_end_gears_set_up/viewall.html

This installer recommended starting at .030 pinion shim for a bare case. I don't need a picture. I was just curious of the defect. Maybe a new gear set is in order. Good luck.

http://www.moparts.org/Tech/Archive/axle/20.html

I hope some of this helps the original poster.

When you put on the marking compound, rotate it around until the compound is in the middle of the pinion. Then take a box end wrench on a ring gear bolt and rock it back or forth vigorously. Use your left hand to help hold the wrench on the bolt. The longer the wrench the easier it is. If this is a struggle you may have to much pinion bearing preload.
 
So when I break this thing down again this weekend, what do you you all want to see pictures of? I'm sure you want the questionable pinion... I'm thinking +/- .002 on the shims with pattern... what else?

When I talked to the vendor in question here, he told me these gears should set up near .090". This was after I had already come to the conclusion that ~.086" was as good as it gets. The manual states .084" to .1" was normal.

When I patterned it, I did apply force to the carrier with a bar and cranked the pinion with a ratchet. Hard to do by yourself, but I did have load on the ring gear.
I just wanted to see what the pinion looked like. The way Alex described it, it sounds kinda funky. As far as putting force on the gears when checking....there's no way you can simulate the force the engine puts on them. If the pinion depth is set in the right place according to my set up tool and whoever marked the pinion depth did it right, it's good to go and I rarely check the pattern and when I do, it never looks right anyways. That's why I don't like recommending anyone do it by the pattern method. I know a lot of people do tho and have good results but I also know many that don't get good results.
 
There is a huge difference in reading the pattern with no force applied and force applied, many times using no force may show the pattern is right on, and when the drag is added it is no longer perfect.
I have also found rotating the ring against the pin also makes the pattern read differently and some gear manufactures ask that method is performed, which i give it a shot and then do it my way as that way has produced guaranteed quiet operation in hundreds of different differential makes and ratios.

You may not be able to put 700 lbs of force on it but neither are many cars, but you very well can generate atleast a couple hundred depending on the bar you use and the material on it to hold up the ring, the only force i can't generate is the deflection, but i find with the force i can produce it shows a better pattern than any other way.


I would like to see pics of the pinion stem bare, and the carrier races and pin race please if possible.
 
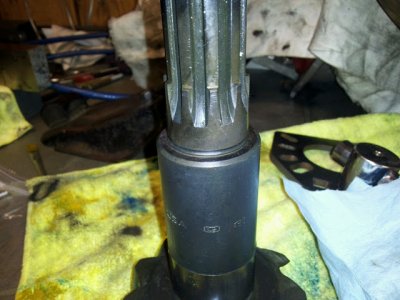
OK- I knocked this thing apart this weekend. Here is, as best I can get, a picture of the "lip" I was talking about. Notice the relief in the stem that the pinion always has- right below it, there is a ~.020" step down to the face where the shims sit. I had used one of the larger ID shims to even this out and then the regular shims worked fine for setting preload.

2013-04-28%u0025252016.21.43.jpg

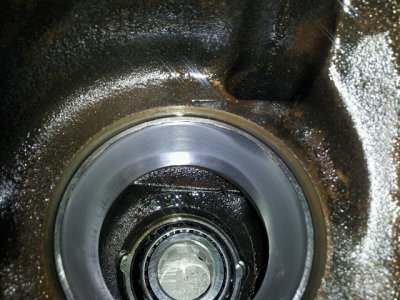
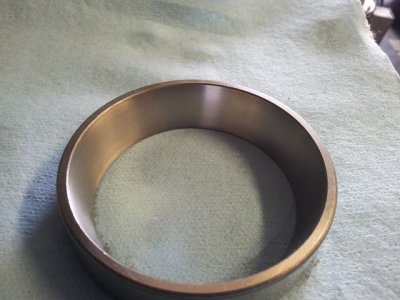
Now, to the issue that most concerns me- the inner pinion bearing race. Here's a pic of the pattern:

2013-04-28%u0025252015.58.09.jpg

As you can see, it's very uneven. The bearing did not show signs of damage, but I'm guessing part of the problem may be here. We had tried this in two cases, but we also used two different sets of pinion bearings, so this could be an issue.

Finally, we measured the installed height of the pinion with the .086" shims and found it to be .016" less than the 4.35" specified earlier in this thread. The measurements were made very carefully, but I would guess there's a collective error range of +/-.005. This makes no sense to me, because correcting that would require using .070" of shims, which is far less than the range used for this case (.08-.1"). Also, we had tried .08" and got a terrible pattern on the drive side, though this brought the coast side in a little better.

The wear pattern on the gears themselves looked pretty good overall. There are a lot of pictures, some blurry, here. Feel free to browse.

I didn't bother to change the shims and try again yet given that pattern on the race. Thanks again.
 
Could you refresh my memory whether this is a 742 or 489 case?
A few things I've noticed in the past on bearing race with uneven wear. When you press the bearing on the pinion be very careful to not press against the bearing cage and distort it. If you distort the bearing cage it will have a rough bumpy feel to it. Another important note it to apply plenty of oil to the bearing and race upon assembly so bearing isn't dry and turns smooth. A final note is to be sure the race and bearing are both completely seated. You can check both with a .002 feeler gauge. I know this is common sense. I'm just trying to help. Your picture showcases just below the pinion spline. I'm wondering if you are talking about shims up there as is the case with a 742 and pinion bearing preload and no crush sleeve?
 
I was thinking that the shim issue was at the gear head and not behind the front bearing....and I don't care for that rear bearing at all. Are you sure the fit is round and true and the seat is clean with no nicks. I've seen them where someone knocked the race out and cobbed up the seat face before.
 
I was pretty shocked with the wear pattern of that large bearing race. The OP was very cautious and paying attention to details and to my knowledge the race was installed very carefully with no burrs in the case. And gear oil was used during the bearing installation process after everything was wiped down with clean room lint free towels. That said we all know that s*it happens. I also noticed brinelling on the race and have to wonder if that contributed to, or was the sole source, of the whine even though the brinelled area was out of that that funny wear pattern. My theory is the reduced contact pattern of the bearing, even under the preload spec, allowed the pinion to move slightly under deceleration stress and cause the noise. That race is coming out for sure and will be replaced.

The slight wear pattern on the ring gear looked excellent and was quite different than what we saw with the yellow paint. Something to be said for real world conditions vs. a pattern. The drive side was dead center and heel to toe was also nicely centered with a feathered edge on both sides. The coast side, which is the side we are worried about, also looked text book perfect and even more so not resembling the yellow paint pattern.

I'm really beginning to suspect that bearing and when the new one goes in I think a little bluing compound will be used to check the pattern of the roller contact under preload. So to quote an old movie line: "If at first you don't succeed, Mr. Kidd", "Try, try again, Mr. Wint."
 

Did you dbl check the race is seated, i take a .0005 feeler and see if it slides in anywhere, if it does i take a narrow flat spot punch and go around the race, then check it again.

Definitely something is wrong in the race, or bore of the race that the bearing isn't running the race right.
When that happens at the carrier the race is twisted, with a spanner they could be off, non spanner and the housing is warped/bent. How do the carrier racers look ?
 
I'll try to get some pictures of the carrier races in the next few days. I didn't take any yet and I won't be able to do so until tomorrow, at least.

To answer a few questions- and thanks everyone for chiming in- It's a 742 case. No crush sleeve, just two sets of shims. The first issue was the lip, which made me have to use a special larger ID shim behind the outer pinion bearing. The amount of shim behind the inner bearing was the .086" I mentioned before. I made sure the race area in the case was clean and burr free, not to say something couldn't have gotten in there. I lubed the race with gear oil before pressing it in. And I did press it, not bang it in with a drift. I checked the backside of the races and couldn't get a .001" feeler behind them.

The pattern on the race looks to me like something isn't concentric- either the race, the bearing, or the pinion. When I pressed on the pinion bearing, I didn't press on the cage at all. There is a machined tube up at the shop specifically for this task. The bearing was fresh, too- never used. I did load the carrier bearings with a spanner, too. Granted, it was done by hand and feel, but I did use a spanner and not a screwdriver and hammer or something.

Finally, I heard from the vendor. He made two comments. He suggested that the backlash was too tight (.007") and that I should open it up. He had previously mentioned .008-.010". He also said the race was probably distorted in the bore and that I should replace it and the bearing.
 
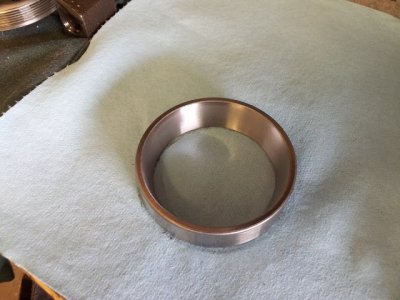
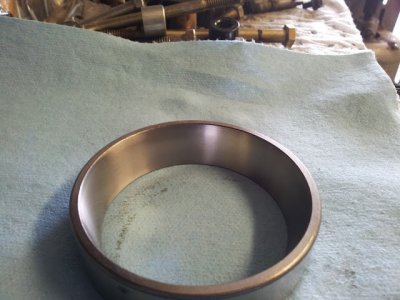
Here are some pictures of the carrier races:

2013-05-05%u0025252014.44.47.jpg
2013-05-05%u0025252014.45.47.jpg
2013-05-05%u0025252014.44.59.jpg

The pattern was pretty consistent and looked fine to me. Both sides looked identical. Thanks again-
 
Auto Transport Service
Back
Top