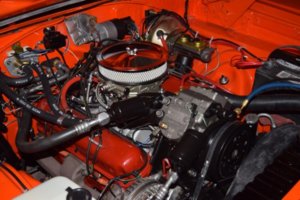
Got itPaint the heads, block, and various brackets etc....anything and everything you can.....
Easier now than when it's all assembled. ...lots of people paint engines while it's still in the car...you won't get every inch, but you can get 99% of what people will see when you open the hood.
It'll fire back up....never fear!!!!!
Jeff
You are using an out of date browser. It may not display this or other websites correctly.
You should upgrade or use an alternative browser.
You should upgrade or use an alternative browser.
Advice for 1970 Sport Satellite
- Thread starter Moparfiend
- Start date
MrJLR
Jeff
- Local time
- 10:23 PM
- Joined
- Feb 12, 2016
- Messages
- 1,010
- Reaction score
- 2,658
- Location
- Menifee, California
It's a PITA...no doubt about it.....but you will be so glad you did it.....Got it
Jeff
JimKueneman
Well-Known Member
I am in Sonoita (not Sedona). I plan on taking my Coronet up the Valley to a show sometime this winter and meet some of the guys I have met here and on Facebook. I also kept my original 318 but put the Performer and FiTech EFI on it with dual exhaust and an RV cam. Runs just fine. My first Mopar was a '69 Sport Satty Convertible so I am partial to them....


Hi Jim cool love it! Let me know where and when and maybe I can meet up.
Hey snap me a pic of the small hose from the pump to the manifold if ya can. The manifold is lower than the pump making the small new stock hose awkward at best. I dont have it obviously connected yet in the pic.
I am delaying the painting of tge block until I get her running satisfactorily. Then I am going to slap some headers on it
View attachment 545393
Belts all on and plumbing cooling system completed! Have some manifold thereded holes that need to be plugged.
Wanted to prime the engine but it looks like the electrical system is not operational. So just another system I have to tackle before I can move forward.

Wanted to prime the engine but it looks like the electrical system is not operational. So just another system I have to tackle before I can move forward.
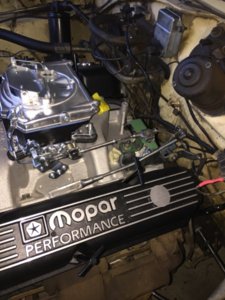
- Ok so I was finally able to spin the engine up albeit with no ignition. The motor spins nice and free using my remote starter. I am test fitting the carb here along with the valve cover. Will work on mounting the carb while I debug the electrical side of the fusible link. It maybe a simple thing like a bad connection via the fire wall connection block but I DID see a bare *** wire behind the dash so I might have to pull the freaken dash.....
Last edited:
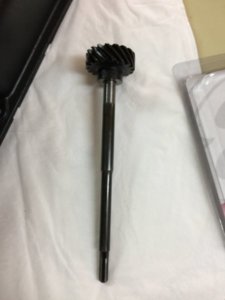
Here is the dizzy gear. I used a screwdriver with a clockwise rotation and my magnetic pick up to easily pull the gear out. Not an issue. I also got the correct Mopar hex oil priming tool from my local soeedshop thanks #ramjet in Phoenix who had the part on hand! Was able to rotate the oil pump by hand no binding. My electric drill is charging now...


ok so I reverted to my 1/2 in corded drill and I have been priming and priming for well over 5 mins on and off. Does it really take this long to start to see the oil on the top end flow and spurt? I see nothing! I am rotating CW and feel the oil pressure resistance.... I do have the plugs out of the cylinders but don't think that should be an issue.....carb is out....am I not able to build pressure with the plugs out?
Am I doing something wrong?
Am I doing something wrong?
Last edited:
JimKueneman
Well-Known Member
Small blocks are clockwise aren’t they? Sorry you said CW
yup and that's the way I am spinning her up....I think I am not building pressure because the plugs arent in and I may have some open ports on my manifold?Small blocks are clockwise aren’t they? Sorry you said CW
Primimg oil top end completed thanks to Threewoods inputs! Apparently there are two crank positions for pathways one to each head. If you don’t simultaneously rotate the crank while primimg you will not be able to get the oil to the top of the heads valve train. I did not know this and was simply spinning the pump up with aprerent luck. Now I know!
SublimeSixpack
Well-Known Member
Primimg oil top end completed thanks to Threewoods inputs! Apparently there are two crank positions for pathways one to each head. If you don’t simultaneously rotate the crank while primimg you will not be able to get the oil to the top of the heads valve train. I did not know this and was simply spinning the pump up with aprerent luck. Now I know!
Glad to hear that you got it. I thought I'd include a photo image that shows the two oiling channels (one per side) to get oil to the valve gear.
Cool thanks for showing that to me!!! The more I learn the more I enjoy this hobby!Glad to hear that you got it. I thought I'd include a photo image that shows the two oiling channels (one per side) to get oil to the valve gear.View attachment 546892
SublimeSixpack
Well-Known Member
Cool thanks for showing that to me!!! The more I learn the more I enjoy this hobby!
Yes, the more we learn the more enjoyment we experience. I've been in this hobby for a long time and still learning.
Well fixed the fusible link correctly as I did not have power to the ammeter on either side. Power came back to the interior. The horn and headlights now work however the ignition smoked in the steering column when energized. Looks like that needs further investigation. It figures I had the steering wheel off but mounted the new one already...time to pluck the wheel and dig in the steering column again.
Last edited:
Last edited:
SublimeSixpack
Well-Known Member
Street Demon carb. Let us know how that works out for you.
I will! Hopefully I can get through all my electrical issues soon so I can get her fired upStreet Demon carb. Let us know how that works out for you.
SublimeSixpack
Well-Known Member
I will! Hopefully I can get through all my electrical issues soon so I can get her fired up
You'll get there.

Ok I am running low on funds and rather spend $50 for a longer throttle cable and even more on a new throttle cable mount I fabricated my own late last night. This is therapeutic for me. The stock location had the wrong trajectory for proper throttle operation. I was able to also recondition the old cable. I still have to set up the kickdown linkage but that is all aligned and there is no binding with the throttle cable.


Similar threads
- Replies
- 13
- Views
- 2K
- Replies
- 1
- Views
- 661
- Replies
- 6
- Views
- 309


