You are using an out of date browser. It may not display this or other websites correctly.
You should upgrade or use an alternative browser.
You should upgrade or use an alternative browser.
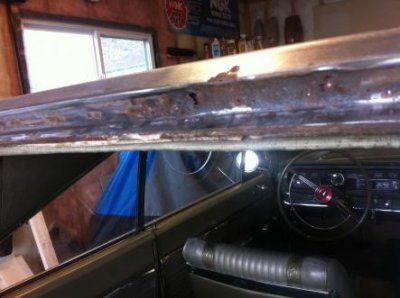
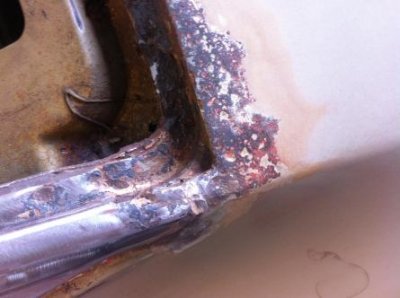
Can of rusty worms
- Thread starter Glenwood
- Start date
Glenwood
Well-Known Member
- Local time
- 9:48 PM
- Joined
- Jun 19, 2015
- Messages
- 2,929
- Reaction score
- 2,851
- Location
- Kawartha Lakes, Ontario
That last patches your fitting and tacking in could put you into pro status, it looks very nicely done.
Thanks for the kind words SF. I'm a long way from pro but trying to inch forward with each repair. I'm working my way up to the tough stuff, particularly where the repairs will be easily seen like the dreaded cowl.
- - - Updated - - -
boy it's weird where they rust in different spots. Check out a post by Crumley, he's doing some amazing work on a very rusty 64. We have rust issues in similar spots yet different degrees in different areas.
I learn from guys like him and so many others here, taking little bits from here and there. Having really never welded before, it really helps build knowledge and confidence when guys point out stuff or answer questions. Believe me, I take a great deal of time analyzing and then fitting the piece. I've found the more time spent prepping and fitting, the less time needed for the actual welding which seems to improve the results.
I should mention that I opted for a new welder since the cheap welder I had just couldn't seem to adjust fine enough for this work. For me as a novice, upgrading the welder was like night and day.
kudos to you for tackling the rust on your 66. take your time and keep pushing yourself, you'll be happy you did! I look forward to learning from you on these repairs so post lots of pics please!
Glen
Glenwood
Well-Known Member
- Local time
- 9:48 PM
- Joined
- Jun 19, 2015
- Messages
- 2,929
- Reaction score
- 2,851
- Location
- Kawartha Lakes, Ontario
thanks 747! Careful selection of pictures creates the illusion that I'm getting the hang of it. What you don't see is the pile of prototypes out back lol
I only wish I had more time to work on it, fixing the kid's car is starting to become a second career lately! Time to teach her to use a wrench
I only wish I had more time to work on it, fixing the kid's car is starting to become a second career lately! Time to teach her to use a wrench
Glenwood
Well-Known Member
- Local time
- 9:48 PM
- Joined
- Jun 19, 2015
- Messages
- 2,929
- Reaction score
- 2,851
- Location
- Kawartha Lakes, Ontario
doing some more surgery, patching the top corner.
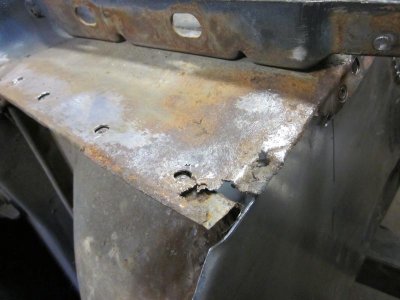
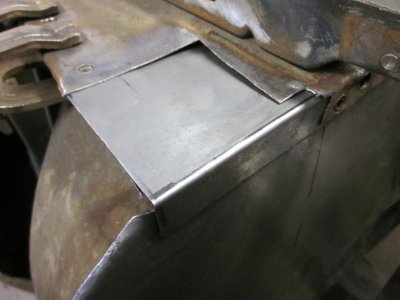
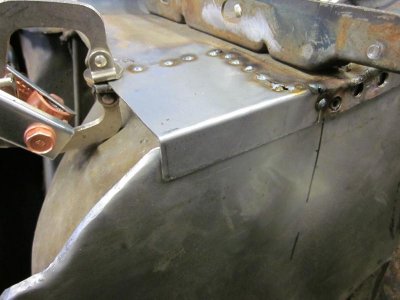
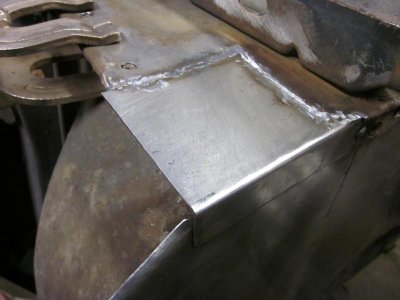
Question for you guys. What do you do about sealant in between the overlapping panels? I figured it would be difficult to weld the panels if I applied sealant in between or is it fine to apply it after welding it all together? Some areas would be tough to access afterwards.


Question for you guys. What do you do about sealant in between the overlapping panels? I figured it would be difficult to weld the panels if I applied sealant in between or is it fine to apply it after welding it all together? Some areas would be tough to access afterwards.
I see some good work going into this car...keep it up Glen. :headbang:
ckessel
Well-Known Member
You will have to apply the sealer after the welding. Before you put the seam sealer on, blow some weld thru primer into the seams to force it inside. Let it dry then apply the seam sealer. If the areas can be seen, put some masking tape down first with a little gap on the top and bottom then squirt in the sealer and use an acid brush [metal handled brush you use for plumbing soldering] to get it in the seam and smooth it out. When its dry, pull the tape. If you can get to the backside of all your repairs and as much of the old stuff as possible, Eastwood has a rust preventative spray that comes with a 2' straw that has a multiple hole spray head. This will coat the backsides and you can get that straw into a lot of areas. They have either a polymer material that hardens up of a spray wax that creeps and sort of solidifies. Its like the stuff used on the newer euro trash cars you see that look like someone spilled some oil at one time and there is dirt still collecting on it.
Glenwood
Well-Known Member
- Local time
- 9:48 PM
- Joined
- Jun 19, 2015
- Messages
- 2,929
- Reaction score
- 2,851
- Location
- Kawartha Lakes, Ontario
I see some good work going into this car...keep it up Glen. :headbang:
Thanks kiwi...means a lot!
Thanks for the tips ckessel.
- - - Updated - - -
time to deal with this mess!
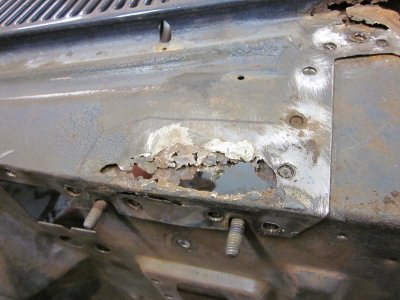
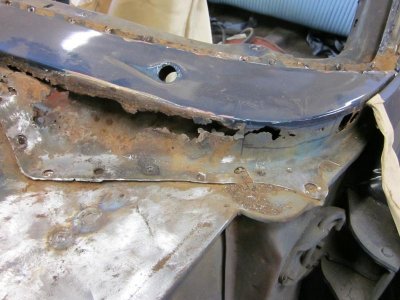
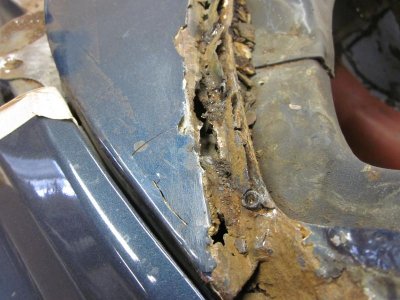
- - - Updated - - -
so just how much bondo is in there...
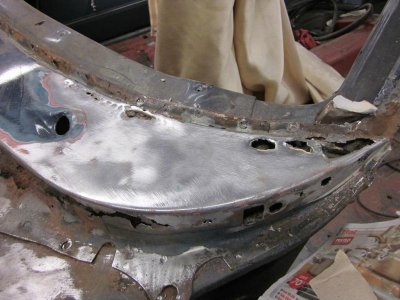
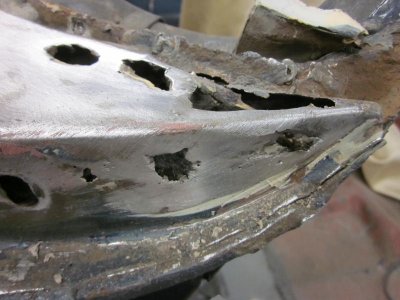
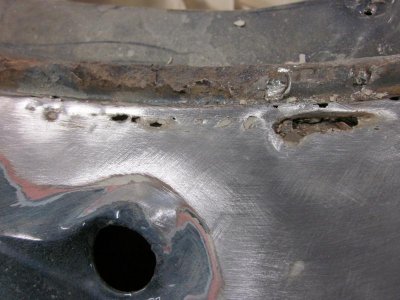
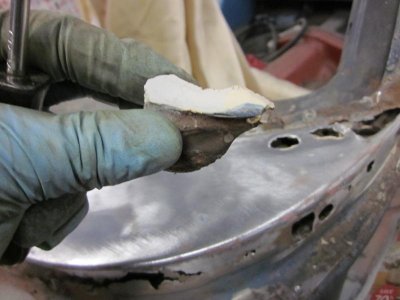
- - - Updated - - -
Time to pull the cowl off.
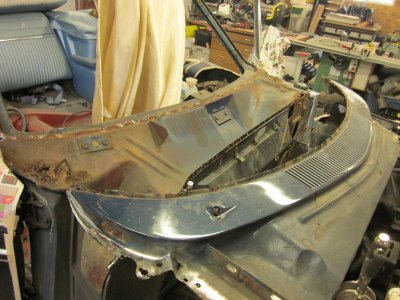
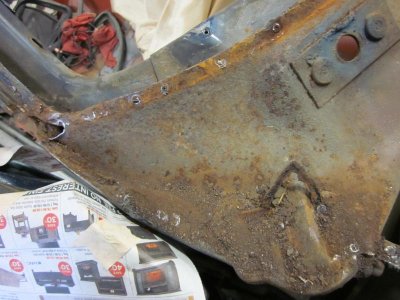
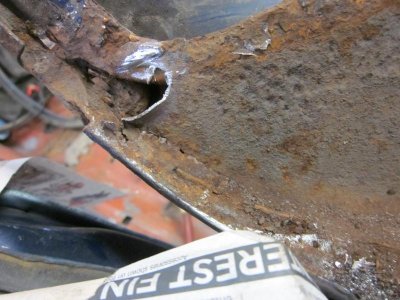
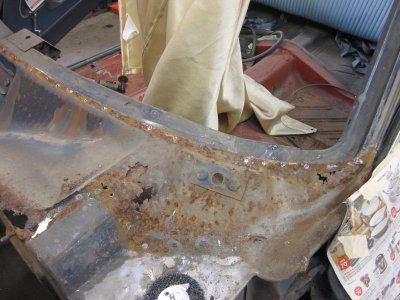
welcome to crustyland
- - - Updated - - -
a little wirewheel work to find more rust!
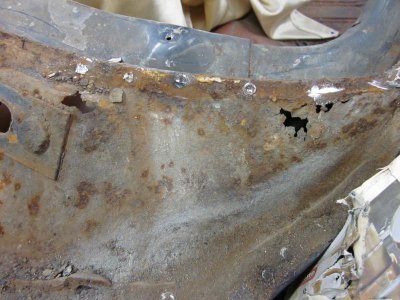
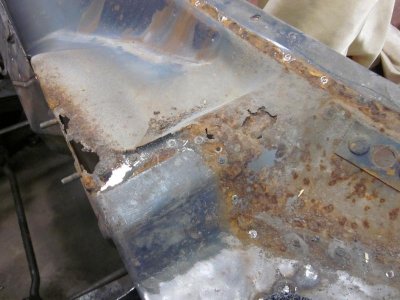
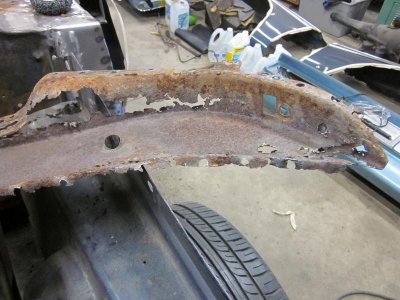
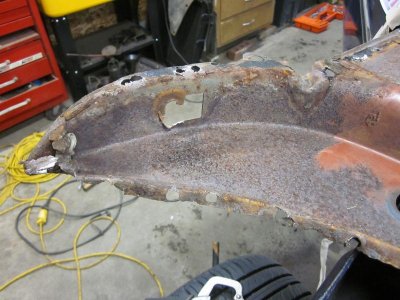
- - - Updated - - -
off with the air box section to finish welding
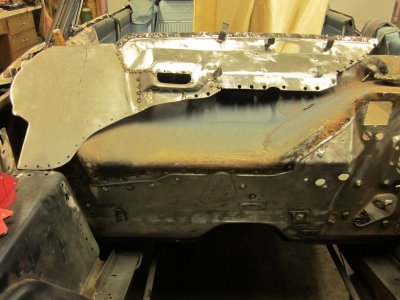
backside is rusty but solid
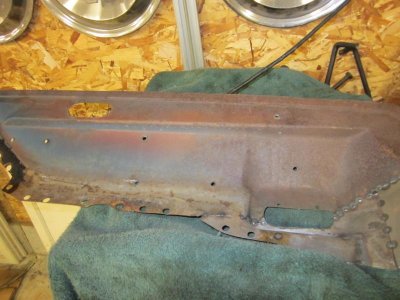
inside doesn't look too bad.
Coronet 14
Well-Known Member
Looks likes your going to need a Tetanus Shot. Looking good on the Welding
ckessel
Well-Known Member
I guess Pontiac doesn't have a corner on the market for Swiss Cheese cars.
Bbodee
Well-Known Member
Looks like you're doing a great job! Keep at it. Lots of work but you're saving this car, giving it many more years of life. This is giving me flashbacks to my destroyed cowl/firewall. Ugh!
Crumley
Well-Known Member
Glenwood, I just went thru your build thread. The cowl area on the Polara is as rough as my Belvedere. Aren't these old cars fun....lol. You are doing an awesome job. Keep up the good work.
Crumley
Crumley
Glenwood
Well-Known Member
- Local time
- 9:48 PM
- Joined
- Jun 19, 2015
- Messages
- 2,929
- Reaction score
- 2,851
- Location
- Kawartha Lakes, Ontario
Looks likes your going to need a Tetanus Shot. Looking good on the Welding
Thanks C14!
- - - Updated - - -
I guess Pontiac doesn't have a corner on the market for Swiss Cheese cars.
I know eh! My first car was a pontiac...and I used to like swiss cheese!
- - - Updated - - -
Looks like you're doing a great job! Keep at it. Lots of work but you're saving this car, giving it many more years of life. This is giving me flashbacks to my destroyed cowl/firewall. Ugh!
Thanks Bbodee! Keeping at it. Seems like one step forward and three step back! Interesting bodywork technique...fill the holes with as much bondo as possible. I saw your thread...we're both brave!
- - - Updated - - -
Glenwood, I just went thru your build thread. The cowl area on the Polara is as rough as my Belvedere. Aren't these old cars fun....lol. You are doing an awesome job. Keep up the good work.
Crumley
Nasty stuff eh Crumley...keeping one step behind you and learning from you! It's fun, really it is (so I keep telling myself!) I hated to have to pull it all apart but glad I did. It would only get worse if left as is. Thanks for the compliment...means a lot.
Glenwood
Well-Known Member
- Local time
- 9:48 PM
- Joined
- Jun 19, 2015
- Messages
- 2,929
- Reaction score
- 2,851
- Location
- Kawartha Lakes, Ontario
Christmas came late (or early depending how you look at it!
Received a couple of replacement kick panels in near perfect condition and the correct colour! -Thanks Jay! These will replace mine which were butchered for 6" round speakers.
Also received a new Northern Alum rad. Website says the overall width is 25.25" which should be a good fit. The rad is actually 29.25"...a TAD wide
You'd think for the over $700 I dropped on this thing, the damn thing would match their website dimensions. Annoying to say the least.
Not much else to update for now. Quit my job last week so I took it easy this weekend and did the rear brakes on the Journey. That was another fiasco! Three wheels had the caliper pins seized on a 2012. The last one was a royal b*tch to free up. So much for taking it easy!
Time to order some sheet metal if I'm ever going to get this beast back together before the end of the summer!
Coronet 14
Well-Known Member
I showed my Dad you restoration pics. He was impressed with your work.
Glenwood
Well-Known Member
- Local time
- 9:48 PM
- Joined
- Jun 19, 2015
- Messages
- 2,929
- Reaction score
- 2,851
- Location
- Kawartha Lakes, Ontario
Thanks C14 and thank your dad for me! I wish my dad shared interest in this stuff.
barbee6043
Well-Known Member
- Local time
- 8:48 PM
- Joined
- Sep 28, 2008
- Messages
- 2,600
- Reaction score
- 2,577
- Location
- S E Texas. Shepherd, texas
congrats for taking the time, work, $$$ to restore this fine car back correctly!
yes you are right, a good welder helps a bunch! and you will gain skills with it as you go,,
one product I like is Ospho, a phorphoric acid solution. I like it for treating surface rust where it is pitted somewhat where I am not replacing that area. True BVallue hardware sells it for like $10 a qt. spray it on, wipe with a rag, let completely try before an y topcoating. sinc e it is an a cid, be carefull what goes over it.
keep up the good work!
Glenwood
Well-Known Member
- Local time
- 9:48 PM
- Joined
- Jun 19, 2015
- Messages
- 2,929
- Reaction score
- 2,851
- Location
- Kawartha Lakes, Ontario
Thanks barbee! I'm trying to fix these issues as best I can. I thought I'd improve on my dad's method of using pop rivets and 100lbs of bondo lol.
good tip about Oshpo-thanks. I was wondering what to do about some lightly pitted areas that I didn't want to patch.
I bought a commercial grade Lincoln 180 and sold the cheap one for basically what I paid for it. The new welder does almost all the work; I just aim and fire! lol
good tip about Oshpo-thanks. I was wondering what to do about some lightly pitted areas that I didn't want to patch.
I bought a commercial grade Lincoln 180 and sold the cheap one for basically what I paid for it. The new welder does almost all the work; I just aim and fire! lol
Glenwood
Well-Known Member
- Local time
- 9:48 PM
- Joined
- Jun 19, 2015
- Messages
- 2,929
- Reaction score
- 2,851
- Location
- Kawartha Lakes, Ontario
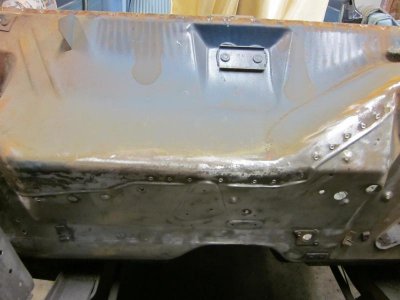
cleaned up the welds and sanded. Starting to look like original?


Glenwood
Well-Known Member
- Local time
- 9:48 PM
- Joined
- Jun 19, 2015
- Messages
- 2,929
- Reaction score
- 2,851
- Location
- Kawartha Lakes, Ontario
I thought this side was not supposed to rust! No patch available for this side, so here goes nothing!

Tried forming a piece using an old 413 truck damper. Has about the right curve.

Couldn't really get the piece to form nicely. I think I need one of those stretcher/shrinker gizmos.
So I tried another idea.
Checking the curve with my profile gauge that I normally use for wood working.

transferring to some 18g.


Cut a couple of pieces and tacked them together. I should have paid more attention to the angle as I tacked these at 90 deg. Oh well, a little hammering on the anvil should get it a bit closer.


Tried forming a piece using an old 413 truck damper. Has about the right curve.
Couldn't really get the piece to form nicely. I think I need one of those stretcher/shrinker gizmos.
So I tried another idea.
Checking the curve with my profile gauge that I normally use for wood working.
transferring to some 18g.
Cut a couple of pieces and tacked them together. I should have paid more attention to the angle as I tacked these at 90 deg. Oh well, a little hammering on the anvil should get it a bit closer.
Last edited:
Similar threads
- Replies
- 4
- Views
- 772
- Replies
- 0
- Views
- 173
- Replies
- 14
- Views
- 2K

